Tag Archives: easy

Creamy Potato Salad

We’ve been having an unusually sunny and warm May, which means it’s time for BBQ food. No BBQ is complete without creamy potato salad. This recipe was inspired by one from Cook’s Country Magazine where they incorporate an egg yolk into the dressing. I’m not usually a fan of hard-boiled eggs mingling with my potato salad, but this time it turned out surprisingly well.

I know everyone has a “method” to cooking perfect hard-boiled eggs. My method is to cover the eggs with cold water and pour in a couple of teaspoons of baking soda. Cover and bring to a boil. Uncover and boil for 11 minutes. Then immediately drain and cover with icy cold water. Not only are the yolks perfectly cooked, but the eggs peel easily too.

Creamy Potato Salad | Alaska Knit Nat

Creamy Potato Salad

Serves 4

3 medium yukon gold potatoes, cut into 1-inch cubes

2 hard-boiled eggs, one yolk reserved

2 Tbs. apple cider vinegar

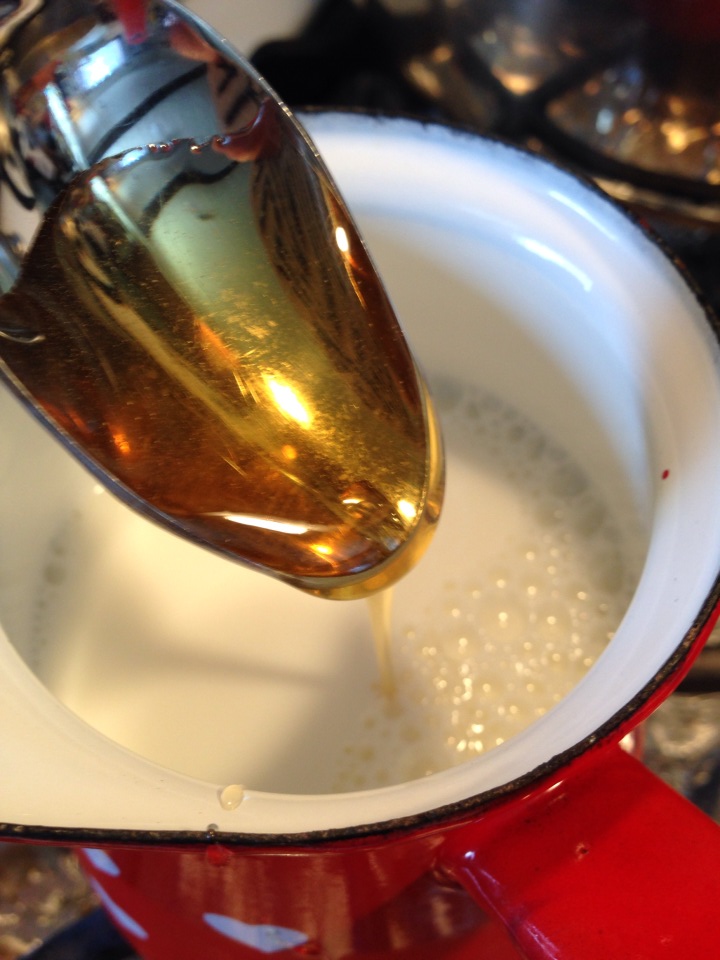
2 tsp. agave nectar or honey

1/2 a celery rib, minced

2 green onions, minced

2 pickles, diced

1/4 cup greek yogurt

2 Tbs. mayonnaise

salt and pepper to taste


Directions:

Toss your diced potatoes into a large pot and cover with water. Add a couple of pinches of salt, cover and bring to a boil. Turn down the heat and simmer till potatoes are just tender — about 8 minutes.

Meanwhile, whisk together the vinegar, agave nectar, and the yolk from one egg. Drain the potatoes and transfer to a bowl. Pour over half the dressing and gently toss to coat. Refrigerate for 30 minutes.

Add the remaining eggs to the remaining dressing and thoroughly mash till the egg whites are small chunks. Add the celery, green onions, pickles, yogurt and mayo. Once the potatoes are cooled, add the remaining dressing. Add salt and pepper to taste. If you prefer your salad even creamier, add a little more mayo.

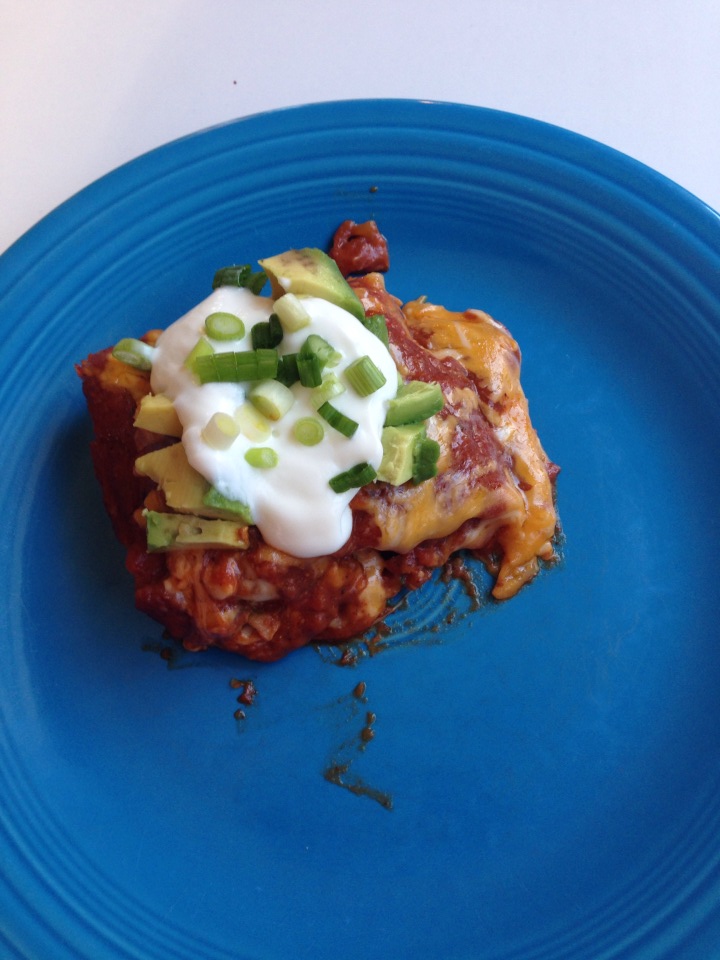
If you’re looking for a healthier potato salad, why not try this tasty recipe I made with red potatoes? Click on the photo for the recipe:

img_11231

Low-guilt Nachos

I love me some junk food and nachos are near the top of the list. They are quick, cheap and can pile on the calories if you’re not careful. I like to justify mowing down on nachos by using healthier ingredients.

Here’s what I had for dinner:

Low-guilt Nachos | Alaska Knit Nat

And here’s how I made them.


Low-guilt Nachos

Serves 1 hungry person

Ingredients:

A few handfuls of Food Should Taste Good Multigrain Tortilla Chips

1/2 cup low-fat grated cheddar cheese

2 green onions, chopped

1 Tbs. Neufchâtel cheese

1/2 of an avocado

1 Tbs. low-fat sour cream

2 Tbs. salsa

Chopped cilantro

Low-guilt Nachos | Alaska Knit Nat

Here’s my no-brainer secret to making perfect nachos in the oven — bake them, don’t broil them. Broiling sometimes burns the chips before the cheese has melted. So, preheat an oven or toaster oven to 375 degrees. Arrange the chips on a foil-lined baking sheet. Top with green onions and cheddar. Dot the Neufchâtel all around the chips. Bake for about 7 minutes, or until the cheddar is gooey.

Remove from oven and top with sour cream, avocado, salsa and cilantro.

This is just a guideline, of course. You can add whatever toppings you like. Jalapeños, black beans, chicken, tofu — the world is your nacho!

If you’re in the mood for a fiesta, try some of my other recipes, such as:

Chicken Taquitos with Spinach & Wild Rice
Guacamole à la Moña
Guacamole à la Moña

Quick Craft: Coffee Filter Flower

I stayed home sick today and I hate wasting my time in bed, so I decided to mildly craft out. I really love tissue paper flowers but I don’t like spending a ton of time cutting out paper. I found this neat tutorial last year for making coffee filter flowers and I thought I’d take it a step further. I dyed the coffee filters with food coloring and water, let them air dry, and then made them with pipe cleaners as the stem. By using coffee filters I didn’t have to cut the paper to shape. I just shaped the petals, which is far quicker. They really turned out splendidly, don’t you think?

DIY Coffee Filter Flowers -- A step-by-step guide from Alaska Knit Nat

DIY Coffee Filter Flowers -- A step-by-step guide from Alaska Knit Nat


Materials:

DIY Coffee Filter Flowers | Alaska Knit Nat

White coffee filters

Red food coloring

Liquid medicine syringe or eye dropper

Scissors

Pipe cleaners

Floral tape

Floral wire


Directions:

DIY Coffee Filter Flowers | Alaska Knit Nat

You’ll be using 12 filters per flower. Fill a small cup with water and about 7 drops of food coloring. Place a few filters at a time onto a plate. With the syringe or eye dropper randomly drop the water all over the filters. Flip them over and do the other side. It’s up to you how much white you want to leave. Hang dry them. Or I guess you could use a hair dryer, but I don’t own one.

DIY Coffee Filter Flowers | Alaska Knit Nat

When filters are dry, take six at a time and fold them in half three times and cut out a heart shape to make the petals. I cut more off of one set of six. These will be the inside petals.

DIY Coffee Filter Flower | Alaska Knit Nat

Rough up the edges of the petals with your scissors. Cut a teeny tiny bit off the point of the filters to create a small hole in each filter.

DIY Coffee Filter Flower | Alaska Knit Nat
Inner petals (left) and outer petals


Repeat with second set of six filters, but don’t cut off as much. These will be your outer petals.

DIY Coffee Filter Flower | Alaska Knit Nat

Take your pipe cleaner and create a little nub at one end. Take one sheet of your smaller filter and thread it up to the nub. Wrap the bottom of the filter all around the nub to cover it and secure with floral tape. This way you won’t be able to see the center of the flower.

DIY Coffee Filter Flower | Alaska Knit Nat

DIY Coffee Filter Flower | Alaska Knit Nat

Thread the next filter onto the pipe cleaner and scrunch it around the nub. Repeat with one filter at a time till you’ve put on all the small filters.

DIY Coffee Filter Flower | Alaska Knit Nat

Scrunch around the base of the flower and wrap with floral tape. You’ll now have a small flower and you could call it a day, but I want a huge peony.

DIY Coffee Filter Flowers | Alaska Knit Nat

Take one larger filter and thread it on the pipe cleaner, but don’t shove it all the way up. Give it a little space so the outer petals are just a little longer than the inner petals. Repeat with the remaining filters. Scrunch up around the base of the flower and secure with floral tape.

DIY Coffee Filter Flowers | Alaska Knit Nat

Cut a 6-inch piece of floral wire and fold it in half, or just use another pipe cleaner. Stick it to the main stem and continue wrapping with floral tape. This stabilizes the stem. Keep wrapping all the way to the bottom.

DIY Coffee Filter Flowers | Alaska Knit Nat

DIY Coffee Filter Flowers | Alaska Knit Nat

Break tape and wrap the bottom of the stem. Ta-da!

DIY Coffee Filter Flowers -- A step-by-step guide from Alaska Knit Nat

These flowers look cheery on a window sill year-round. Peony season is on the way, but I just couldn’t wait. These will definitely do in the meantime.

Banana Cupcakes with Dulce de Leche Icing

We never seem to consume an entire bunch of bananas. There’s always those sorry two or three sitting in the bottom of the fruit bowl, waiting to be make into banana bread. I don’t even like banana bread all that much, but I hate to waste the darn things.

I decided to spice things up a bit and use my overripe bananas for something a little more decadent than sliced bread.

I basically just made regular banana bread but put it in cupcake liners and topped it with a sweet and salty icing.

My recipe was inspired by this one from Culinary Couture.

Banana bread cupcakes with dulce de leche icing -- an alternative to boring banana bread

Banana bread:

  • 1/2 cup softened coconut oil
  • 1/4 cup brown sugar
  • 1/2 cup white sugar
  • 2 eggs
  • 1.75 cups all-purpose flour
  • 2 tsp. baking powder
  • 1/2 tsp. baking soda
  • 1/2 tsp. salt
  • 1/2 tsp. cinnamon
  • 1/2 tsp. ground ginger
  • 1/4 tsp. all spice
  • 1/4 tsp. nutmeg
  • 3 overripe bananas, mashed

Banana bread cupcakes with dulce de leche icing -- an alternative to boring banana bread

Icing:

  • 6 oz. softened cream cheese
  • 3 Tbs. softened butter
  • 3 Tbs. Nestle’s La Lechera (sweetened condensed milk)
  • 1/4 tsp. vanilla extract
  • pinch of salt
  • coarse sea salt for garnish

Banana bread cupcakes with dulce de leche icing -- an alternative to boring banana bread

Preheat oven to 350 degrees. With an electric mixer, combine the coconut oil and sugar. Add the eggs and mix well. In a small bowl combine the flour, baking powder, baking soda, salt, cinnamon, ginger, allspice and nutmeg. Add the flour mixture and mashed bananas in intervals to the wet ingredients.

Pour batter into a muffin tin filled with liners or greased well. Bake for about 20 minutes or until a toothpick comes out clean. Let cool completely.

For the icing:

with an electric mixer, combine the cream cheese, butter, La Lechera, vanilla and salt. Beat until smooth and aerated. Frost the cupcakes with a knife or with a pastry bag. Sprinkle coarse sea salt on top of each cupcake.

Banana bread cupcakes with dulce de leche icing -- an alternative to boring banana bread

DIY Necklace Holder

This morning my husband was cleaning up the yard. Amid the brush and rubble I found a lovely stick that would be just perfect for a necklace holder. It looked like this:

DIY Necklace Holder | Alaska Knit Nat

So I turned it into this:

DIY Necklace Holder | Alaska Knit Nat

Here’s how.

Materials:

One stick, 12-18 inches long, about 2 inches thick

Acrylic paints

Painters or masking tape

Small paint brush

Power drill

4-7 Screw-in cup hooks (found at the hardware store)

Two long wood screws

Feathers and embroidery thread (optional)

DIY Necklace Holder | Alaska Knit Nat

Directions:

Clean off any dirt from your stick. Mark the stick with painters tape to set up your stripe pattern.

DIY Necklace Holder | Alaska Knit Nat

Paint the stick to your liking. Let dry about 15 minutes and peel away the tape. Let stick dry completely.

Determine where you’d like to drill through your stick on either end. I held up the stick against the wall to find the places that were most flush against the wall, about two inches in from either end. Drill holes the same size as the wood screws through either end of the stick. This is where I let my husband help me because I’m really terrible at power tools.

Determine where you’d like your hooks to go. I used a 12-inch ruler as my guide and pressed the end of a hook into the wood every three inches. You could eyeball it. Hand-screw each hook into the stick.

DIY Necklace Holder | Alaska Knit Nat

If you’d like, tie some embroidery thread around a couple of feathers, leaving a foot-long tail of thread. Wrap around one end of the stick for decoration.

Figure out the placement of your necklace holder and drill the wood screws into the previously drilled holes. Tighten screws and make sure it’s secure. Hang necklaces on your new, awesome hippy craft.

DIY Necklace Holder | Alaska Knit Nat

Homemade Bagels

My favorite bagels in Alaska come from LuLu’s in Fairbanks. That’s a six-hour drive from Anchorage and sometimes I crave a good rosemary bagel! I’ve blogged about bagels in the past, but I have to post the recipe I made tonight because it was near perfect. Homemade bagel heaven. Crusty and salty on the outside, soft and chewy on the inside.

The recipe hails from an unassuming corner of the internet — HubPages.com. It contains few ingredients and the steps are simple. I tweaked the ingredients and process ever so slightly, which is why I’m posting it. I will forget how I made them if I don’t!

Homemade Bagels | Alaska Knit Nat

Ingredients:

4 cups all-purpose flour

1 Tbs. sugar

1.5 tsp. salt

1 Tbs. vegetable oil

2 tsp. yeast (not instant rise)

1.25-1.5 cups warm water

2 Tbs. chopped fresh rosemary (optional)

Coarse salt (optional)

Homemade Bagels | Alaska Knit Nat

Directions:

Place all the dry ingredients plus the oil in a Kitchen Aid mixer. With the hook attachment turn the machine onto a medium setting. Slowly pour in the water and wait for it to be fully incorporated into dough before adding all the water. If the dough is too dry, add the remaining quarter cup water. Knead the dough on a floured surface for about five minutes. Place back in the mixer bowl and cover with plastic wrap. Let rise until doubled in size, about 1.5 hours.

Once risen, remove the dough and split into eight even-sized balls. This is where I incorporated the chopped rosemary. Roll each ball into a snake, about 8 inches long, folding in the rosemary as you go. Overlap the ends to make a bagel shape and carefully roll the the seam part of the bagel back and forth till it’s combined and sealed.

Pumpkin Rosemary Bagels

Form the rest of your bagels and set them on the Silpat-lined or greased baking sheet. Cover with plastic wrap and set aside.

Homemade Bagels | Alaska Knit Nat

Bring a large pot of water to a boil and preheat the oven to 425 degrees. When the water is boiling, gently set a few bagels at a time into the pot, being sure not to overcrowd. Boil for one minute, then flip the bagels and boil another minute. Using tongs, remove the bagels and place them back on the baking sheet. Sprinkle liberally with coarse salt. Boil the remaining bagels. Place baking sheet in the oven and bake for 20 minutes, turning the sheet around halfway through. Let cool completely.

Slice, toast, butter and enjoy the bagely goodness.

Homemade Bagels | Alaska Knit Nat

Chicken Enchilada Roll-ups

I am trying to pare down our cabinets and fridge contents. This takes a little creativity. Last night I made a list of all the cookable staples such as rice, beans, rotisserie chicken, can of tomatoes, lasagna noodles, cheese and so on.

I recall my friend Kelly telling me last week that she was making enchilada stuffed shells. Any time a recipe calls for stuffed shells I automatically switch to lasagna roll-ups. You don’t have to be as ginger with them and they are really easy to serve. Why not make enchilada roll-ups with lasagna noodles, leftover chicken, spinach, cheese and homemade enchilada sauce? Sounds good to me. It was!

Since I only had a can of tomatoes, I decided to make my own enchilada sauce using this fabulous recipe from DamnDelicious.net. I will never buy enchilada sauce again if I can help it. It was thick and bursting with flavor.

As for the roll-ups, I modeled my recipe from this one at Bevcooks.com. I tweaked it here and there, but I think this experiment may become a staple in our household. I was licking the plate!

Chicken Enchilada Roll-ups | Alaska Knit Nat

Chicken Enchilada Roll-ups

Serves six

Chicken Enchilada Roll-ups | Alaska Knit Nat

Ingredients:

1 large can of red enchilada sauce (or the equivalent of homemade)

1/2 bag frozen chopped spinach, thawed and squeezed of excess liquid

1 leftover rotisserie chicken, edible bits removed and chopped

1 can diced green chiles

3 chipotle chiles in adobo sauce, seeds removed and chopped fine

1 egg (I figure if I’m modeling it after lasagna, I might as well add an egg)

1 cup grated cheese blend (I used mozzarella and cheddar)

salt and pepper to taste

12 undercooked lasagna noodles

Chicken Enchilada Roll-ups | Alaska Knit Nat

Directions:

Preheat oven to 375 degrees. Coat the bottom of a casserole dish with a generous amount of enchilada sauce. While the lasagna noodles cook, combine the spinach, chicken bits, chiles, egg, salt and pepper and 1/2 cup of cheese. Mix it well. Spread a couple of tablespoons of the mix into each lasagna noodle. Roll up the noodle and place it seam down in the casserole. Repeat with rest of the noodles and filling. Top with remaining sauce and sprinkle liberally with grated cheese. Cover and bake for 30 minutes. Remove foil and bake another 10 minutes, if desired. Let sit 5 minutes before serving with chopped scallions, sour cream and avocado.

Chicken Enchilada Roll-ups | Alaska Knit Nat


Easy homemade cocoa

One of my son’s favorite winter treats is hot cocoa. He learned the words when he was about 18 months old. I prefer hot cocoa made with milk but there’s so much sugar and other junk in store bought cocoa, plus usually you are supposed to use water.

So I made my own. And it’s super good! I also never have whipping cream so to make it extra special I use my Nescafe milk frother to top off the cocoa with a thick layer of foam. It makes me feel like I’m in a fancy cafe.

Easy Homemade Cocoa|Alaska Knit Nat

Ingredients:

1 cup milk

1 tsp. honey or agave nectar

2 tsp. unsweetened cocoa powder


Directions:

In a small saucepan whisk together the milk, honey and cocoa. Heat to desired temperature. Top with whipped cream or milk foam.

Easy Homemade Cocoa|Alaska Knit Nat Easy Homemade Cocoa|Alaska Knit Nat

Easy Homemade Cocoa|Alaska Knit Nat


Quick craft: Soda Bottle Kitty Planters

This was a perfect crafting weekend. Between family dinners and birthday parties my friend Kelly and I had just enough time for small crafts.

I’ve been hauling around some two liter soda bottles in my car for several weeks with the intention of creating kitty planters I saw on Recycleart.org (original post from Brudiy.com).

It took no time at all to cut the bottle to shape, paint it and plant some lovely soleirolia in it. Here’s our version.

Quick craft: Recycled soda bottle kitty planters. Irresistibly cute from Alaska Knit Nat

Materials:

one, two-liter soda bottle

scissors

permanent marker

acrylic paints in black, white and pink

paintbrushes

glossy finish spray (optional)

small plant

extra soil for planting

Quick craft: Recycled soda bottle kitty planters. Irresistibly cute from Alaska Knit Nat

Directions:

With sharp-tipped scissors, cut the top off of your bottle. Also poke some drainage holes in the bottom if you think of it. Clean and rinse the bottle. Note how deep your potted plant is to determine how tall your bottle planter should be. Also note where the “paws” are to determine where to place the ears. I didn’t think to do this so the black cat looks like his head is turned to the side, which is OK with me. With a Sharpie, draw the cat’s ears on the bottle. Cut around the ears and the back of the bottle. It should now look like a clear cat shape.

Paint two coats of desired base color on the outside of the bottle. Place your fist inside the bottle to make it easier to paint all around. Hold it up to the light to see if you missed any spots. I used a sponge brush and dabbed all over to give it more texture and eliminate any brush strokes. Let fully dry.

Paint on the ears and nose in pink. Paint the eyes and whiskers. Let fully dry.

Spray on an even coat of glossy finishing spray. I only did this because I was afraid watering the plant might cause the paint to chip over time. It’s probably not necessary. Let gloss dry.

Quick craft: Recycled soda bottle kitty planters. Irresistibly cute from Alaska Knit Nat

Place a plant of your choice in your kitty and enjoy how irresistibly cute it is.

Quick craft: Recycled soda bottle kitty planters. Irresistibly cute from Alaska Knit Nat

Homemade ABC Book — Free Tutorial

My son is starting to pick up on the alphabet and lately he’s been into ABC books. I was browsing Pinterest and came across a great idea. A homemade ABC book using personal photos.

With some basic Photoshop skills and a trip to Walgreens and Michael’s Crafts I was able to make a fantastic photo book for only $5.50.

Homemade ABC Book -- Free Tutorial

You can use phone, Instagram or digital camera photos as long as you size them well. I’m a self-taught Photoshop gal. Here’s a step-by-step guide to how I made my book, but I’m sure my techniques are not exactly textbook methods — but they work!

Homemade ABC Book -- Free Tutorial

Step 1: Open your image in Photoshop. I encourage you to make all your photos the same resolution — one of a printable quality — so that they all look more uniform. My personal photos come in several different sizes and resolutions depending on what camera I used. I made them all the same so the font size would be the same on each photo. A 140 pt. font on a 180 dpi resolution will look a different size from 140 pt. on 300 dpi.

Homemade ABC Book -- Free Tutorial

Step 2: Go to Image<Image size and take a look at the size of your photo. If the dpi is 180 or more, you’re good to go. Most of my Instagram and iPhone photos are really low resolution, such as 72 dpi, but really large in dimension, such as 45 inches wide. If you were to just resize the photo and leave a low resolution they wouldn’t print well.

Homemade ABC Book -- Free Tutorial

Step 3: Click the crop tool and enter the dimension and resolution you want for the photo. I selected 12×8 with 300 dpi to maintain as much data in the photo as possible (it will print better this way). Crop the photo the way you would like it.

Homemade ABC Book -- Free Tutorial

Step 4: Make sure your background layer is unlocked (double click the little lock next to the layer name). Create a new layer. Choose the font you’d like. I selected Helvetica bold. Type in your letter. I used 140 pt. font. Add a new layer. Type the word you want. I used 90 pt. font. With the selection tool, position the letter and word where you’d like them. If your photo is dark consider making the letters white. Leave enough space between the edge of the photo and the words in case the printers cut the photo funny.

Homemade ABC Book -- Free Tutorial

Step 5: Save your photo as a .jpg and make 25 more!

Step 6: Upload your photos to a photo printing site such as Walgreens and print 26, 4×6 prints. Search for online coupons. I saved $1.50!

Step 7: Purchase a “brag book” at a craft store. It’s just a floppy plastic photo album that holds up to 36, 4×6 photos. I had a coupon for Michael’s so I saved $1!

I don’t think I need to explain the rest. But you’ll end up with a personal ABC book that hopefully your child will love. Our child already recognized several familiar people and objects in his book.

Homemade ABC Book -- Free Tutorial