Last-minute weddings are sometimes the best. When my high school friend Amy called me last week to ask if I’d make her bridal bouquet for her wedding this week, I couldn’t say no.
Amy asked for plum and white colors. Alaska Wholesale Flower Market had the most precious Moody Blues roses and deep purple mini carnations. Amy was sold.
I love presenting the corsages and bouts in a pretty way. My first step is to use grocery store doughnut boxes. They have the clear window on the top so you can peek inside and they are big enough to hold several boutonnieres at once. I happened to have some purple tissue paper that was perfect for this occasion.
I had a few leftovers so I made myself a little flower crown. I was able to stop by the reception in the evening and ran into all my old friends. It was a fun reunion. And, of course, I had Ivan model my crown.
Most Anchorage residents would tell you that autumn is here. It arrived last Tuesday, to be precise. There was a nip in the air this morning as I made my way up the windy dirt road to Arctic Valley for my last gig of the wedding season.
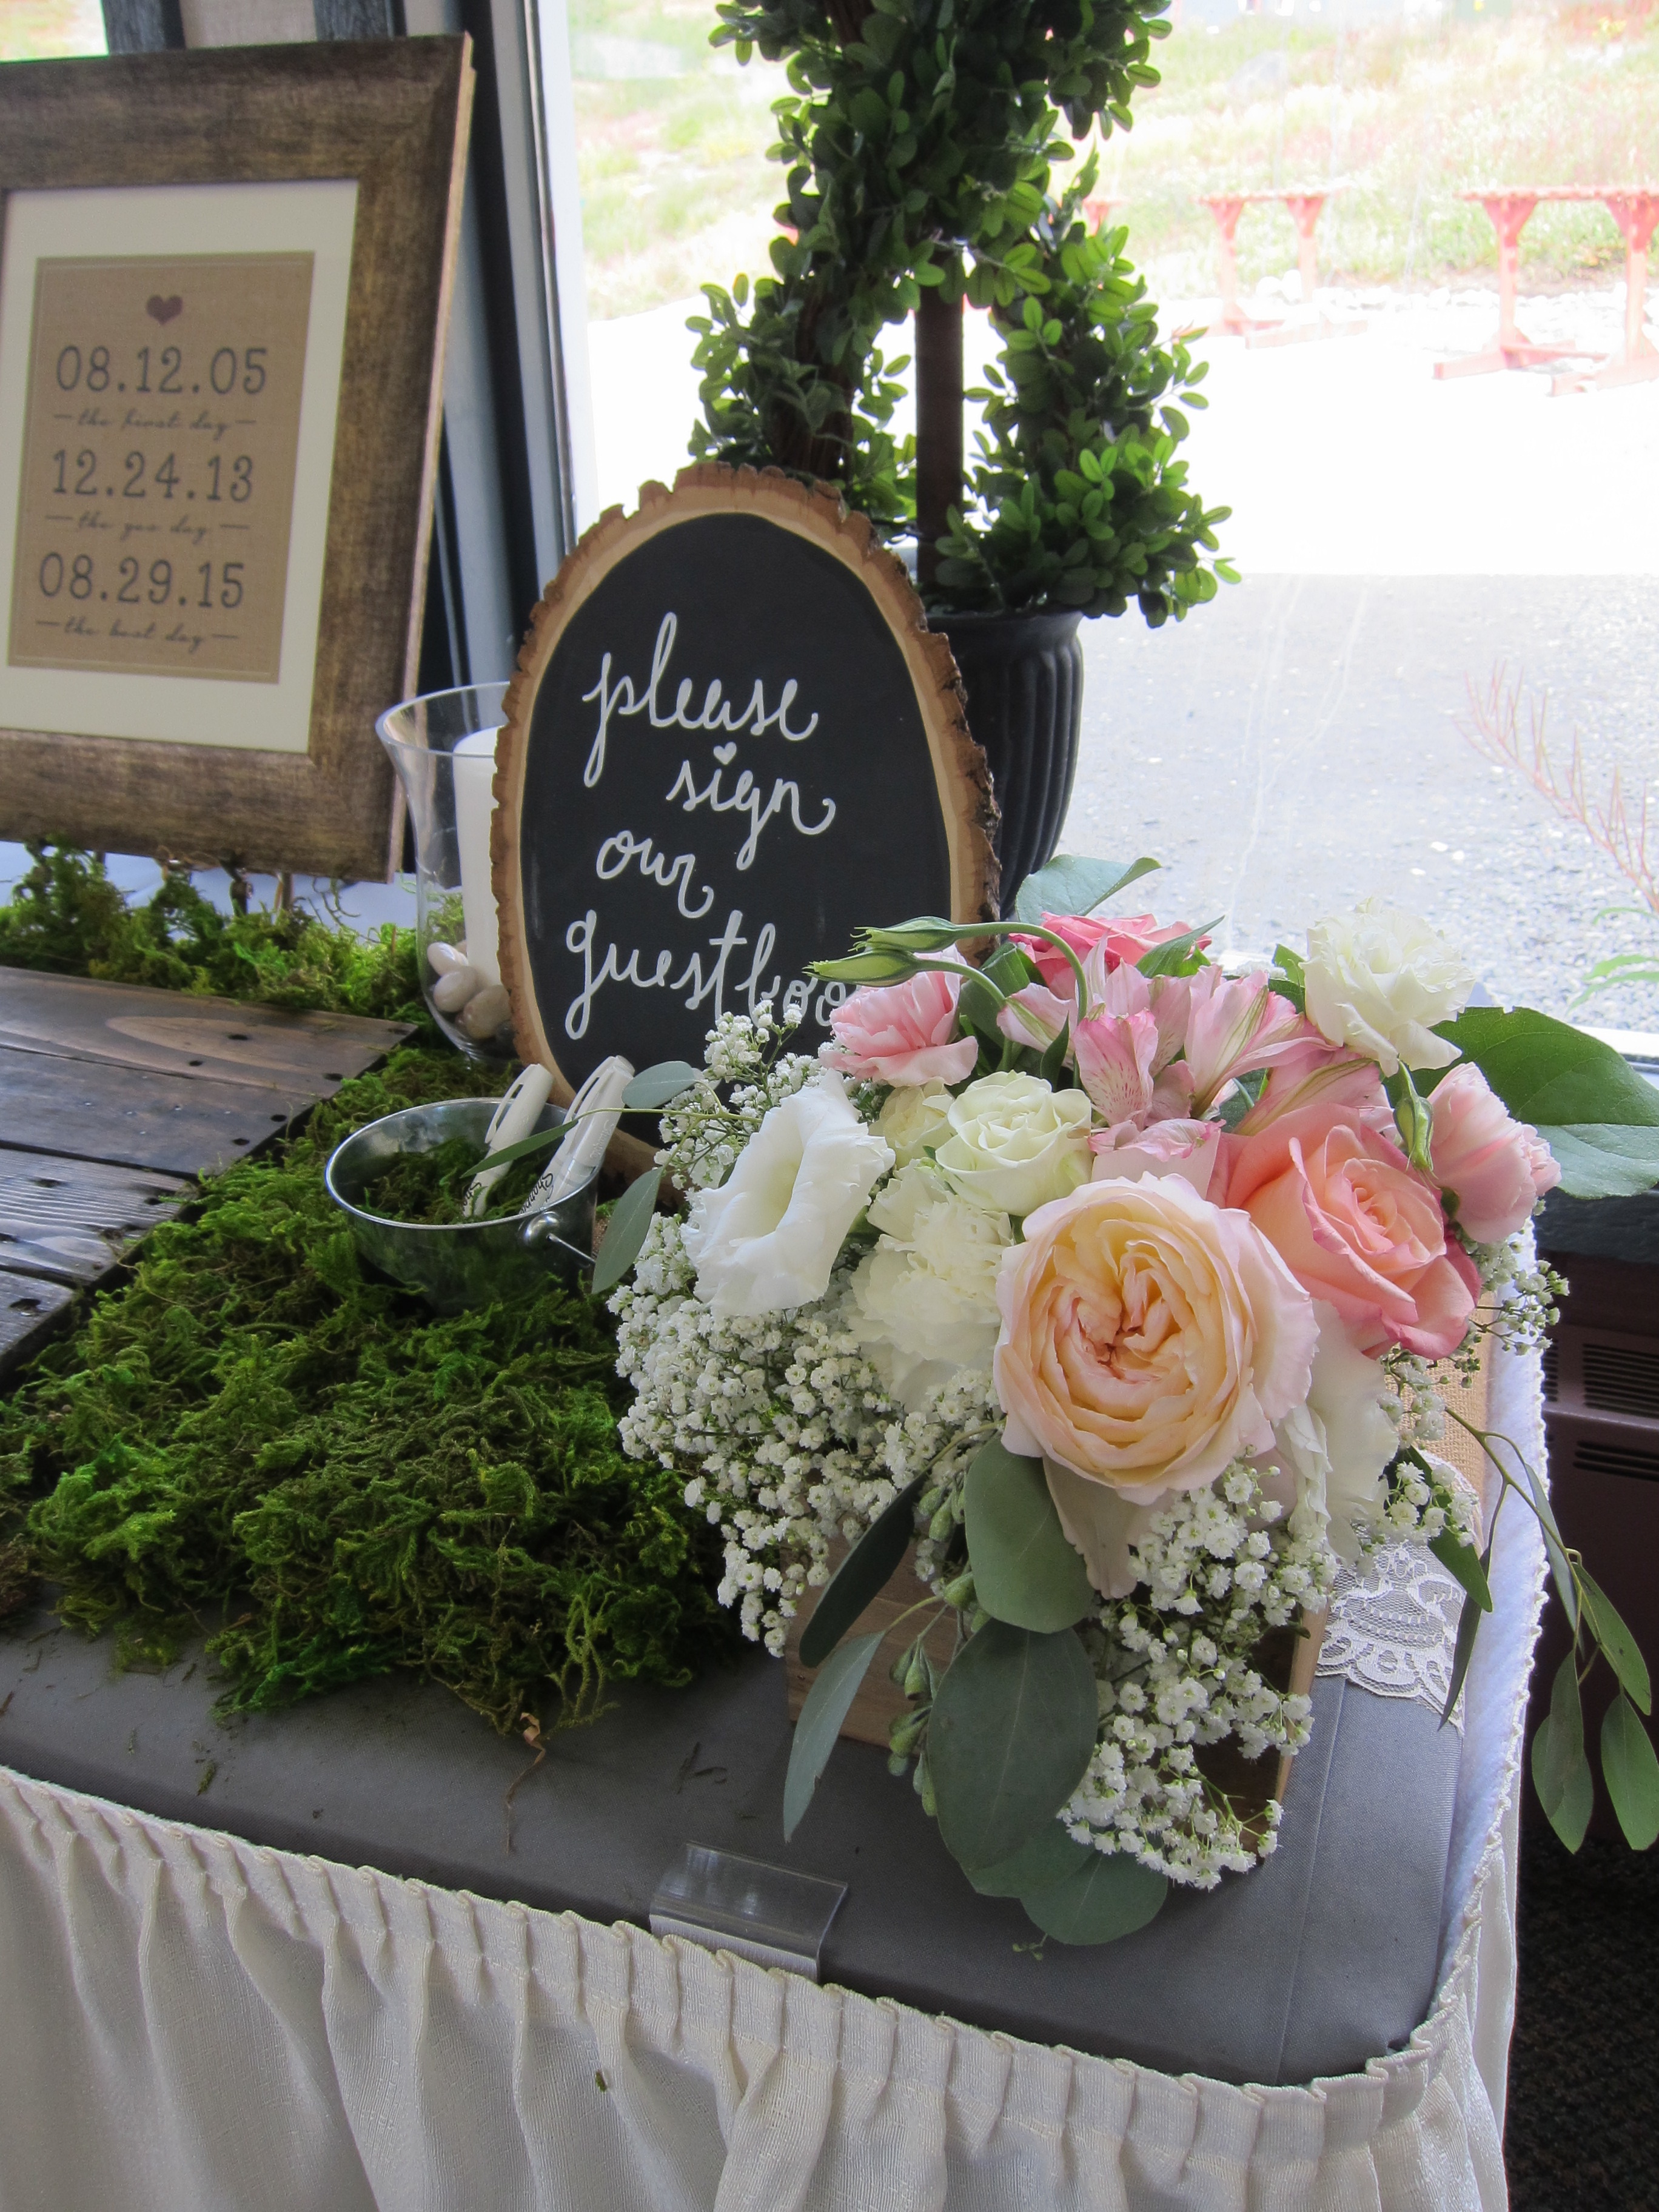
Cara and Tyler chose a rustic theme for their wedding, which was fitting against the wilderness surrounding the Arctic Valley chalet. Burlap table runners dressed with vintage lace and slabs of raw birch logs surrounded by moss were just the right touch.
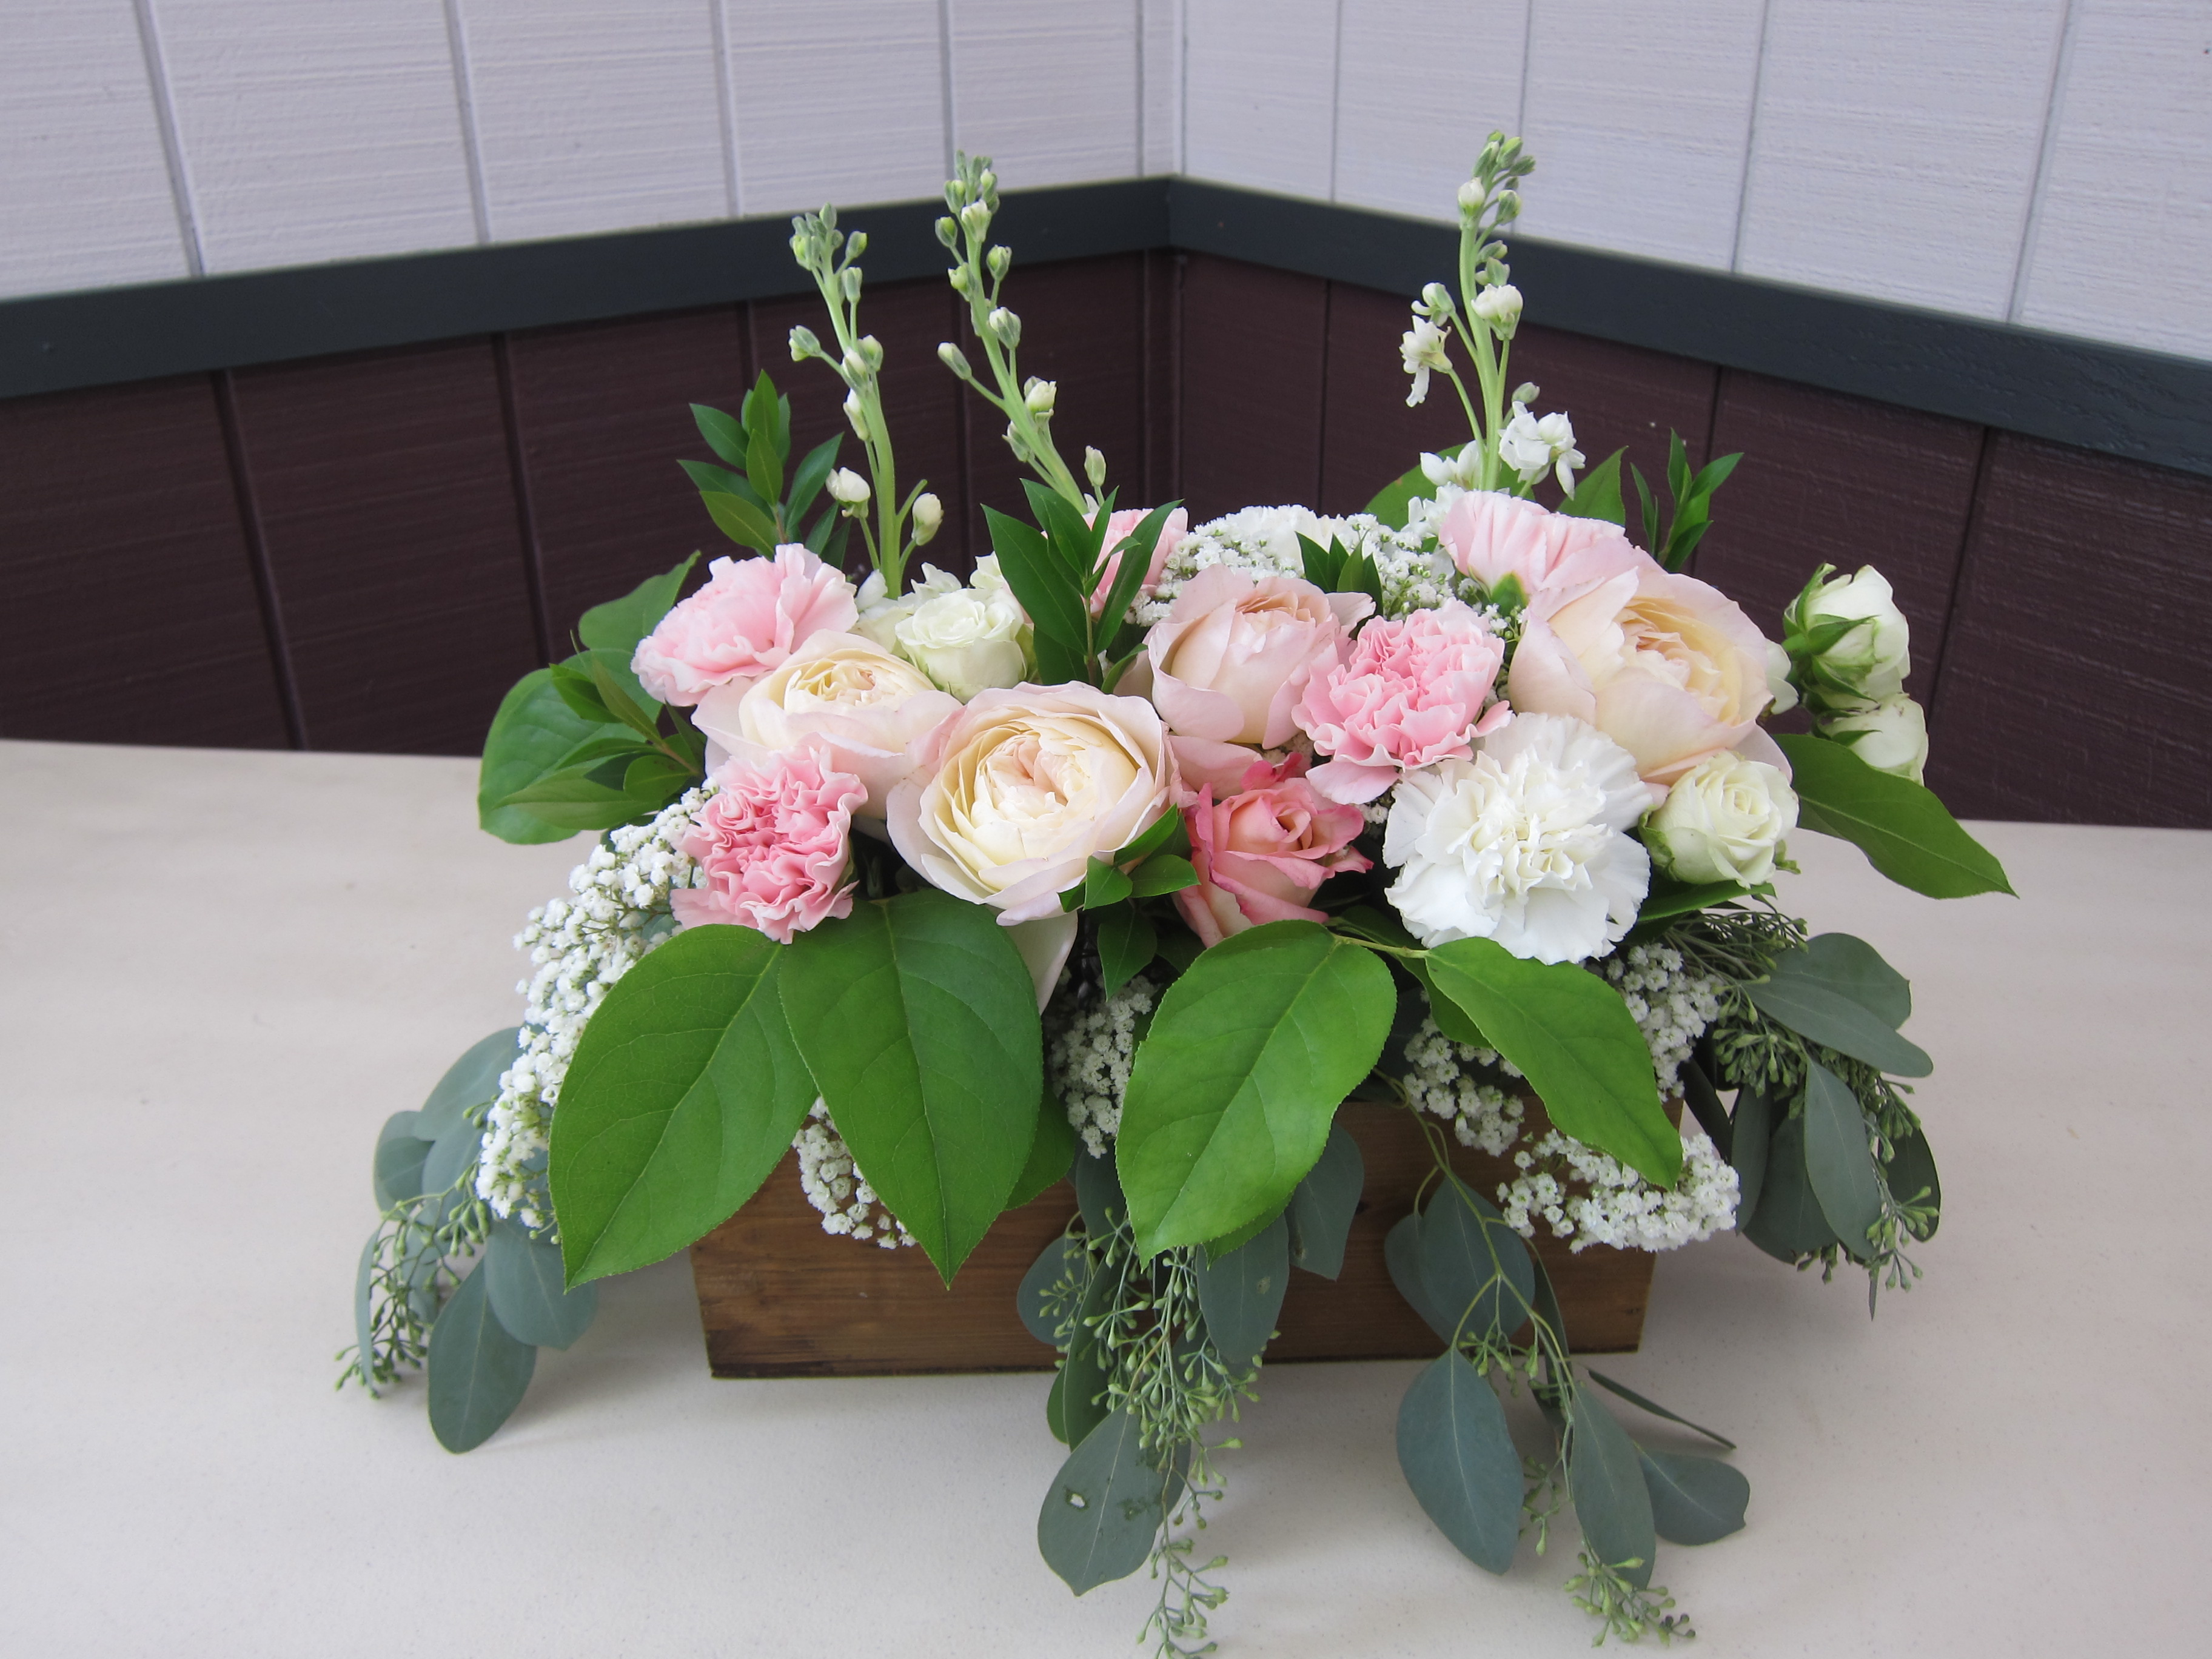
Cara chose pink, blush, white and sage green for the floral arrangements. The shabby-chic color palette complimented the rest of the decor perfectly.
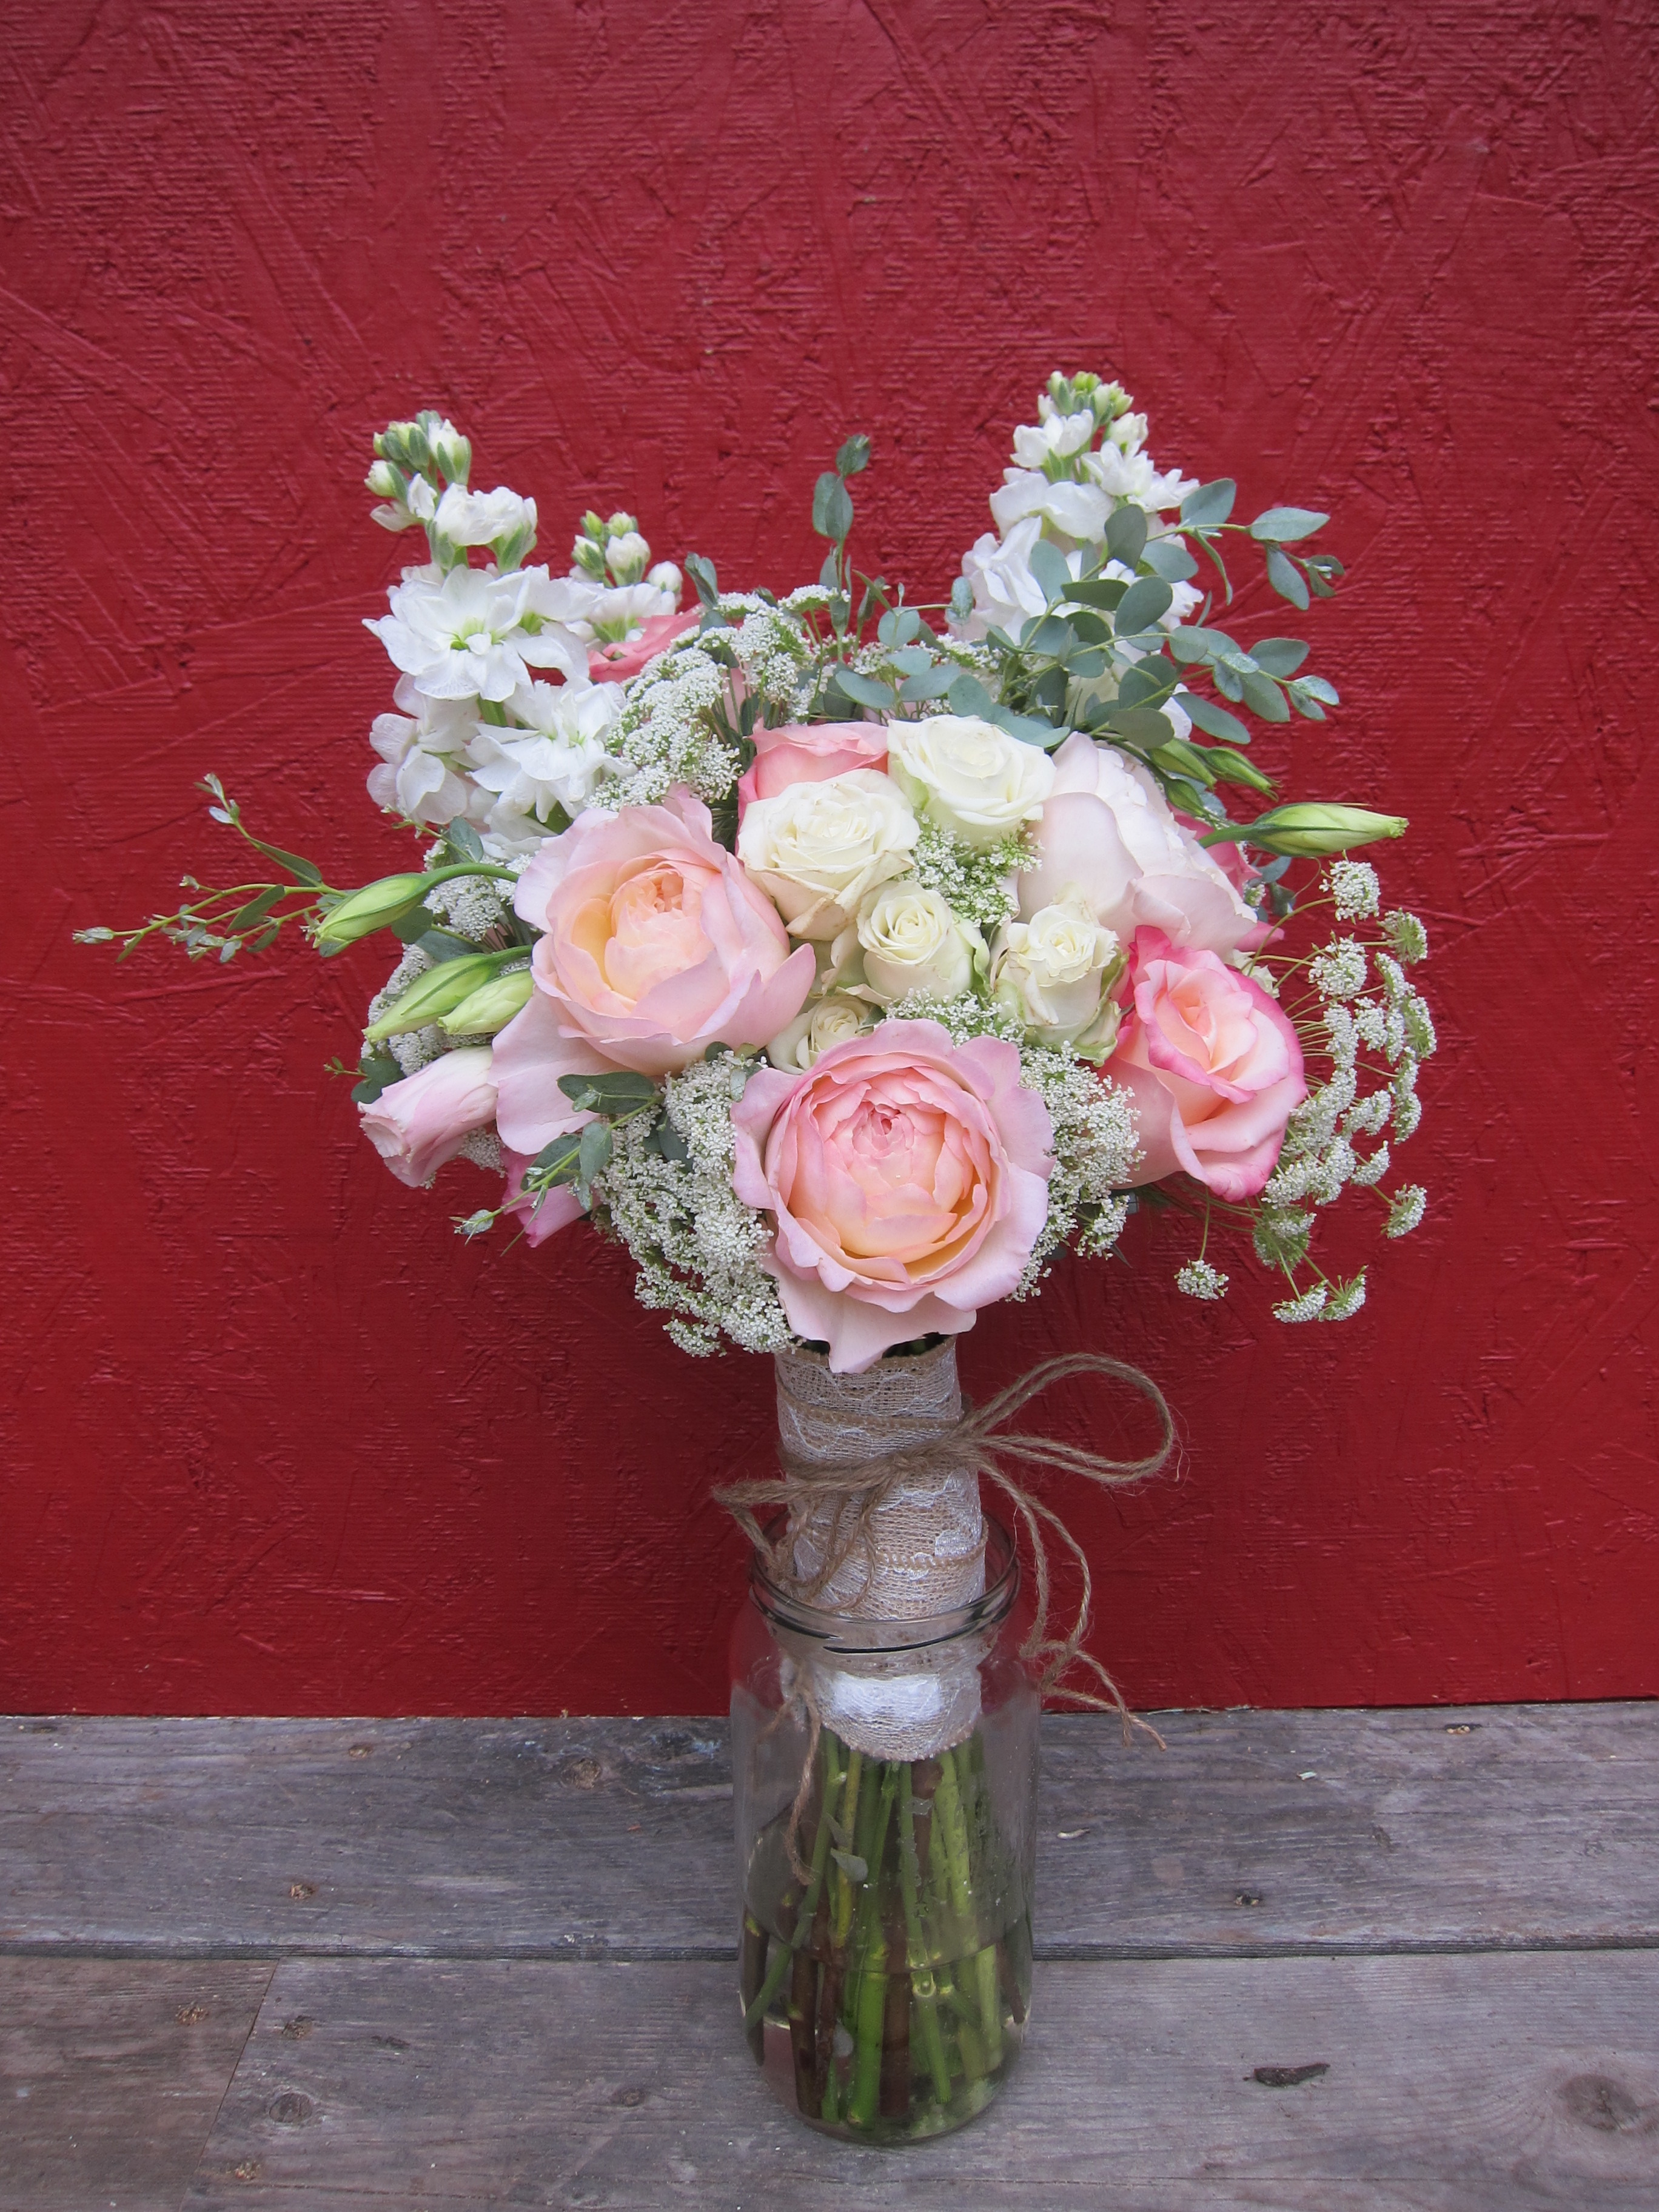
I had the pleasure of working with feather-light garden roses, the color of rosy cheeks on a crisp autumn day.
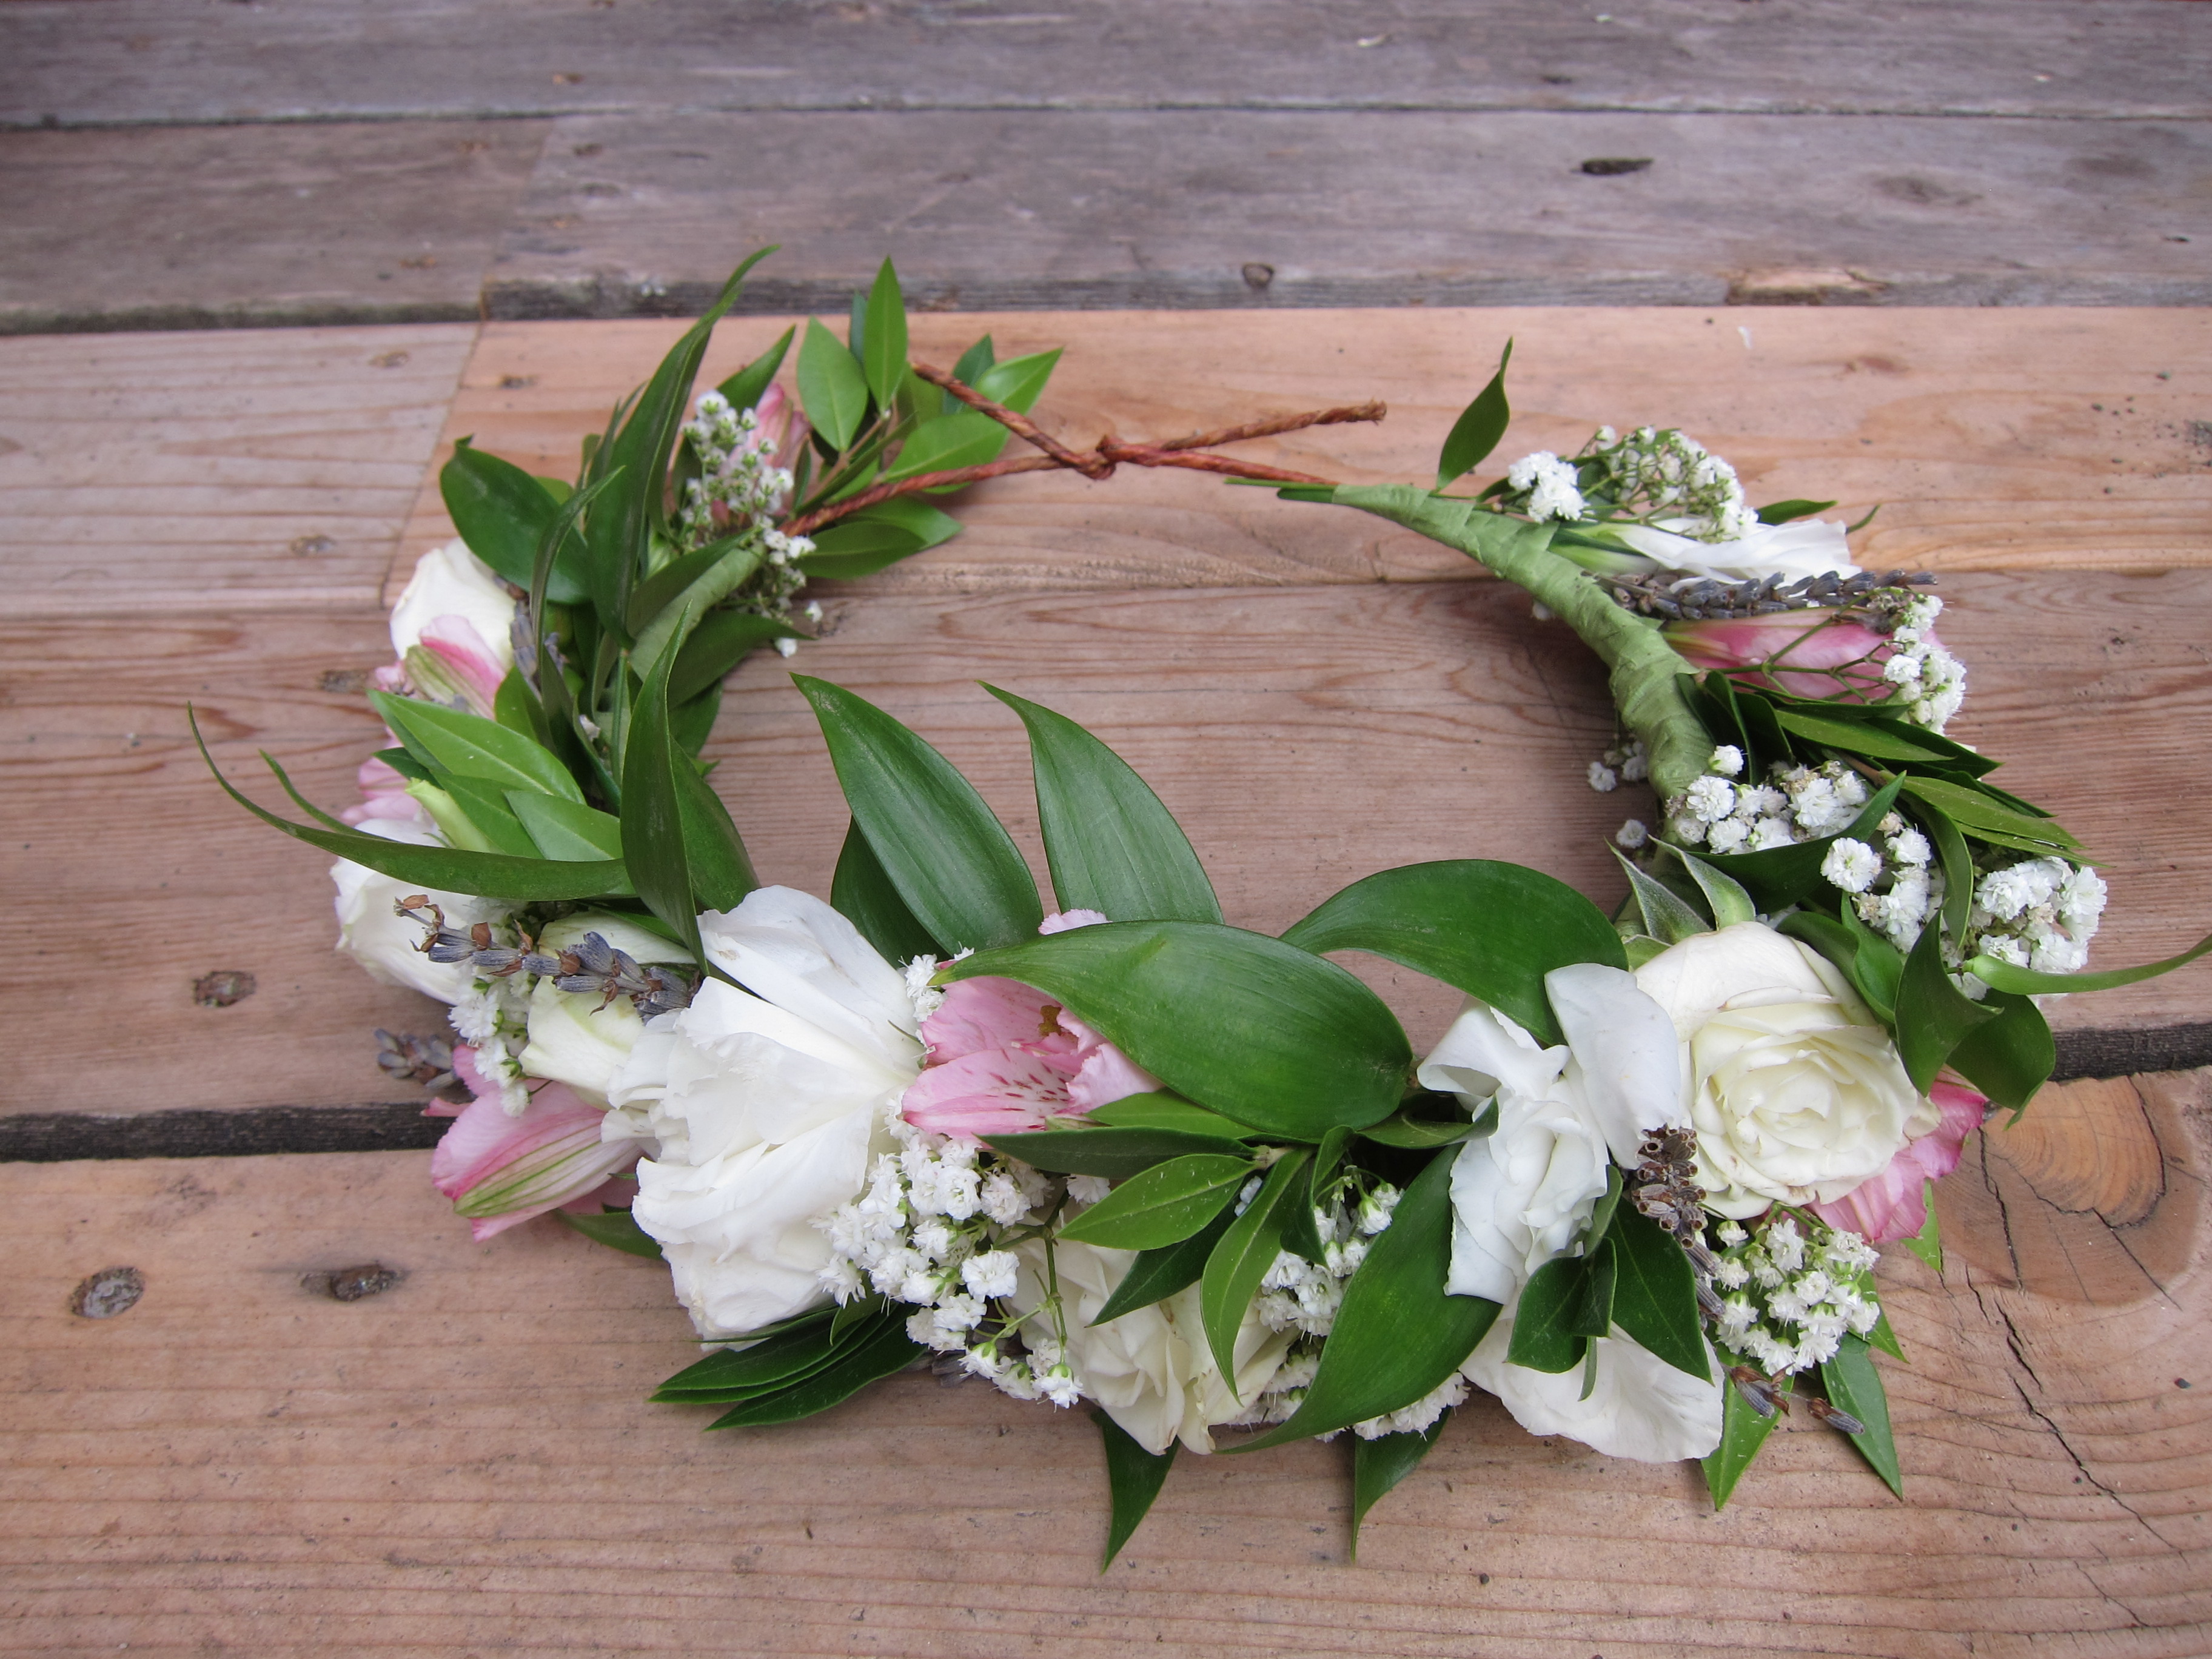
The mother of the bride requested a garland over the birch tree wedding arch, which I was looking forward to creating. It was my first try at a garland and I constructed it sort of like a giant flower crown. I put the garden roses in water tubes and wired them in just before hanging to ensure the blooms lasted as long as possible.
What a truly wonderful close to my wedding season. This was a challenging, fun summer. I learned a lot through my experience of being a new florist on my own and I’m grateful to the brides who put their trust in me. I can’t wait for next summer!
Last fall I attended a networking getaway in Homer hosted by The Boardroom called End of Summer Camp. It was a weekend full of meeting and making new friends. During that time I met Crystal and Carrie, owners of Toast of the Town event planning. I told them I was a flower lady and they said they would keep me in mind for future events.
Six months later they set me up with Charlee, a whimsical bride who wanted her flowers colorful, unkempt and carefree — just my style!
I had so much fun putting together the florals for Charlee and her fiancé Marc. I got to work with nearly a dozen different types of flowers from the most fragrant mauve garden roses to my favorite accent flower, craspedia.
I got to do something new, which I’m calling “hair flair.” Charlee had wanted hair combs with fresh flowers for the bridesmaids, but after a hair trial with another bride I discovered that the plastic combs I was using were not easy to work with. What I decided to do was make teeny flower bouquets with wire and floral tape to be pinned into the bridesmaids’ hair.
My niece and I made about 35 pieces of hair flair so the bridesmaids could pick and choose the flowers they liked best for their hairstyle. It was a lot of fun.
I delivered the flowers to Glory View Farm in Wasilla where Crystal and Carrie were setting up the most magical hootenanny.
Congratulations to Marc and Charlee and I wish them all the best!
I’ve been trying to polish up my site and I realized one of my most popular patterns was full of dead photo links. I also realized it wasn’t even a pattern but just some nice photos of my wearing a bunch of my headbands — pretty much useless to all of you! Instead of just updating the post, which was from three years ago, I figured I’d just start anew and reintroduce it.
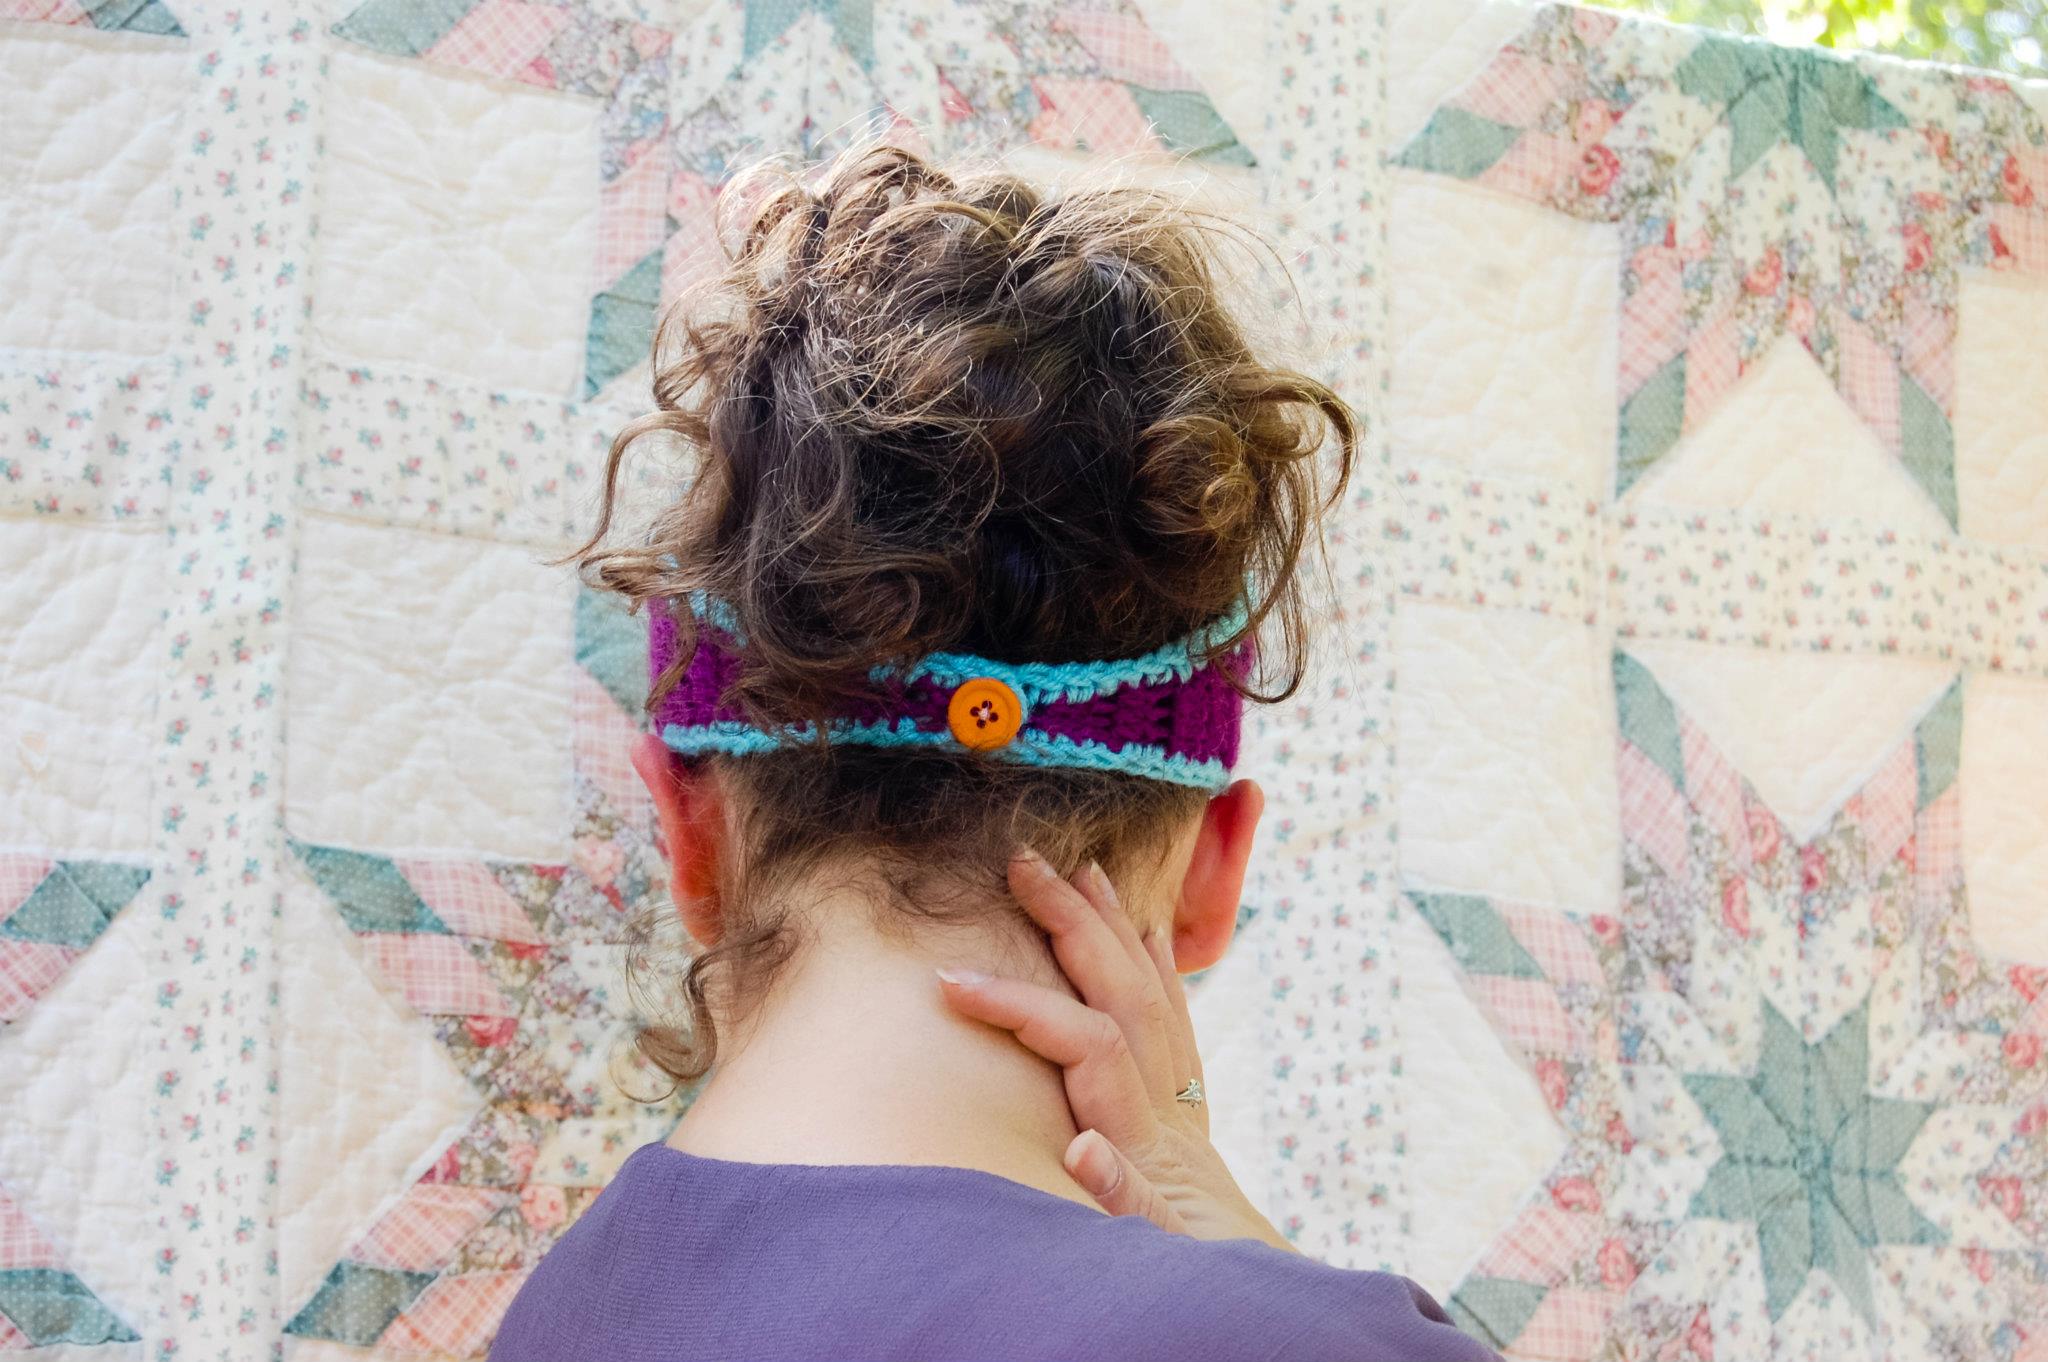
This simple crocheted headband is my best-selling product. I sell out of it at Bella Boutique every holiday season. You can’t go wrong — it’s colorful and has a huge flower on it. I also love embellishing the back of the headband with a vintage button.
The pattern is inspired by Knitty.com’s Calorimetry Headband, which I like, but is really too wide for my head. I also get bored by the ribbing pattern. I wanted something that I could create quickly for my short attention span. I relied on this pattern for the base and then added a simple trim and my own flower pattern, instructions for which can be found here.
Many thanks to my old friend Laura for taking (and recovering) these shots. She was just starting out her photography business when these were taken and they are lovely!
I originally made two versions of this pattern, one with worsted yarn and the other while crocheting two strands of worsted at the same time. I prefer the double stranded version because it’s fuller looking. You can do a single strand but you may have to extend the ends by a couple of rows.
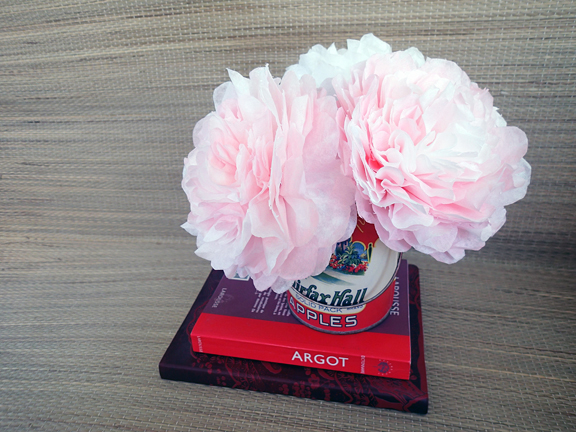
I stayed home sick today and I hate wasting my time in bed, so I decided to mildly craft out. I really love tissue paper flowers but I don’t like spending a ton of time cutting out paper. I found this neat tutorial last year for making coffee filter flowers and I thought I’d take it a step further. I dyed the coffee filters with food coloring and water, let them air dry, and then made them with pipe cleaners as the stem. By using coffee filters I didn’t have to cut the paper to shape. I just shaped the petals, which is far quicker. They really turned out splendidly, don’t you think?
Materials:
White coffee filters
Red food coloring
Liquid medicine syringe or eye dropper
Scissors
Pipe cleaners
Floral tape
Floral wire
Directions:
You’ll be using 12 filters per flower. Fill a small cup with water and about 7 drops of food coloring. Place a few filters at a time onto a plate. With the syringe or eye dropper randomly drop the water all over the filters. Flip them over and do the other side. It’s up to you how much white you want to leave. Hang dry them. Or I guess you could use a hair dryer, but I don’t own one.
When filters are dry, take six at a time and fold them in half three times and cut out a heart shape to make the petals. I cut more off of one set of six. These will be the inside petals.
Rough up the edges of the petals with your scissors. Cut a teeny tiny bit off the point of the filters to create a small hole in each filter.
Inner petals (left) and outer petals
Repeat with second set of six filters, but don’t cut off as much. These will be your outer petals.
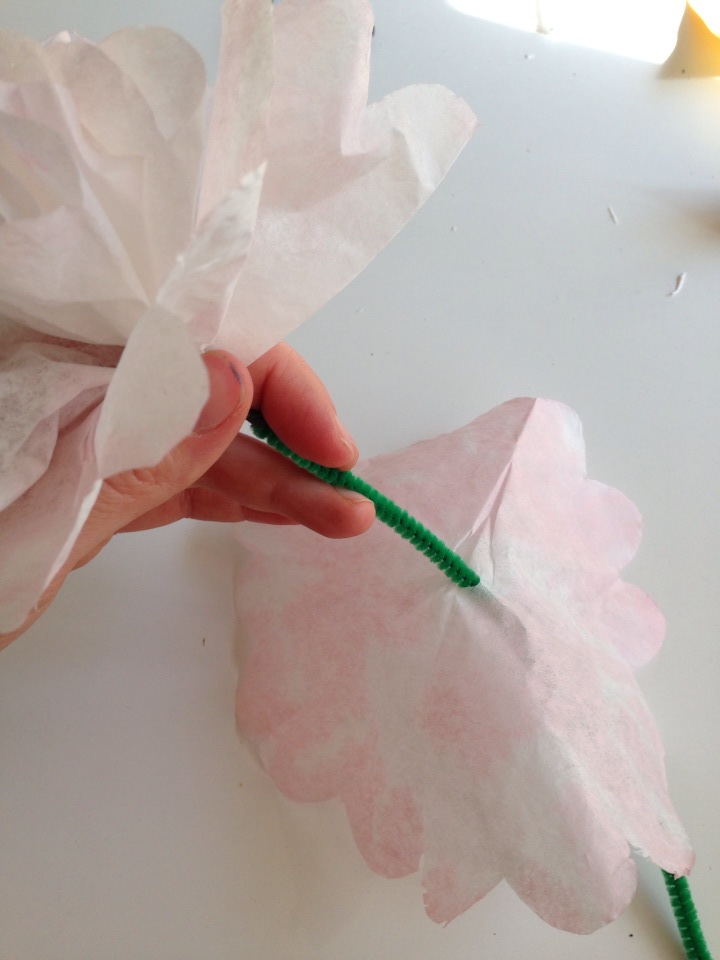
Take your pipe cleaner and create a little nub at one end. Take one sheet of your smaller filter and thread it up to the nub. Wrap the bottom of the filter all around the nub to cover it and secure with floral tape. This way you won’t be able to see the center of the flower.
Thread the next filter onto the pipe cleaner and scrunch it around the nub. Repeat with one filter at a time till you’ve put on all the small filters.
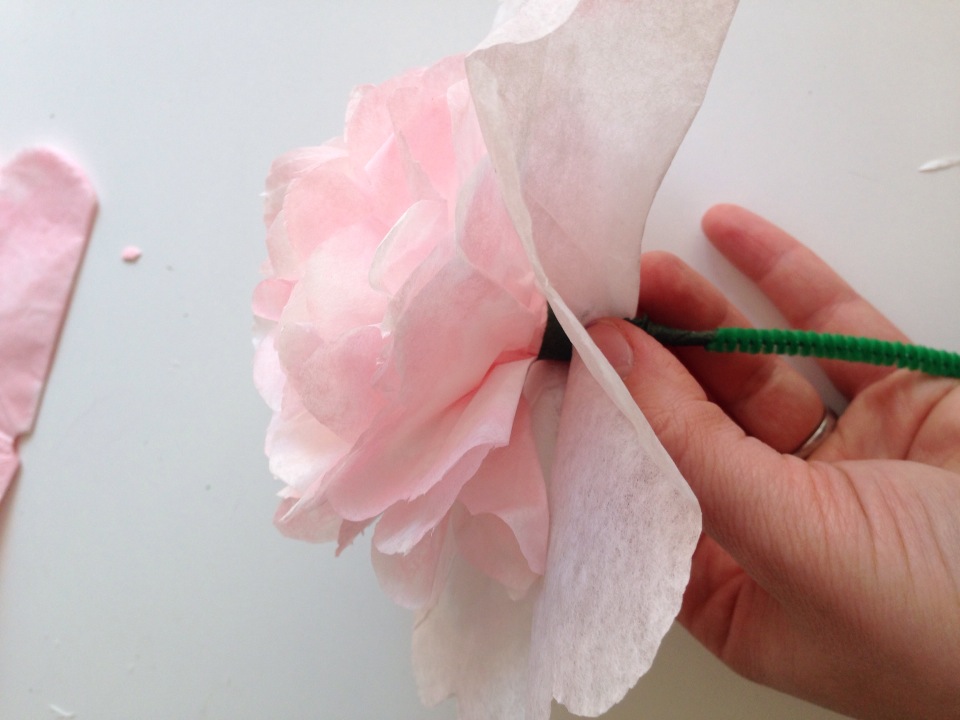
Scrunch around the base of the flower and wrap with floral tape. You’ll now have a small flower and you could call it a day, but I want a huge peony.
Take one larger filter and thread it on the pipe cleaner, but don’t shove it all the way up. Give it a little space so the outer petals are just a little longer than the inner petals. Repeat with the remaining filters. Scrunch up around the base of the flower and secure with floral tape.
Cut a 6-inch piece of floral wire and fold it in half, or just use another pipe cleaner. Stick it to the main stem and continue wrapping with floral tape. This stabilizes the stem. Keep wrapping all the way to the bottom.
Break tape and wrap the bottom of the stem. Ta-da!
These flowers look cheery on a window sill year-round. Peony season is on the way, but I just couldn’t wait. These will definitely do in the meantime.
At long last I have finally caved into mainstream fashion and I’ve gone and made a flowered headband. You know the ones — tapered with a big flower on the side? They are cute, don’t get me wrong, but I was never into knitting them and then I realized the other day — I was never into KNITTING them. But what about crochet?
I actually admire Knitty.com’s Calorimetry Headband. I’ve made it before, although slightly altered because I feel as though it’s too wide for my head.
But honestly, I hate purling. All you do is knit 2, purl 2 for the whole pattern and it’s enough for me to stay away.
Last weekend I set out looking on Ravelry for a simple crochet headband pattern. I ended up finding a crocheted version of the Calorimetry Headband. As a knitter by nature, I needed a crochet pattern I could understand. This one was simple and best of all, much quicker than knitting.
I decided to take this basic pattern and embellish it with a border and a flower. Pizzazz!
But I didn’t stop there. In case you don’t know me very well, when I get on a new kick I don’t stop. So I made five more. Then I decided to double the yarn and WOWEE it made it really pop. So I made four more.
So how are these pretty headbands made? LET ME TELL YOU!
First, I followed the instructions here but I used a J hook instead. I also think doubling up the yarn is much nicer, but that’s up to you. If you only have one ball just make another ball from it or use the end from the inside at the same time as the outside, if that makes sense.
Once you’ve completed the basic headband, with your contrast color start making single chains all around the outside of the headband. I didn’t put the hook into individual stitches, but instead I stuck the hook in the ch2 gaps at each end. When you’ve gone all the way around, slip stitch into the first SC and weave in all the ends.
View my previous blog post on how to crochet a flower. Then stitch the flower with a darning needle to wherever you’d like the flower to be. Pretty simple!