Back in 2011 I posted a recipe for one of my favorite dumpling recipes – pelmeni. This was back before I had all the recipe-writing knowledge I have today, so I wanted to update this recipe for anyone wanting to make these delicious dumplings at home.
It’s super helpful to have a pelmeni mold, but you can always make them using a small glass as a dough cutter and folding them into half moon shapes.
Russian Pelmeni
Makes about 60 dumplings
Ingredients for the dough:
1/2 cup warm water
2 eggs
About 260-270 grams AP or 00 flour, plus more for dusting
Ingredients for the meat filling:
1/2 medium onion, chopped very finely (I recommend using a small food processor)
1 tablespoon olive oil
2 garlic cloves, minced
1 teaspoon curry powder
1/2 pound ground beef
1/2 pound ground pork
1/2 teaspoon salt
Pepper, to taste
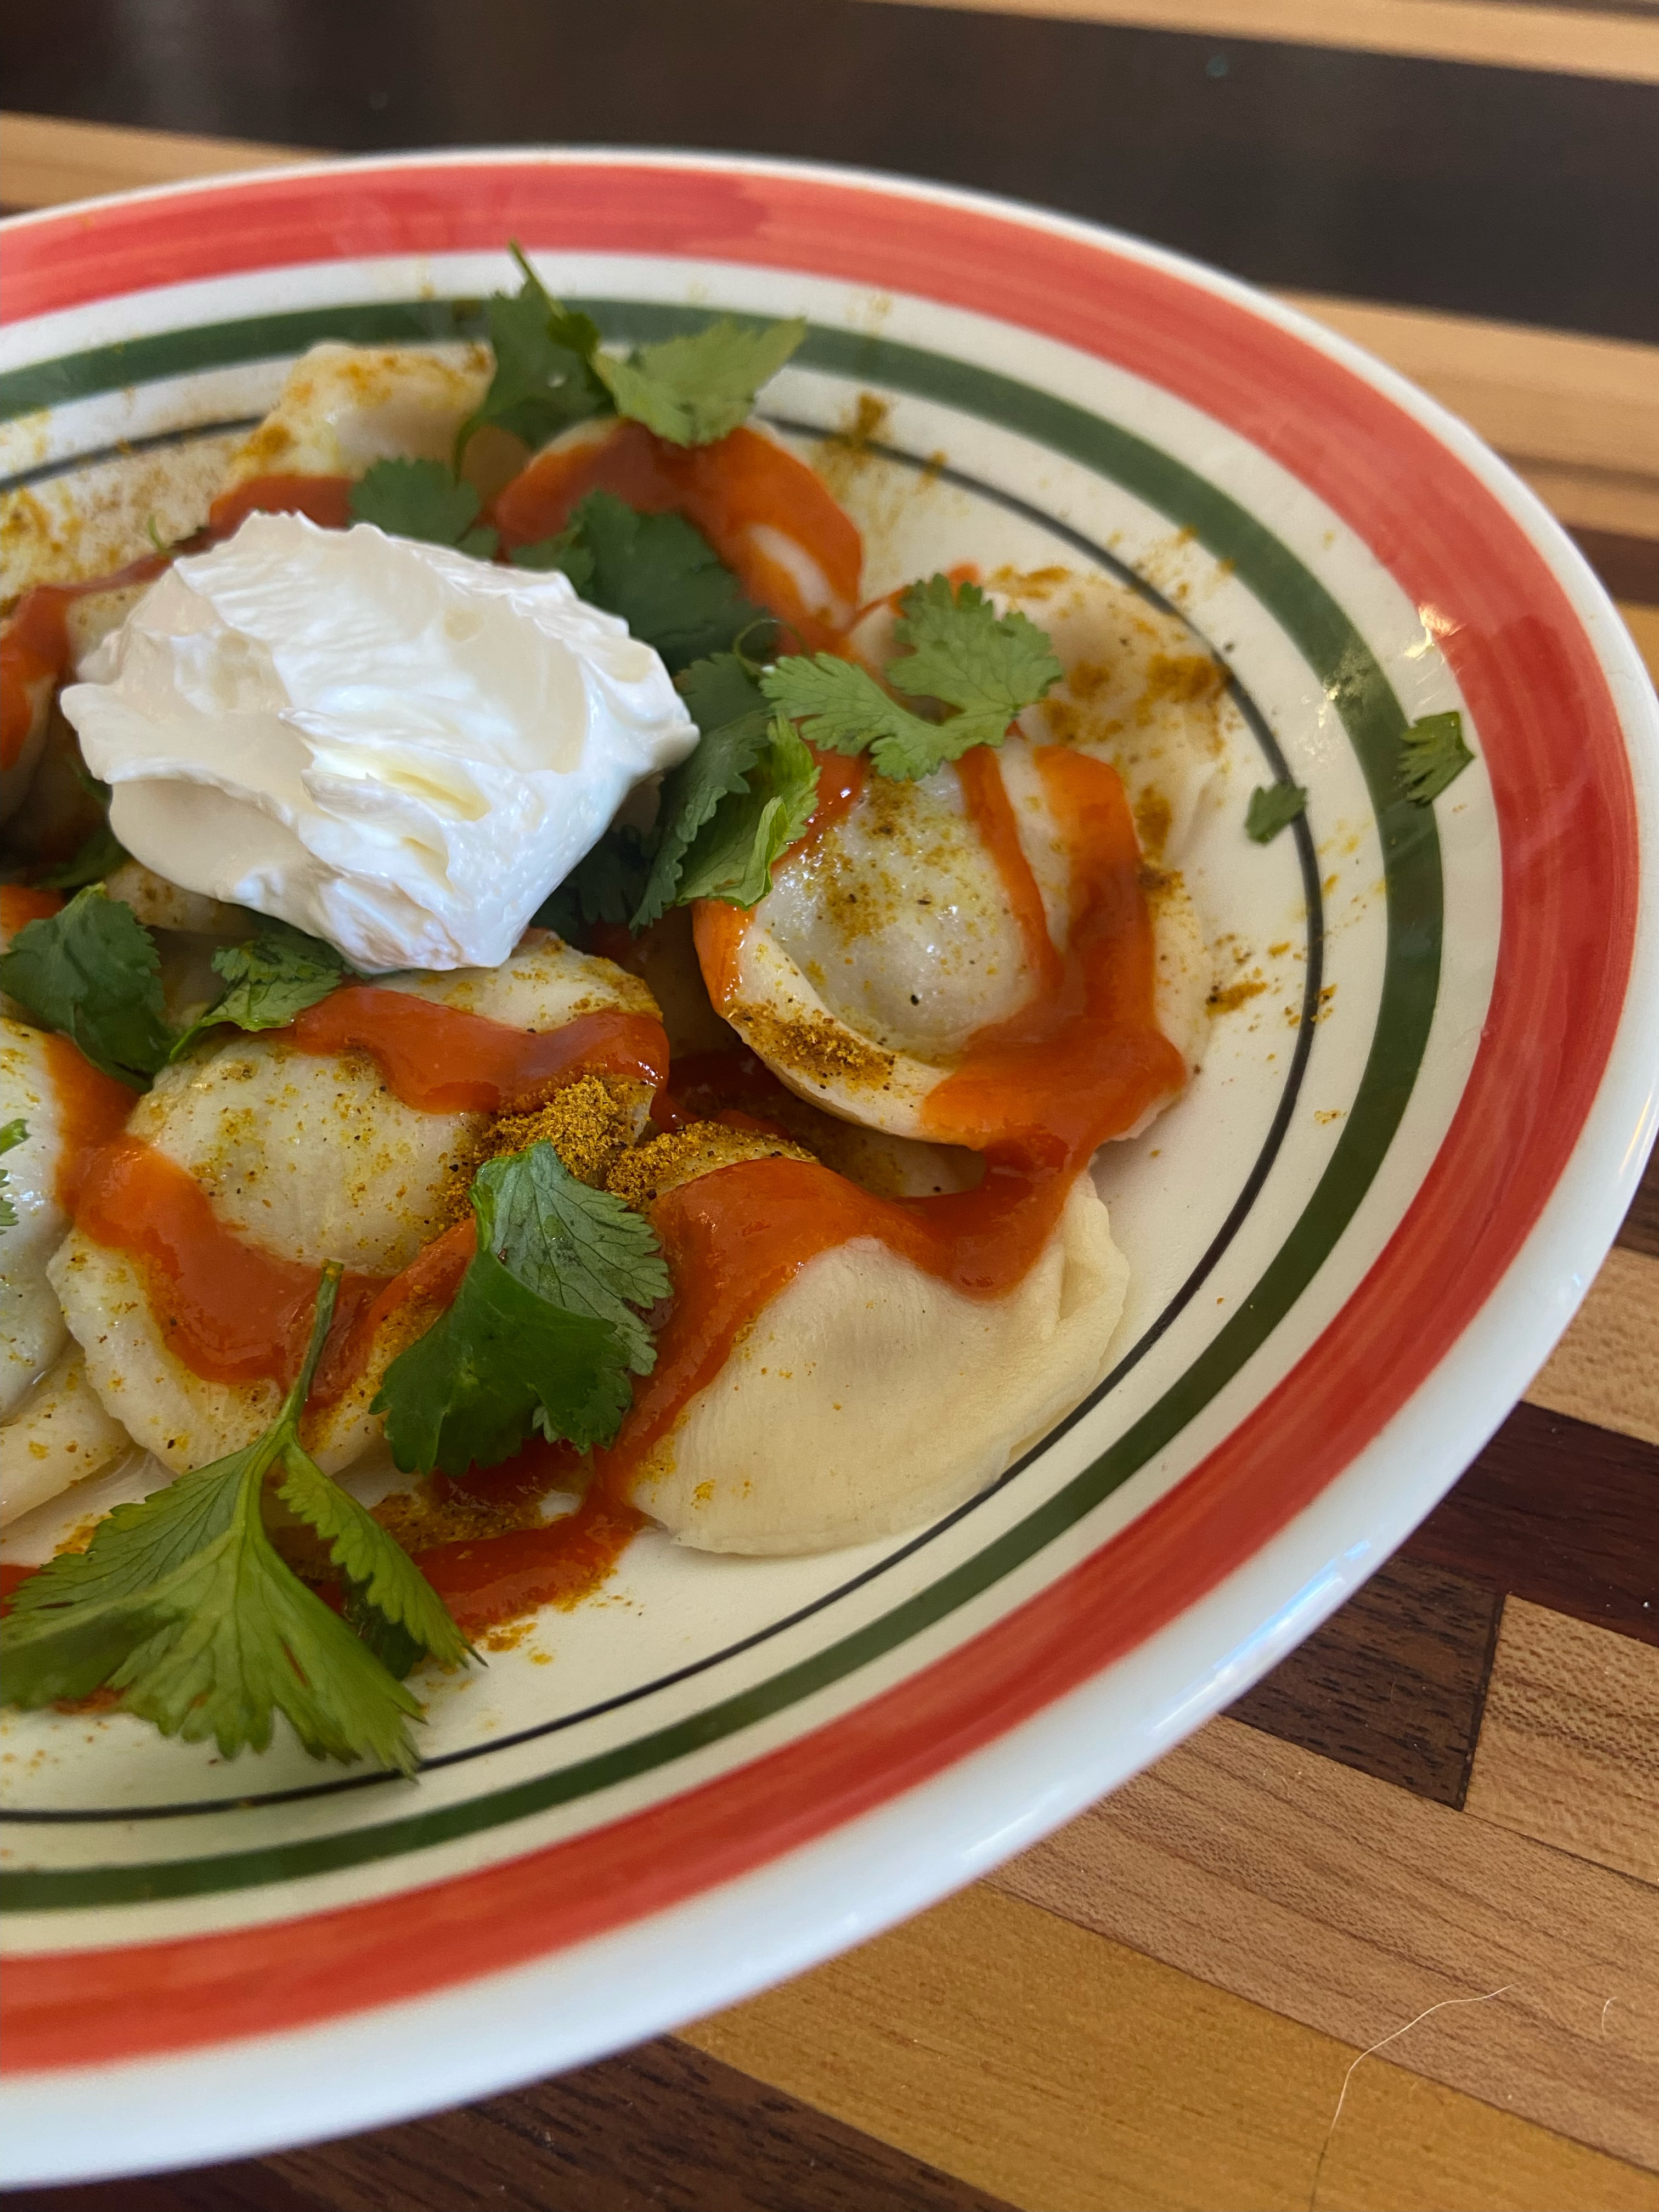
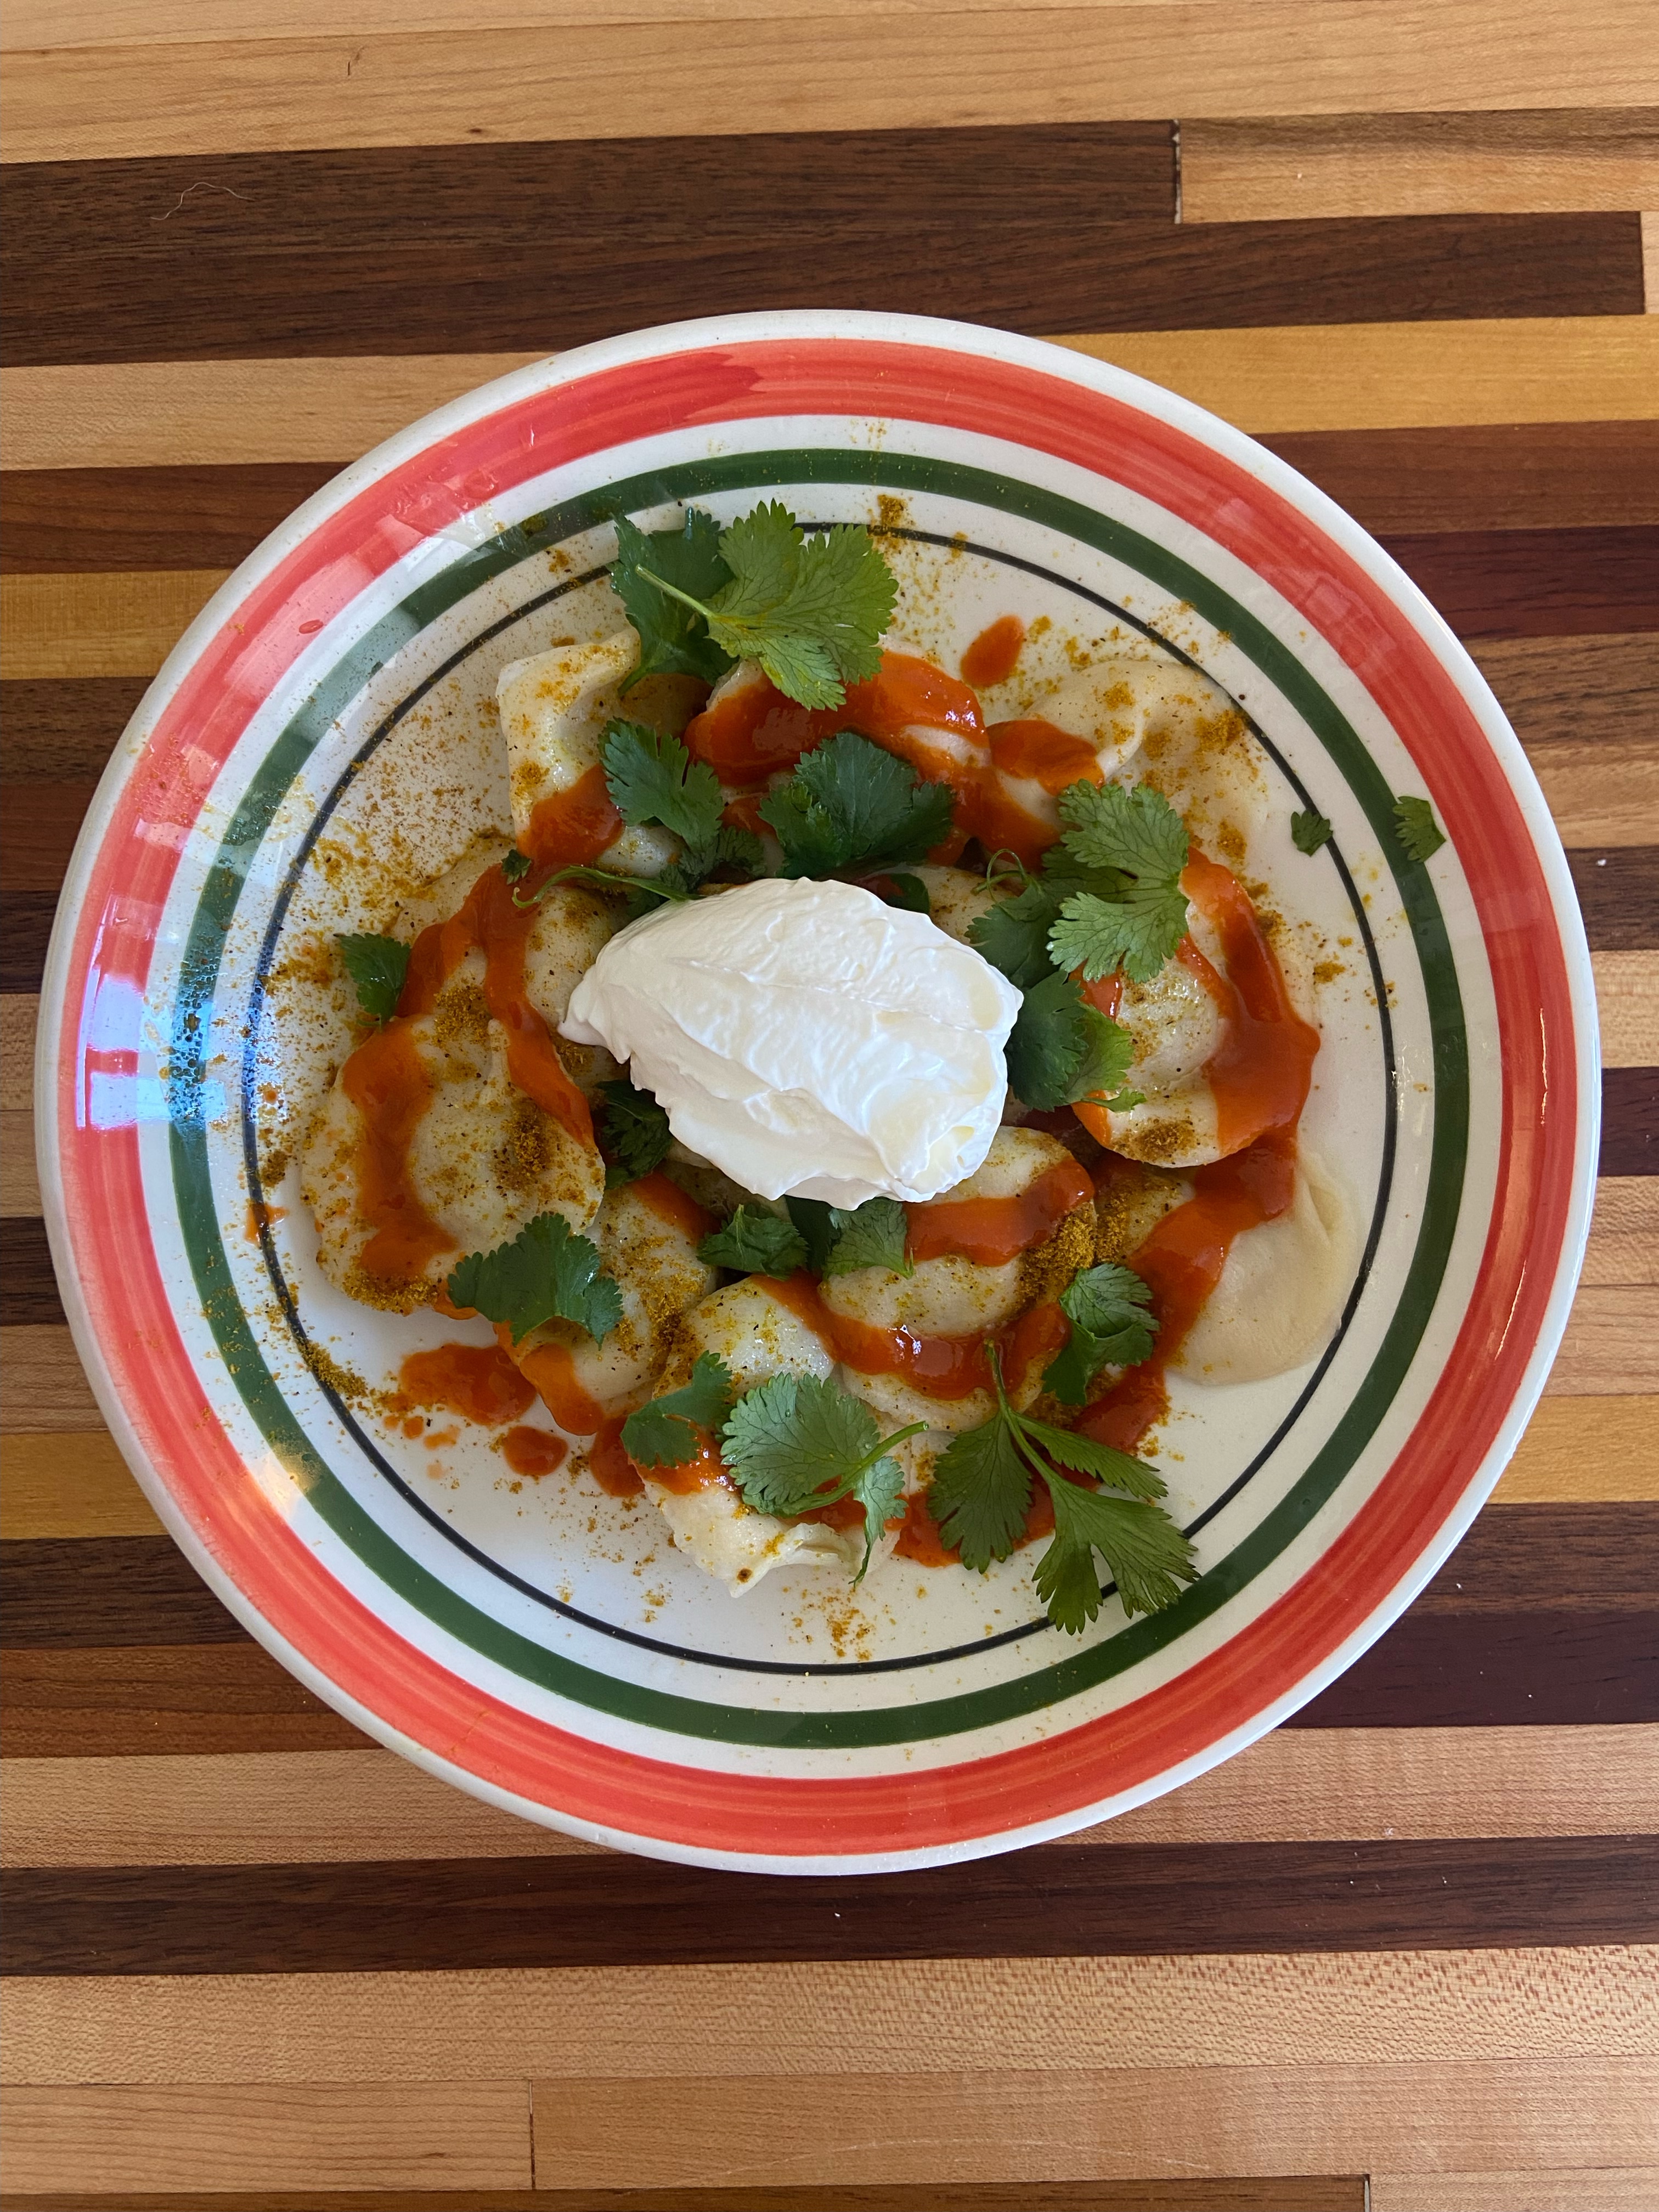
For the topping:
Butter
Rice vinegar
Curry powder
Sriracha
Fresh cilantro
Sour cream
Directions:
In a medium bowl, whisk together the egg and water. Incorporate flour till you have a soft, stretchy dough that isn’t sticky to the touch. Knead on a floured surface for five minutes, incorporating flour if it’s still too sticky. Wrap the dough in plastic wrap and let sit for 30 minutes.
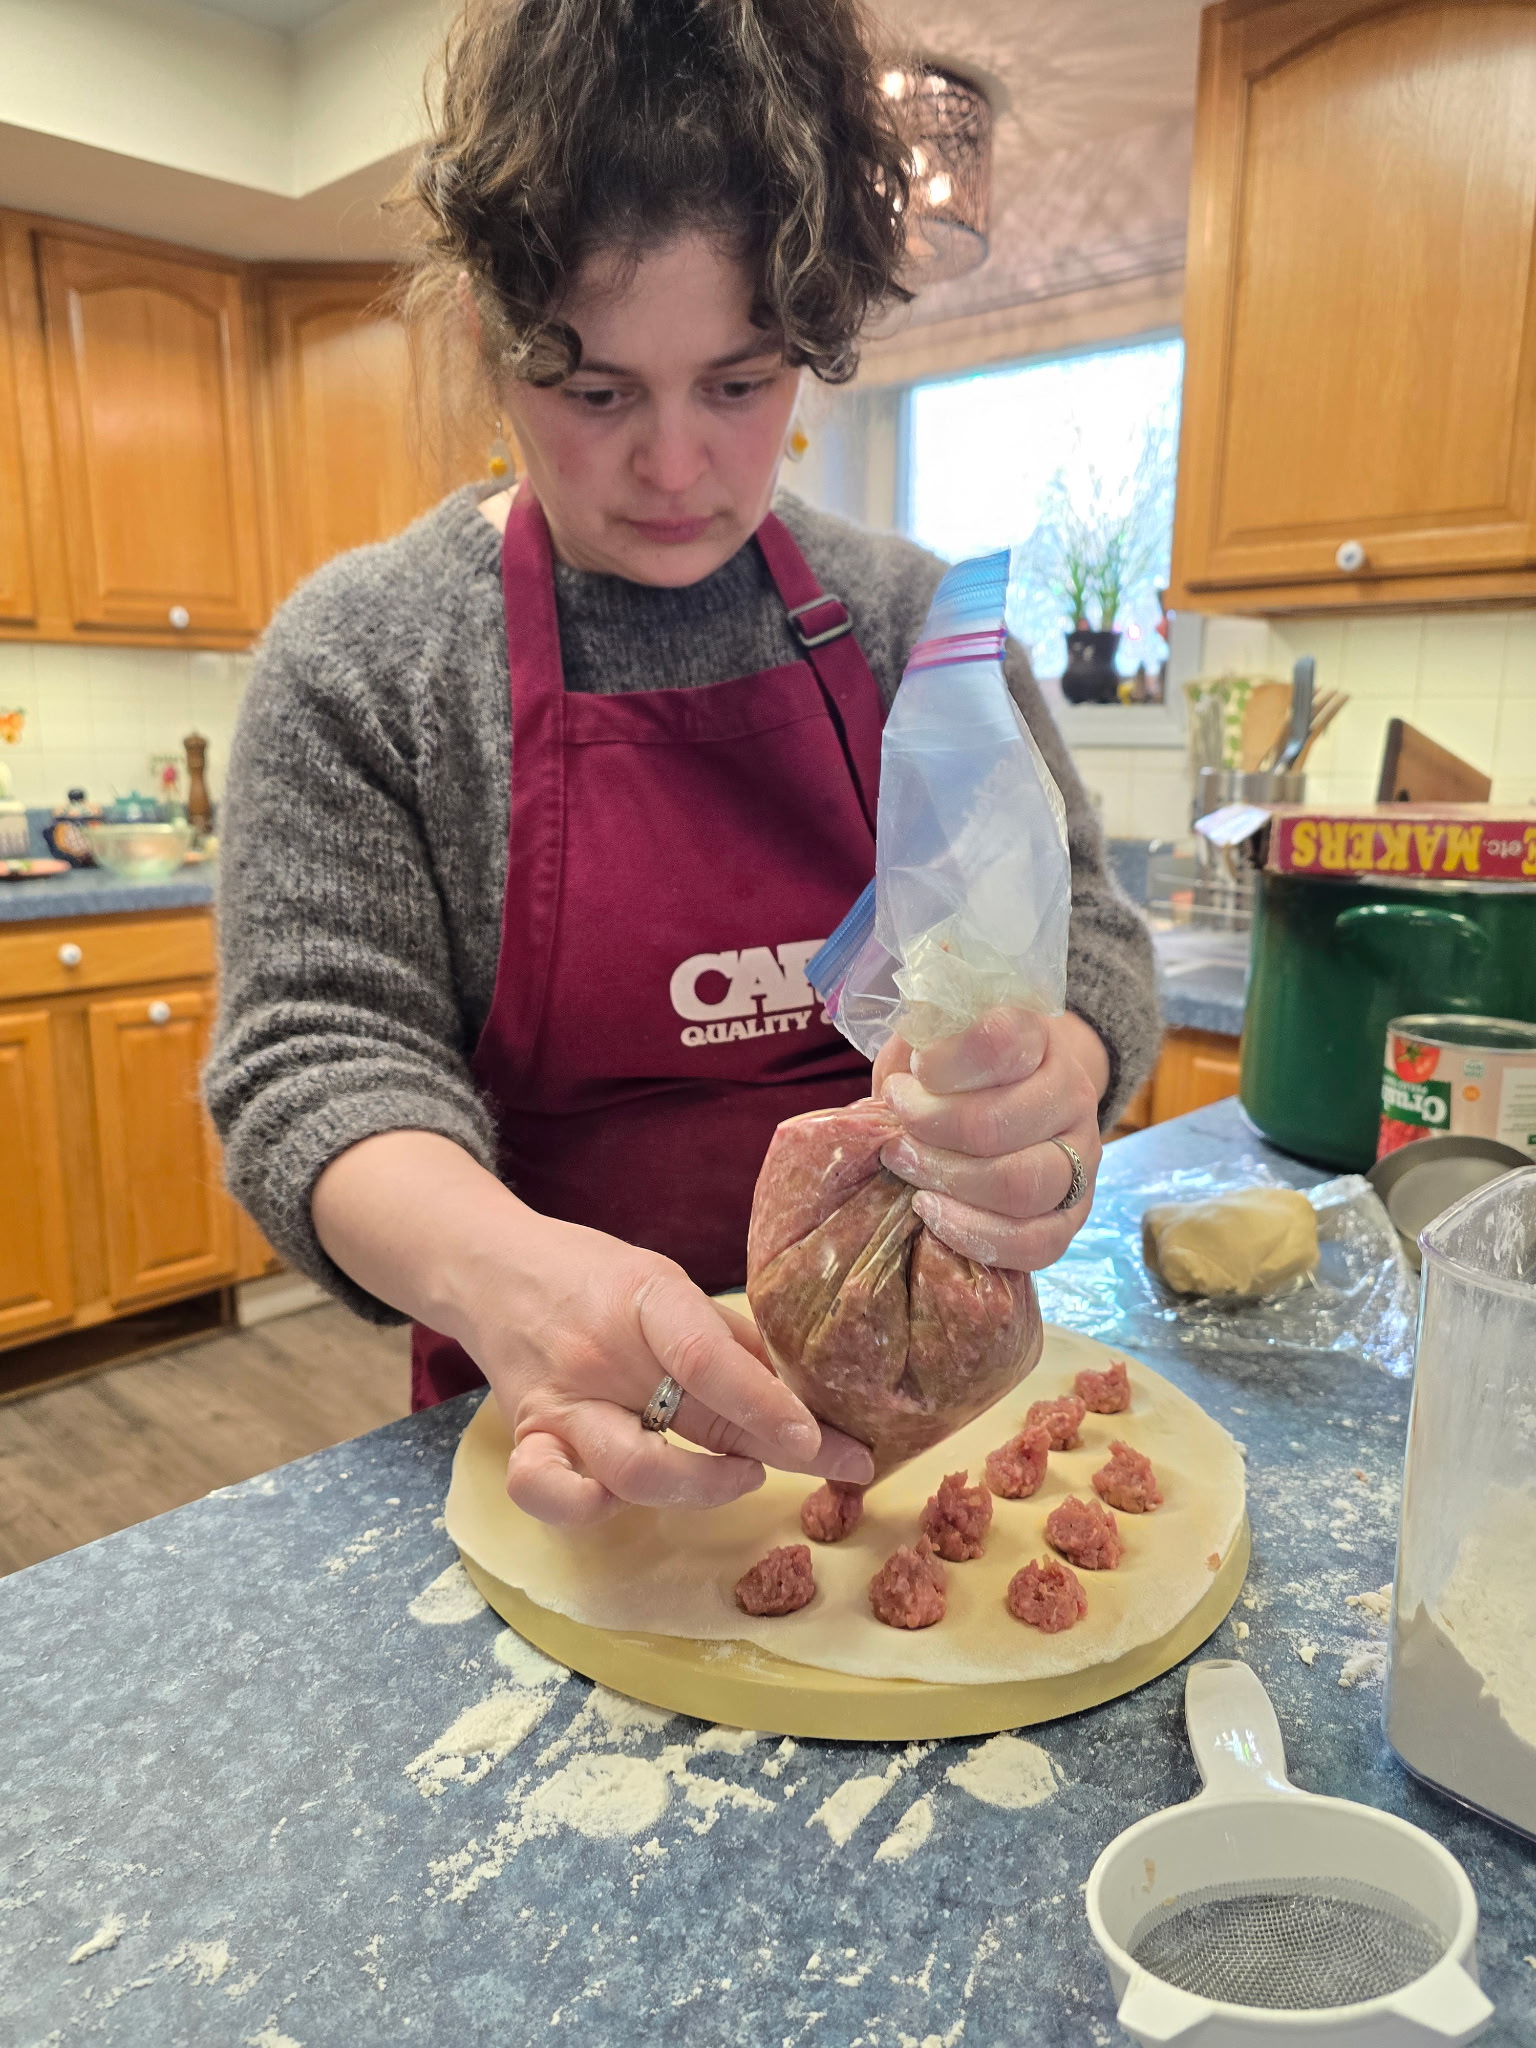
Meanwhile, heat a pan with the oil over medium-high. Add the onions and sauté until onions are soft, about 5 minutes. Turn the heat to medium, add the curry powder and garlic, and cook for 1 more minute. Let this cool off the stove while you combine the beef, pork, salt and pepper in a mixing bowl. Once onions are mostly cooled, add to the meat and combine well. Cook a small sample in your frying pan to sample, if you like, then adjust for salt. Once the meat mixture is seasoned to your liking, place it in a gallon sized zip top bag and cut a small hole in one of the bottom corners.
If you have a pelmeni mold, use 1/4 of the dough and roll out a large, thin, round sheet of dough, incorporating flour if needed so it doesn’t stick. Sprinkle flour over the mold and drape the dough on top. If you don’t have a mold, use a biscuit cutter or the edge of a glass and cut circles out of the dough.
Using your makeshift piping bag, add about a teaspoon of filling to each divot in the pelmeni mold. If the dough seems too dry, you may want to lightly spritz the whole sheet with a water sprayer because you want the other sheet of dough to stick. Roll out another 1/4 of the dough into a large, round sheet and place it on top of the filled mold. Using your rolling pin, gently roll back and forth along the dough side of the mold until the mold starts to pierce through the edges of each pelmeni. Lightly dust a counter with flour and turn the mold upside down to shake/poke the pelmeni out of the mold.
Repeat with the remaining dough to make one more set of pelmeni with the mold.
If not using a mold, add about 1 teaspoon of filling to each cut circle. Crimp closed with your fingers. The dough should be sticky enough to stay closed on its own without additional moisture.
Set each finished pelmeni on a flour-lined baking sheet.
From here you could either boil the dumplings right away or place them in the freezer for later. If you freeze them, make sure to freeze them on the baking sheet before putting them in a zip top bag or container, otherwise they will stick together.
To prepare, bring a big pot of salted water to a boil. Add the dumplings and return to a boil. Cook until dumplings float — about 5 minutes (7 minutes if frozen).
Use a slotted spoon to remove dumplings and place them in bowls. Top with butter, vinegar, curry powder, Sriracha, cilantro and sour cream.