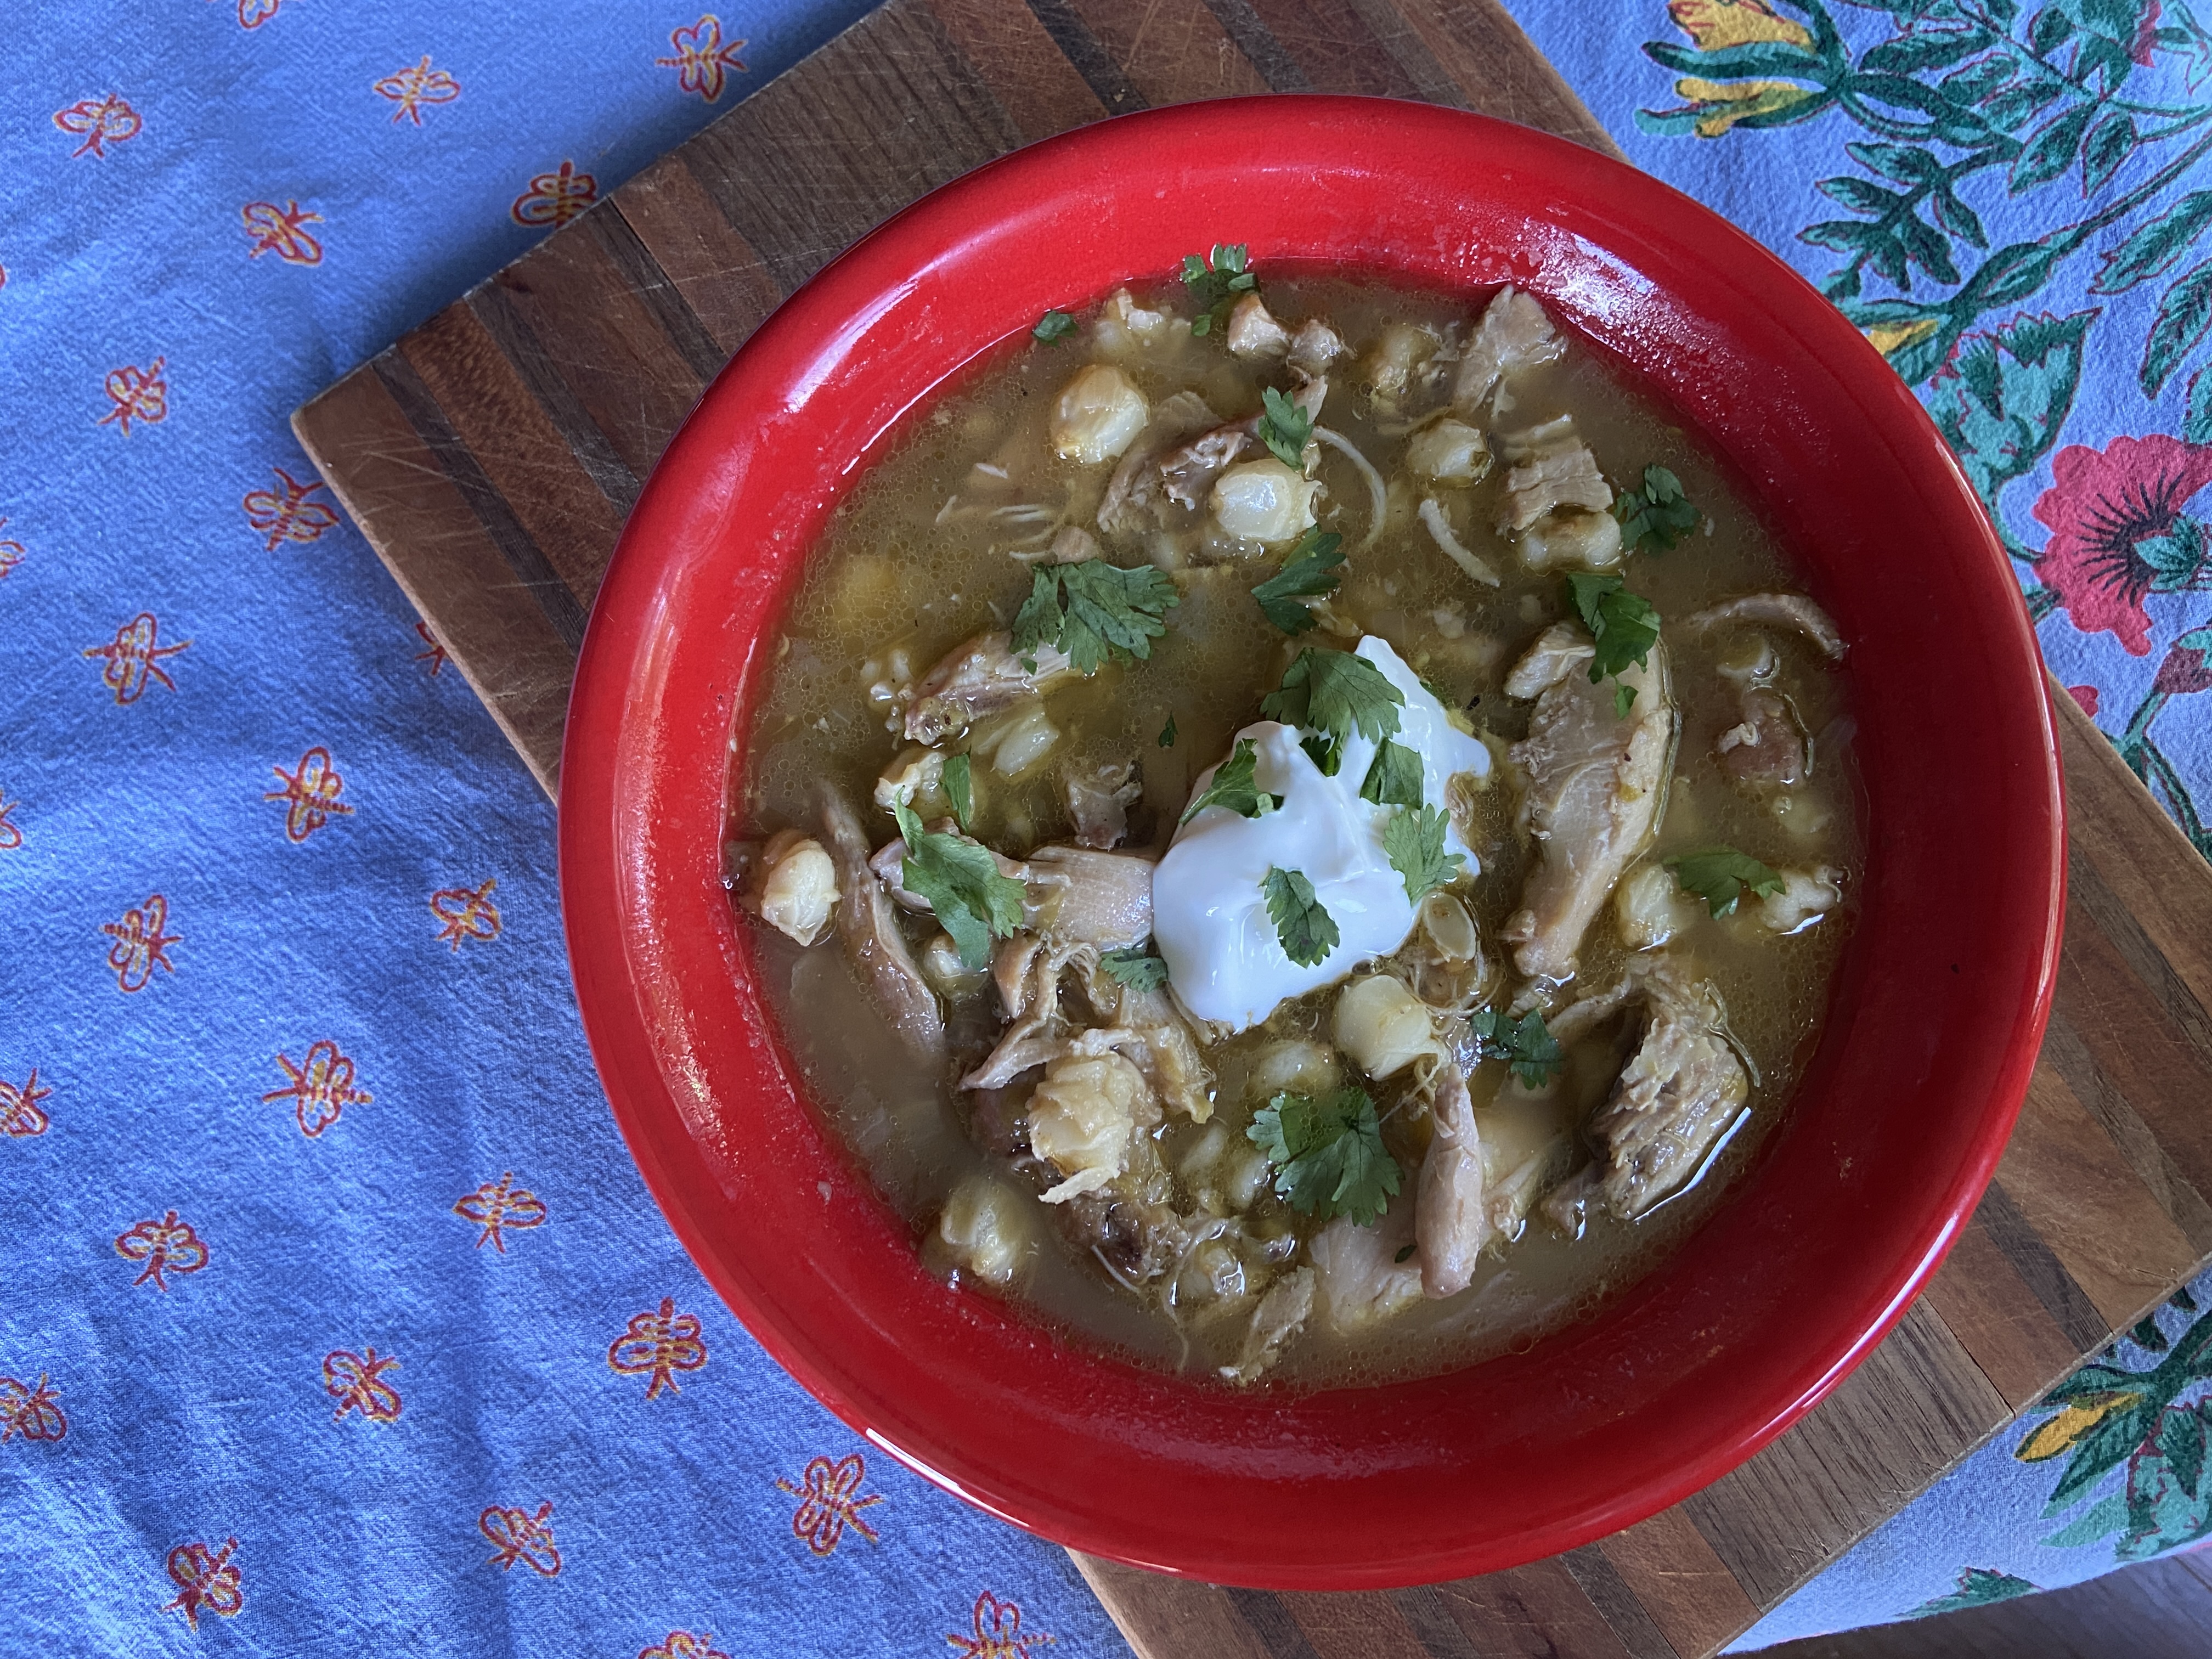
The other day my husband bought a huge jar of hatch green chiles from Costco. He thought it was salsa. I guess since it contains garlic and salt, one could consider it a salsa, but I had a feeling it would not get finished before it started getting moldy in the fridge, so I decided to make a green pozole.
I am only familiar with making red posole, a New Mexican style hominy stew that’s thicker than Mexican-style pozole. Both contain hominy and pork. I’m assuming a Mexican-style pozole verde uses tomatillos and green chiles (I’ve never made it) so I decided to improvise and not look up any recipes for pozole verde. I knew I could make a flavorful hominy stew with chicken thighs, jarred hatch chiles and store bought salsa verde.
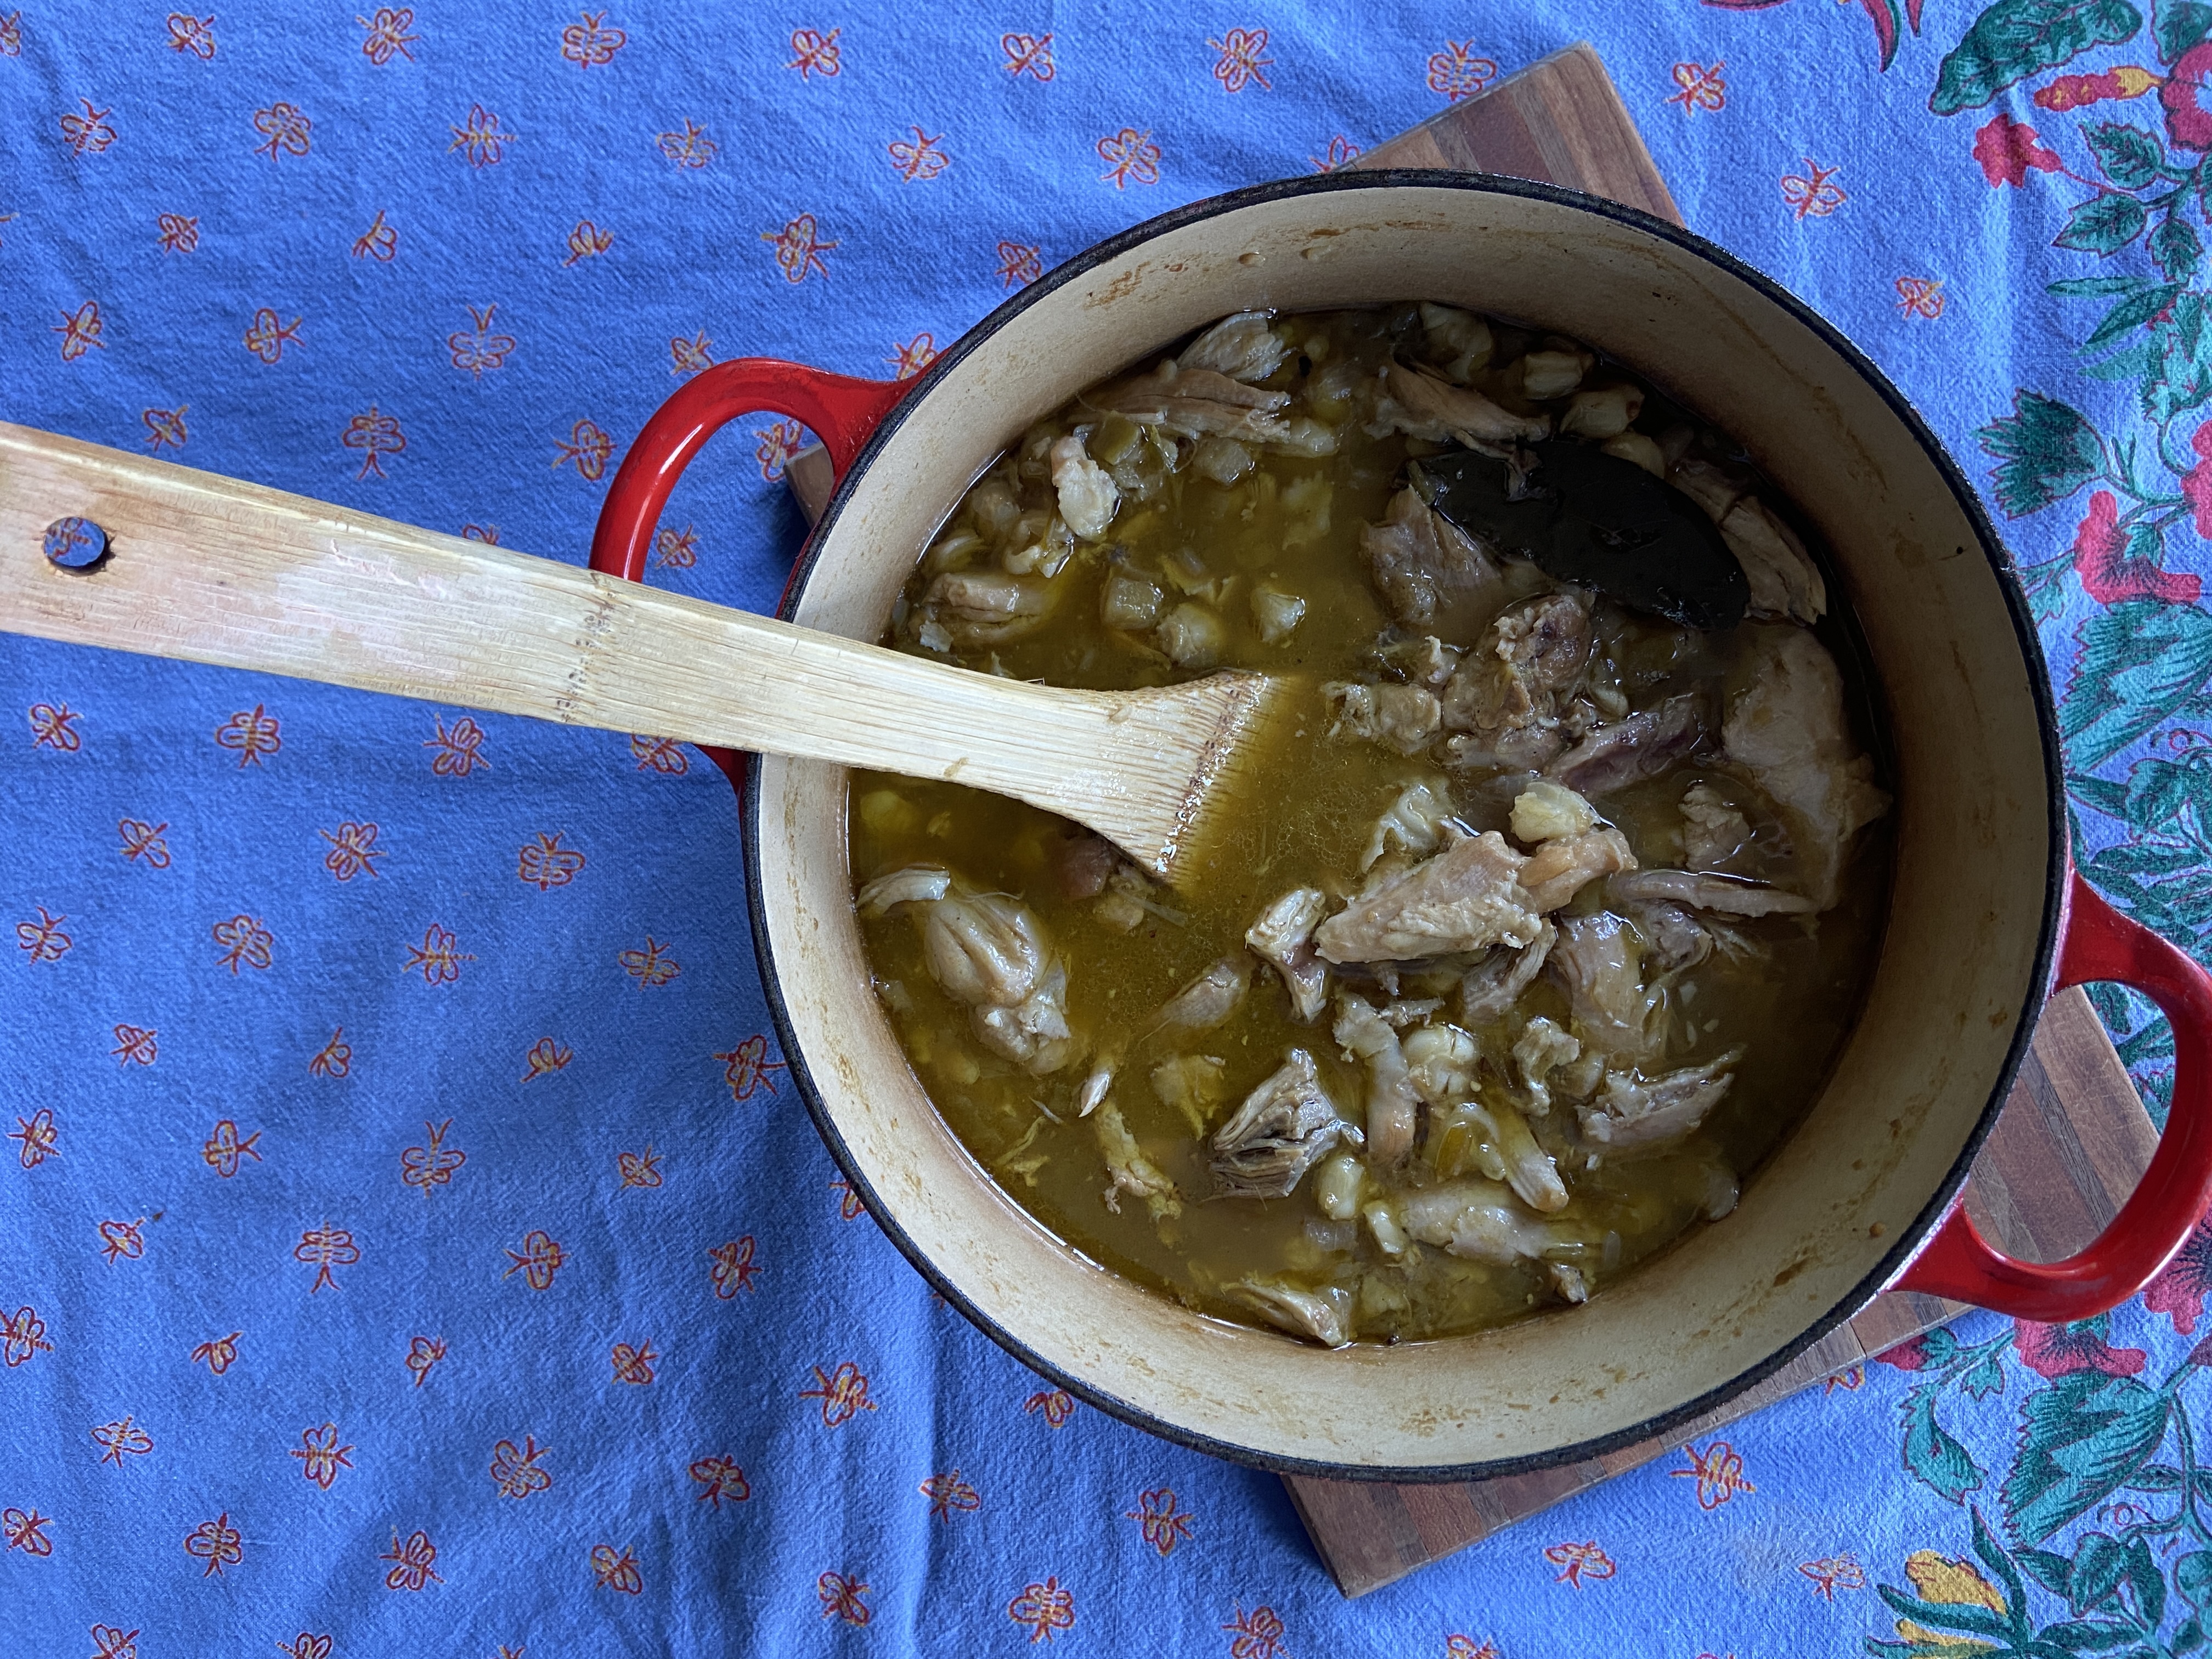
The salsa verde contains tomatillos, jalapeños, coriander, and arbol peppers, which gave the soup some kick and brightness. I added one packet of Bare Bones instant bone broth to add some dimension to the soup. Cooking the thighs with the bone in creates a more robust broth as well.
This turned out to be so flavorful with a deep, but not overwhelming, spice to it. The chicken thighs are fall-apart tender and because I used dried hominy, the kernels have the perfect chew to them. The hominy thickens the soup as it simmers so now I have a recipe for another kind of pozole that I enjoy almost as much as the rojo variety.
Note: you can use canned hominy for this recipe and it will significantly reduce the cook time. I’ve included a note at the end about how to use canned instead of dried.
Pozole Verde
Serves 6-8
Total prep & cook time (not including soaking the hominy): 4 1/2-5 hours or 1 1/2 hours if using canned hominy.
Ingredients:
- 5 ounces dried hominy, soaked in water overnight (or one 28-ounce can of cooked hominy)
- 3 green onions
- 7 garlic gloves, divided
- 1 tablespoon salt, plus more for seasoning
- 5 bone-in, skin on chicken thighs
- 1 medium onion, chopped
- 3 cups chicken stock
- 1 packet of Bare Bones instant bone broth (optional)
- ¾ cups jarred hatch green chiles
- 1 1/4 cup salsa verde
- 2 bay leaves
- Freshly ground pepper, to taste
- Sour cream, for serving
- Fresh cilantro, for serving
- Flour tortillas, for serving
Directions:
After you’ve soaked your hominy overnight, drain it and place it in a slow cooker. Add enough water to cover the hominy by three inches. Toss in the green onions, 3 smashed garlic cloves and 1 tablespoon salt. Slow cook for 3 hours (I have an Instant Pot and I set it to high). Drain, discarding the green onions and garlic, and set aside until ready to use.*
Pat dry the chicken with paper towels and sprinkle both sides with salt. Heat a large dutch oven over medium high and add the thighs skin-down. You may have to do this in two batches. Cook until the skin is golden brown, about 5 minutes. Flip and cook the other side for a few more minutes. Remove thighs from the pot and set aside. This renders a lot of fat and we only need a little bit of it to cook the onions. Drain all but 2 teaspoons fat and reserve it for another time you want fat with flavor (I store it in my freezer after it’s solidified). Remove the skin from the chicken and if you want a little snack, place it back in the pot and fry until completely brown and crispy. Or just discard it. I wanted the skin on to render the fat because chicken fat has more flavor than olive oil.
While you munch on chicken chicharrones, toss the onions into the pot with the remaining chicken fat. Saute until soft, about 5 minutes. Roughly chop the remaining garlic and add that to the pot. Stir and cook another two minutes until the garlic is fragrant.
Add the chicken thighs back to the pot along with the hominy, stock, Bare Bones packet, hatch green chiles, salsa verde and bay leaves. Add some freshly ground pepper to your liking. Cover the pot. Bring to a simmer, turn down heat, and cook for an hour.
Carefully remove the chicken thighs from the pot and transfer them to a cutting board. With a fork and knife, remove and discard the bones and gristle. Shred or roughly chop the chicken thigh meat and return to the pot. Simmer for another half hour. Add salt to taste.
Serve with a dollop of sour cream, a sprinkle of fresh cilantro and flour tortillas.
*If using canned hominy, skip this step and just drain the canned hominy and start at step 2.