Tag Archives: homemade

Totally Homemade Chicken Noodle Soup

It’s been a really busy summer. My floral endeavors have pretty much taken over my creative life and I have very little room for blogging.

After four weddings this weekend and barely cooking for my family, I finally had time to prepare a home-cooked meal.

I started by making a really rich chicken stock. After simmering it for about six hours I strained it and then decided to make chicken noodle soup with homemade noodles.

It was a hit!

Homemade Chicken Noodle Soup | The Best Chicken Soup Ever from Alaskaknitnat.com

Here’s how I made it from start to finish.

Homemade Chicken Noodle Soup

Serves 6 or so

I’ve divided up this recipe into to parts: the stock and then the soup. You can of course start with store-bought chicken stock, but there is something so satisfying about creating your own opaque chicken stock. Plus it’s way more flavorful than anything found at the store.

Ingredients for the stock:

  • 2-3 chicken carcasses
  • 1-2 onions, roughly chopped
  • 3 celery ribs, roughly chopped
  • 3 carrots, roughly chopped
  • 1/4 cup parsley, roughly chopped
  • 1/2 teaspoon whole peppercorns
  • 2 bay leaves

Directions for the stock:

Using pliers, crack the bones of your chicken carcasses. I actually do this after eating a chicken and freeze it until I have two or three. I also had some frozen skin-on chicken thighs that I added as well just to use them up.

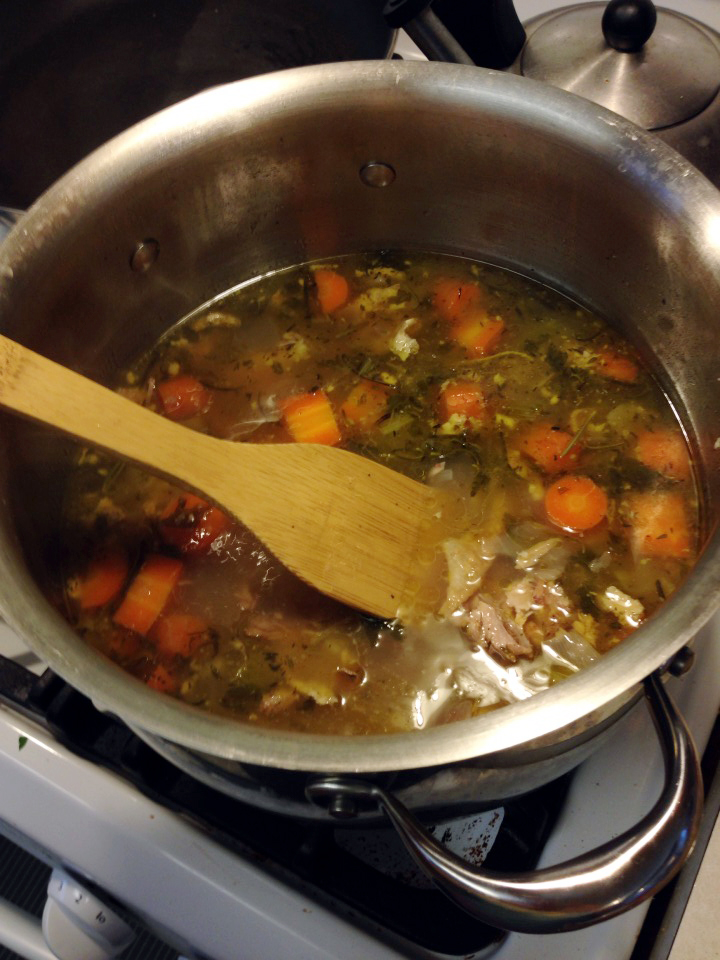
Add the carcass – bones, skin and all – to a large stock pot. Add the onions, celery, carrots, parsley, peppercorns and bay leaves. Fill the pot with water. You don’t need to be exact here at all. Just fill the pot, whatever size it is.

Cover and set over high flame. Bring to a boil, turn heat to low, and simmer for several hours. I think I let mine simmer for six hours while I cleaned the house and made flowers for an elopement tomorrow.

Turn off the heat and let cool for 30 minutes or so.

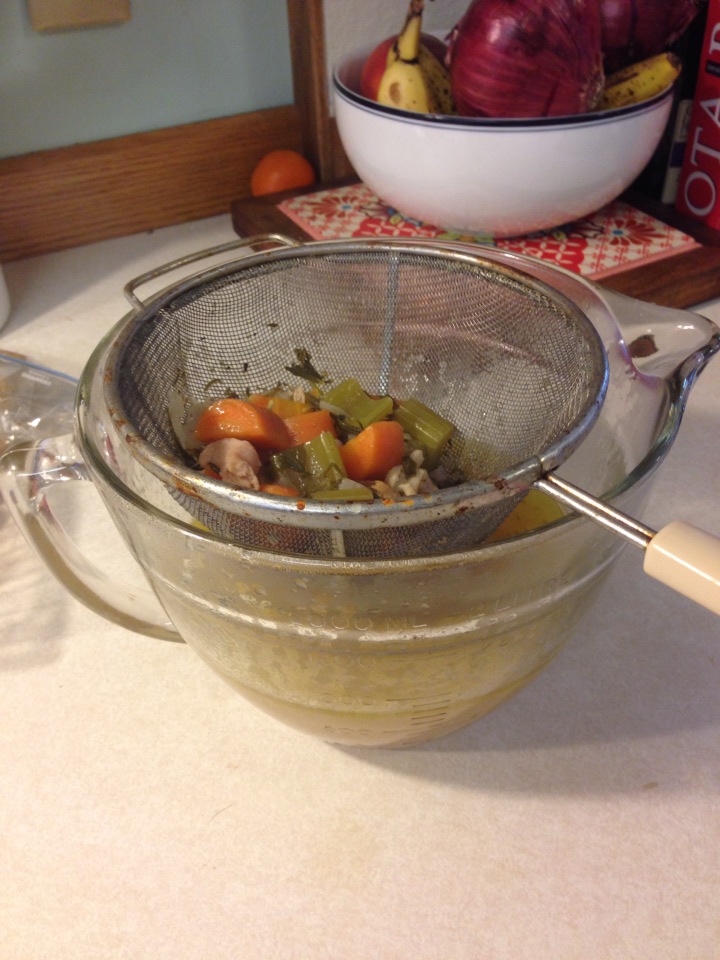
Place a fine-mesh sieve over a large liquid measuring cup and start ladling the stock into the sieve. Use the back of the ladle to mash up the solids so as much liquid as possible comes out.

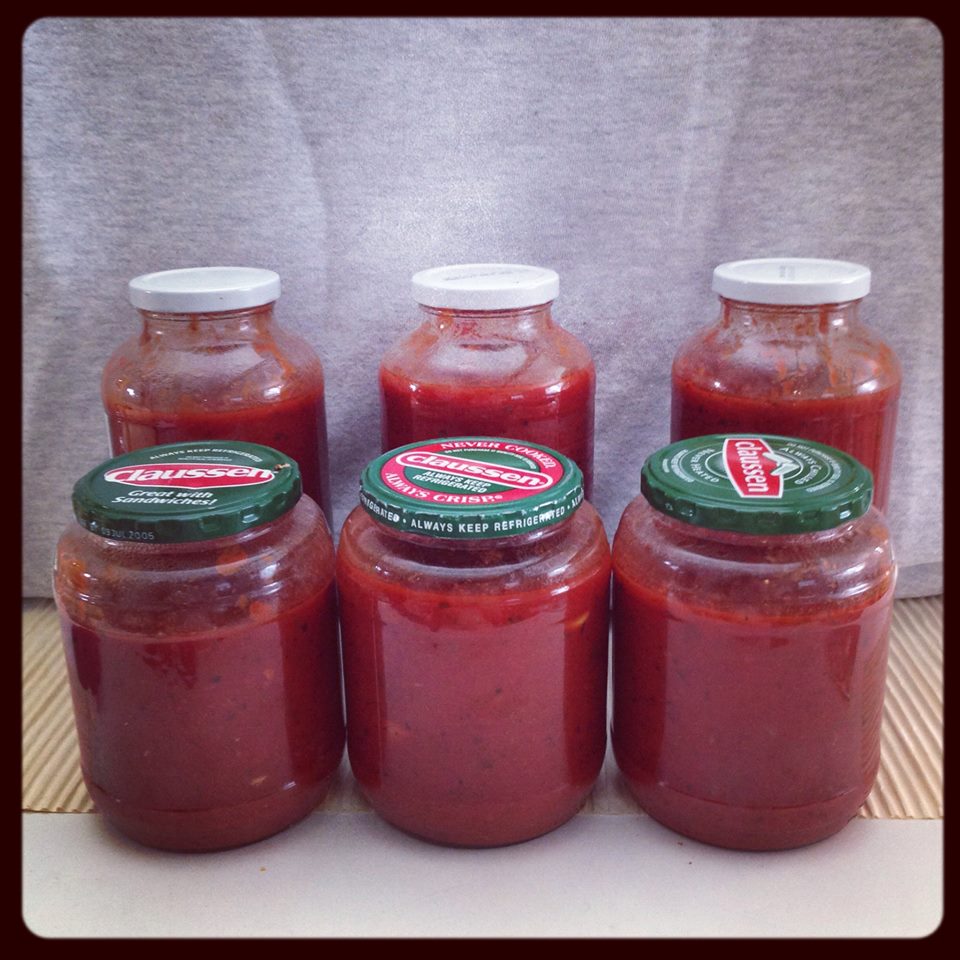
Toss the solids and pour the stock into jars. Repeat until you’ve strained all the stock. Store the stock in the fridge for a couple of weeks or freeze for several months.

Ingredients for the noodle soup:

  • 2 tablespoons cooking oil
  • 1 onion, chopped
  • 2 celery ribs, chopped
  • 2 carrots, chopped
  • 1 pound chicken – if you have leftover chicken that works, but raw chicken is good too
  • 8 cups chicken stock
  • 1 cup frozen green beans, thawed
  • Salt and pepper to taste

For the noodles: (this is enough for two batches. Save the remaining dough and make some fresh pasta the following day. Or halve the recipe)

  • 300 g all-purpose flour (or 2 cups)
  • 100 g semolina flour (or 2/3 cup)
  • 4 eggs

Directions:

For the noodles, mix the flours together in the bowl of a standing mixer. Make a well in the center and add the eggs. Whisk up the eggs with a fork until they are combined. Using the paddle attachment, mix on medium-low until a dough is formed. Turn onto a table sprinkled with flour and knead the dough for 5 minutes. The dough should be smooth and not sticky.

Wrap dough in plastic wrap and let sit for 30 minutes.

Meanwhile, in a heavy soup pot, heat the oil over medium-high heat. I had three skin-on chicken thighs so I fried those up to render the fat instead of adding oil.

Add the onions and celery. Sprinkle on some salt. Sauté until onions are soft, about 5 minutes. Pour in the stock and add the chicken. Cover and bring to a boil. Simmer for 10 minutes. Add the carrots and continue to simmer while you make the noodles.

After the dough has rested for 30 minutes or so, cut it into two pieces. Place one piece in the fridge for fresh pasta tomorrow.

Cut the remaining dough into three equal pieces. Cover two with plastic wrap while you roll out the first ball.

Add the pasta rolling adaptor to your Kitchen Aid (or use the old-fashioned version). Flatten the piece of dough with your hands and flour on both sides. Run it through the largest setting. Fold the dough in half and run it through again. Repeat about six times and flour again on both sides if it’s feeling tacky. It should feel smooth.

Run the pasta sheet through the next setting just once. Repeat until setting 6 or until the desired thickness. I typically go to setting 8 on my Kitchen Aid but that’s for delicate pasta like vermicelli. For this dish I wanted something sturdier.

Hang the sheet of dough on a pasta rack (I find a laundry drying rack to be super useful for this). Repeat with other two balls of dough. Let the dough air dry for about 15 minutes. This makes it easier to cut.

In the meantime, remove the chicken from the pot and break it up with the whisk adaptor of your Kitchen Aid (or a fork would do). Place it back in the pot along with the green beans. Bring the soup back to a simmer.

Flour each sheet of dough and cut it into your desired noodle shape. You could run it through the fettuccini roller but I prefer hand-cut wide noodles.

Add your noodles to the pot and cover to bring it back to a boil. Simmer, stirring frequently, for about 3 minutes or until noodles are cooked through. Typically I prefer al dente, but for soup I let them cook a little longer.

Serve in bowls with freshly grated pepper.

Homemade Chicken Noodle Soup | The Best Chicken Soup Ever from Alaskaknitnat.com

DIY mini hang tags

Recently I was commissioned to sew 10 coin purses out of vintage kimono silk remnants. Part of providing the service of craft is the presentation. Sure, I could have delivered the purses in a plastic grocery bag, but the buyer is more impressed when she receives them as though they are a gift. It’s remarkable how much a tiny hang tag on your product gives it a professional finish.

I have yet to order Alaska Knit Nat hang tags. I just don’t feel like ordering large quantities and I worry they might not turn out right and I’d have spent money on something I won’t use.

Here’s a way to create your own hang tags in small quantities that is super inexpensive.

DIY mini hang tags | Give your products a professional finish with affordable homemade hang tags. Tutorial from Alaska Knit Nat

First, log in to Canva.com. If you aren’t familiar with it, it’s a fantastic, free site where you can create pretty graphic elements from Facebook posts to business cards. It’s like graphic design for dummies.

Continue reading DIY mini hang tags

Homemade Bagels

My favorite bagels in Alaska come from LuLu’s in Fairbanks. That’s a six-hour drive from Anchorage and sometimes I crave a good rosemary bagel! I’ve blogged about bagels in the past, but I have to post the recipe I made tonight because it was near perfect. Homemade bagel heaven. Crusty and salty on the outside, soft and chewy on the inside.

The recipe hails from an unassuming corner of the internet — HubPages.com. It contains few ingredients and the steps are simple. I tweaked the ingredients and process ever so slightly, which is why I’m posting it. I will forget how I made them if I don’t!

Homemade Bagels | Alaska Knit Nat

Ingredients:

4 cups all-purpose flour

1 Tbs. sugar

1.5 tsp. salt

1 Tbs. vegetable oil

2 tsp. yeast (not instant rise)

1.25-1.5 cups warm water

2 Tbs. chopped fresh rosemary (optional)

Coarse salt (optional)

Homemade Bagels | Alaska Knit Nat

Directions:

Place all the dry ingredients plus the oil in a Kitchen Aid mixer. With the hook attachment turn the machine onto a medium setting. Slowly pour in the water and wait for it to be fully incorporated into dough before adding all the water. If the dough is too dry, add the remaining quarter cup water. Knead the dough on a floured surface for about five minutes. Place back in the mixer bowl and cover with plastic wrap. Let rise until doubled in size, about 1.5 hours.

Once risen, remove the dough and split into eight even-sized balls. This is where I incorporated the chopped rosemary. Roll each ball into a snake, about 8 inches long, folding in the rosemary as you go. Overlap the ends to make a bagel shape and carefully roll the the seam part of the bagel back and forth till it’s combined and sealed.

Pumpkin Rosemary Bagels

Form the rest of your bagels and set them on the Silpat-lined or greased baking sheet. Cover with plastic wrap and set aside.

Homemade Bagels | Alaska Knit Nat

Bring a large pot of water to a boil and preheat the oven to 425 degrees. When the water is boiling, gently set a few bagels at a time into the pot, being sure not to overcrowd. Boil for one minute, then flip the bagels and boil another minute. Using tongs, remove the bagels and place them back on the baking sheet. Sprinkle liberally with coarse salt. Boil the remaining bagels. Place baking sheet in the oven and bake for 20 minutes, turning the sheet around halfway through. Let cool completely.

Slice, toast, butter and enjoy the bagely goodness.

Homemade Bagels | Alaska Knit Nat

Homemade ABC Book — Free Tutorial

My son is starting to pick up on the alphabet and lately he’s been into ABC books. I was browsing Pinterest and came across a great idea. A homemade ABC book using personal photos.

With some basic Photoshop skills and a trip to Walgreens and Michael’s Crafts I was able to make a fantastic photo book for only $5.50.

Homemade ABC Book -- Free Tutorial

You can use phone, Instagram or digital camera photos as long as you size them well. I’m a self-taught Photoshop gal. Here’s a step-by-step guide to how I made my book, but I’m sure my techniques are not exactly textbook methods — but they work!

Homemade ABC Book -- Free Tutorial

Step 1: Open your image in Photoshop. I encourage you to make all your photos the same resolution — one of a printable quality — so that they all look more uniform. My personal photos come in several different sizes and resolutions depending on what camera I used. I made them all the same so the font size would be the same on each photo. A 140 pt. font on a 180 dpi resolution will look a different size from 140 pt. on 300 dpi.

Homemade ABC Book -- Free Tutorial

Step 2: Go to Image<Image size and take a look at the size of your photo. If the dpi is 180 or more, you’re good to go. Most of my Instagram and iPhone photos are really low resolution, such as 72 dpi, but really large in dimension, such as 45 inches wide. If you were to just resize the photo and leave a low resolution they wouldn’t print well.

Homemade ABC Book -- Free Tutorial

Step 3: Click the crop tool and enter the dimension and resolution you want for the photo. I selected 12×8 with 300 dpi to maintain as much data in the photo as possible (it will print better this way). Crop the photo the way you would like it.

Homemade ABC Book -- Free Tutorial

Step 4: Make sure your background layer is unlocked (double click the little lock next to the layer name). Create a new layer. Choose the font you’d like. I selected Helvetica bold. Type in your letter. I used 140 pt. font. Add a new layer. Type the word you want. I used 90 pt. font. With the selection tool, position the letter and word where you’d like them. If your photo is dark consider making the letters white. Leave enough space between the edge of the photo and the words in case the printers cut the photo funny.

Homemade ABC Book -- Free Tutorial

Step 5: Save your photo as a .jpg and make 25 more!

Step 6: Upload your photos to a photo printing site such as Walgreens and print 26, 4×6 prints. Search for online coupons. I saved $1.50!

Step 7: Purchase a “brag book” at a craft store. It’s just a floppy plastic photo album that holds up to 36, 4×6 photos. I had a coupon for Michael’s so I saved $1!

I don’t think I need to explain the rest. But you’ll end up with a personal ABC book that hopefully your child will love. Our child already recognized several familiar people and objects in his book.

Homemade ABC Book -- Free Tutorial


How to Make Marinara in Bulk

I never thought I’d be a label reader. But then I had a child and started feeding him. I quickly realized there’s a lot of extra stuff in store-bought food. I could be making a lot of that food myself and it would probably be cheaper.

Then again I am pretty lazy. I’ll make homemade marinara every once in a while, but when I’m in a pinch, I just go buy the jarred stuff. If I want the good jarred stuff it usually costs about $4.

Here is where I take a lesson from good ol’ dad. My entire life he has cooked sauce in bulk and freezes jars of it for later. I’ve been saving quite a few pickle and sauce jars so why not give it a try?

How to Make Marinara Sauce in Bulk

It was easy and in the end cost less than half as much as store bought; and it’s probably twice as good.

Here’s what you’ll need:

2 GIANT 106-oz. cans of crushed tomatoes – $2.99 apiece at Costco

25 cloves of garlic, smashed

about 1/3 cup good olive oil

1/4 cup dried basil

2 Tbs. dried oregano

2 Tbs. sugar

8 dried red chilis

salt and pepper to taste

6-7 large 40-oz. jars with lids


Directions:

Heat the olive oil in an extra large stock pot over medium-high. When oil is heated, toss in the garlic and turn heat to medium. Stir frequently and sauté till garlic is golden, about five minutes. Add all the other ingredients and turn heat to high. Cover and bring to a simmer. Turn heat to med-low and simmer for about two hours, stirring every once in a while so sauce doesn’t burn.

Let cool and spoon into jars. Do not fill right to the top because the sauce will expand in the freezer and then you’d have a sauce bomb to clean up later. If sauce is still hot enough, the jars might self seal as once they cool on the counter. Freeze up to six months.

To thaw: Defrost in microwave according to your microwave settings or leave out on the counter during the day. Once it’s slightly thawed and can be loosened into a sauce pot, thaw the rest of the way over medium-low flame.

How to Make Marinara Sauce in Bulk

Easy Homemade Chicken Stock

Making your own chicken stock is actually pretty easy and far more delicious than store bought stock.

I like to make the most of a Costco rotisserie chicken. I can stretch it for three meals.

1. Chicken with stuffing and glazed carrots

2. Chicken pesto lasagna roll-ups

3. Chicken noodle soup

The secret to tasty chicken stock is in the bones. By crushing the chicken bones you release all the marrow and yummy goodness into the stock. You know you have a good stock when it’s like Jell-o in the fridge — that means the bones really got into the stock. I do cheat a little bit by adding a can of store bought stock just to boost the flavor, but it’s not necessary.

Whenever I’m done with a Costco chicken, I’ll take apart the carcass, crush the bones and freeze them until I have enough to make stock with. Then just follow the recipe below, no need to thaw the bones first.

Easy Homemade Chicken Stock

Ingredients:
2-3 leftover rotisserie chickens
2 Tbs. olive oil
1 onion, chopped
2 celery ribs, chopped
2 carrots, chopped
handful of fresh parsley
2 fresh rosemary sprigs (optional)
1 tsp. dried thyme
1 bay leaf
6+ cups water
1 can chicken stock (optional)
salt and pepper

Directions:
Remove all the edible meat left on the chicken and store in the fridge (in case you’d like to use it for chicken noodle soup later).
Using a mallet or a big pair of pliers, crush that carcass so that all the bones are broken up.

Heat the oil over medium high in a large soup pot. Add the onion, celery and carrots and cook for about five minutes. Add the chicken, parsley, rosemary, thyme and bay leaf and cook till onions are translucent, about 10 minutes. Add pepper to taste. Fill the pot with water, cover and simmer for three-eight hours. Salt to taste.

Easy Homemade Chicken Stock

Set a fine-mesh strainer over a large liquid measuring cup and carefully strain the stock to remove bones, veggies and other flavor enhancers. You may need to do this in batches. Toss the solid ingredients. Store stock in jars. You can freeze the jars but make sure not to fill them all the way to the top to allow stock to expand when freezing (science!)

Easy Homemade Chicken Stock

If you’re making chicken noodle soup, add the chicken meat back to the stock. Add egg noodles to boiling soup and cook till al dente. Yum!

Easy Homemade Chicken Stock