Tag Archives: DIY

DIY mini greenhouse: A quick kids craft

Last week was our son’s third birthday party. He requested it be Lorax themed, which is fitting because his birthday is on Earth Day. Although I consider myself of the crafty variety, birthdays are overwhelming to me and going all out is too exhausting. So I choose activities and decorations with minimal prep work.

One of the save-the-trees crafts I put together was a miniature greenhouse where the kids could plant a seed, create the greenhouse, take it home and watch it grow. It was a hit among two partygoers and that’s a success in my book for a 3-year-old birthday.

DIY mini greenhouses || a quick kids craft from Alaskaknitnat.com

DIY mini greenhouses

Materials:

  • Clear plastic cups
  • Potting soil
  • Dry beans
  • Painter’s tape
  • Knife

Directions:

Fill a plastic cup halfway with potting soil. Wet the soil so it’s moist, but not sopping.

With a knife, poke three holes in the bottom of another cup. Set aside.

Let your little one plant two or three beans in the soil. There’s no wrong way to do it. Jack barely put them beneath the soil and they still sprouted.

DIY mini greenhouse || a quick kids craft from Alaskaknitnat.com

DIY mini greenhouse || a quick kids craft from Alaskaknitnat.com

Place the other cup on top and affix a few pieces of painter’s tape to hold the cups in place.

DIY mini greenhouses || a quick kids craft from Alaskaknitnat.com

Set in a sunny window. No need to water it. About three or four days later your beans should sprout. You can transfer your sprout to a small pot if you like. Be sure there is a drainage hole.

DIY mini greenhouses || a quick kids craft from Alaskaknitnat.com

The Aspen Ascot – a free knitting pattern

Happy Easter! It’s currently snowing here in Anchorage, which makes today’s pattern just perfect.

I was scrolling through some old knitting patterns on my blog and I came across my Chunky Ascot Pattern, which included a terrible Hipstamatic photo (before Instagram existed). I decided it was worth making a new ascot just to update the photo.

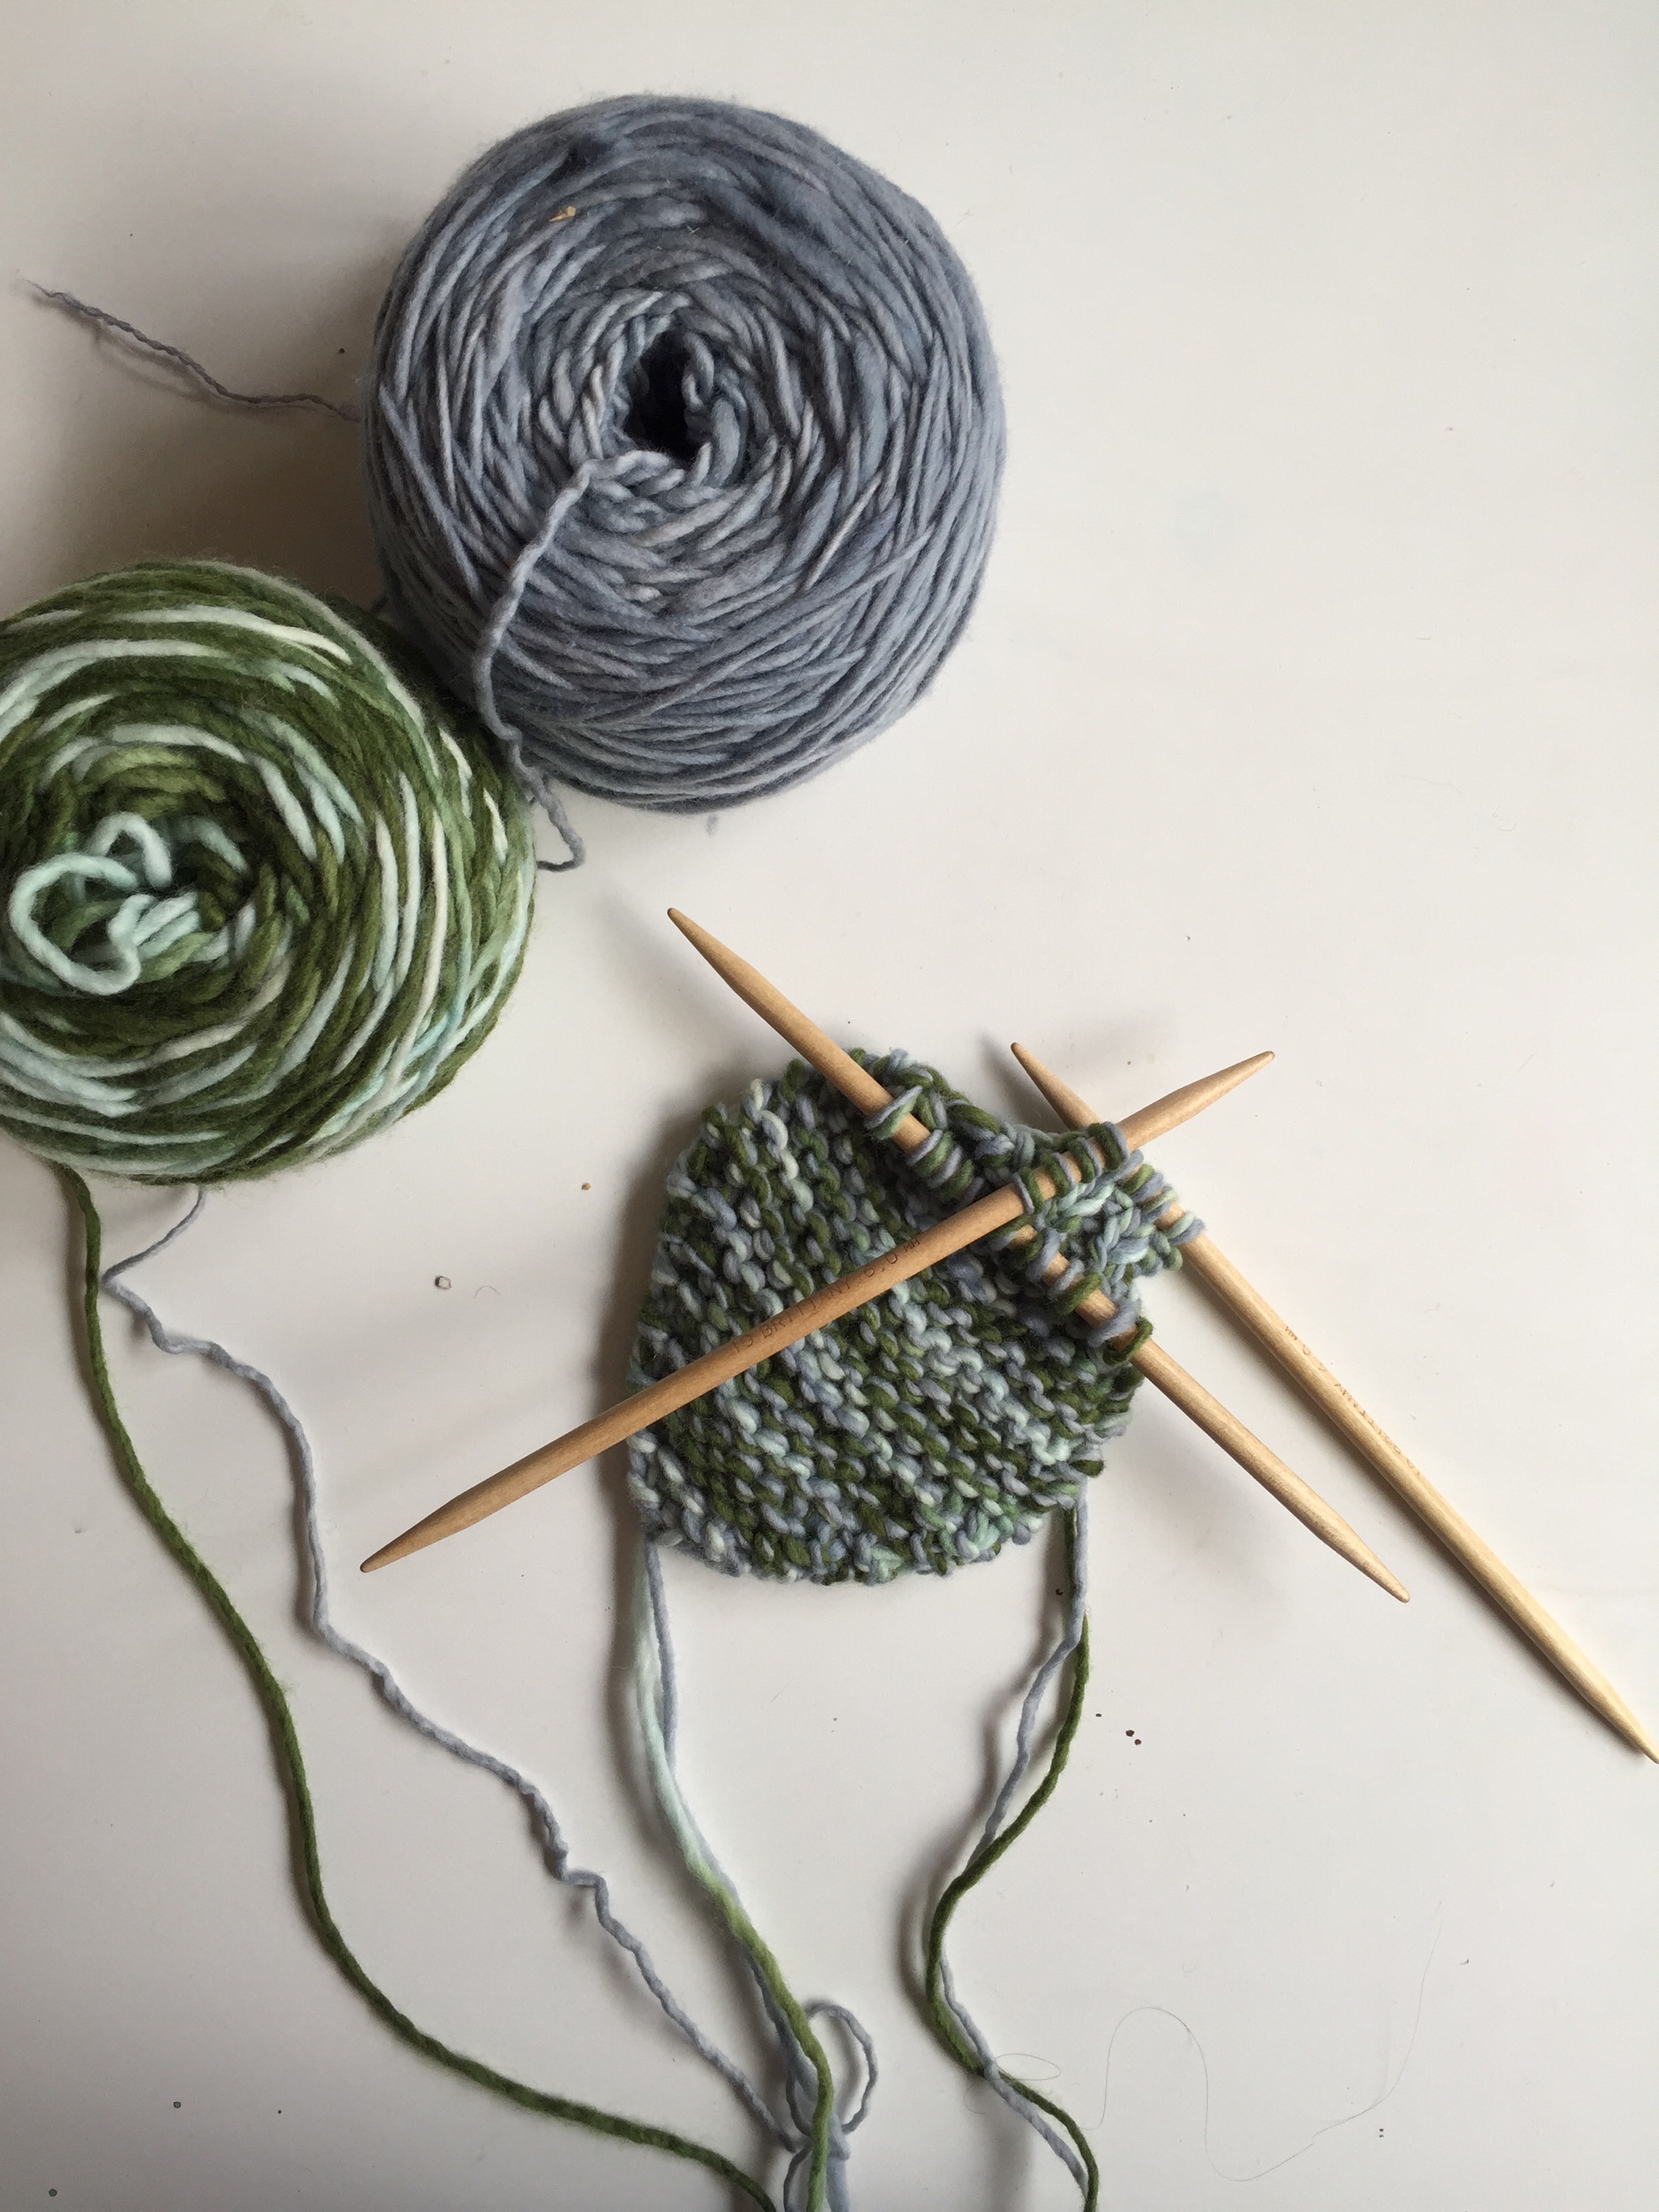
This pattern uses chunky yarn or you can knit two strands of worsted weight yarn together. It takes very little yarn, so it’s a great way to use up any leftover high quality fibers. I used Malabrigo and Manos de Uruguay worsted alpaca.

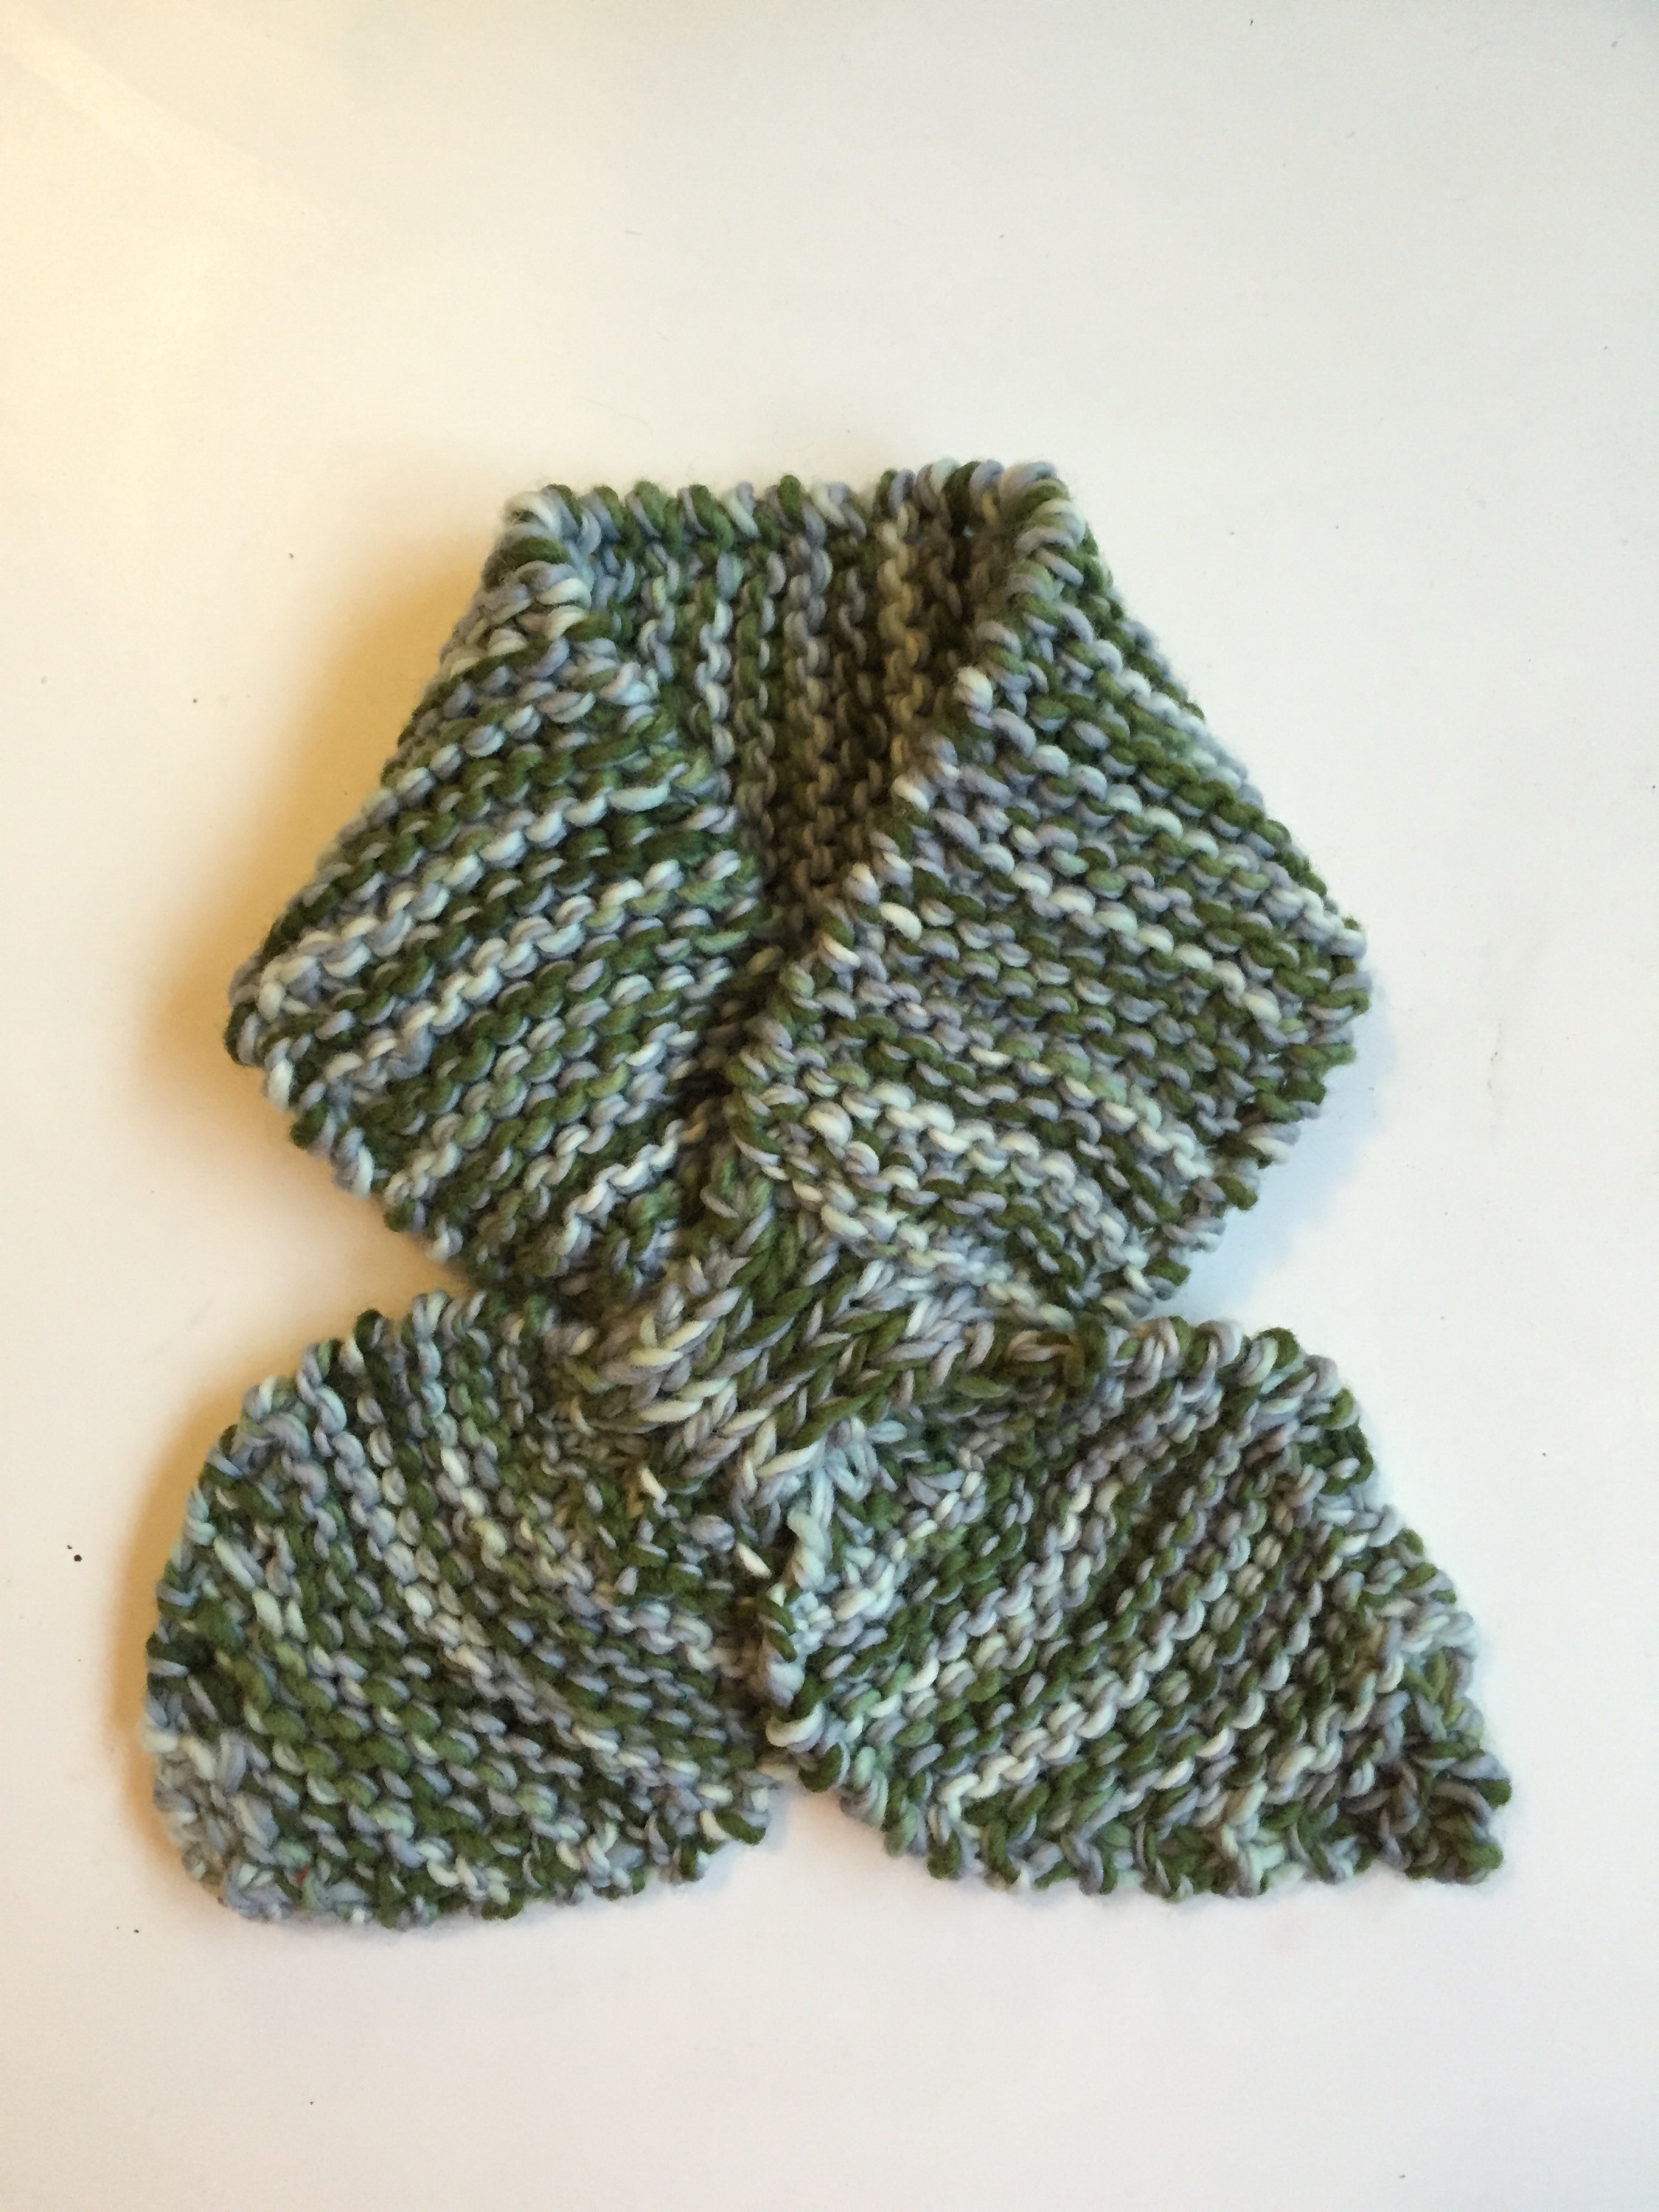
The Aspen Ascot is just right for a chilly spring morning when you don’t need a bulky scarf. The two spade-shaped ends create a lovely bow look.

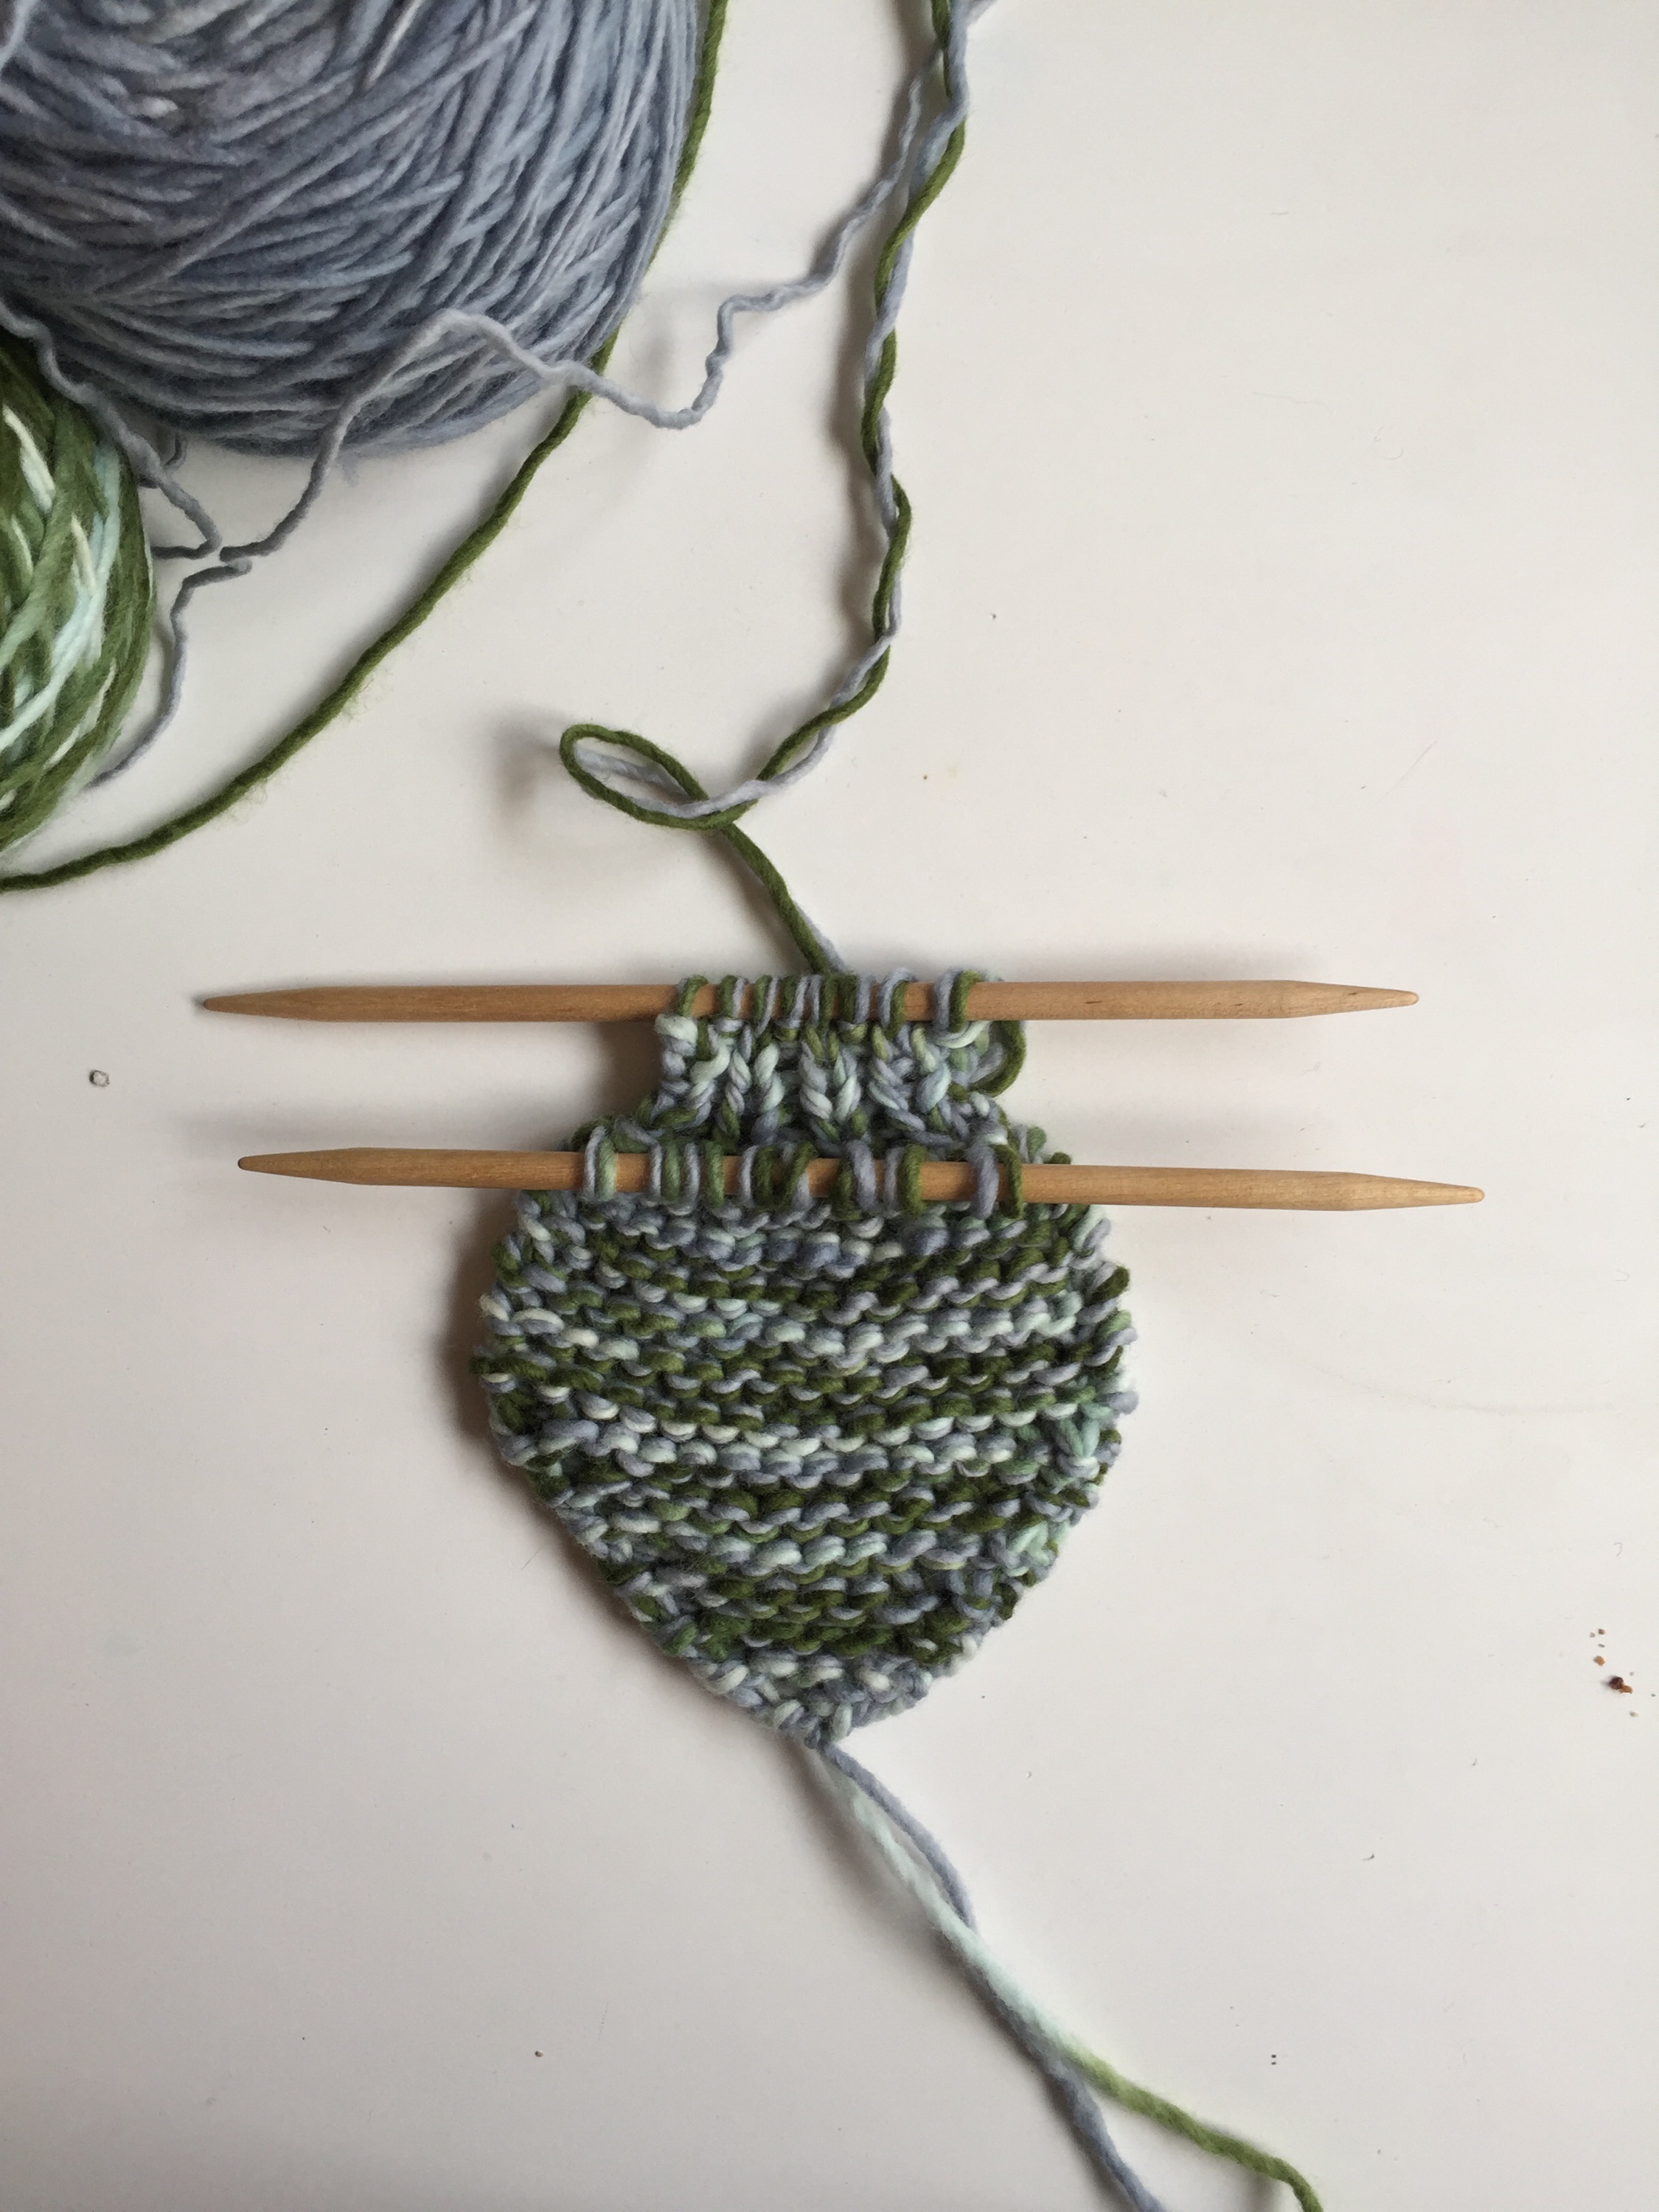
The pattern isn’t difficult, but it does require thinking outside the box. You’ll use three double-pointed needles for the part where you create the loop. The instructions sound sort of whack, but trust the way it’s written and it should make sense in the end.

The Aspen Ascot | A free pattern from Alaska Knit Nat. Perfect afternoon project! The Aspen Ascot | A free pattern from Alaska Knit Nat. Perfect afternoon project!

The Aspen Ascot – a free knitting pattern from Alaska Knit Nat

Materials:

One ball of chunky alpaca, or two strands of worsted knitted together

3 size US 10 double-pointed needles

darning needle

Abbreviations:
M1FB — make 1 stitch in the front and 1 stitch in the back of the same stitch, thus increasing the piece by 1 stitch

k2tog— knit two stitches together

Directions:
Cast on 2 stitches. M1FB of the first stitch, K the next stitch.
Continue to M1FB of the first stitch of every row till you have 16 stitches.
K 12 rows in garter stitch. I slip the first stitch of every row to keep the rows neat and even.
Next row: *Knit the first stitch, transfer the second stitch to the third double point needle.* Repeat * to end of row. You should have 8 stitches on each needle.
Starting with the needle that has the working yarn, K1, P1 for 9 rows. Cut yarn, leaving a 6-inch tail.

The Aspen Ascot | A free pattern from Alaska Knit Nat. Perfect afternoon project!

The Aspen Ascot | A free pattern from Alaska Knit Nat. Perfect afternoon project!
With the other needle holding 8 stitches, leave a 6-inch tail and K1, P1 for 9 rows, but don’t cut the yarn when done.

Next row: *Knit the first stitch from both the front and back needles together, then knit one from the front and one from the back.* Repeat * till there is 1 stitch on each needle. Knit these two stitches together. You should now have 12 stitches on one needle.

Knit in garter stitch till the work is long enough to go around your neck and touch the loop you just created, about 12 inches.

Next row: *K1, K2tog* Repeat * to end of row. You should now have 8 stitches again. K1, P1 for 9 rows.

Next row: M1FB in each stitch. You should now have 16 stitches.

Knit in garter stitch for 12 rows.

Next row: K1, K2tog, K to end of row. Repeat the last row till there are 3 stitches remaining.

Bind off. Weave in tails. Sew on decorative button to one side of the loop if you desire.


8 Simple Steps to Long-lasting Grocery Store Flowers

Yesterday was my birthday and I’m fortunate to have friends and family who know me well enough to buy me flowers on my special day. Fresh flowers add so much cheer to my home, but this simple luxury isn’t something I can always afford. That’s why I like to make my fresh flowers last as long as possible before having to toss them.

Here are some simple ways you can make your grocery store flowers liven up your home for several days.

8 Simple Steps to Long-lasting Grocery Store Flowers | from Alaska Knit Nat

1. Buy fresh flowers

This may seem like a no-brainer, but the less time the flowers have been in the grocery store, the longer you can enjoy them in your home before they wilt. Look for blooms that haven’t yet fully opened. If you’re buying lilies or daffodils, select a bouquet where only a couple have opened and several are still closed up. This will ensure you will have blooms for days to come. If purchasing roses, avoid the romantically opened blooms. Those will only go bad quickly. Here’s a rose tip: gently squeeze the base of the bloom. It should feel sort of firm like a golf ball. If it’s squishy, then that rose is on its way out.

Continue reading 8 Simple Steps to Long-lasting Grocery Store Flowers

Big, Fluffy Brioche Cowl — A Free Knitting Pattern

Now that the holidays are over and my handmade gifts have been delivered I can start posting some more patterns.

Earlier this winter I became mildly obsessed with the brioche stitch. I found this lovely tutorial and pattern for a cowl and I came up with a simple headband/turban using the same stitch.

I took it one step further with this fluffy, scrumptious stitch and decided to make an oversized cowl using larger needles and a wider width. Not only is it super cozy, but you can stretch part of it over your head for a makeshift hood. You can wear it looped around your neck twice or have it hang loosely. It’s a versatile piece that happens to be trendy.

Big, Fluffy Brioche Cowl | A Free Knitting Pattern from Alaskaknitnat.com

Big Fluffy Brioche Cowl

Materials:

250 grams of heavy worsted yarn such as Lamb’s Pride (I used 2.5 skeins of Loops & Threads Wool to Wash)

Size  US 13 straight needles

Darning needle

Big, Fluffy Brioche Cowl | A Free Knitting Pattern from Alaskaknitnat.com

Continue reading Big, Fluffy Brioche Cowl — A Free Knitting Pattern

DIY mini hang tags

Recently I was commissioned to sew 10 coin purses out of vintage kimono silk remnants. Part of providing the service of craft is the presentation. Sure, I could have delivered the purses in a plastic grocery bag, but the buyer is more impressed when she receives them as though they are a gift. It’s remarkable how much a tiny hang tag on your product gives it a professional finish.

I have yet to order Alaska Knit Nat hang tags. I just don’t feel like ordering large quantities and I worry they might not turn out right and I’d have spent money on something I won’t use.

Here’s a way to create your own hang tags in small quantities that is super inexpensive.

DIY mini hang tags | Give your products a professional finish with affordable homemade hang tags. Tutorial from Alaska Knit Nat

First, log in to Canva.com. If you aren’t familiar with it, it’s a fantastic, free site where you can create pretty graphic elements from Facebook posts to business cards. It’s like graphic design for dummies.

Continue reading DIY mini hang tags

I’ll have a glue, glue Christmas — #9: Paint chip gift tags

The older I get the less I despise big box hardware stores. Every time I get dragged into one by my husband I treat it as a mission to think of cool ways to reuse hardware supplies. This craft is perfect for the holidays, and free too.

Paint chip gift tags | #9 on Alaska Knit Nat's DIY Holiday Craft Guide

Paint chip gift tags — No. 9 on Alaska Knit Nat’s DIY Holiday Craft Guide

What you’ll need:

  • Paint samples from the hardware store (you can usually get about 3 tags per paint chip)
  • Scissors or a gift tag-shaped paper punch
  • Tiny hole punch or large needle
  • String

Directions:

Cut out the paint samples in the shape of gift tags. Poke a hole in one end and run a six-inch piece of string through the hole. Tie the ends of the string together. Elaborately wrap a gift and add the tag as a finishing touch.

Paint chip gift tags | #9 on Alaska Knit Nat's DIY Holiday Craft Guide

I’ll have a glue, glue Christmas — #8: DIY Heart Shirt

Each year I try to give my two sisters equally awesome handmade gifts that follow a similar theme. I usually make something for myself so we can all dorkily match. Last year was a winner: shirts with giant cashmere hearts.

DIY Heart Shirt | #8 in Alaska Knit Nat's DIY Holiday Craft Guide

This is a low-skill craft. It requires hand sewing, but nothing complicated. I turn to my local thrift shops for blank sweatshirts and cashmere sweaters. Any tight-knit sweater will work if you aren’t able to find cashmere. Mohair or angora might be fun. Be sure to wash and dry your sweater on the hot setting a couple of times to ensure it is completely done shrinking. If you sew on a fresh sweater when you wash the final product the heart will shrink and cause the shirt to tear and bunch up where you sewed it on (I know from disappointing experience).

Quick Craft: DIY Heart Shirt | Alaksa Knit Nat

DIY heart shirt — No. 8 in Alaska Knit Nat’s DIY Holiday Craft Guide

What you’ll need:

  • A blank sweatshirt
  • A sweater you don’t mind massacring (cashmere recommended)
  • Embroidery thread of contrasting color
  • Embroidery needle
  • Double-sided fusible, lightweight interfacing or Stitch Witchery

For the full tutorial, click here.

I’ll have a glue, glue Christmas — #6: Felt tree garland

There are vastly different ways to trim a Christmas tree. Some prefer the all-white glitter tree, while I love bright colors and a homey hodgepodge of ornaments and garlands.

As I was preparing to trim our tree last week I opened our ornament box and was delighted to find a felt garland I’d constructed last year. I had forgotten about it and it kind of made my day to place it on our tree this year. I love popcorn garlands, but they get pretty messy and i have a toddler who is fascinated with the tree and eating things, so I imagine it wouldn’t last long.

This craft is cheery, colorful and easy. It does require the use of a sewing machine and some monotonous cutting. I recommend putting on “A Christmas Story” or some other holiday film you have memorized and cut out your felt while watching it. Mulled wine could be included, if desired.

DIY Felt Tree Garland | #6 on Alaska Knit Nat's DIY Holiday Craft Guide

Easy felt tree garland: No. 6 on Alaska Knit Nat’s DIY Holiday Craft Guide

  • Craft felt in many different colors (about $5 at Walmart)
  • Fabric scissors (optional but extremely helpful)
  • Sewing machine

Directions:

Fold a piece of felt in fourths and cut out 1-inch circle-ish shapes. Repeat with other felt colors until you have about 300 hundred (I really didn’t count. I just cut out circles until I was sick of it.)

Place all your circles in a bowl and set next to your sewing machine. Start sewing across the diameter of a circle with a straight stitch. When you get to the end of the circle, start sewing through another circle. Repeat this until you’ve run out of circles. You’re basically just lining up the circles side by side and sewing a seam through them to keep them together. I didn’t follow a color pattern, I just sewed them randomly. It doesn’t matter what thread color you use, but I imagine gold thread would look neat. I used white. It’s ok if there are gaps between the circles. If you run out of thread mid-garland, just rethread your machine and sew across the most recently sewn circle.

Wrap your garland around your tree. If it’s too short, make more circles and take your garland back to your sewing machine.

DIY Felt Tree Garland | #6 on Alaska Knit Nat's DIY Holiday Craft Guide

DIY Felt Tree Garland | #6 on Alaska Knit Nat's DIY Holiday Craft Guide

I’ll have a glue, glue Christmas — #5: DIY Kitschy desk caddies

Number 4 on my holiday craft guide was all about recycling. Today’s cheap craft is about upcycling. Instead of making planters, we’re going to make planters into something else.

Last week at the thrift store I found a couple of vintage ceramic baby planters. I’m sure you’ve seen them collecting dust somewhere. They are usually hideous with a thick layer of dirt crust inside.

DIY Kitschy Desk Caddies | #5 on Alaska Knit Nat's DIY Holiday Craft Guide

Metallic desk stuff is all the rage right now. I’m jumping on the golden bandwagon. This craft took very little time and even I was impressed with how well they turned out.

DIY Kitschy Desk Caddies | #5 on Alaska Knit Nat's DIY Holiday Craft Guide

You need no artistic ability, just minute index finger strength. Use them to hold pencils, cell phones or place them in a kitchen to hold rubber spatulas. The world is your kitschy oyster!

A great place in Anchorage to find a vintage ceramic planter is The Packrat on Fireweed or Lazy Dog Antiques on Karluk. They are usually reasonably priced (about $10) but I lucked out at the Bishop’s Attic and found two for $2 apiece. But really, you could take soup cans and spray paint them gold and you’d probably mildly impress your significant other on Christmas Day.

DIY Kitschy Desk Caddy: No. 5 on Alaska Knit Nat’s DIY Holiday Craft Guide

What you’ll need:

  • A ceramic planter/figurine from the thrift store
  • Metallic Spray paint
  • Glossy finish spray (optional)

Directions:

Wash your planter with hot water and soap and scrub away as much dirt as you can. This isn’t a huge deal because you’ll be spray painting it anyway so any super crust will be hidden.

Once the planter is dry, set on newspapers in your garage and apply a thin coat of spray paint. Spray the inside of the planter too. Let dry and apply another thin coat, being sure to spray any missed areas from the first coat. Once dry apply an optional glossy finish spray. Props to my graffiti artist friend, who shall remain anonymous, for lending me some of his stash.

DIY Kitschy Desk Caddies | #5 on Alaska Knit Nat's DIY Holiday Craft Guide

Revel in the cutest, shiniest thing you’ve probably ever made.

DIY Kitschy Desk Caddies | #5 on Alaska Knit Nat's DIY Holiday Craft Guide

DIY Kitschy Desk Caddies | #5 on Alaska Knit Nat's DIY Holiday Craft Guide

I’ll have a glue, glue Christmas — #4: Soda bottle kitty planter

All right, now it’s time to start making some crafty gifts that hopefully don’t suck. I’m so over homemade bath salts, soup in a jar and t-shirt pillows. Let’s shake it up a bit and give the gift of creative recycling.

My best friend Kelly and I made kitty planters last spring out of 2-liter plastic soda bottles. Somehow, despite my brown thumb, I’ve managed to keep it alive. This craft is easy, not too time consuming and cute as hell. It requires minimal artistic ability, which is a big plus for me.

DIY Soda Bottle Kitty Planter | #4 on Alaska Knit Nat's DIY Holiday Craft Guide

DIY Soda bottle kitty planters: No. 4 on Alaska Knit Nat’s DIY Holiday Craft Guide

What you’ll need:

  • one, two-liter soda bottle
  • scissors
  • permanent marker
  • acrylic paints in black, white and pink
  • paintbrushes
  • glossy finish spray (optional)
  • small plant
  • extra soil for planting

Click here for the full tutorial.

DIY Soda Bottle Kitty Planter | #4 on Alaska Knit Nat's DIY Holiday Craft Guide

Isn’t she lovely? I call her Beatrice. I have a friend whose dog is called Jack (same name as my son), so I figured I should name my fake pet after her daughter.

DIY Soda Bottle Kitty Planter | #4 on Alaska Knit Nat's DIY Holiday Craft Guide