Tag Archives: easy

I’ll have a glue, glue Christmas — #5: DIY Kitschy desk caddies

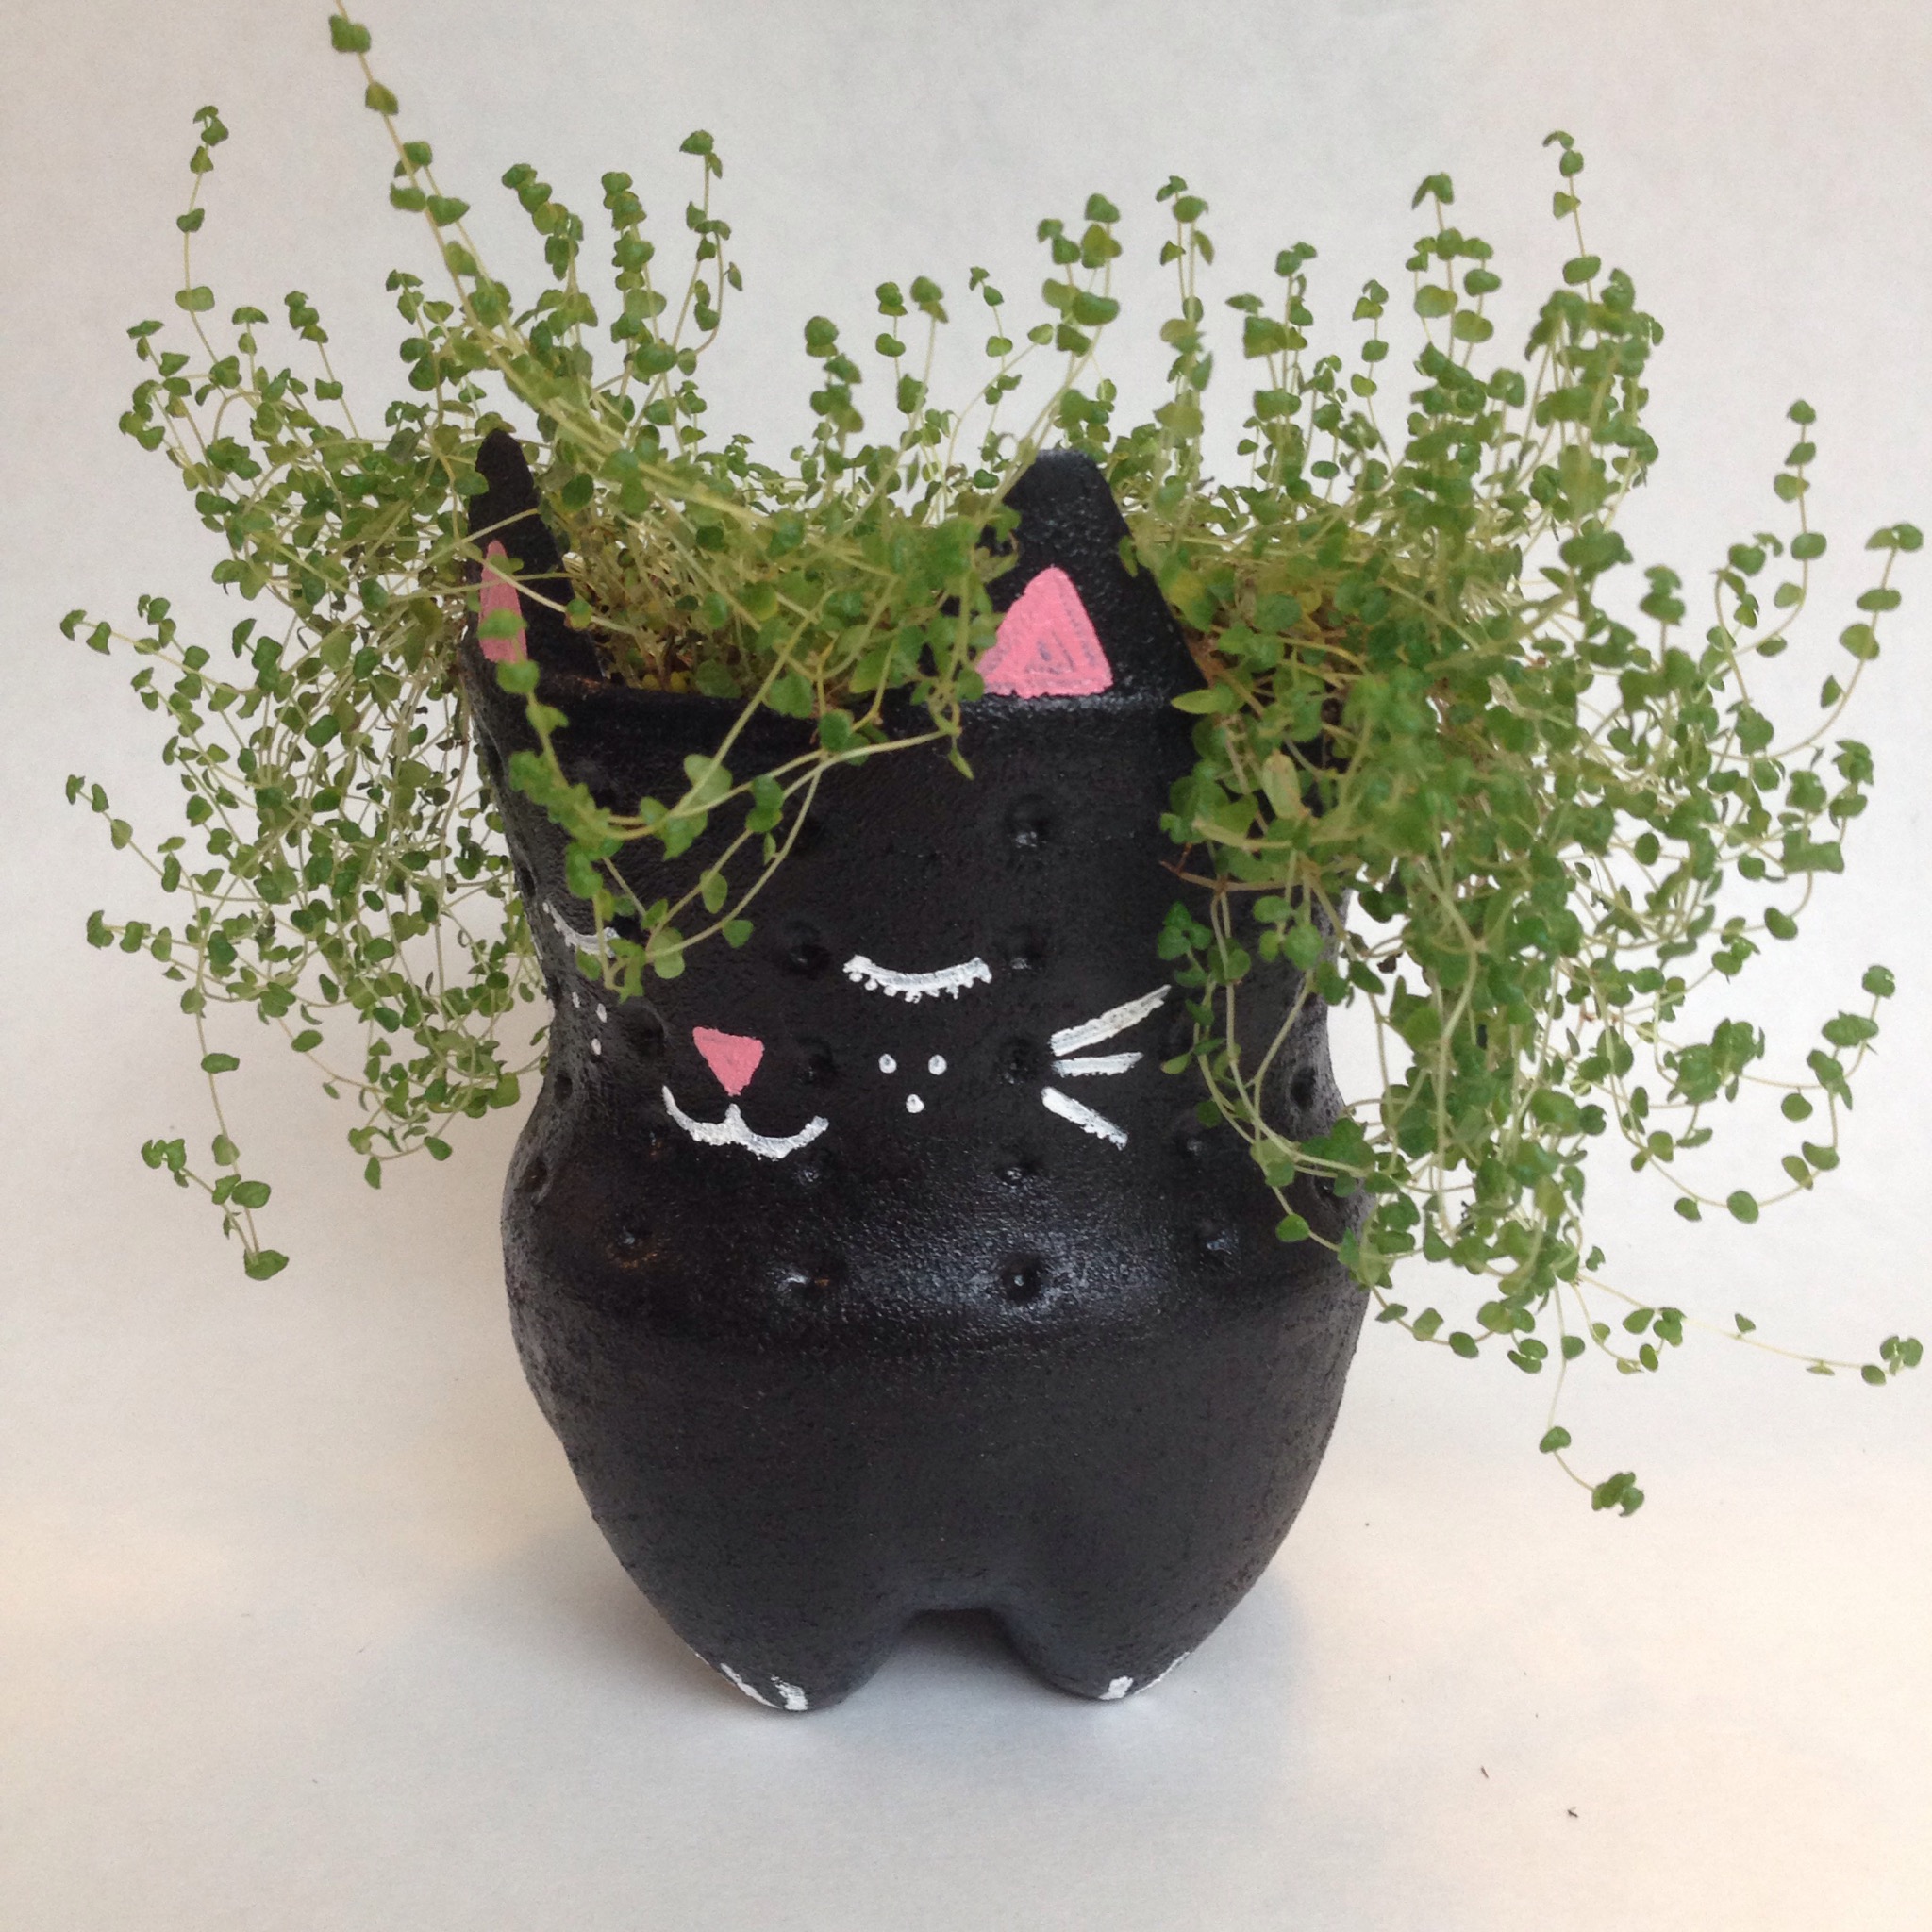
Number 4 on my holiday craft guide was all about recycling. Today’s cheap craft is about upcycling. Instead of making planters, we’re going to make planters into something else.

Last week at the thrift store I found a couple of vintage ceramic baby planters. I’m sure you’ve seen them collecting dust somewhere. They are usually hideous with a thick layer of dirt crust inside.

DIY Kitschy Desk Caddies | #5 on Alaska Knit Nat's DIY Holiday Craft Guide

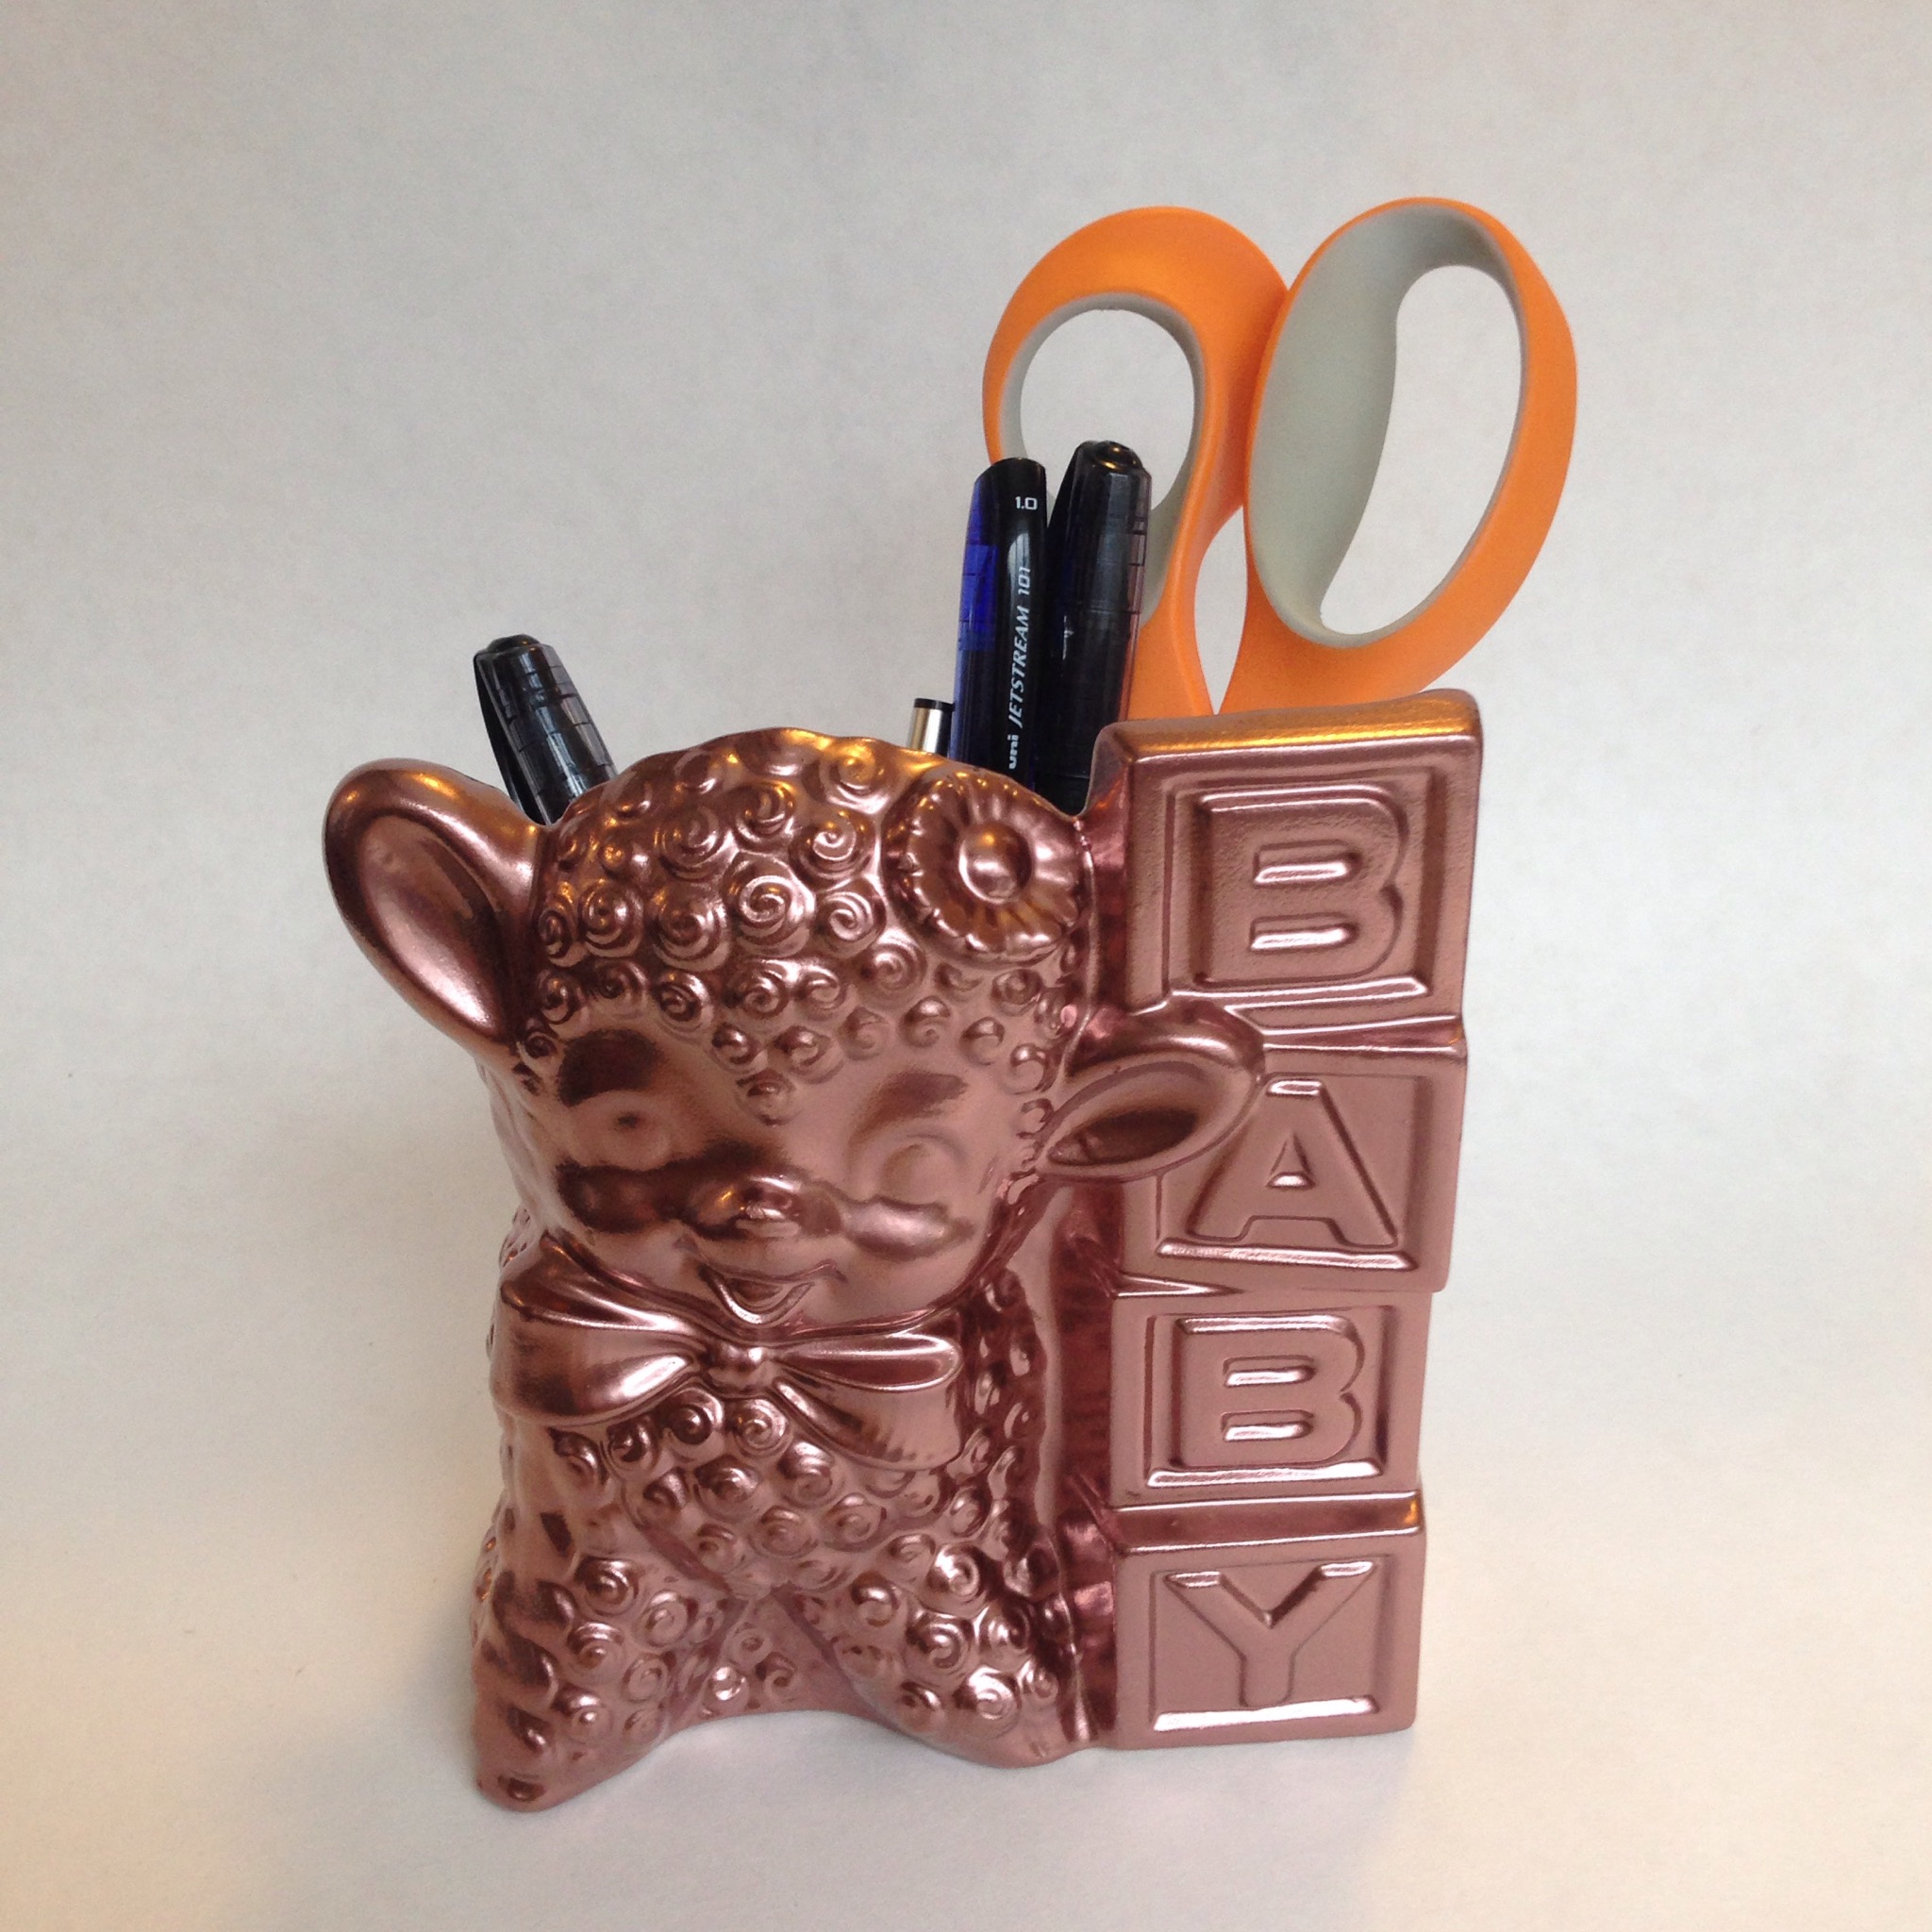
Metallic desk stuff is all the rage right now. I’m jumping on the golden bandwagon. This craft took very little time and even I was impressed with how well they turned out.

DIY Kitschy Desk Caddies | #5 on Alaska Knit Nat's DIY Holiday Craft Guide

You need no artistic ability, just minute index finger strength. Use them to hold pencils, cell phones or place them in a kitchen to hold rubber spatulas. The world is your kitschy oyster!

A great place in Anchorage to find a vintage ceramic planter is The Packrat on Fireweed or Lazy Dog Antiques on Karluk. They are usually reasonably priced (about $10) but I lucked out at the Bishop’s Attic and found two for $2 apiece. But really, you could take soup cans and spray paint them gold and you’d probably mildly impress your significant other on Christmas Day.

DIY Kitschy Desk Caddy: No. 5 on Alaska Knit Nat’s DIY Holiday Craft Guide

What you’ll need:

  • A ceramic planter/figurine from the thrift store
  • Metallic Spray paint
  • Glossy finish spray (optional)

Directions:

Wash your planter with hot water and soap and scrub away as much dirt as you can. This isn’t a huge deal because you’ll be spray painting it anyway so any super crust will be hidden.

Once the planter is dry, set on newspapers in your garage and apply a thin coat of spray paint. Spray the inside of the planter too. Let dry and apply another thin coat, being sure to spray any missed areas from the first coat. Once dry apply an optional glossy finish spray. Props to my graffiti artist friend, who shall remain anonymous, for lending me some of his stash.

DIY Kitschy Desk Caddies | #5 on Alaska Knit Nat's DIY Holiday Craft Guide

Revel in the cutest, shiniest thing you’ve probably ever made.

DIY Kitschy Desk Caddies | #5 on Alaska Knit Nat's DIY Holiday Craft Guide

DIY Kitschy Desk Caddies | #5 on Alaska Knit Nat's DIY Holiday Craft Guide

I’ll have a glue, glue Christmas — #4: Soda bottle kitty planter

All right, now it’s time to start making some crafty gifts that hopefully don’t suck. I’m so over homemade bath salts, soup in a jar and t-shirt pillows. Let’s shake it up a bit and give the gift of creative recycling.

My best friend Kelly and I made kitty planters last spring out of 2-liter plastic soda bottles. Somehow, despite my brown thumb, I’ve managed to keep it alive. This craft is easy, not too time consuming and cute as hell. It requires minimal artistic ability, which is a big plus for me.

DIY Soda Bottle Kitty Planter | #4 on Alaska Knit Nat's DIY Holiday Craft Guide

DIY Soda bottle kitty planters: No. 4 on Alaska Knit Nat’s DIY Holiday Craft Guide

What you’ll need:

  • one, two-liter soda bottle
  • scissors
  • permanent marker
  • acrylic paints in black, white and pink
  • paintbrushes
  • glossy finish spray (optional)
  • small plant
  • extra soil for planting

Click here for the full tutorial.

DIY Soda Bottle Kitty Planter | #4 on Alaska Knit Nat's DIY Holiday Craft Guide

Isn’t she lovely? I call her Beatrice. I have a friend whose dog is called Jack (same name as my son), so I figured I should name my fake pet after her daughter.

DIY Soda Bottle Kitty Planter | #4 on Alaska Knit Nat's DIY Holiday Craft Guide

Zig-Zag Chevron Hat — A Free Knitting Pattern

I’m not good at fair isle knitting. Usually everything comes out three sizes too small. I pull the yarn too tightly. Or I follow a pattern that slowly incorporates a new color and I’m left with long strands of yarn on the wrong side.

Today I decided to try fair isle again by designing something simple — zig zags. I’ve included the chart and the row-by-row instructions. I recommend knitting the patterned portion in a place with little distraction and possibly without other people. I end up counting out loud “knit one, knit two, knit three, knit two,” etc. so I don’t get lost in the pattern. It’s not difficult, but requires a fair amount of focus.

Zig Zag Chevron Hat | A Free Pattern from Alaska Knit Nat

The advantage to fair isle knitting is you create a thick wrong side to your fabric, which means a warmer hat. Below is a photo of the inside of the hat.

Zig Zag Chevron Hat | A Free Pattern from Alaska Knit Nat

Zig Zag Hat

Materials:

size US 8 circular needle

size US 9 circular and double pointed needles

Loops & Threads Wool to Wash, one skein of neon orange (color A) and one electric blue (color B) Any heavy worsted weight wool yarn would work.

darning needle

Continue reading Zig-Zag Chevron Hat — A Free Knitting Pattern

Sports Team Hat — A Free Knitting Pattern

When you’re a knitter, there are only so many knitted gifts you can give your relatives. I’ve made hats, cowls, mittens, hats, hats and hats. My family will never tell me “Enough with the hats already!” so I’m of course knitting them all hats this year for Christmas.

My nephew is a Dodgers fan. For his birthday I got him a Dodgers wallet, felt banner and classic metal waste basket. Those gifts went over well (He’s 14 and he gave me an enthusiastic “thank you,” which is a lot coming from a teenager). So I figured he wouldn’t mind a knitted cap in Dodgers colors.

This hat is mostly made from Plymouth Yarn’s DK Merino Superwash, although the grey is Lion Brand. Merino wool is soft and not itchy in the slightest. It’s also warmer than synthetic. Feel free to substitute acrylic yarn if you are trying to save money.

So get those team colors and knit on! You might get an honest “thank you” from your teenage nephew.

Click here if you’d like to make this type of hat for a baby.

Sports Team Hat | A free knitting pattern from Alaska Knit Nat

Sports Team Knitted Cap

If you’re wanting to knit this pattern with a different needle size and different weight yarn, I am unable to adjust the pattern for you. This pattern is written for a specific needle size and yarn weight.

Fits an average size head (my husband, who was the only model I had around, has a gigantic head so the hat is a little stretched out in the photos)

Skill level: easy/beginner

Materials:

1 skein each of Plymouth DK Merino Superwash in Cobalt (Color A), Natural (Color B), and Light Gray (Color C)

Size US 8 circular and double pointed needles

Darning needle

Sports Team Hat | A free knitting pattern from Alaska Knit Nat

Abbreviations:

K1, P1 = knit 1, purl 1 ribbing

k2tog = knit two stitches together

Directions:

With your circular needle cast on 80 stitches using color A. Join stitches to form a circle, being careful not to twist the stitches. Place a marker where you joined the yarn. K1, P1 in the round for 5 rounds or until the ribbing is to your liking.

Start knitting all rounds. Knit 15 more rounds with color A. Cut yarn leaving an 8-inch tail. Begin knitting with color B. Knit 4 rounds. Cut yarn leaving an 8-inch tail. Start knitting with color C. Knit for 10 rounds. Cut yarn leaving an 8-inch tail. Knit 4 rounds with color B. Cut yarn. Switch to color A and knit approximately 8 rounds or until the hat is about 5.5-6 inches tall from the edge.

Begin decreasing as follows:

*k2tog, k6* Repeat * till end of round
K one round
*K2tog, k5*, repeat * till end of round
K one round
*K2tog, k4*, repeat * till end of round (switch to double points here)
K one round
*K2tog, k 3*, repeat * till end of round
K one round
*K2tog, k 2*, repeat * till end of round
K one round
*K2tog, k1*, repeat * till end of round
*K2tog*, repeat * till end of round.
Cut yarn leaving an 8-inch tail. Using a darning needle, weave in all ends. I like to tie the striped yarn ends together somewhat loosely before weaving them in. I have no official technique for this, so do what seems best for you. Just be sure not to tie them together too tightly as that will cause the stitches to look uneven on the outside of the hat.Sports Team Hat | A free knitting pattern from Alaska Knit Nat

Sports Team Hat | A free knitting pattern from Alaska Knit Nat

Zissou Hat — A Free Knit Cap Pattern

Some people feel strongly about Wes Anderson films. I happen to love his styles, colors, sets and costumes. When I saw an old friend post his halloween costume on his Facebook page this week, I knew I had to give it a hand-knit boost.

My buddy, Wes, is dressing up as Steve Zissou from “The Life Aquatic.” Each Cousteau-like character in the film wears a different style of bright red beanie, some with their first initials stitched in yellow.

I’ve made these hats before for my husband and son, but I didn’t bother to write a pattern.

Zissou Hat | A free knitting pattern from Alaska Knit Nat

If you’d like to make a baby version of this hat, follow this pattern, but just use red yarn (and no ears)

After making this fine cap with a small pompom, I figured it was time to share it with the world.

Zissou Hat | A free knitting pattern from Alaska Knit Nat

Zissou Hat

If you’re wanting to knit this pattern with a different needle size and different weight yarn, I am unable to adjust the pattern for you. This pattern is written for a specific needle size and yarn weight.

Fits an average-sized adult head

Materials:

1 skein of Lion Brand Vanna’s Choice worsted in Scarlet

size US 9 circular and double pointed needles

darning needle

large fork

yellow embroidery thread

Zissou Hat | A free knitting pattern from Alaska Knit Nat

Abbreviations:

k1, p1 = knit 1, purl 1

k2tog = knit 2 together

Zissou Hat | A free knitting pattern from Alaska Knit Nat

With the circular needle, cast on 80 stitches. K1, p1 for seven rounds.

Knit for 34 more rounds, or until work measures about 5.5 inches from the edge.

Begin decreasing as follows:

Round 1: K2tog knit 6. Repeat for one round.
Round 2 (and all even rounds): Knit
Round 3: K2tog, K 5 for one round
Round 5:K2tog, K 4 for one round (this is where you should probably switch to the double points).
Round 7: K2tog, K 3 
Round 9:K2tog, K 2
Round 11:K2tog, K 1
Round 13: K2tog

Cut yarn leaving a 12-inch tail. With a darning needle, run the yarn through the remaining stitches and cinch close. Weave in all tails.

For the pompom:

Zissou Hat | A free knitting pattern from Alaska Knit Nat

Zissou Hat | A free knitting pattern from Alaska Knit Nat

Wrap yarn around a large fork several times until you have enough bulk for a pom. Cut yarn. Cut two pieces of yarn about 12 inches long and run through the center tine under the wound-up yarn. Tie these two pieces around the bulk of yarn and secure with a double knot. Remove from fork and trim the loops. Form pompom to your liking. Use the long strings you tied around the pom pom to secure it to the hat. Run the four strands from the top of the hat down into the inside using a darning needle. Tie the four pieces together and trim ends.

For the initial: Free hand embroider the initial into the front of the hat above the ribbing. I typed the letter “W” into microsoft word and set it to Futura font to get an idea of how to shape it.

Zissou Hat | A free knitting pattern from Alaska Knit NatZissou Hat | A free knitting pattern from Alaska Knit Nat

Brioche Turban — A Free Pattern

I’ve been all about the brioche stitch lately. Ever since I found a left-handed video tutorial on HandsOccupied.com, I’ve been hooked! It’s really a simple stitch, involving yarn overs and slipped stitches and best of all (no offense to my good friend Annie) it involves absolutely no purling!

In just a week I’ve made two scrumptious, fluffy cowls and I felt ready to experiment with the stitch.

I put together this simple turban headband in just a day’s worth of mindless knitting. It went together quickly and with minimal effort.

I highly recommend checking out this gal’s tutorial, as it makes more sense to see this easy stitch in action than it is to read it.

Brioche Turban | Free Knitting Pattern from Alaska Knit Nat

Brioche Stitch Turban

Materials:

1 skein of worsted weight yarn (I used Red Heart Boutique Treasure in the Watercolors colorway)

Size US 10 straight needles

Darning needle

safety pins (optional)

Brioche Turban | Free Knitting Pattern from Alaska Knit Nat

Brioche stitch:

Cast on 10 stitches.

Foundation row: YO before you even start knitting (this is the strange part where it’s easier to understand visually), slip the first stitch purlwise, k1. Repeat YO, sl 1 pw, k1 till the end of the row.

Row 2: *YO, sl 1 pw, knit the 2 criss-cross stitches together. Repeat * to end of row.

Repeat row 2 till work measures about 40 inches, or a few inches less than twice the circumference of your head. It helps to “try on” the turban as you’re knitting it as your yarn’s stretchiness may be different from mine (see assembly instructions below).

Bind off all stitches. Cut yarn leaving an 18-inch tail.

Assembly:

Here’s a rough demonstration of how to assemble the turban using a sash since I’d already constructed mine by the time I wrote this post.

Brioche Turban | Free Knitting Pattern from Alaska Knit Nat

Start with the middle of the strip at the nape of your neck and wrap the ends toward the top of your head. Twist the ends of the strip around twice and bring them back down toward the nape of your neck. Pin ends together.

Carefully remove the turban and pin together the long edges where they meet from the center loop toward the back of the headband. Using the 18-inch tail of yarn, thread a darning needle and sew together the short ends that you first pinned. Starting at the center back toward the front knot, sew together the long ends from underneath, running the needle through the wrong side stitches.

Brioche Turban | Free Knitting Pattern from Alaska Knit Nat

You can be as messy as you like because you won’t be able to see these stitches. Stitch together the long sides until you’re two inches away from the center knot. Tie off the yarn and weave in the end. Take a new 18-inch piece of yarn and sew on the other side of the turban in the same way, from the back seam toward the center knot. Here’s a crummy drawing of where the stitches should go:

Brioche Turban | Free Knitting Pattern from Alaska Knit Nat

Remove all the pins, place on your head and admire how awesome you are for making a functional piece of clothing.

Brioche Turban | Free Knitting Pattern from Alaska Knit Nat

How to Cook Perfect Beans

Taco night is always a big hit in our family and one of the most requested ingredients from our son is beans. Sure, canned beans are convenient and inexpensive, but there’s often a bit of sodium in them and when you reheat them, they can easily be overcooked.

Many are hesitant to cook dry beans due to lack of experience and convenience, but with a little planning and minimal effort, you can easily cook creamy, flavorful beans to accompany many food genres. And they are much cheaper than canned beans!

How to cook perfect beans | Alaska Knit Nat

Perfect Beans

Makes about 3 cups

Ingredients:

One cup of dried beans such as pinto, great northern or black

1 Tbs. salt

water

How to cook perfect beans | Alaska Knit Nat

Directions:

The morning you want to have beans for dinner, toss your dry beans into a mesh strainer and rinse with cold water. Add beans and salt to a medium saucepan. Fill with water so pan is about 2/3 full. Cover and let sit all day, about 7-9 hours.

Put pan on stove, still covered, and bring to a boil. Reduce heat and gently simmer beans for 1.5-2 hours. Be sure it’s not at a full rolling boil as the beans can get torn up if overly disturbed. Drain and serve.

*Beany tidbit: If your beans appear shriveled after soaking them it means they are past their prime. They will still taste all right but you may want to buy new beans next time.

How to cook perfect beans | Alaska Knit Nat

Guest Post: Fan and Feather Lovey — Free Pattern

Today I have the honor of hosting a pattern by the ever-so-lovely Annie Ciszak Pazar, owner of Anchorage’s Bella Boutique and author of the crafty blog Annie’s Arts and Follies.

I’ve always admired this lady for her unique jewelry and undying motivation for knitting big ol’ scarves and cowls.

Recently a mutual friend of ours had a baby — today actually! I felt like there was no better day to showcase the stunning blanket Annie made for her new little girl. So I’ll hand it over to Annie:

I have a blanket on my bed which I affectionately call Lovey. Lovey was a gift from my grandmother at my mother’s baby shower for me, 30-some years ago. Lovey is still around. And on my bed. Needless to say I have a very tolerant husband and perhaps some slight attachment issues. So when it comes time to make special soft and cuddly things for my friend’s little ones, I choose the Lovey pattern – also known as Fan and Feather for those in the biz.

Fan and Feather Baby Blanket | Free Pattern

The first blanket I made was for my friend Jeni when she was expecting her second little one, Robert, as she and I have known each other for 97% of our lives – so it was only fitting she have a Lovey too.

Fan and Feather Baby Blanket | Free Pattern

(Left: my Lovey in 2011. Right: Robert’s Lovey)

  • Using a US6 (4mm) needle cast on a multiple of 18 stitches + whatever you want for a border, but at least 1 stitch on either end (I add 10 – 5 on each side).
  • Knit 10 rows
  • Assuming 5 stitches at each end, work the following 4 rows until you reach desired length:
  • Row 1: knit
  • Row 2: purl
  • Row 3: k5, * k2 tog 3 times, (k1, yo) 6 times, k2 tog 3 times * repeat from * to * until last stitch, k5
  • Row 4: knit
  • When you have reached desired length, knit 10 rows to finish border. Weave in ends.

Fan and Feather Baby Blanket | Free Pattern

This latest blanket is for a local fab lady who keeps me in popsicles all summer on her funky custom PopCycle bike complete with cooler sidecar. I worked on this one from Alaska to New York and back again, and find it only appropriate that it already be travelling as the parents to be met while exploring the world in another country.

This is a super easy and rather fast pattern which looks more complicated than it is. In a bout of bravery I entered one in the Alaska State Fair 2 years ago and brought home a green ribbon and honorable mention in the baby blanket category. But what it really comes down to, is my hope that the kiddos for whom I make these little Lovey’s, love them as much as I love mine (or maybe a little less – there’s that attachment thing…).

Want to see more of Annie’s work? Check out her Etsy store!


Chicken-stuffed Eggplant

Eggplant is a foreign food to me. I’ve only cooked with it once before when I made eggplant parmesan a long time back. They looked so irresistible today at Costco — so purple and shiny without a single flaw. I added a $5 rotisserie chicken, mini heirloom tomatoes and mini bell peppers to my cart and knew I’d be able to throw something together.

I made stuffed eggplant almost like a meatball recipe. They turned out flavorful and not too soggy, thanks to a quick technique inspired by America’s Test Kitchen.

Chicken-stuffed Eggplant | Alaska Knit Nat

Chicken Stuffed Eggplant

Serves 2-3

Ingrdients:

2 medium eggplants, sliced down the middle

2 Tbs. olive oil

1/2 onion, chopped fine

3 mini orange and yellow bell peppers, chopped fine

1/2 stalk celery, chopped fine

1/4 cup diced tomatoes

3 cloves garlic, minced

2 tsp. dried basil

1 tsp. dried oregano

1/2 tin of anchovies, minced (about 3 filets)

1 egg

1/2 cup cooked chicken, diced

2 Tbs. fresh parsley, chopped

3 Tbs. Italian breadcrumbs

1/2 cup parmesan cheese, grated

salt and pepper to taste

Chicken-stuffed Eggplant | Alaska Knit Nat

Directions:

Carefully scoop out the flesh of your eggplants without breaking the skin. Chop the flesh into small pieces. Lightly salt the flesh and hollowed out eggplants. Place eggplant shells in a foil-lined casserole dish and set aside.

In a saute pan, heat the olive oil over medium-high flame. Add the onion, peppers, celery and tomatoes and cook till onions are soft, about five minutes. Add the garlic, basil and oregano and cook another two minutes.

In a mixing bowl, combine the egg, chicken, anchovies, parsley, breadcrumbs and sautéed vegetables. Place the eggplant flesh in a microwave safe bowl and microwave for 30 seconds. Pat dry with a paper towel. This removes excess liquid from the eggplant and makes the filling less soggy. Add the eggplant to the mix and salt and pepper to taste. Add 3 Tbs. of parmesan cheese, mix well and add filling to the eggplant shells. Lightly press the filling and create small mounds in the shells if needs be.

Sprinkle liberally with parmesan cheese and bake for 45 minutes or until browned.

Serve with brown rice.

Chicken-stuffed Eggplant | Alaska Knit Nat

Thrift Store Skirt Refashion — Free Tutorial

Floral prints are all the rage these days and I’m always finding skirts at the thrift store that have pretty patterns, but they are just too long for my stumpy legs.

You’ve probably come across these types of skirts — they are from the ’90s, ankle-length and look as though a church lady might wear them.

If you have basic sewing skills it’s pretty simple to shorten a skirt to a more youthful length. It only took me 45 minutes and I went from bake sale mom to hipster mom for $2.50. You can too!

Thrift Store Skirt Refashion -- go from bake sale mom to hipster mom in less than an hour!

Materials:

One thrift store skirt in your size

Ruler

Straight pins

Chalk or pencil

Fabric scissors

Sewing machine

Iron

Thrift Store Skirt Refashion -- go from bake sale mom to hipster mom in less than an hour!

Step 1: Iron your skirt if it needs it.

Step 2: Determine how much length you’d like to cut off. I wanted the skirt to fall just above my knees, which was about 10.5 inches from the original hem. I subtracted 1.5 inches to account for the new hem. For me, 9 inches was how much I needed to remove.

Thrift Store Skirt Refashion -- go from bake sale mom to hipster mom in less than an hour!

Step 3: If your skirt has buttons down the front, unbutton it and lay it flat, wrong side up. With a ruler and chalk or pencil go along the bottom of the skirt and mark 9 inches all around. I didn’t do this accurately at all and it still worked out fine. My skirt had a slight arc to it so I eyeballed it here and there.

Step 4: Cut along the measurement lines you made.

Thrift Store Skirt Refashion -- go from bake sale mom to hipster mom in less than an hour!

Step 5: With your iron, turn under 1/2 inch from the edge all across the skirt.

Thrift Store Skirt Refashion -- go from bake sale mom to hipster mom in less than an hour!

Step 6: Turn under 1 inch all around and iron down, pinning as you go. *NOTE* if your skirt buttons in the front, make sure your ends match in the front. Mine were really off so I had to re-iron and eyeball it till it worked. Doesn’t need to be perfect, especially if it’s a flowing skirt. No one will notice if the back is slightly shorter than the front.

Thrift Store Skirt Refashion -- go from bake sale mom to hipster mom in less than an hour!

Step 7: Sew a seam along the hem 3/4 inches from the folded edge, backstitching at the beginning and end.

Step 8: Trim all threads and run an iron along the hem one last time.

Step 9: Put on your skirt and admire your crafty awesomeness.

Thrift Store Skirt Refashion -- go from bake sale mom to hipster mom in less than an hour!