Have you ever gotten your jeans professionally hemmed? It looks all neat and tidy and they even manage to keep the original hem. If you have basic sewing skills and a sewing machine, then hemming your jeans is easy. Save yourself the alteration charge. Learn to shorten your jeans and keep the original hem. This is the best kind of project because it takes about 15 minutes. Here’s what you’ll need:
First, try on your jeans and figure out how much length you’d like to take off by folding up the cuff and measuring from the edge to the fold. With today’s pair I wanted them to be two inches shorter.
Take your measurement and divide it in half. This is how much you’re going to sew away. Remove your jeans (and continue crafting without pants if you’d like) and now fold up the edge of your jeans till the fabric below the hemline measures half of what you’d like to remove. In my case, I want to remove two inches, so I make sure there is one inch of fabric folded below the hem. Pin in place.
Start your seam in the inner leg and sew right below the edge of the original hem. Repeat with other leg.
You are now basically done and if you are truly lazy you could walk away from this project now. But why not make them look perfect? It will only take a few more minutes.
Turn your jeans inside out and iron the fold you just made. Iron the whole “flap” you just created upward. Take your Stitch Witchery and cut a couple of strips that are long enough to be tucked under the flaps. You may need to trim the tape if the flap is narrower than the tape’s width. Sorry, no photo, but it’s really not that hard. You’re just fusing the flap to the leg so it doesn’t flop around when you wear the jeans. Press your hot iron on the flap, using steam, for about 20 seconds and *PRESTO* your flap has been fused to the leg.* I love Stitch Witchery. It’s one of my favorite sewing notions.
Now, admire your professionally hemmed jeans and how you saved, like, $15.
*If you are shortening your jeans by a lot, such as more than four inches, I would consider cutting the flap till it’s about an inch wide and running a zig zag stitch around the raw edge (which used to be a fold). Then fuse this flap to the leg.
I’m in love with the lasagna roll-up. It’s simple, it’s customizable and it’s delicious. I also love pesto. So it only makes sense to combine my two loves to create something super amazing tasty.
Chicken pesto roll-ups!
They were indeed super amazing tasty, but they were more like stuffed shells than lasagna. They weren’t as gooey and cheesy. I would consider using cottage cheese next time or adding some milk to the filling.
Ingredients (I eyeballed everything):
Lasagna noodles
1 chicken breast, cooked and shredded
1/2 cup pesto sauce (Costco has the best store-bought kind, but nothing beats homemade)
1 egg
1/2 cup shredded parmesan cheese plus 1/4 cup for topping
1/4 cup shredded mozzarella
1/2 cup cream cheese, softened
salt and pepper
Directions:
Preheat oven to 350. Grease a casserole dish. Boil a large pot of salted water and cook noodles according to box directions.
Meanwhile, mix together all the rest of the ingredients. Lay the cooked noodles out on your counter and spread some of the filling on each noodle. Roll up the noodle and place it seam side down in the casserole dish. When all the filling is used up, top the roll-ups with cheese and bake for 30 minutes.
In an attempt to make less messy breakfasts for my 13-month-old son, I came up with a tasty pancake recipe that’s healthy and delicious. I’ll never understand why my mom always had pancake mix in the cupboard because homemade pancakes still only take minutes to make. And if you have leftover pancakes, bag them and freeze them for another day when you don’t have as much time. Just pop them in the microwave to reheat.
Ingredients:
2/3 cup whole wheat flour
3/4 cup all-purpose flour
1.5 tsp. baking powder
1/2 tsp. salt
1 tsp. cinnamon
1/4 tsp. allspice
1/4 tsp. nutmeg
1 Tbs. sugar or agave nectar
1 egg
1 Tbs. cooking oil or melted butter
1.5 cups milk
1/4 cup canned pumpin purée
Directions:
Mix together the dry ingredients. Measure the milk in a large liquid measuring cup and add the rest of the wet ingredients. Whisk gently to combine. Add the wet ingredients to the dry and stir till just combined. It’s ok if there are lumps.
Heat a large skillet over medium flame. Coat with cooking spray. Ladle batter into pan, forming three flapjacks at a time. Turn when edges are cooked and bubbles form in middle. Cook on other other side till brown. Repeat with rest of batter. Serve with butter and syrup or honey.
In my ongoing quest for quick and somewhat healthy dinner ideas, I came across a tasty recipe for chicken flautas today. Usually my decision to try a recipe is based 90 per cent on whether I have all of the ingredients already. This one passed the screening and sounded tasty as can be. Since I never know what type of vegetable to serve alongside Mexican food, I tweaked the recipe slightly and added chopped frozen spinach. I also healthified it more by adding a wild rice/quinoa blend that I’d made earlier in the day and saved in the fridge.
Both boys (husband and son) gobbled this up. I think I’ll have to make these a staple dinner in our house.
Ingredients (I eyeball everything, so measurements are approximations):
8-10 taco-sized flour tortillas
1 chicken breast
olive oil
1/4 cup salsa
1/4 cup cooked brown rice or quinoa
1/2 cup frozen spinach
1/2 brick Neufchatel cheese or cream cheese
nearly one cup Monterey jack cheese
1/4 tsp. cumin
1/8 tsp. chili powder
1/2 tsp. smoked paprika
1/4 tsp. garlic powder
1/4 tsp. onion powder
salt and pepper to taste
Directions:
Preheat oven to 400 degrees. Spray a casserole dish with cooking spray and set aside.
Place frozen spinach in a microwave-safe bowl and cover with water. Cover bowl with plastic wrap and microwave for two minutes. Drain thoroughly, squeezing with your hands to remove as much water as possible. Place in a medium mixing bowl.
Butterfly the chicken breast and coat both sides with salt and pepper. Coat a frying pan with olive oil and heat over medium-high flame. Add chicken and brown on both sides, about 5 minutes per side. Once chicken is thoroughly cooked, shred with two forks and add to mixing bowl.
Add all the other ingredients but the tortillas and combine thoroughly. Spoon about 1/4 cup of the filling onto a tortilla and shape it into a narrow log. Roll up the tortilla tightly and place seam-side down in a casserole dish. Do the same with the rest of the tortillas and coat the tops of the taquitos with cooking spray. Bake in the oven for 15 minutes or until they are golden and crisp on the edges.
We recently spent two and a half weeks in Mexico where I spent a good deal of time watching the housekeeper cook. She used to run a restaurant from her home and one of her specialties is a dish called chilaquiles. It’s fried corn tortilla strips steeped in a red chile sauce. I thought the sauce would transfer well to an enchilada dish. I made a few twists and it turned out almost as well as Moña’s in Mexico. I wasn’t able to find the exact same dried chiles she used, but I used the kind from the Hispanic food section of the grocery store and it worked just great. Add in a little bit of slow-cooked beef, some rice, black beans and cheese and you’ve got yourself some amazing enchiladas.
Oh, and if you’re totally lazy, you could buy the sauce and just follow the enchilada recipe below. That’s what I did to obtain this pathetic photo. Trust me, it’s waaaaay tastier than it looks.
Homemade Red Enchilada Sauce with Slow-Cooked Shredded Beef
Ingredients:
3 plum tomatoes
4 medium-sized dried red chiles
3 cups water
2 cloves garlic
2 Tbs. olive oil
1/2 onion, chopped fine
3 Tbs. flour
2 cups chicken stock
1 Tbs. chile powder
salt to taste
1 Tbs. chiles in adobo sauce, chopped finely
Directions:
Break the tops off the dried chiles and toss as many of the seeds as you can. Bring the water, tomatoes and chiles to a boil in a saucepan. Boil for 10 minutes. Turn off the heat, cover and let sit for 20 minutes.
Place one clove of garlic in a blender. With a slotted spoon, add the tomatoes and chiles, cover the blender and start blending. Slowly add the water from the saucepan and blend on high for a minute or so.
Mince the remaining clove of garlic. Heat olive oil in a large saute pan. Add the onion and garlic and cook till onions are tender, about 5 minutes. Add the flour and mix into a paste. Cook over medium heat for a couple of minutes.
Turn down the heat and add the blended mixture, chicken stock, chile powder, chiles in adobo sauce and salt. Bring to a simmer, turn to low and let bubble for 10 minutes or so. The sauce will be thinner than gravy.
If you prefer it thick, make a slurry with 1/2 cup chicken stock and 1-2 Tbs. flour and pour it in. Stir and let simmer for five minutes or so till it thickens.
Store in a jar in the fridge for up to a week.
Recipe for beef enchiladas
Ingredients:
1 thin, cheap cut of beef; about 1/2 lb.
olive oil
salt & pepper
dried oregano
smoked paprika
1/2 onion, roughly chopped
1 can black beans, partially drained
2 chiles in adobo sauce, seeded and chopped fine
leftover brown rice (optional)
1 cup cheddar cheese, grated
1/2 cup mozzarella cheese, grated (for the top, optional)
tortillas (flour or corn)
Directions:
Coat the beef in olive oil and sprinkle both sides with salt, pepper, paprika and oregano. Place in a slow cooker and add the onions. Cook on low for 5 hours or so. It’ll be so tasty you might have a hard time getting it into the enchiladas. Shred the beef and set aside.
When it’s near dinner time, preheat the oven to 375′. Add the beans to a small saucepan and bring to a simmer. Mash with a potato masher and add the chopped chiles and some salt. Cook for five minutes or so. Heat up your leftover rice, if using. Coat the bottom of a square or rectangular baking pan with enchilada sauce.
Pour about a cup of sauce in a pie pan. Set up a little assembly line with the tortillas, sauce, work surface, beans, beef, rice, cheese and baking pan. Soak a tortilla in the sauce and place it on your work surface. Add small amounts of all your ingredients, roll up the tortilla and place it seam-side down in the pan. Repeat till the pan is full. Pour a cup or so of the sauce all over the enchiladas. I never put enough and they end up drying out on the edges, so really saturate the baking dish. The tortillas suck up a lot. Top with remaining cheeses. Place, uncovered, in the oven for 30 minutes, or until it’s all bubbly.
Remove from oven and let sit for 10 minutes before serving, or, if starving, risk lava-hot amazingness.
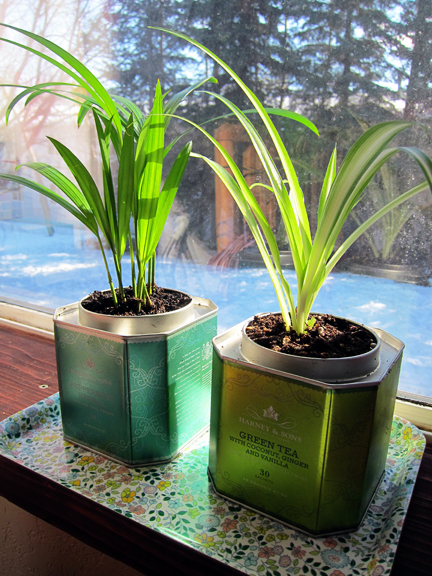
I found the cutest little mug at the thrift store today.
I just knew the daffodils I got yesterday would look delightful with the grey and red. I love low floral arrangements. They are fun to make too. Here’s a step-by-step.
1. Choose a mug or container that suits you.
2. Make a grid on top of the mug using narrow scotch tape (I only had wide, so I cut it in half).
3. Bring your mug to the edge of your work surface and hold a flower up against the mug. Figure out how tall you want the flower to stick up over the mug and cut the stem.
4. Work around the mug, cutting and nestling the flowers in different parts of the grid. Fill mug with water.
5. A good tip is to make sure some of the flowers cover up the edge of the mug. This creates a continuous flow from flowers to vase.
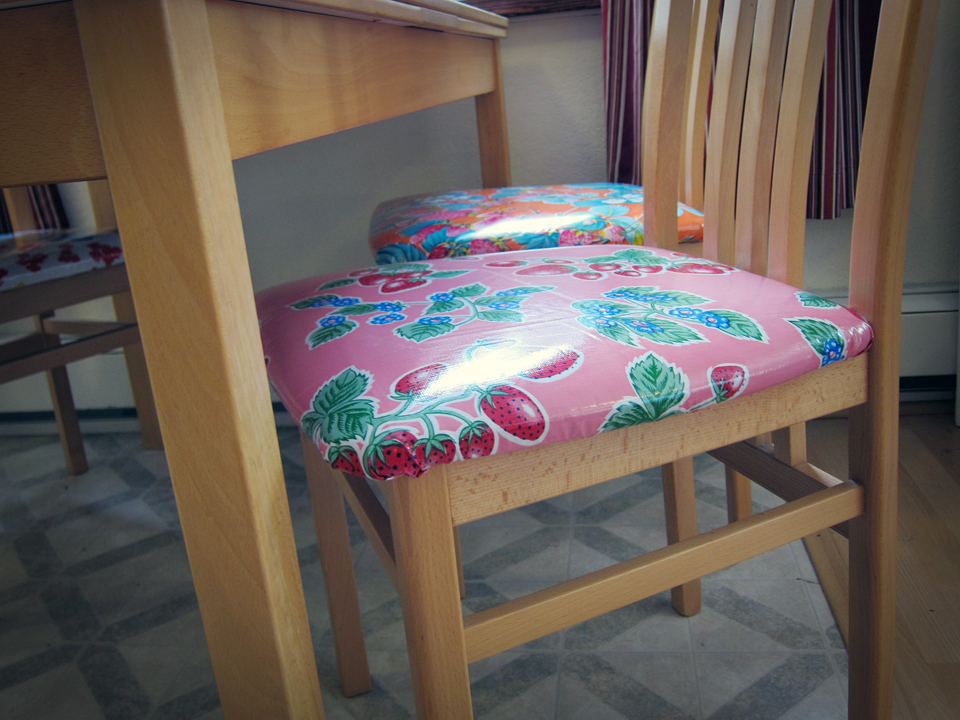
Every time I am down in Mexico I’m attracted to the long rolls of colorful oilcloth. Adorned with fruits, flowers or fake lace, oilcloth is durable material that could be used for myriad projects. I just never know what to do with it. I’ll get a meter here and a meter there and sometimes try sewing with it or gluing it to old cans.
I finally decided on a decent (and super easy) oilcloth project. Since we have a little one and mealtime tends to be messy, I thought that recovering our dining chairs would not only brighten our living space, but cleanup would be a breeze!
I’ve already posted a tutorial on reupholstering furniture, so feel free to check it out here or here. But look at the vast improvement!
BeforeAfter
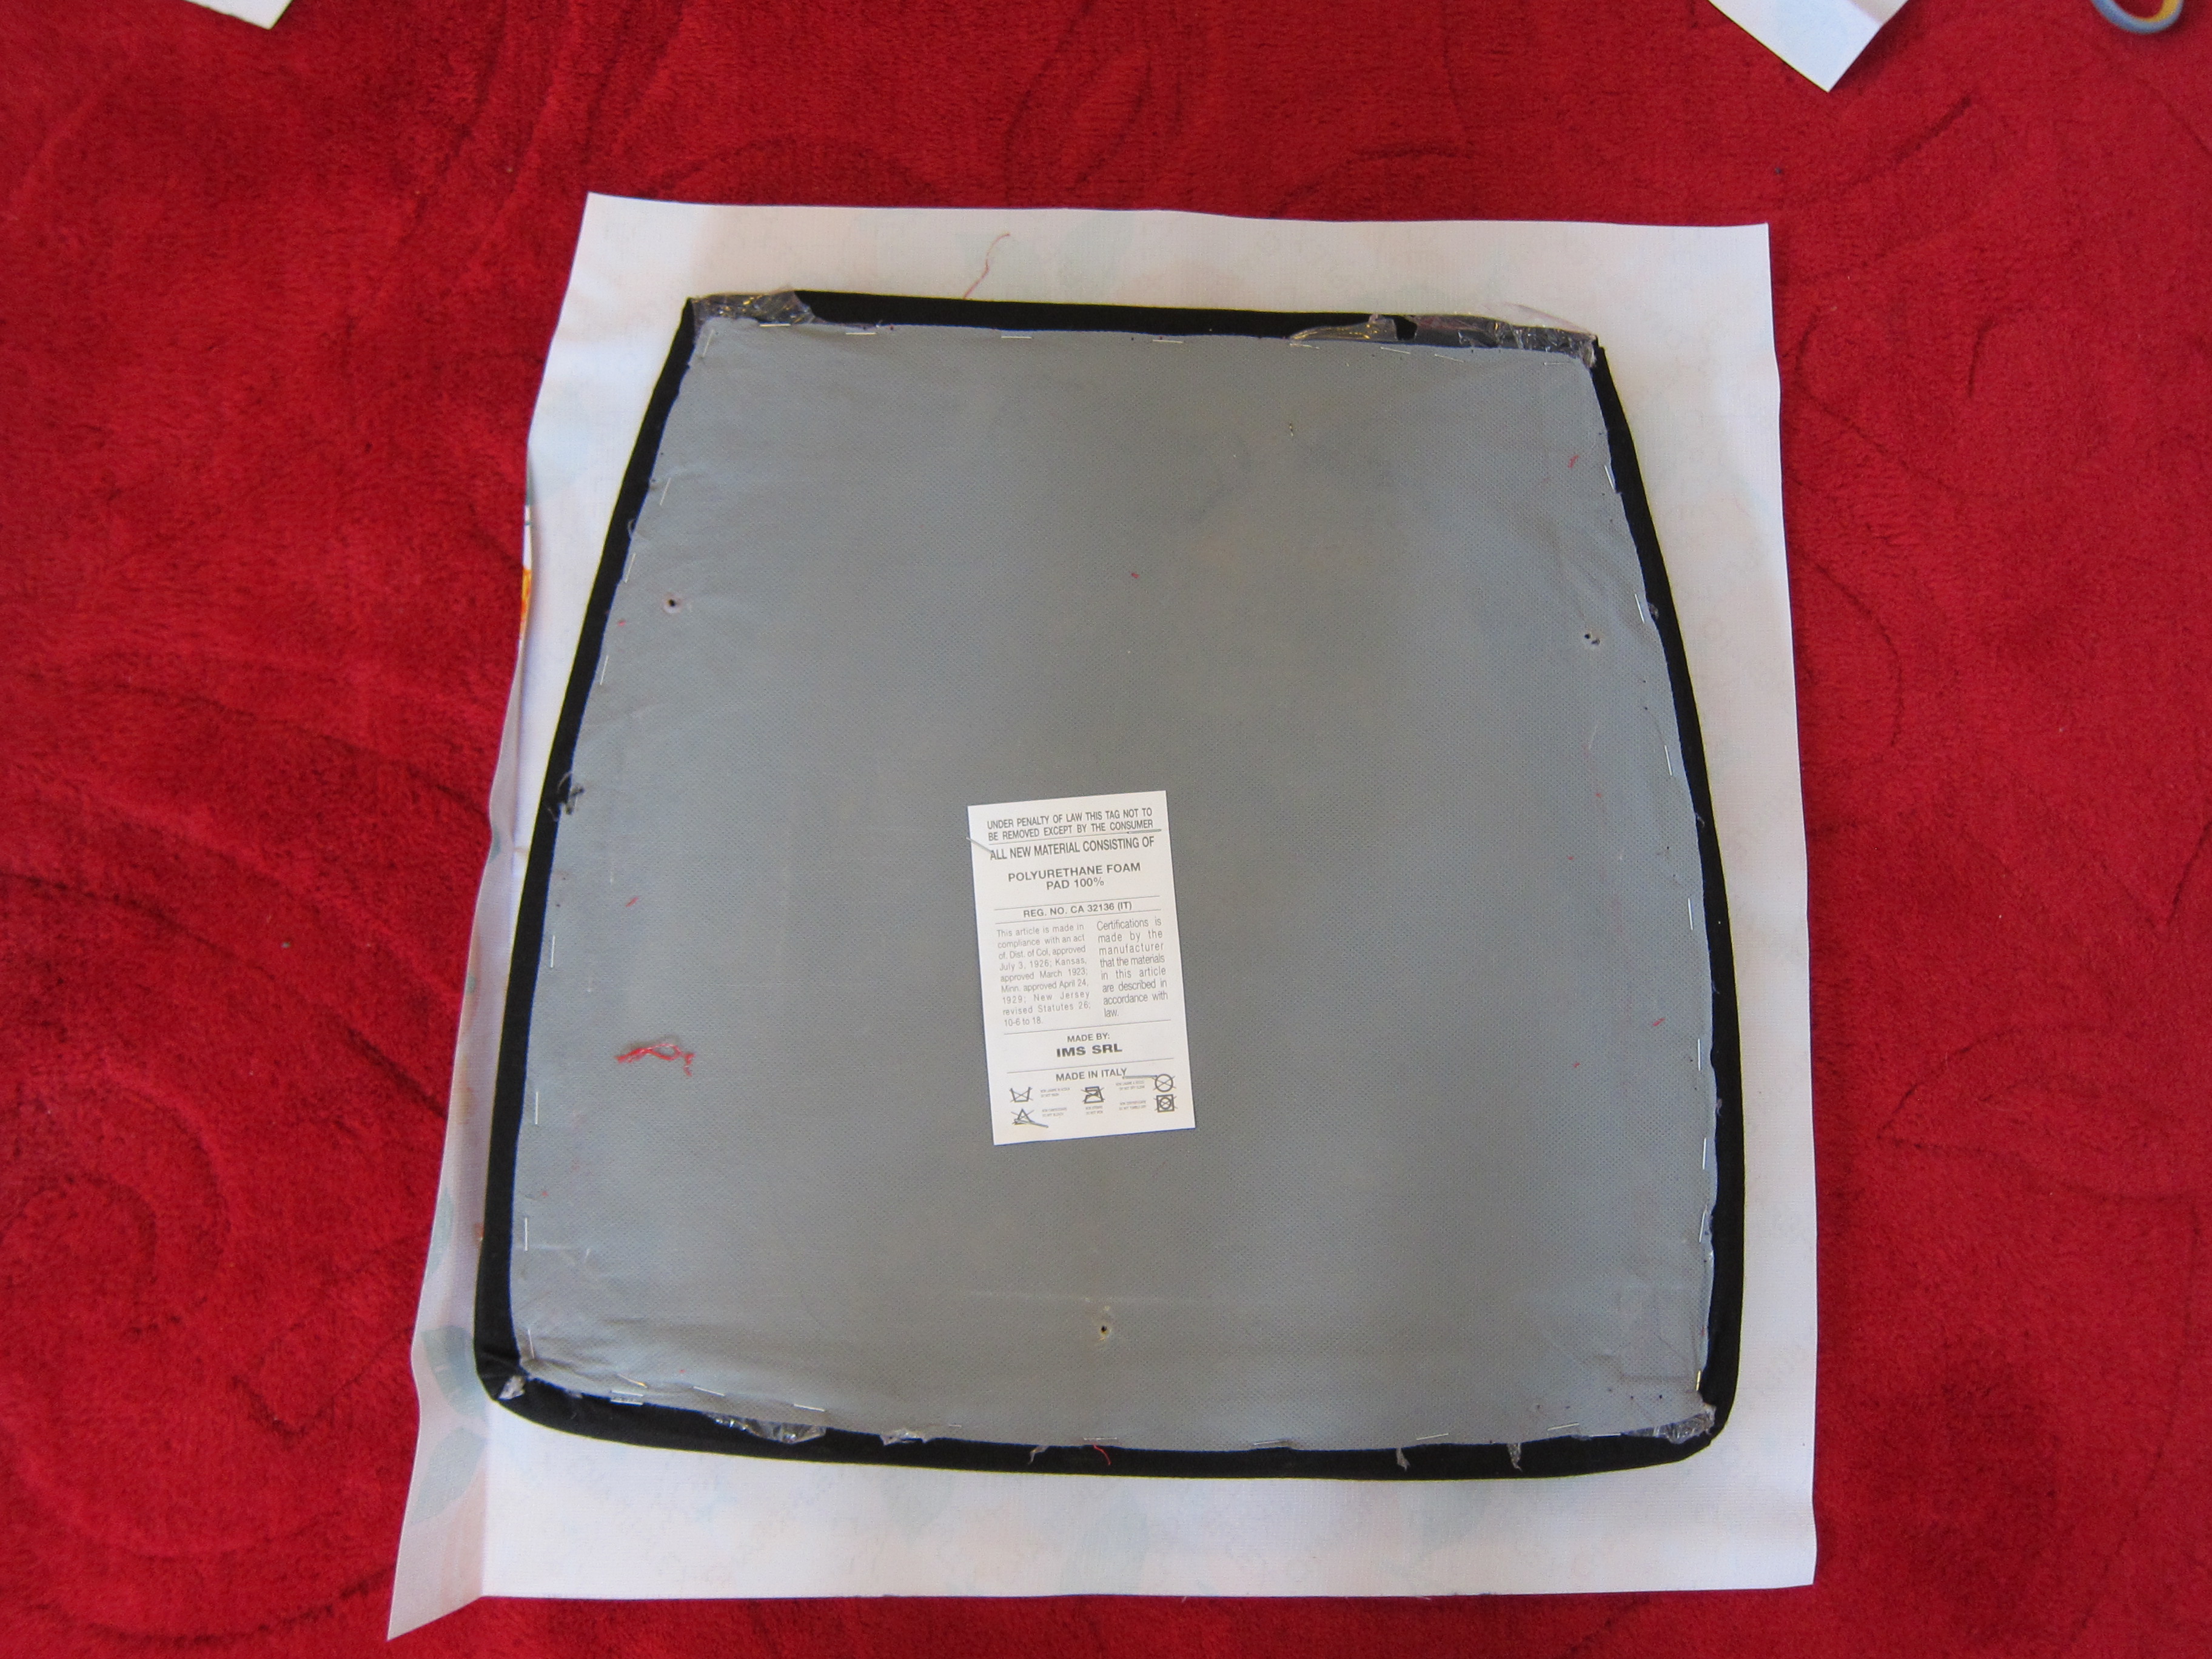
Here’s a brief tutorial of the process:
Cut oilcloth with enough of an edge for it to wrap around the cushion and still have a couple of inches worth of an edge.
Try to fold the corners in an elegant way so it’s not all bunched up.Use a staple gun to secure the oilcloth all the way around.Make sure the baby helps!
Have you ever envisioned a meal and had it turn out better than you expected? This was one of those dishes. I had some leftover ground pork and a can of black beans in the cupboard, so I did a Google search for those two ingredients and found this recipe for mexican pot pie. I had everything the recipe called for, but I didn’t need to feed an army, so I halved it for just me and my husband and tweaked a couple of ingredients.
This casserole had deep flavors and just the right amount of spice and cheese. The cornbread topping was crusty on top and creamy underneath. A dollop of sour cream and this became an instant dinnertime favorite in our household.
Since the full recipe called for one egg, I just beat an egg and eyeballed half of it.
Feeds 4-6
Ingredients:
1/2 onion, chopped
2 cloves of garlic, chopped
1/3 cup diced bell pepper, color of your choice
2 Tbs. jarred jalapeños, chopped
3/4 lb. ground pork (or beef)
olive oil
1, 8-oz. can of tomato sauce
1 Tbs. tomato paste
5 oz. frozen corn, thawed
1/2 can of black beans
1.5 tsp. cumin
1/4 tsp. allspice
1 Tbs. chili powder
1 Tbs. Worcestershire sauce
1/2 tsp. Tabasco sauce
2 tsp. yellow cornmeal
salt and pepper to taste
Cornbread crust:
1/2 cup flour
1/2 cup yellow cornmeal
1.5 tsp. sugar
1 tsp. baking powder
1/8 tsp. salt
2 Tbs. melted butter
3/8 cup milk
1/2 egg
1/2 cup grated cheddar
1/2 can green chili peppers (4 oz. can)
Directions:
Preheat the oven to 350 degrees.
Grease a small baking dish (mine was 1.5 quarts). In a large skillet, heat up a couple of tablespoons of oil. Add the onion, garlic, bell pepper and jalapeño and cook for about five minutes.
Add the pork and cook till the pork is no longer pink, chopping with a wooden spoon as you go.
Stir in the tomato sauce, paste, corn, beans, cumin, allspice, chili powder, Worcestershire sauce, Tabasco, cornmeal, salt and pepper. Bring to a simmer, stirring occasionally.
For the cornbread batter, combine the flour, cornmeal, baking powder, sugar, and salt. Add the butter, milk and egg. Stir until just combined. Add the cheese and chili peppers.
Place the filling in the baking dish and dollop the cornbread on top of the filling, spreading it out as you go. If you can’t cover the whole top of the pie, then fill in the holes with grated cheese.
Bake for 35 minutes or until the crust is baked and the filling is bubbling.
Serve with a dollop of sour cream and a cold beer.
Seven months have passed since I published “17 Most Essential Infant Items.” A lot has changed since then. For instance, my son is now nine months old and he doesn’t use many of the things on that list anymore. I figured I might as well update my list, thus furthering my contribution to the Internet baby advice world.
These are things I find myself using every day. I’d say they are essential for us, but they may not be for you. Also, keep in mind I’m not including the obvious essentials such as a crib, car seat or high chair.
1. Breast Pump
Most of the items on this list are not in order of importance, but I put a breast pump on the top of the list because it is really one of the most important things I use every single day. I’m a working mom. My son goes to day care. He is still breastfed and in order to keep nourishing him with my milk, I gotta pump. I recommend getting an electric pump if you’re serious about collecting your milk. My husband brought home a hand pump back in the beginning and it was laughable. The Medela Pump in Style works great. It is the dorkiest thing you will ever attach to your body but I’m able to pump once at work to provide my son with milk for the following day. Yes, these pumps are really pricey, but the good news is they are always for sale on Craigslist and it’s really OK to buy a used one. The tubing and parts can be sanitized with Madela’s microwave sanitizing bags or if you’re really creeped about by it, you can buy all new parts. With its über sleek design you’ll be the most fashionable mom at work! (That was rife with sarcasm, by the way).
2. Jumperoo
Now that my boy is mobile, I’m starting to phase out the Jumparoo, but it was crucial for about seven months. As soon as your baby has good neck and core strength, these bouncing harness toys are the perfect place to set him while you make breakfast, take a shower or just take a load off for a little while. They light up, play music and have enough toys to entertain your little one and you know he’s in a safe place. These can also be easily found in the Craigslist and garage sale zone. Don’t bother paying full price for one. Since my son is no longer interested in being stationary, I’m thinking of taking the bouncer to a kiddie consignment shop and trading it for a baby walker.
3. Hydrogen Peroxide
Before I get too carried away with my thrift store mantra (really, you’ll save thousands by buying things used) I might as well tell you how to best clean all the used baby items you acquire. I used to clean toys with a weak bleach solution, but thanks to Pinterest I’ve discovered that hydrogen peroxide is super for cleaning all the surfaces your baby’s mouth will come in contact with (i.e. everything). I just took a sprayer from a spray bottle and screwed it on to a bottle of hydrogen peroxide. I spray his high chair tray and all his toys with it, let them sit for a couple of minutes and wipe them down with a sponge.
4. Softee Blanket
We live in Alaska where blankets are of the essence. This item may not apply to those living in hotter climates, but we use a super fuzzy — some call it minky — blanket every night at bedtime. Someone bought us a really fancy one, but really, you could just buy a $10 fuzzy throw at the store, cut it in half and hem it. I’m in the process of crafting a back-up for our vacation. Yes, most of the time I find my son’s face buried in his blanket come morning but it’s starting to grow on him and the fuzziness soothes him at night (and isn’t self-soothing the ultimate goal here?)
5. Humidifier
We live in a semi-arid part of the world and a humidifier comes in handy up here especially during cold season. When my son’s nose is all stuffed up, this helps make the air in his room less harsh.
6. Cloth Wipes
One of the few items that carried over from the previous list, the cloth wipe is definitely essential in our household. I still use the wipes I made out of old receiving blankets. I stuff them in an empty wet wipes container, about 24, and wet them with water during diaper changes. Then I toss them into a regular wash. I know wet wipes are pretty cheap, but this is waaaaaay cheaper and I’m saving my baby’s bottom from harsh detergents and chemicals or something. Ok, ok, I’m doing it more for the saving money thing and less for the environment thing. But check out my neato tutorial here.
7. Homemade laundry detergent
Thanks again to Pinterest for showing me the light on homemade laundry detergent. I mix equal parts Oxy Clean, Borax and washing soda and just use a tablespoon per cycle. This is a huge money saver. This is a recipe for cloth diapers, since soap isn’t recommended for them. But you can incorporate Fels Naptha and make a general detergent and you’d still be saving a bundle.
8. Dimmer Switch
I am forever thankful we installed a dimmer light switch in our baby’s room. I should have included this on the first list. We use dimmers to wind things down in the evenings, for middle-of-the-night wake ups and as a general nightlight. No one is chipper in the morning when the light is suddenly turned on. This is an inexpensive and easy fix-up.
9. Internet Radio
Music is great for people of all ages and babies are no exception. I love Internet radio sites such as Pandora or Spotify. I’m really digging Songza because they help you choose the music you feel like listening to at that moment. Babies don’t need to listen to strictly baby music. My favorite Songza playlist is “Songs to Raise Your Kids To,” which is a mixture of all my favorite old tunes. I’ll put on music while getting breakfast ready, in the car and during playtime. Our son is getting into clapping and nothing beats sweatin’ to the oldies.
10. Pack ‘n’ Play
This is a recently acquired item in our house, but I’m happy we have it. This is a portable play pen/crib that folds up really easily. It’s perfect for your more mobile baby when you need to get some housework done because it keeps him in a safe place so you don’t have to worry about his exploring and a chair falling on him (that happened this morning as I was making breakfast). I also use it for nights at Grammy and Grandpa’s house. These run about $30-70 on Craigslist, so definitely buy a used one.
11. Zipper Jammies
If you think your baby is cute, he will be ten times cuter in footie pajamas. Our son practically lives in zip-up jammies. They are super convenient to get on and off, you don’t need to worry about socks and they usually have grips on the bottom of the feet so he can climb around without falling (as much).
12. Coconut Oil
This is the ultimate multi-purpose goop. Coconut oil comes in Crisco-like form and can be found at health food stores and even Costco. Not only is it nice for cooking as a replacement for saturated fats it can also be used for dozens of topical reasons. It’s great for dry skin and cures diaper rash. Check out this list for tons of other uses.
A sample of some of our thrift store toys and books.
13. Used Toys and Books
You could easily spend a fortune on stuff for your child. Do yourself a favor and get used toys and books. See if your town has a Freecycle Web site. Go to garage sales and thrift shops and keep an eye out for sturdy toys in good working condition. The thrift shop is a gold mine for used books, usually just a few cents each. We have fully furnished our son’s nursery with second-hand toys and I’m happy to say none of them makes electronic noise and our son still loves them. There’s still a lot of love left in his toys for them to be passed on when he grows out of them. Pay it forward!