I’ll have a glue, glue Christmas — #1: DIY Photo Christmas Cards

It’s that time of year again where I scramble to find affordable and meaningful gifts for my family and friends. I wouldn’t go so far as to say I’m cheap, but I definitely don’t have the means to purchase nose-hair trimmers willy nilly.

I turn to my thrifting and crafting skills during the holidays. I thought this year I’d share a couple of my moneysaving ideas each week until it’s crunch time and you’re desperate for ideas on how to glue random trash and recyclables together in your house and stick a bow on it — we’ll get there together.

So here we go.

Alaska Knit Nat’s DIY Holiday Guide 2014

#1: Make your own photo cards

I always have those friends who mail out holiday cards with professional family photos arranged on glossy photo paper with a side banner that reads in hipster calligraphy, “May your days be merry and bright.” Yes, I’m jealous of them. Yes, I want to copy them but without spending a lot of money. Yes, I want to mail mine out perfectly on time too.

Here’s how you can create your own family photo card with an awesome font on the side for a fraction of the cost.

DIY Photo Christmas Card | A DIY Holiday Guide from Alaska Knit Nat

What you’ll need:

  • Digital photos of your family. Instagram and phone photos would work too.
  • Blank 5×7″ notecards, like these
  • Glue stick
  • Internet access

You don’t have to be a graphic designer to make your own photo cards. Just visit canva.com. It’s like graphic design for dummies. Create an account for free and you have access to tons of banners, frames, fonts and digital doodads that are predesigned and ready for you to arrange into myriad media. Just today Canva added a Christmas Card category where you select the template you like and upload your photos. You can get a little more technical and design your own. Most of the graphics are free.

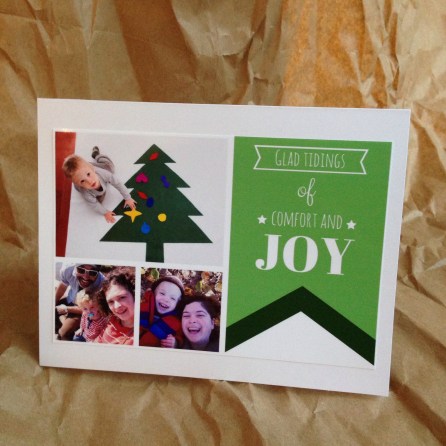
I spent about an hour tinkering around with a design and finally settled on this one:

DIY Photo Christmas Card | A DIY Holiday Guide from Alaska Knit Nat

Next, save your design as a PDF. Then upload your photo collage to any online drugstore photo processor. I prefer Walgreens because not only is it a block away from my house, but there is always a coupon code floating around the internet that works. *Note: I did have to change the PDF file to a JPG in order to upload it to Walgreens’ site. If you originally save it from Canva as a JPG it may not be high quality enough to print since it’s saved much smaller than a PDF.

Print one tester photo and see how it turns out. If it’s to your liking, print the number you need.

Then, glue your photo to the front of your blank card.

DIY Photo Christmas Card | A DIY Holiday Guide from Alaska Knit Nat

Revel in your thrifty, crafty genius.

DIY Photo Christmas Card | A DIY Holiday Guide from Alaska Knit Nat

Zig-Zag Chevron Hat — A Free Knitting Pattern

I’m not good at fair isle knitting. Usually everything comes out three sizes too small. I pull the yarn too tightly. Or I follow a pattern that slowly incorporates a new color and I’m left with long strands of yarn on the wrong side.

Today I decided to try fair isle again by designing something simple — zig zags. I’ve included the chart and the row-by-row instructions. I recommend knitting the patterned portion in a place with little distraction and possibly without other people. I end up counting out loud “knit one, knit two, knit three, knit two,” etc. so I don’t get lost in the pattern. It’s not difficult, but requires a fair amount of focus.

Zig Zag Chevron Hat | A Free Pattern from Alaska Knit Nat

The advantage to fair isle knitting is you create a thick wrong side to your fabric, which means a warmer hat. Below is a photo of the inside of the hat.

Zig Zag Chevron Hat | A Free Pattern from Alaska Knit Nat

Zig Zag Hat

Materials:

size US 8 circular needle

size US 9 circular and double pointed needles

Loops & Threads Wool to Wash, one skein of neon orange (color A) and one electric blue (color B) Any heavy worsted weight wool yarn would work.

darning needle

Continue reading Zig-Zag Chevron Hat — A Free Knitting Pattern

Our Thanksgiving Plans — A step-by-step guide to avoiding a festive failure

About nine years ago I had the honor of roasting the turkey for my family’s Thanksgiving dinner. Until that dinner my father was always the main chef during this holiday meal, but that year I had learned a turkey tip from a friend that I really wanted to try, so I took the responsibility from him. I remember his taking a bite of my bird and formally announcing he was passing the turkey scepter on to me; he could not make a better turkey.

This was, of course, before Alton Brown made famous the technique of brining a turkey. Now my father claims it’s the only decent way to prepare a Thanksgiving feast. I tried brining once, but it was too much effort for me. I don’t even like turkey!

So this year my parents are arriving home from Mexico on Thanksgiving Day. What with their being old and tired (no offense mom and dad!) I don’t want them to have to cook anything, so I’m taking on the entire meal, fixings and all. I’m even going to try to decorate — but we’ll see how it goes.

I thought I would share my plans for next week in case you are feeling completely uninspired (which I am currently feeling).

Turkey Day -- A step-by-step guide to avoid festive failure | Alaska Knit Nat

Continue reading Our Thanksgiving Plans — A step-by-step guide to avoiding a festive failure

Slouchy Pom Pom Hat – A Free Knitting Pattern

Being a lifelong craftaholic I’m no stranger to the pom pom. Memories of yarn-covered tin can pencil holders and ricrack come to mind.

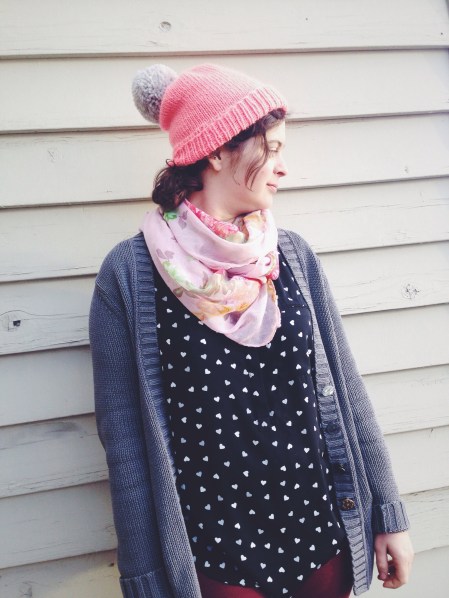
But lo and behold, again my childhood craft projects are becoming popular again (remember friendship bracelets?) Yes, the pom pom is this season’s biggest accessory trend. So I’ve decided to stay on board the pom pom train and offer up a delicious, fluffy, slouchy hat pattern. It’s got extended ribbing in case you want to fold it up for a thicker brim.

Slouchy Pom Pom Hat | A free pattern from Alaska Knit Nat

Slouchy Pompom Hat

If you’re wanting to knit this pattern with a different needle size and different weight yarn, I am unable to adjust the pattern for you. This pattern is written for a specific needle size and yarn weight.

What you’ll need:

1 skein each Loops & Threads Wool to Wash in pink and grey or any worsted weight yarn

size US 9 circular and double pointed needles

darning needle

pom pom maker or large serving fork

stitch marker

Continue reading Slouchy Pom Pom Hat – A Free Knitting Pattern

Sports Team Hat — A Free Knitting Pattern

When you’re a knitter, there are only so many knitted gifts you can give your relatives. I’ve made hats, cowls, mittens, hats, hats and hats. My family will never tell me “Enough with the hats already!” so I’m of course knitting them all hats this year for Christmas.

My nephew is a Dodgers fan. For his birthday I got him a Dodgers wallet, felt banner and classic metal waste basket. Those gifts went over well (He’s 14 and he gave me an enthusiastic “thank you,” which is a lot coming from a teenager). So I figured he wouldn’t mind a knitted cap in Dodgers colors.

This hat is mostly made from Plymouth Yarn’s DK Merino Superwash, although the grey is Lion Brand. Merino wool is soft and not itchy in the slightest. It’s also warmer than synthetic. Feel free to substitute acrylic yarn if you are trying to save money.

So get those team colors and knit on! You might get an honest “thank you” from your teenage nephew.

Click here if you’d like to make this type of hat for a baby.

Sports Team Hat | A free knitting pattern from Alaska Knit Nat

Sports Team Knitted Cap

If you’re wanting to knit this pattern with a different needle size and different weight yarn, I am unable to adjust the pattern for you. This pattern is written for a specific needle size and yarn weight.

Fits an average size head (my husband, who was the only model I had around, has a gigantic head so the hat is a little stretched out in the photos)

Skill level: easy/beginner

Materials:

1 skein each of Plymouth DK Merino Superwash in Cobalt (Color A), Natural (Color B), and Light Gray (Color C)

Size US 8 circular and double pointed needles

Darning needle

Sports Team Hat | A free knitting pattern from Alaska Knit Nat

Abbreviations:

K1, P1 = knit 1, purl 1 ribbing

k2tog = knit two stitches together

Directions:

With your circular needle cast on 80 stitches using color A. Join stitches to form a circle, being careful not to twist the stitches. Place a marker where you joined the yarn. K1, P1 in the round for 5 rounds or until the ribbing is to your liking.

Start knitting all rounds. Knit 15 more rounds with color A. Cut yarn leaving an 8-inch tail. Begin knitting with color B. Knit 4 rounds. Cut yarn leaving an 8-inch tail. Start knitting with color C. Knit for 10 rounds. Cut yarn leaving an 8-inch tail. Knit 4 rounds with color B. Cut yarn. Switch to color A and knit approximately 8 rounds or until the hat is about 5.5-6 inches tall from the edge.

Begin decreasing as follows:

*k2tog, k6* Repeat * till end of round
K one round
*K2tog, k5*, repeat * till end of round
K one round
*K2tog, k4*, repeat * till end of round (switch to double points here)
K one round
*K2tog, k 3*, repeat * till end of round
K one round
*K2tog, k 2*, repeat * till end of round
K one round
*K2tog, k1*, repeat * till end of round
*K2tog*, repeat * till end of round.
Cut yarn leaving an 8-inch tail. Using a darning needle, weave in all ends. I like to tie the striped yarn ends together somewhat loosely before weaving them in. I have no official technique for this, so do what seems best for you. Just be sure not to tie them together too tightly as that will cause the stitches to look uneven on the outside of the hat.Sports Team Hat | A free knitting pattern from Alaska Knit Nat

Sports Team Hat | A free knitting pattern from Alaska Knit Nat

Alaska Knit Nat turns 4 — TBT Harlequin Cowl Pattern

I was just sitting down to my computer to write a post today and I started to think about when I first started my blog. I logged into my old Blogger account and scrolled back to “Posting No. 1.” Turns out it was four years ago today!

I started this blog as a means to keep track of all the stuff I make. I never remember how many stitches I cast on here or how many tablespoons of soy sauce I mixed in there, so I began to keep an online record. It’s still a useful tool to me and I reference my own patterns and recipes all the time.

I soon realized that others might like what I was cataloging. That’s when I started Alaska Knit Nat’s Facebook page.

My first big break was when BuzzFeed featured my DIY T-shirt onesie tutorial. Then Pinterest was invented. Lots of folks find my blog via Pinterest.

But it wasn’t until I was contacted by AllFreeKnitting.com that I really started to see interaction on the blog. In one day alone last winter I got more than 7,000 visits to my Simple Striped Baby Blanket pattern. That’s pretty exhilarating! And totally out of the ordinary. I typically get about 400-800 visits a day.

It makes me happy to know that people enjoy the projects and recipes I share.

So I thought as a throwback Thursday I would share my very first post, which was a pattern for a lovely cowl.

Thanks to all my fans and supporters. I truly enjoy your feedback and interactions.

Posting No. 1

So I’ve been tinkering with the idea of starting a blog and I think it’s high time I do. It’s mainly for my own benefit — I make so much stuff I can’t keep track of it all. In addition to knitting (hence the Knit Nat title), I cook, sew and repurpose things. This blog is a catalog of all things Craft.

I’ve wanted to knit myself a cowl for the winter and I finally used my $25 credit at the Quilt Tree to purchase the most beautiful yarns for it. I did a lot of Ravelry research yesterday and found a pattern that was simple enough. It’s an easy lace pattern.
Just how luscious is this yarn?

I shall call this project the Harlequin Cowl.
Ingredients:
24-inch size 9 circular needle
1 skien of Cascade Lana Bambu color 11 &  2 skeins of Ironstone Sunset color
1 stitch marker

Cast on 104 stitches. Place marker and join yarn, being careful not to twist the work.
k4, p4 for three rows (or however wide you want the trim to be)
row 1:*k2tog, yo*, repeat ** till end of row (don’t forget that the last stitch of the row is a yarn over.)
row 2 and all even rows: knit

Repeat this pattern till project is wide enough to your liking

k4, p4 for three rows and bind off.

Here’s what I have so far:

###
It took me a long time to finish the cowl, so I didn’t post the finished product until later. Here’s what it came out like:
Knitted Harlequin Cowl | A free pattern from Alaska Knit Nat Knitted Harlequin Cowl | A free pattern from Alaska Knit Nat
xoxo,
Natasha

Zissou Hat — A Free Knit Cap Pattern

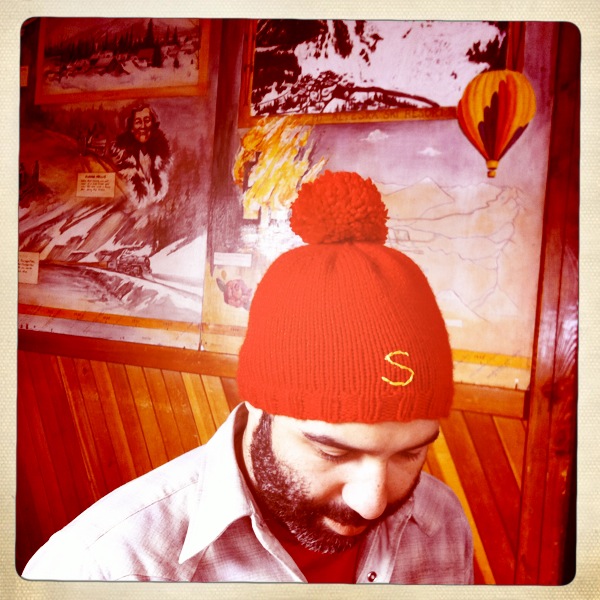
Some people feel strongly about Wes Anderson films. I happen to love his styles, colors, sets and costumes. When I saw an old friend post his halloween costume on his Facebook page this week, I knew I had to give it a hand-knit boost.

My buddy, Wes, is dressing up as Steve Zissou from “The Life Aquatic.” Each Cousteau-like character in the film wears a different style of bright red beanie, some with their first initials stitched in yellow.

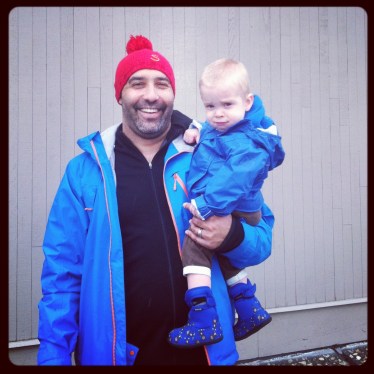
I’ve made these hats before for my husband and son, but I didn’t bother to write a pattern.

Zissou Hat | A free knitting pattern from Alaska Knit Nat

If you’d like to make a baby version of this hat, follow this pattern, but just use red yarn (and no ears)

After making this fine cap with a small pompom, I figured it was time to share it with the world.

Zissou Hat | A free knitting pattern from Alaska Knit Nat

Zissou Hat

If you’re wanting to knit this pattern with a different needle size and different weight yarn, I am unable to adjust the pattern for you. This pattern is written for a specific needle size and yarn weight.

Fits an average-sized adult head

Materials:

1 skein of Lion Brand Vanna’s Choice worsted in Scarlet

size US 9 circular and double pointed needles

darning needle

large fork

yellow embroidery thread

Zissou Hat | A free knitting pattern from Alaska Knit Nat

Abbreviations:

k1, p1 = knit 1, purl 1

k2tog = knit 2 together

Zissou Hat | A free knitting pattern from Alaska Knit Nat

With the circular needle, cast on 80 stitches. K1, p1 for seven rounds.

Knit for 34 more rounds, or until work measures about 5.5 inches from the edge.

Begin decreasing as follows:

Round 1: K2tog knit 6. Repeat for one round.
Round 2 (and all even rounds): Knit
Round 3: K2tog, K 5 for one round
Round 5:K2tog, K 4 for one round (this is where you should probably switch to the double points).
Round 7: K2tog, K 3 
Round 9:K2tog, K 2
Round 11:K2tog, K 1
Round 13: K2tog

Cut yarn leaving a 12-inch tail. With a darning needle, run the yarn through the remaining stitches and cinch close. Weave in all tails.

For the pompom:

Zissou Hat | A free knitting pattern from Alaska Knit Nat

Zissou Hat | A free knitting pattern from Alaska Knit Nat

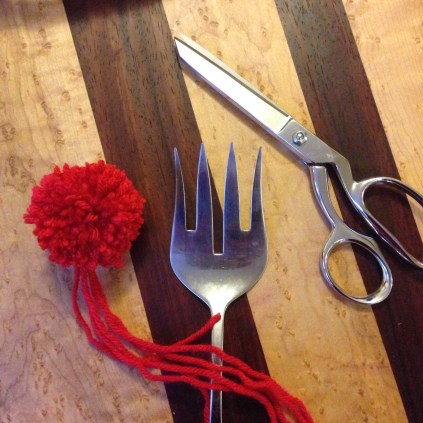
Wrap yarn around a large fork several times until you have enough bulk for a pom. Cut yarn. Cut two pieces of yarn about 12 inches long and run through the center tine under the wound-up yarn. Tie these two pieces around the bulk of yarn and secure with a double knot. Remove from fork and trim the loops. Form pompom to your liking. Use the long strings you tied around the pom pom to secure it to the hat. Run the four strands from the top of the hat down into the inside using a darning needle. Tie the four pieces together and trim ends.

For the initial: Free hand embroider the initial into the front of the hat above the ribbing. I typed the letter “W” into microsoft word and set it to Futura font to get an idea of how to shape it.

Zissou Hat | A free knitting pattern from Alaska Knit NatZissou Hat | A free knitting pattern from Alaska Knit Nat

Rainbow Pippi Hat — A Free Pattern

I love me a good ear flap hat. It’s the first real knitting pattern I learned to follow. I reckon I’ve made more than 100 ear flap hats over the years. The pattern is timeless and practical for Alaska winters.

I’ve posted my ear flap hat pattern before, but I thought with knitting season underway that I’d bring it back with one of my favorite color patterns: random stripes. I used to call these junk or leftover hats because I use bits and pieces of yarn from my stash, but after I finished this hat last weekend it made me think of my literary friend Pippi Longstocking. I feel as though Villa Villa Coola probably gets nippy in the wintertime and that if Pippi were taking time away from the South Seas to visit back home with her pals Tommy and Annika, she would wear a rag-tag hat like this one. The braided cords with long tassels also remind me of Pippi’s kooky pigtails.

Feel free to get creative with your stripes, but keep in mind the yarns should all have a similar weight. If you look carefully you can see the green-blue stripe in the middle of the hat is a lighter weight than the rest and it’s slightly inconsistent. But I like it that way. If you don’t have enough bulky yarn, knit two strands of worsted at the same time. Just divide your color into two balls and knit them as though they were one piece of bulky.

Rainbow Pippi Hat | free ear flap hat pattern from Alaska Knit Nat

Rainbow Pippi Ear Flap Hat

If you’re wanting to knit this pattern with a different needle size and different weight yarn, I am unable to adjust the pattern for you. This pattern is written for a specific needle size and yarn weight.

Sizes XS, S, M, L — I knit size small for a female’s head and size medium for an average male’s head. The BOLD text is the pattern I used for the Rainbow Pippi Hat.

Ingredients:
Size US 10 circular and double point needles
Several colors of leftover yarn, either bulky or two strands of worsted knitted together
Tapestry Needle
Pom pom maker (optional)

Abbreviations:

kfb = knit one stitch, then without dropping the working stitch, knit in the back of the stitch, thus increasing your stitch by one.

k2,p2 = knit 2, purl 2

k2tog = knit two stitches together

Ear flap (make 2):
With two double point needles cast on 4 stitches.

Row 1 (right side): Kfb, k2, kfb (6 st.)

Row 2 (wrong side): purl

Continue to kfb in the first and last stitch of every right side row and purl the wrong side. This will create the triangle shape. Keep going until there are 16 stitches for the XS, 18-S, 20-M, or 22-L. Set this flap aside and repeat with second flap.


Hat: Start the hat using the same color as the ear flaps. With the circular needle, cast on 12-XS, 14-S, 16-M, or 18-L stitches for the back of hat; knit across stitches of the first ear flap making sure the right side is facing you. Cast on 20-22-24-or 26 stitches for the front; knit across second ear flap. There will be 64-72-80-or 88 stitches in all. Join stitches carefully without twisting. K2, p2 on the front and back part of the hat (regular knit the ear flaps) for four to six rounds. This will make the nice ribbing and will prevent the hat from curling up.

Cut yarn, leaving a six-inch tail. Bring in a new color and knit 2 or 3 rounds, depending on your preference. Cut yarn, leaving a six-inch tail.

Continue knitting and changing stripes until the hat is about 5.5 inches tall. I usually go with 31 rows from the edge of the hat. Bring in the original color you used for the earflaps and brim and knit one row.
Start decreasing as follows:
Round 1: K2tog knit 6. Repeat for one round.
Round 2 (and all even rounds): Knit
Round 3: K2tog, K 5 for one round
Round 5:K2tog, K 4 for one round (this is where you should probably switch to the double points).
Round 7: K2tog, K 3 
Round 9:K2tog, K 2
Round 11:K2tog, K 1
Round 13: K2tog

Gather remaining stitches with a darning needle and fasten off. Weave in all tails. The inside of your hat should look pretty cool, with all sorts of colorful ends. Tighten all the knots you made and then double tie them. Don’t pull too tightly as you want the stitches on the outside to look uniform. Just play with the tension of the knots before double knotting. I then knot the yarn ends vertically to one anther, if that makes sense, and trim them. 


Rainbow Pippi Hat | free ear flap hat pattern from Alaska Knit Nat

Braided ties:

Using all the colors from your stripes, cut 6 strands of yarn, about 24-inches long. Fold them in half and push the folded edge through the bottom of the ear flap from back to front. Draw the ends of the strands back through the loop and tighten the loop.  Divide the strands into three groups and braid them till they are about 8 inches long. Tie a knot at the end of the braid and leave two inches as fringe. Don’t cut the ends of the fringe until you’ve put in both ties. That way you can cut them evenly.

For the giant pom pom:

Use all your color strands together to create the pom pom. I love my pom pom maker, but you can also use the giant fork method. Once your pom pom is trimmed and pretty, secure it to the top of the hat using yarn and a darning needle. I like to go through the pom pom a few times to really get it to stay on the hat. Rainbow Pippi Hat | free ear flap hat pattern from Alaska Knit Nat
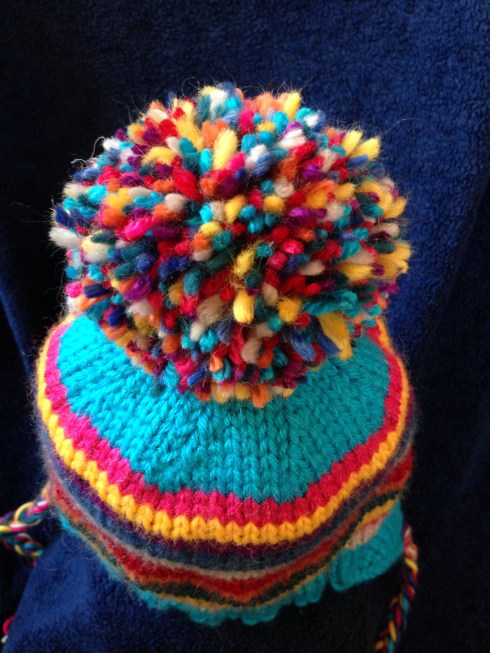
Rainbow Pippi Hat | A free ear flap hat pattern from Alaska Knit Nat

Brioche Turban — A Free Pattern

I’ve been all about the brioche stitch lately. Ever since I found a left-handed video tutorial on HandsOccupied.com, I’ve been hooked! It’s really a simple stitch, involving yarn overs and slipped stitches and best of all (no offense to my good friend Annie) it involves absolutely no purling!

In just a week I’ve made two scrumptious, fluffy cowls and I felt ready to experiment with the stitch.

I put together this simple turban headband in just a day’s worth of mindless knitting. It went together quickly and with minimal effort.

I highly recommend checking out this gal’s tutorial, as it makes more sense to see this easy stitch in action than it is to read it.

Brioche Turban | Free Knitting Pattern from Alaska Knit Nat

Brioche Stitch Turban

Materials:

1 skein of worsted weight yarn (I used Red Heart Boutique Treasure in the Watercolors colorway)

Size US 10 straight needles

Darning needle

safety pins (optional)

Brioche Turban | Free Knitting Pattern from Alaska Knit Nat

Brioche stitch:

Cast on 10 stitches.

Foundation row: YO before you even start knitting (this is the strange part where it’s easier to understand visually), slip the first stitch purlwise, k1. Repeat YO, sl 1 pw, k1 till the end of the row.

Row 2: *YO, sl 1 pw, knit the 2 criss-cross stitches together. Repeat * to end of row.

Repeat row 2 till work measures about 40 inches, or a few inches less than twice the circumference of your head. It helps to “try on” the turban as you’re knitting it as your yarn’s stretchiness may be different from mine (see assembly instructions below).

Bind off all stitches. Cut yarn leaving an 18-inch tail.

Assembly:

Here’s a rough demonstration of how to assemble the turban using a sash since I’d already constructed mine by the time I wrote this post.

Brioche Turban | Free Knitting Pattern from Alaska Knit Nat

Start with the middle of the strip at the nape of your neck and wrap the ends toward the top of your head. Twist the ends of the strip around twice and bring them back down toward the nape of your neck. Pin ends together.

Carefully remove the turban and pin together the long edges where they meet from the center loop toward the back of the headband. Using the 18-inch tail of yarn, thread a darning needle and sew together the short ends that you first pinned. Starting at the center back toward the front knot, sew together the long ends from underneath, running the needle through the wrong side stitches.

Brioche Turban | Free Knitting Pattern from Alaska Knit Nat

You can be as messy as you like because you won’t be able to see these stitches. Stitch together the long sides until you’re two inches away from the center knot. Tie off the yarn and weave in the end. Take a new 18-inch piece of yarn and sew on the other side of the turban in the same way, from the back seam toward the center knot. Here’s a crummy drawing of where the stitches should go:

Brioche Turban | Free Knitting Pattern from Alaska Knit Nat

Remove all the pins, place on your head and admire how awesome you are for making a functional piece of clothing.

Brioche Turban | Free Knitting Pattern from Alaska Knit Nat

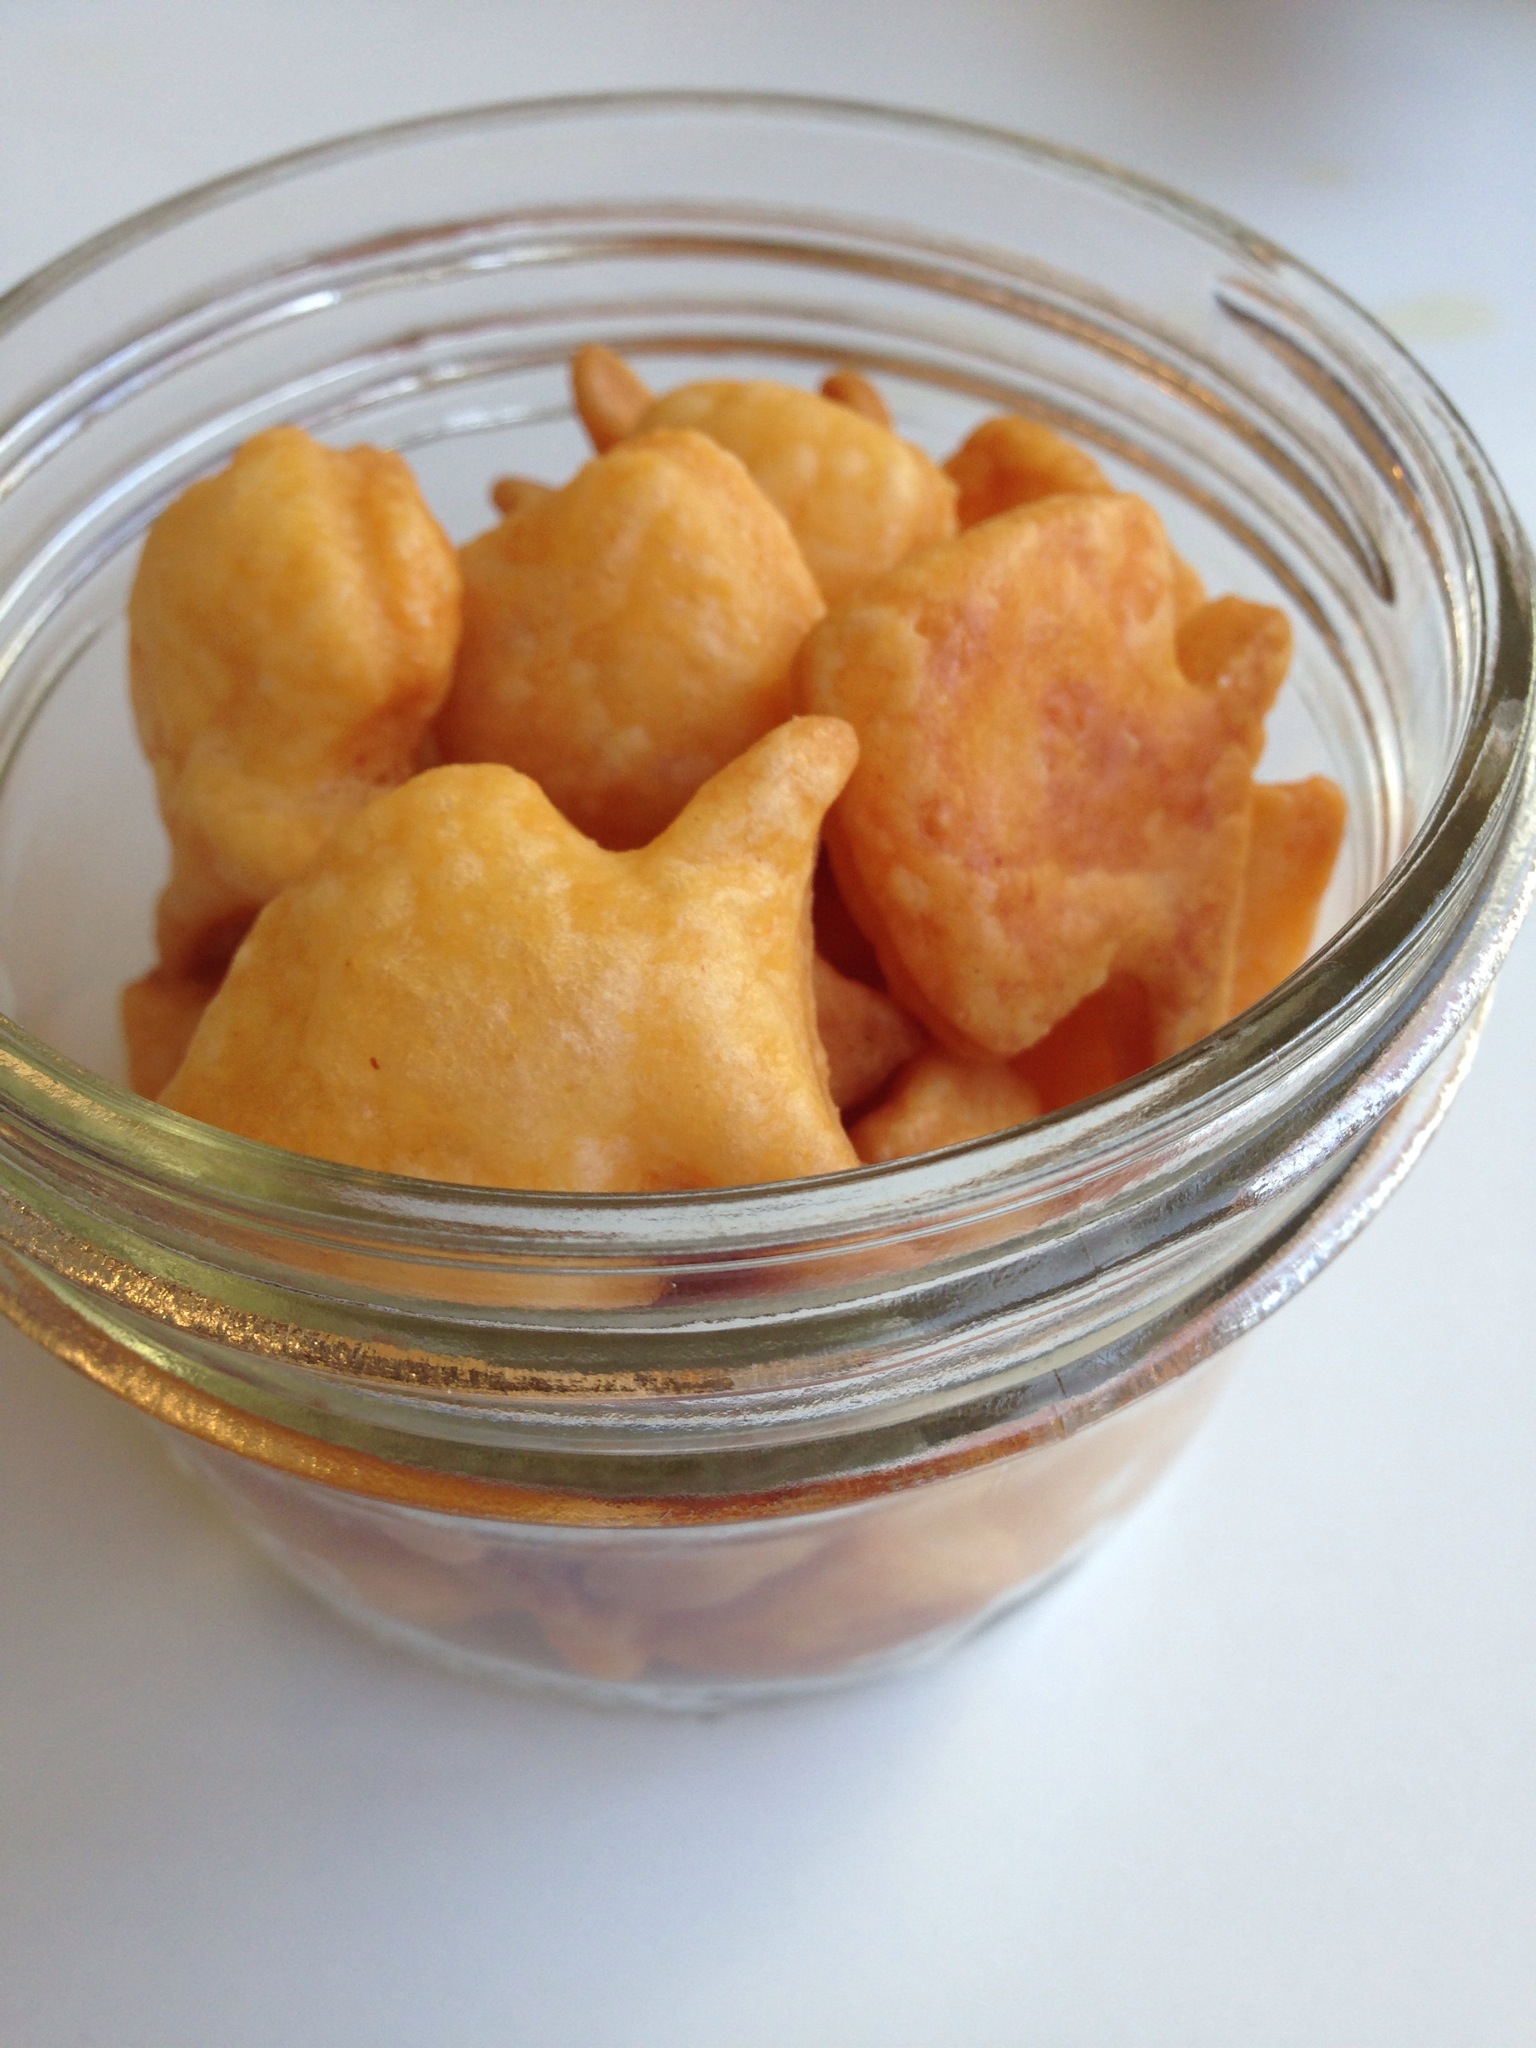
Homemade goldfish crackers

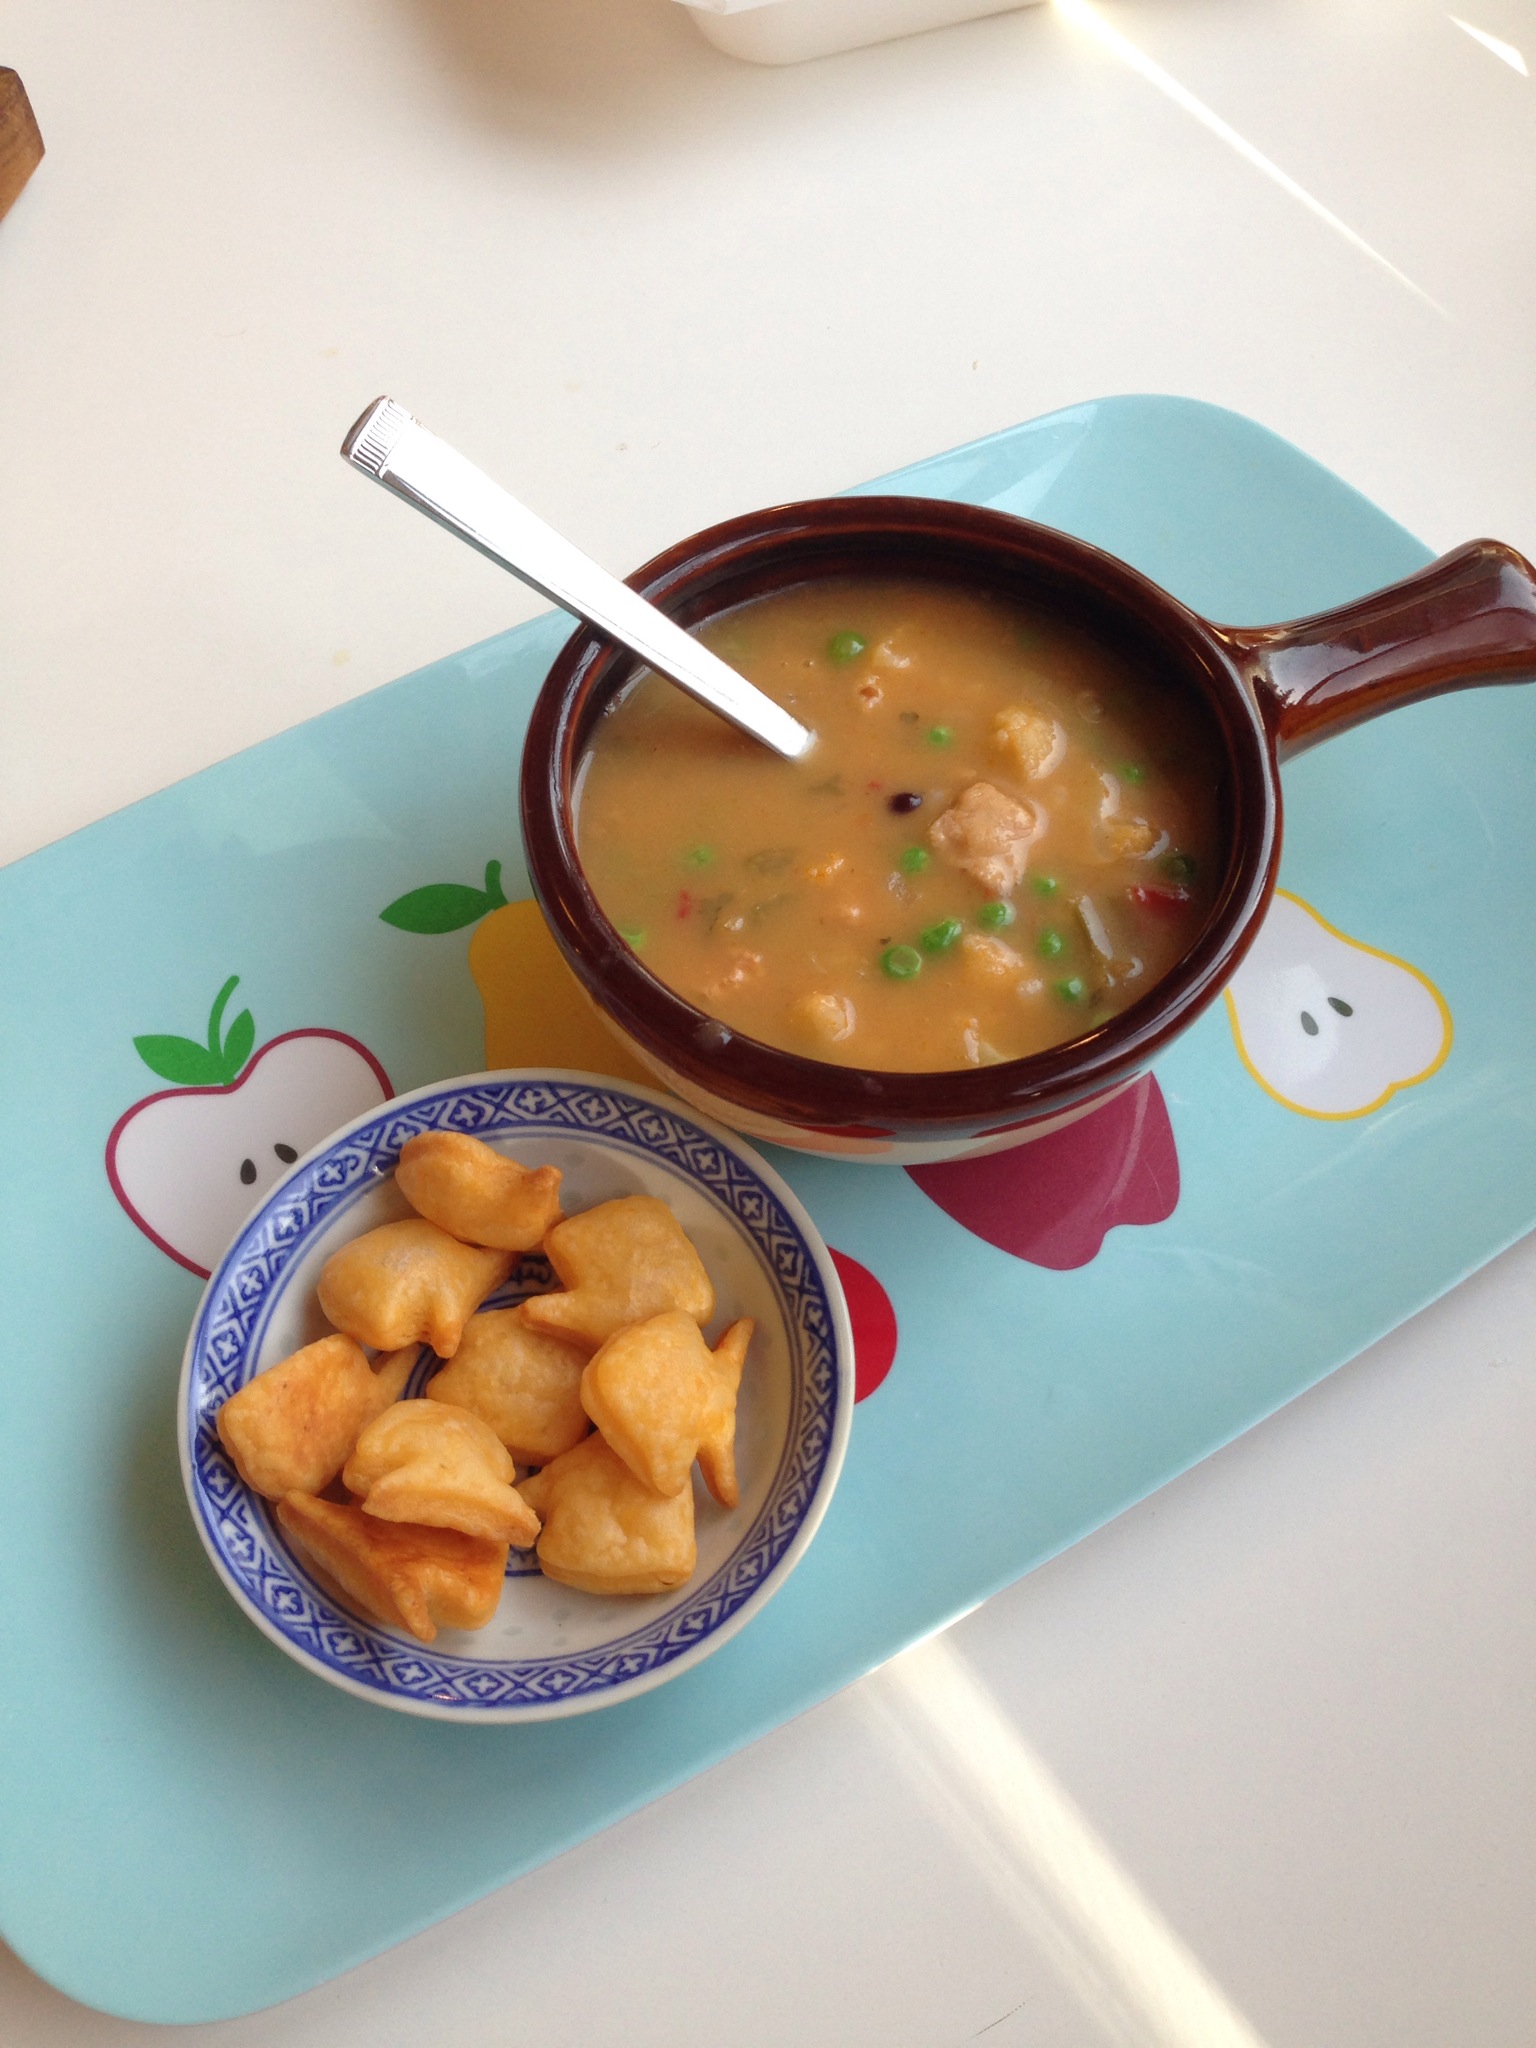
Homemade crackers are surprisingly easy. When I saw this recipe from Sheknows.com I just had to try it. I added a pinch of smoked paprika, which made for a deeper flavor. I happened to have a goldfish cookie cutter, so I wanted to see how homemade goldfish crackers would live up to store bought.

What came out of the oven was flakey, crunchy and downright cheesy.

Homemade goldfish crackers | recipe from Alaska Knit Nat

Homemade Goldfish Crackers

Adapted from a recipe by Sarah Crowder

Ingredients:

1/2 cup all-purpose flour

4 oz. cheddar cheese or mixture of cheddar and parmesan, grated on a micro plane or rasper

1/8th tsp smoked paprika

2 Tbs. butter, chilled and cut into small cubes

1/4 tsp. salt

2 Tbs. or so cold water

Homemade goldfish crackers | recipe from Alaska Knit Nat

Directions:

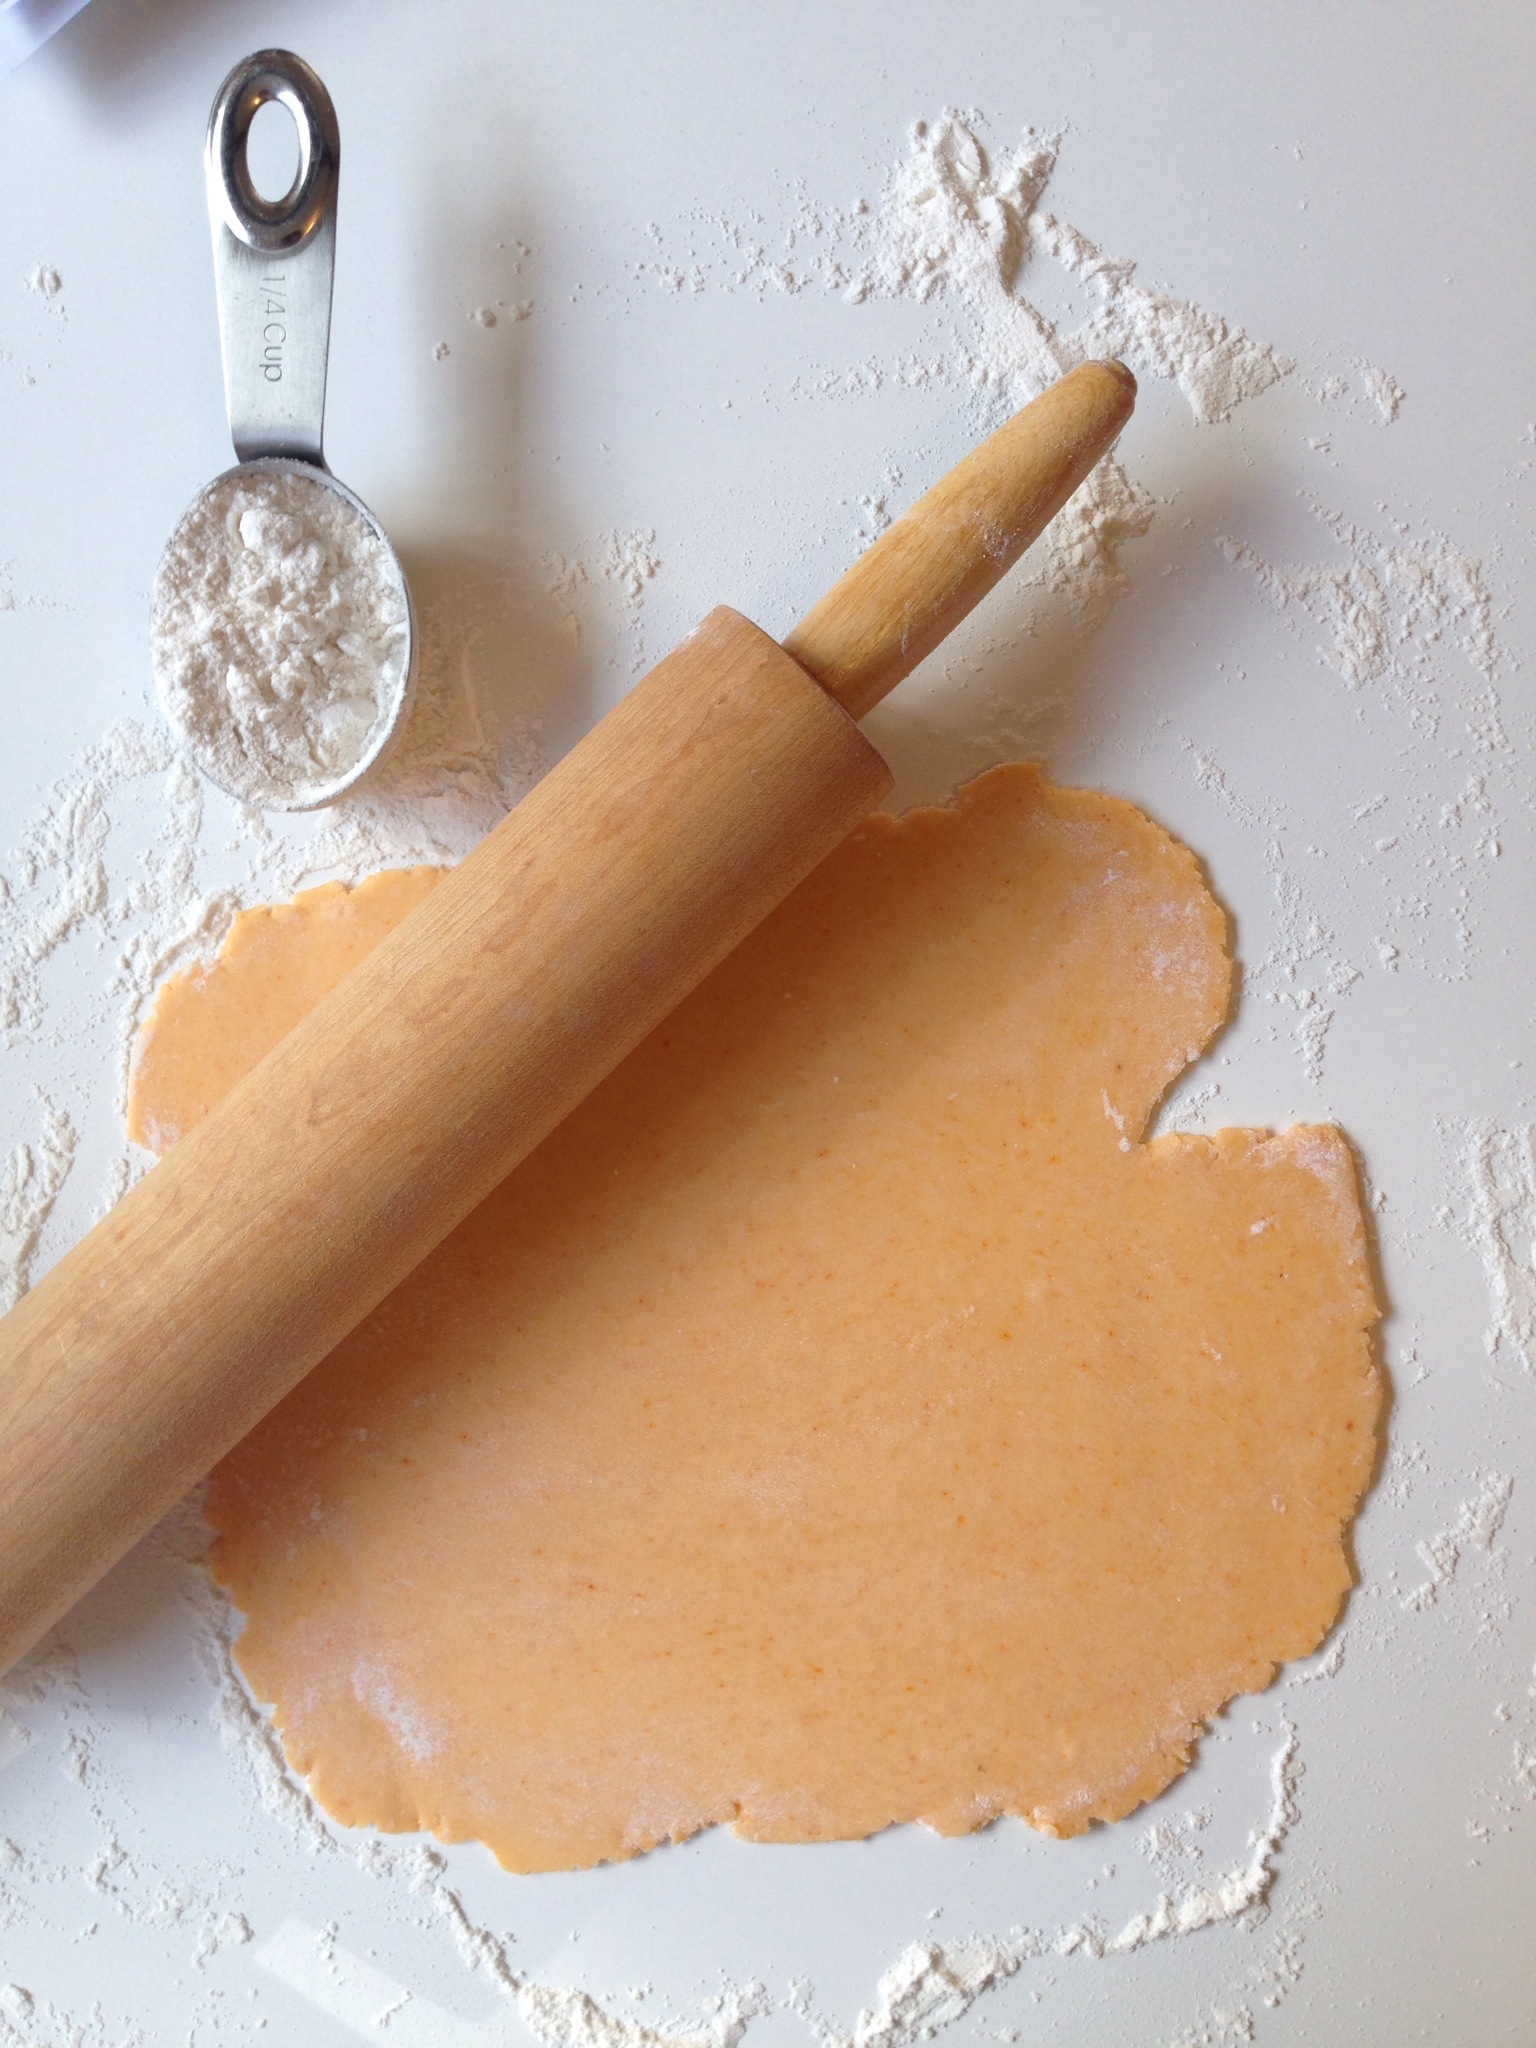
Add the flour, salt and paprika to a food processor and pulse till combined. Add the cheese and butter and pulse till just combined (it will look like crumbly flour). Turn on the processor and slowly add the water. Let the machine turn the dough into a ball. It should take less than a minute. If it doesn’t turn into a ball add a tiny bit more water. Remove ball, wrap in plastic wrap and refrigerate for 30 minutes.

Homemade goldfish crackers | recipe from Alaska Knit Nat

Preheat oven to 350 degrees. Roll out the dough on a lightly floured surface till it’s pretty thin. Either cut into Cheez-it like squares, or use a decorative cookie cutter. Place on two parchment-lined cookie sheets, with a little space between each cracker. Bake about 15 minutes, till slightly puffy and beginning to brown.

Homemade goldfish crackers | recipe from Alaska Knit Nat

Homemade goldfish crackers | recipe from Alaska Knit Nat

Let cool completely and store in an airtight container.

Homemade goldfish crackers | recipe from Alaska Knit Nat

Free knitting patterns, DIY crafts, easy recipes and more!