Tag Archives: pom pom

I’ll have a glue, glue Christmas — #10: Pompom ornaments

I recently assessed my yarn stash and quickly came to the conclusion that I have way too much. I’m running out of time to knit and crochet presents for my loved ones and I need to taper down my yarn inventory. Enter the pompom. This perky accessory harkens to my younger years when my clothes were adorned with rick rack and I coveted Tinkerbell peel-off nail polish. 

Pompoms are making a comeback in a big way. Plus, they eat through yarn stashes quickly. This was a great way to decorate my tree and it requires barely any skills. I highly recommend using fabric scissors for this project; otherwise you might find yourself getting callouses in the crotch of your thumbs.

You’ll love the trick to making these ornaments. Look no further than your kitchen utensil drawer.

Pompom ornaments | #10 on Alaska Knit Nat's DIY Holiday Craft Guide

Pompom ornaments — No. 10 in Alaska Knit Nat’s DIY Holiday Craft Guide

What you’ll need:

  • Yarn
  • Large serving fork
  • Sharp scissors

Directions:

Cut a piece of yarn about 16 inches long and fold it in half. Run it in between the middle prong of the fork and hold it securely against the handle. Take up to four strands of yarn at a time and loosely start wrapping around the fork. Do this till you’ve got a whole lotta yarn on there. The more strands you use at a time the faster this will go. Cut the yarn when you think it’s enough. This may take some tinkering.

IMG_1973

Use the yarn you originally placed between the prongs to tie around all the wrapped yarn. Another person’s finger comes in handy, but it’s possible to do this alone. Tie a double knot and slip your uncut pompom off the fork.

Pompom ornaments | #10 on Alaska Knit Nat's DIY Holiday Craft Guide

Pompom ornaments | #10 on Alaska Knit Nat's DIY Holiday Craft Guide

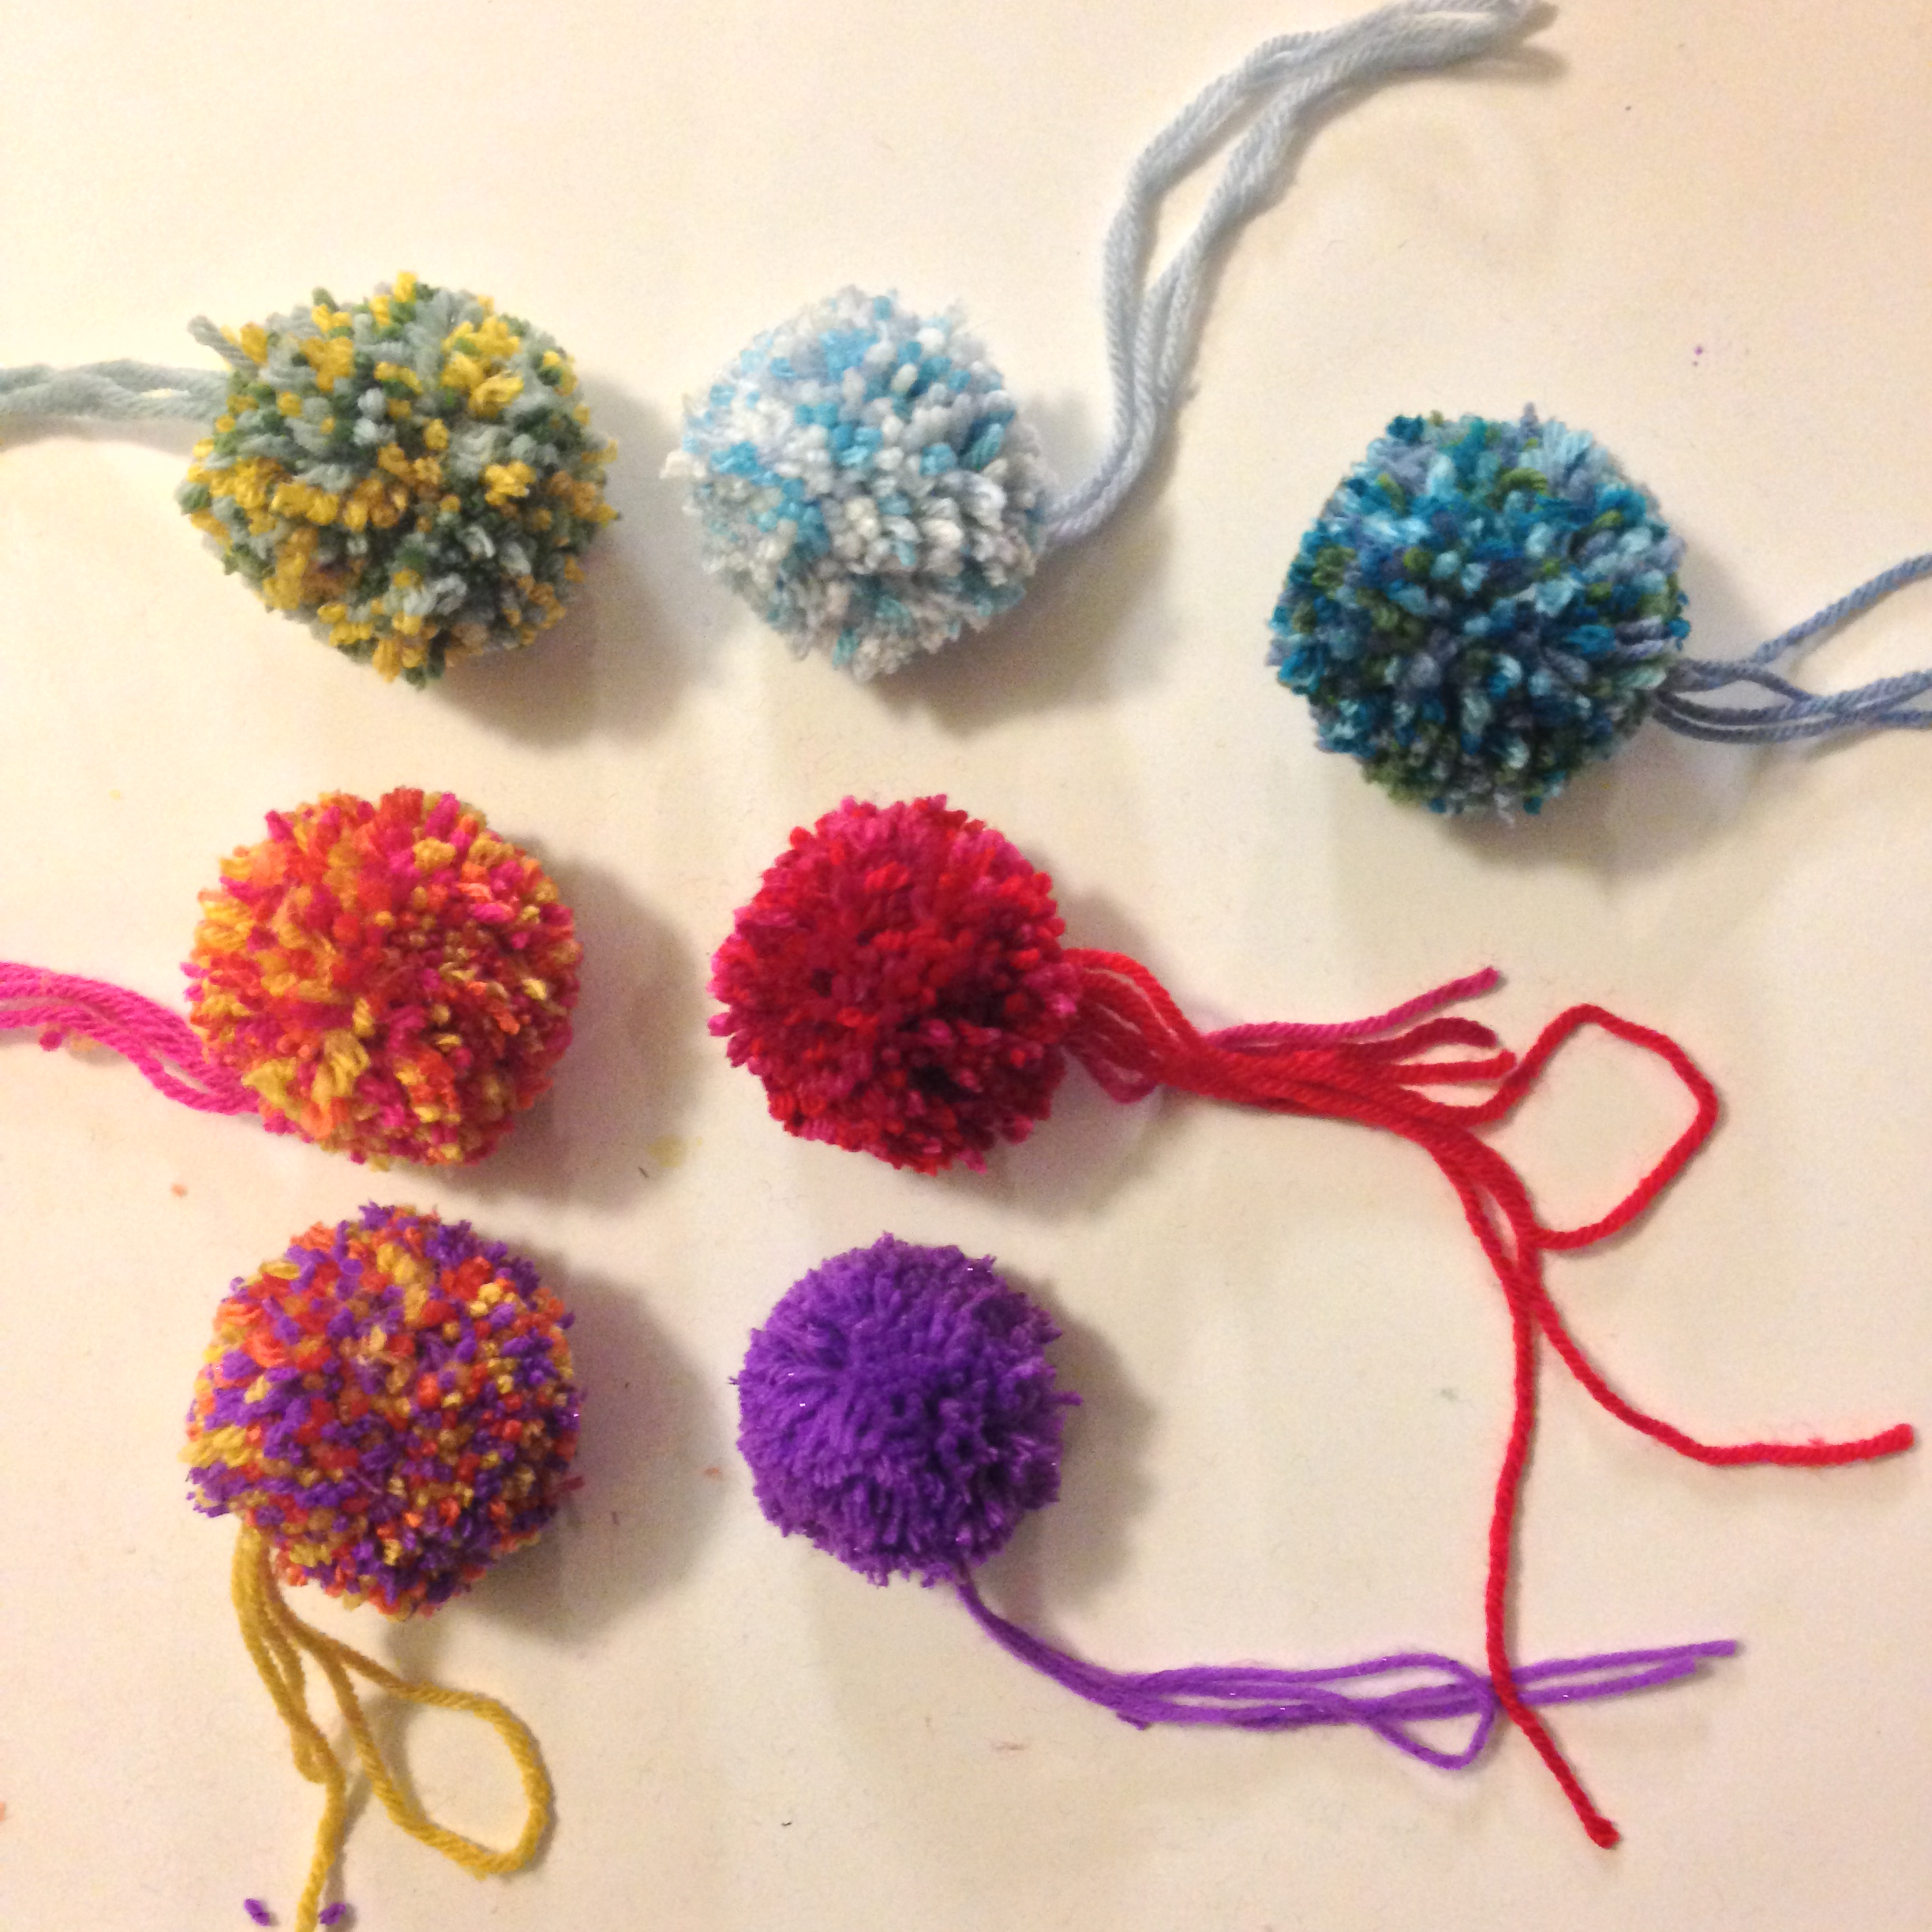
Cut apart all of the loops, being sure not to cut the original strand of yarn as this will be what you’ll hang the ornament from.

Pompom ornaments | #10 on Alaska Knit Nat's DIY Holiday Craft Guide

Trim your pompom as you deem fit. Repeat till you’ve run out of yarn or have worked up an appetite for some microwave nachos.

Slouchy Pom Pom Hat – A Free Knitting Pattern

Being a lifelong craftaholic I’m no stranger to the pom pom. Memories of yarn-covered tin can pencil holders and ricrack come to mind.

But lo and behold, again my childhood craft projects are becoming popular again (remember friendship bracelets?) Yes, the pom pom is this season’s biggest accessory trend. So I’ve decided to stay on board the pom pom train and offer up a delicious, fluffy, slouchy hat pattern. It’s got extended ribbing in case you want to fold it up for a thicker brim.

Slouchy Pom Pom Hat | A free pattern from Alaska Knit Nat

Slouchy Pompom Hat

What you’ll need:

1 skein each Loops & Threads Wool to Wash in pink and grey or any worsted weight yarn

size US 9 circular and double pointed needles

darning needle

pom pom maker or large serving fork

stitch marker

Continue reading Slouchy Pom Pom Hat – A Free Knitting Pattern

Baby Candy Cane Stocking Cap — Free Pattern

My photographer friend commissioned me to make a cute stocking cap for her holiday baby photo shoots.

I’ve never made anything so tall and pointy, but I think the effect is perfect. Could a baby look more like an adorable naked Christmas elf?

Photo by Laura Stennett Photography

This pattern is for a 3-6 month head. It’s also a great introduction to knitting stripes.

Ho ho hope you enjoy it!


Baby Candy Cane Stocking Cap

Materials:

One skein of red worsted weight yarn

One skein of cream worsted weight yarn (I used Red Heart soft)

Size 9 circular needles

Set of 9 double-point needles

darning needle

pom pom maker or large fork


Abbreviation: K2tog = knit two stitches together


Directions:

With the red yarn cast on 64 stitches on your circular needle. Join with first stitch being careful not to twist the stitches. Begin ribbing in k1, p1 for six rounds.

Switch to white yarn and knit 2 rounds. There is no need to cut the red yarn as the rows are so narrow you can easily bring up the other yarn when you need it.

Continue knitting in stockinette stitch for 25 more rounds changing colors every 2 rounds. Transfer stitches to double pointed needles and begin decreasing as follows (while continuing to switch colors every 2 rounds):

*K2tog, k6, repeat * till end of round

knit 3 rounds

*K2tog, k5, repeat * till end of round

knit 4 rounds

*K2tog, k4, repeat * till end of round

knit 6 rounds

*K2tog, k3, repeat * till end of round

knit 15 rounds

*K2tog, k2, repeat * till end of round

knit 16 rounds

*K2tog, k1, repeat * till end of round

knit 5 rounds

*K2tog, repeat * till end of round

k 4 rounds. Cut yarn leaving a 12-inch tail. Using a darning needle, draw up remaining stitches and weave in all ends.


Make your pom pom and sew it to the top.


Happy Holidays from Alaska Knit Nat!


Ice Cream Sundae Hat — Free Pattern

During my bedtime Pinterest bingeing (I like to call it “pingeing”) I came across a lovely knitted hat from muitaihania.blogspot.dk/

I don’t know Finnish, but I’m pretty sure the blogger didn’t post a pattern for it. *Correction: after 30 seconds of browsing the site, I did find the pattern. Oh well!

So here’s my version. It’s called the Ice Cream Sundae Hat and it’s lovely. I made it up as I went along and the pattern is simple enough that I don’t think I need to provide a chart as long as you follow the instructions.

Materials:

3 colors of bulky yarn such as Lamb’s Pride Bulky, (Color A, Color B, and Color C)

Size 9 circular needles

Size 9 double-pointed needles

darning needle

pom-pom maker or giant fork

Abbreviations:

K = knit

P = purl

k2tog = Knit two stitches together

Special notes: You’ll be knitting a basic fair isle pattern, so carry the unworked yarn across the back of the stitches you’re working, being VERY CAREFUL not to pull the unworked yarn too tightly. Your hat will shrink significantly in diameter if you don’t pay attention to the unworked yarn. I intentionally made my pattern bigger than my normal hats to account for my habit of pulling too tightly.

On your circular needle, cast on 80 stitches with Color A. Place marker on needle. Knit into the first stitch, being careful the stitches aren’t twisted. K2, P2 for five rounds. Knit 3 rounds regularly.

Round 9: With Color A, Knit 3 stitches. *With Color B, knit 4 stitches. With Color A, knit 6 stitches.* Repeat ** till end of round (you’ll end by knitting 3 stitches with color A).

Round 10: With Color A, Knit 2 stitches. *With Color B, knit 6 stitches. With Color A, knit 4 stitches.* Repeat ** till end of round, ending with 2 stitches of Color A.

Round 11: With Color A, Knit 1 stitch. *With Color B, knit 8 stitches. With Color A, knit 2 stitches.* Repeat ** till end of round, ending with 1 stitch of Color A.

Rounds 12 & 13: With Color A, knit 1 stitch. *With Color B, knit 9 stitches. With Color A, knit 1 stitch.* Repeat ** till end of round. Cut Color A leaving a six-inch tail.

Knit 5 rounds with Color B.

Repeat rounds 9-13 with Colors B & C.

Knit 6 rounds with Color C.

Decrease as follows:

Round 1: Knit two together, knit 6. Repeat for one round.

Round 2 (and all even rounds): Knit

Round 3: K2tog, K 5 for one round

Round 5: K2tog, K 4 for one round (this is where you should probably switch to the double points).

Round 7: K2tog, K 3

Round 9: K2tog, K 2

Round 11: K2tog, K 1

Round 12: K2tog

Cut yarn leaving a 12-inch tail. Gather remaining stitches with a darning needle and fasten off. Weave in all tails.

For the pom pom:

I recommend a pom pom maker, which you can buy for about $6 at any big-box crafts store. Another super technique I found on Pinterest, where you use a serving fork. It’s pretty great if you’re feeling lazy.

Secure your pom pom to the hat using yarn and a darning needle. Run the yarn through the pom pom a couple of times and tie on the inside of the hat. I always try and leave a little length in case the pom pom loosens so I can easily refasten it.

Thanks again to Muita Ihania for the pretty design.

Please contact me if there are any errors in the pattern. I’ve already given the hat away so I wasn’t able to look at it as I was writing the pattern.