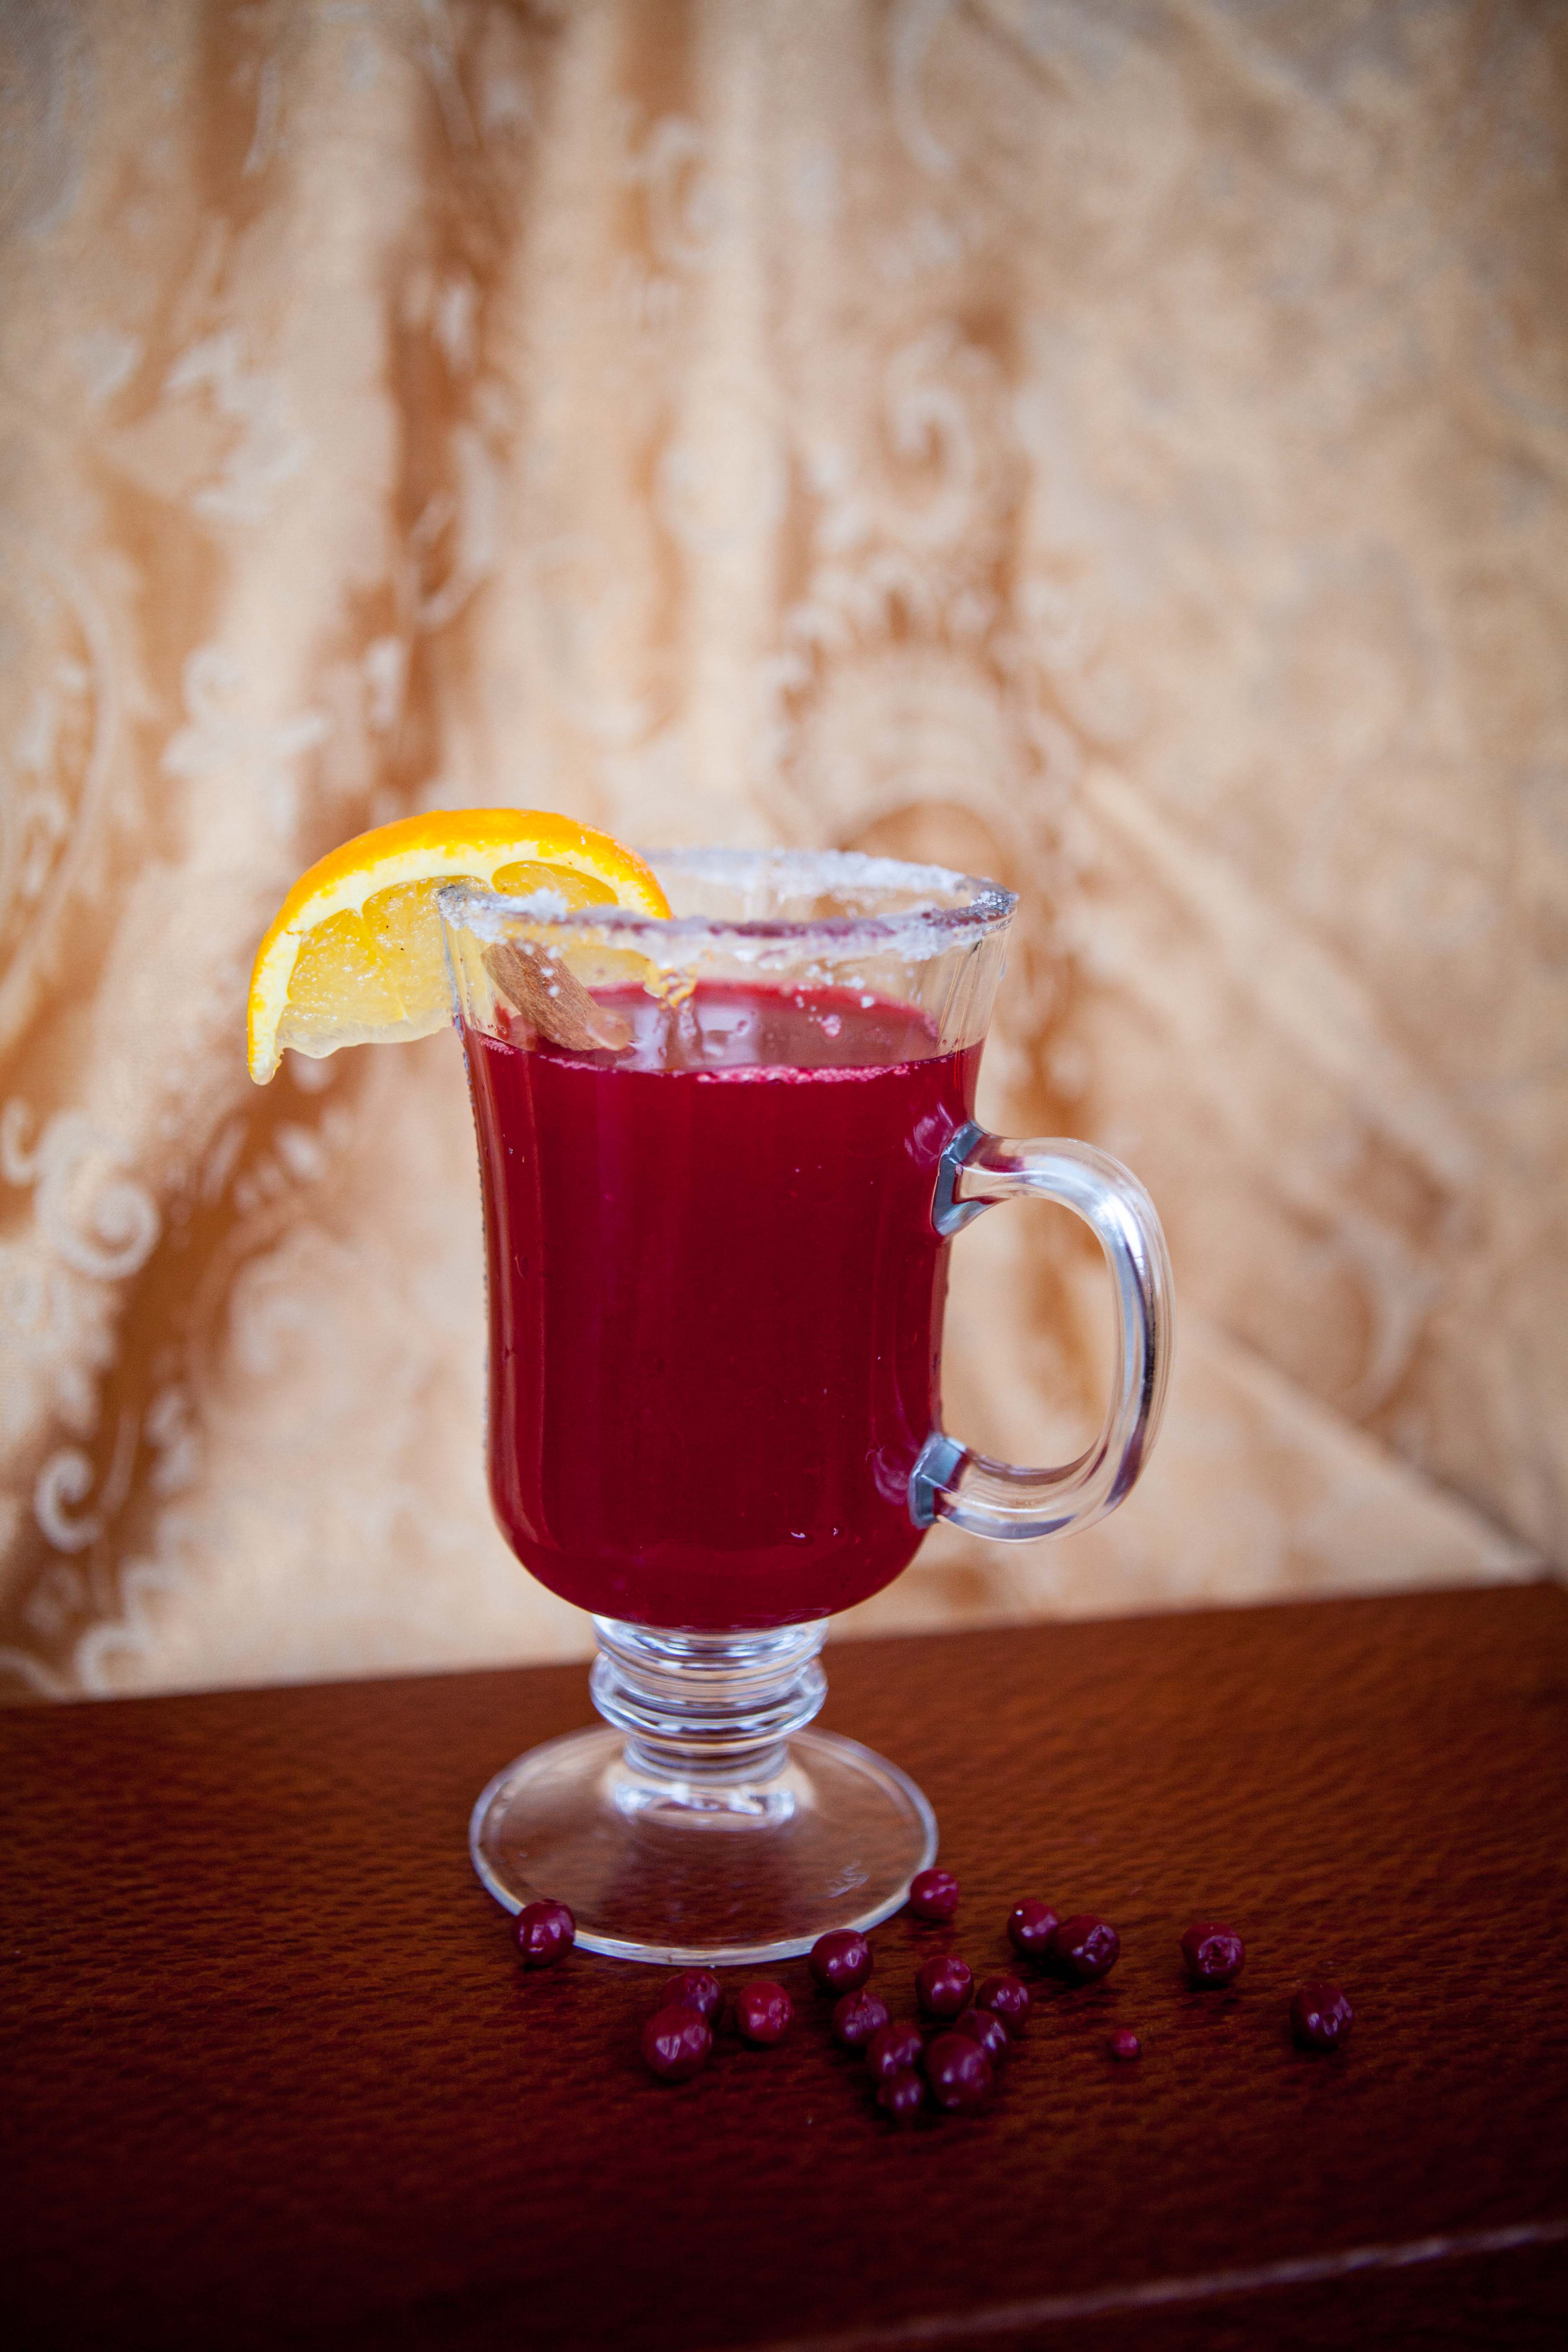
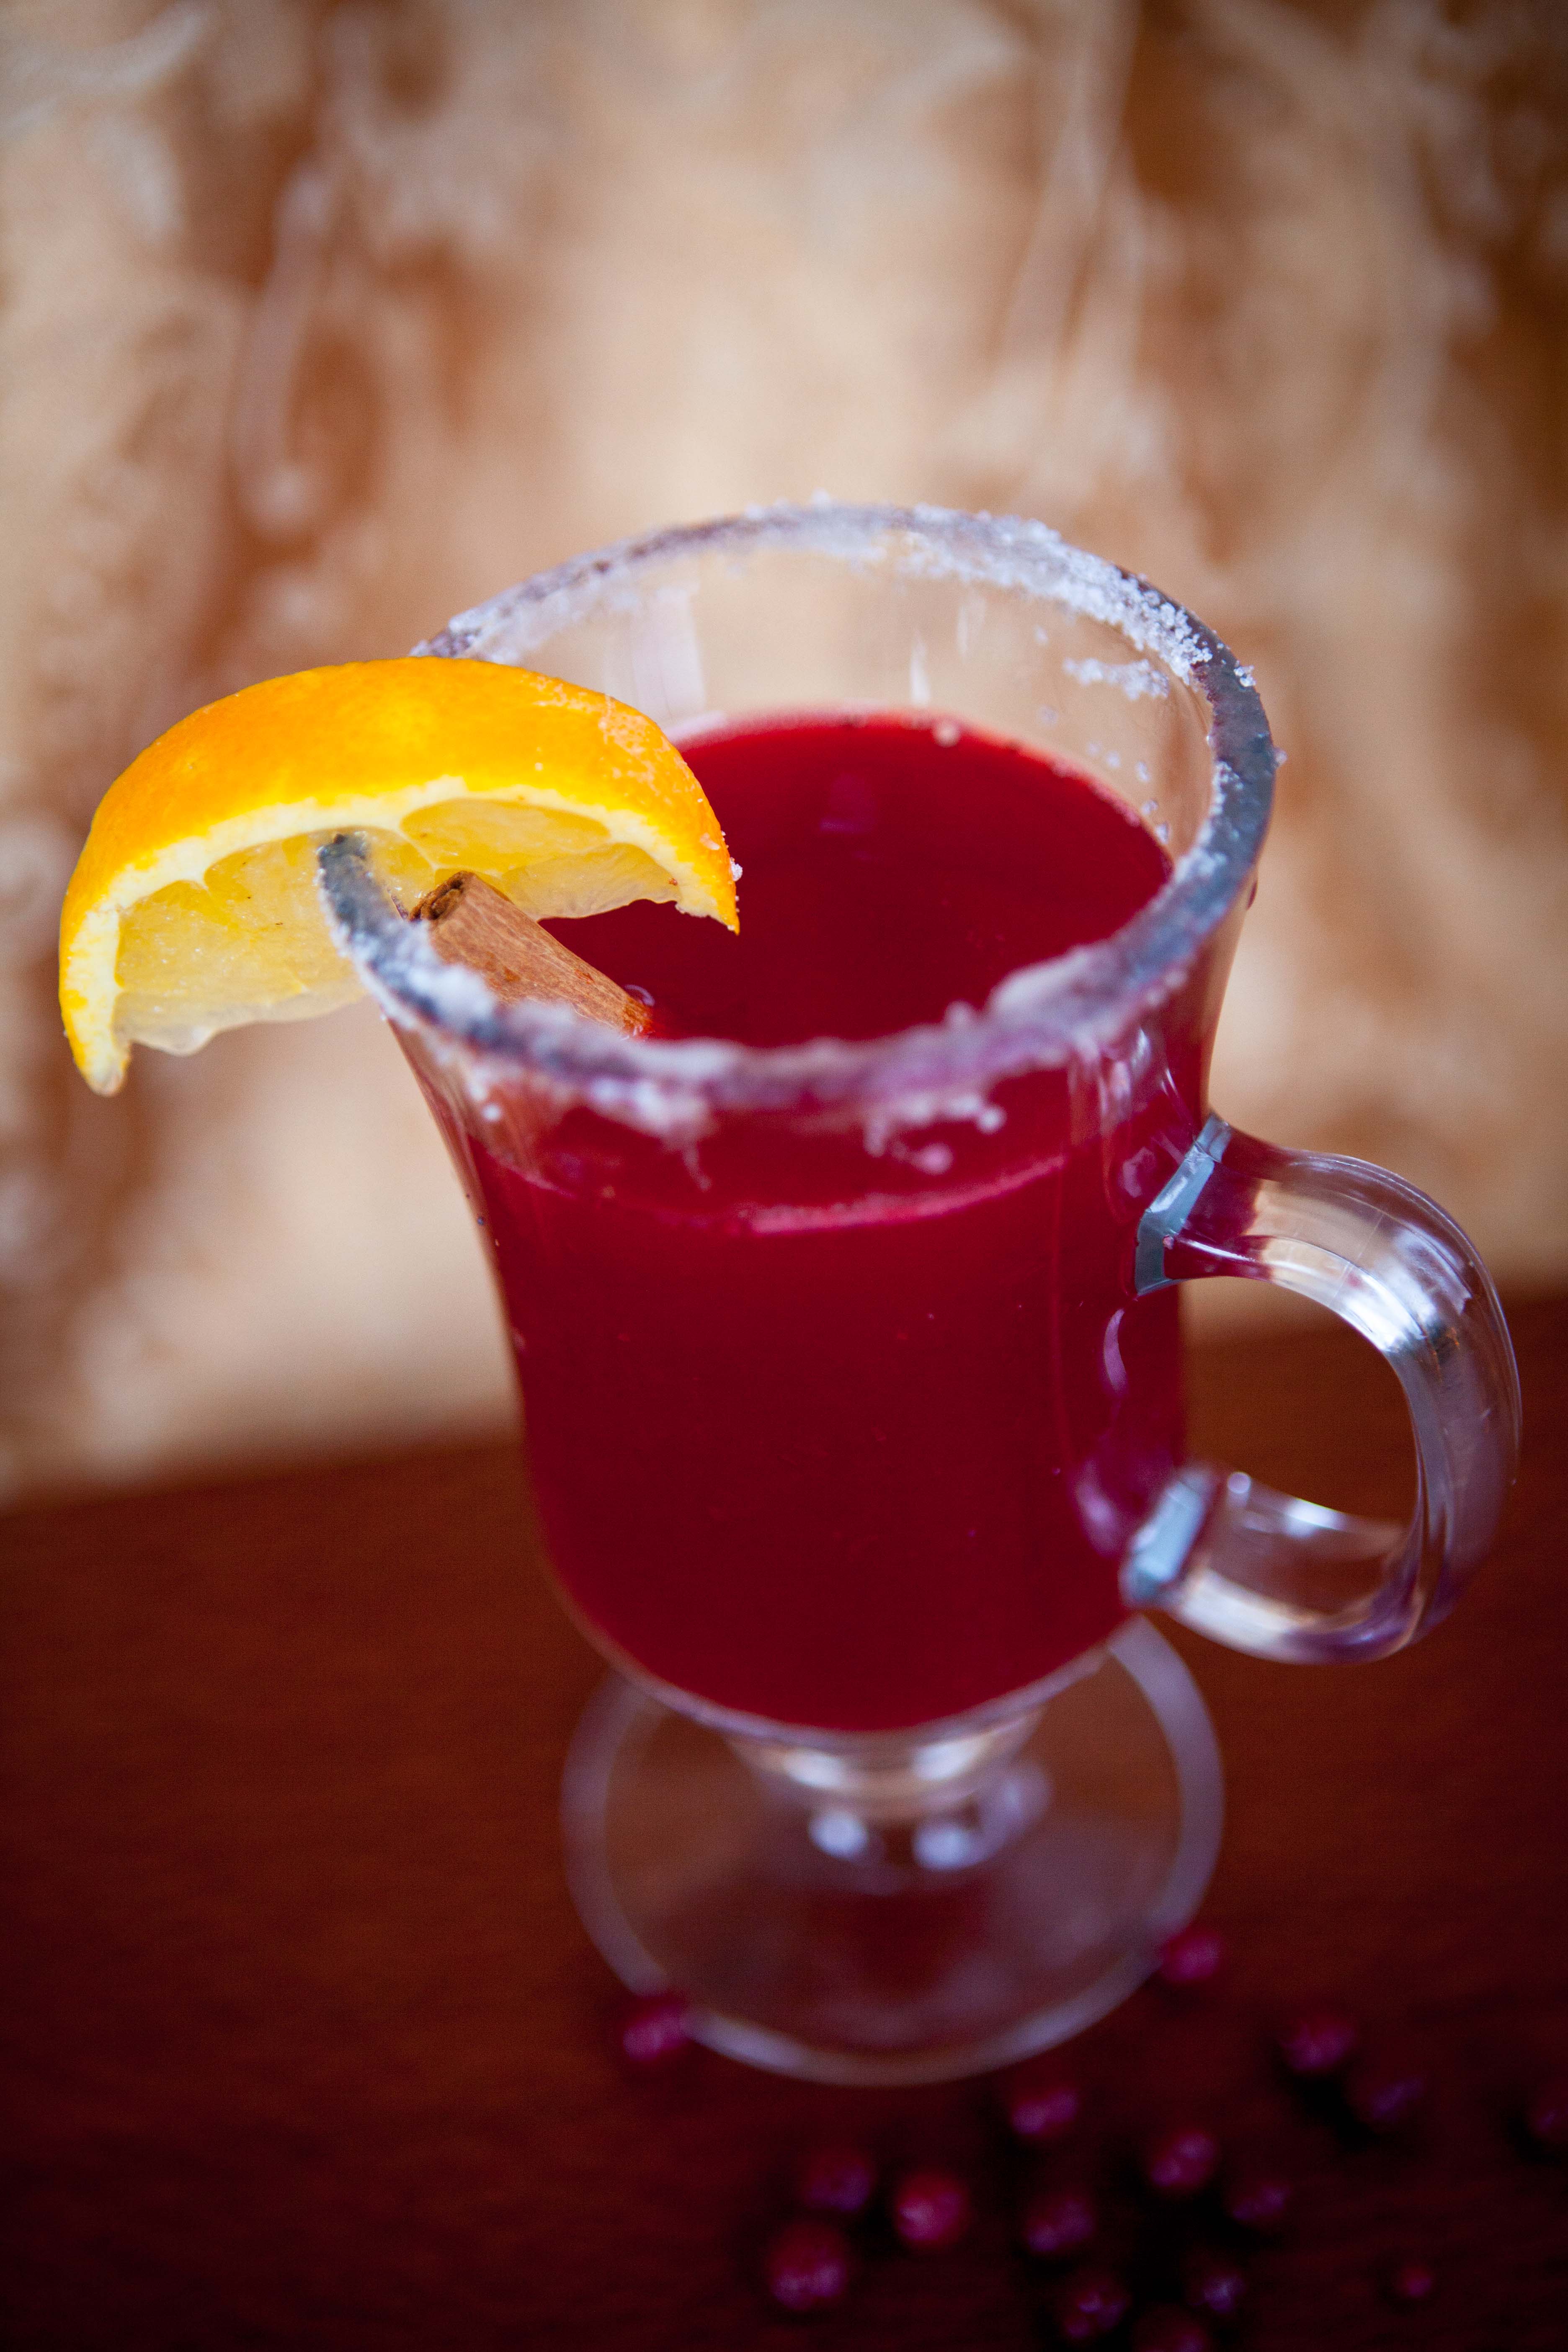
Every fall I look forward to picking lowbush cranberries. They are my favorite food to forage – easy to pick and they keep perfectly in the freezer until November when I use them to make Thanksgiving cranberry sauce.
I had some leftover cranberries this year and I saw a friend on Instagram share a video of her making cranberry tea. She was kind enough to share the recipe, which she got from a friend in Unalakleet, Alaska named Betty.
I used the last of my lowbush cranberries for this delicious tea, which I’m calling a punch because I added a wee kick of rye whiskey. You can use store bought cranberries or even high bush cranberries if you happened to have foraged those in the fall.
This might have to be a new holiday tradition in my household!
Holiday Cranberry Punch
Serves 4
Ingredients:
2 cups cranberries
1.5 quarts water
1 cinnamon stick
Juice of 1 lemon
1 cup orange juice
up to 1 cup sugar (to taste)
Rye whiskey (optional)
Directions:
In a saucepan, combine the cranberries, water and cinnamon stick. Heat to a boil, turn down heat and simmer until the berries are soft and have popped, about 10 minutes.
Strain through a fine mesh strainer into a pitcher. Discard pulp and cinnamon stick. Add the lemon juice and orange juice to the pitcher. Slowly stir in the sugar so it dissolves in the hot liquid, until it’s sweetened to your taste. Serve hot with 1.5 oz. of rye whiskey if desired.
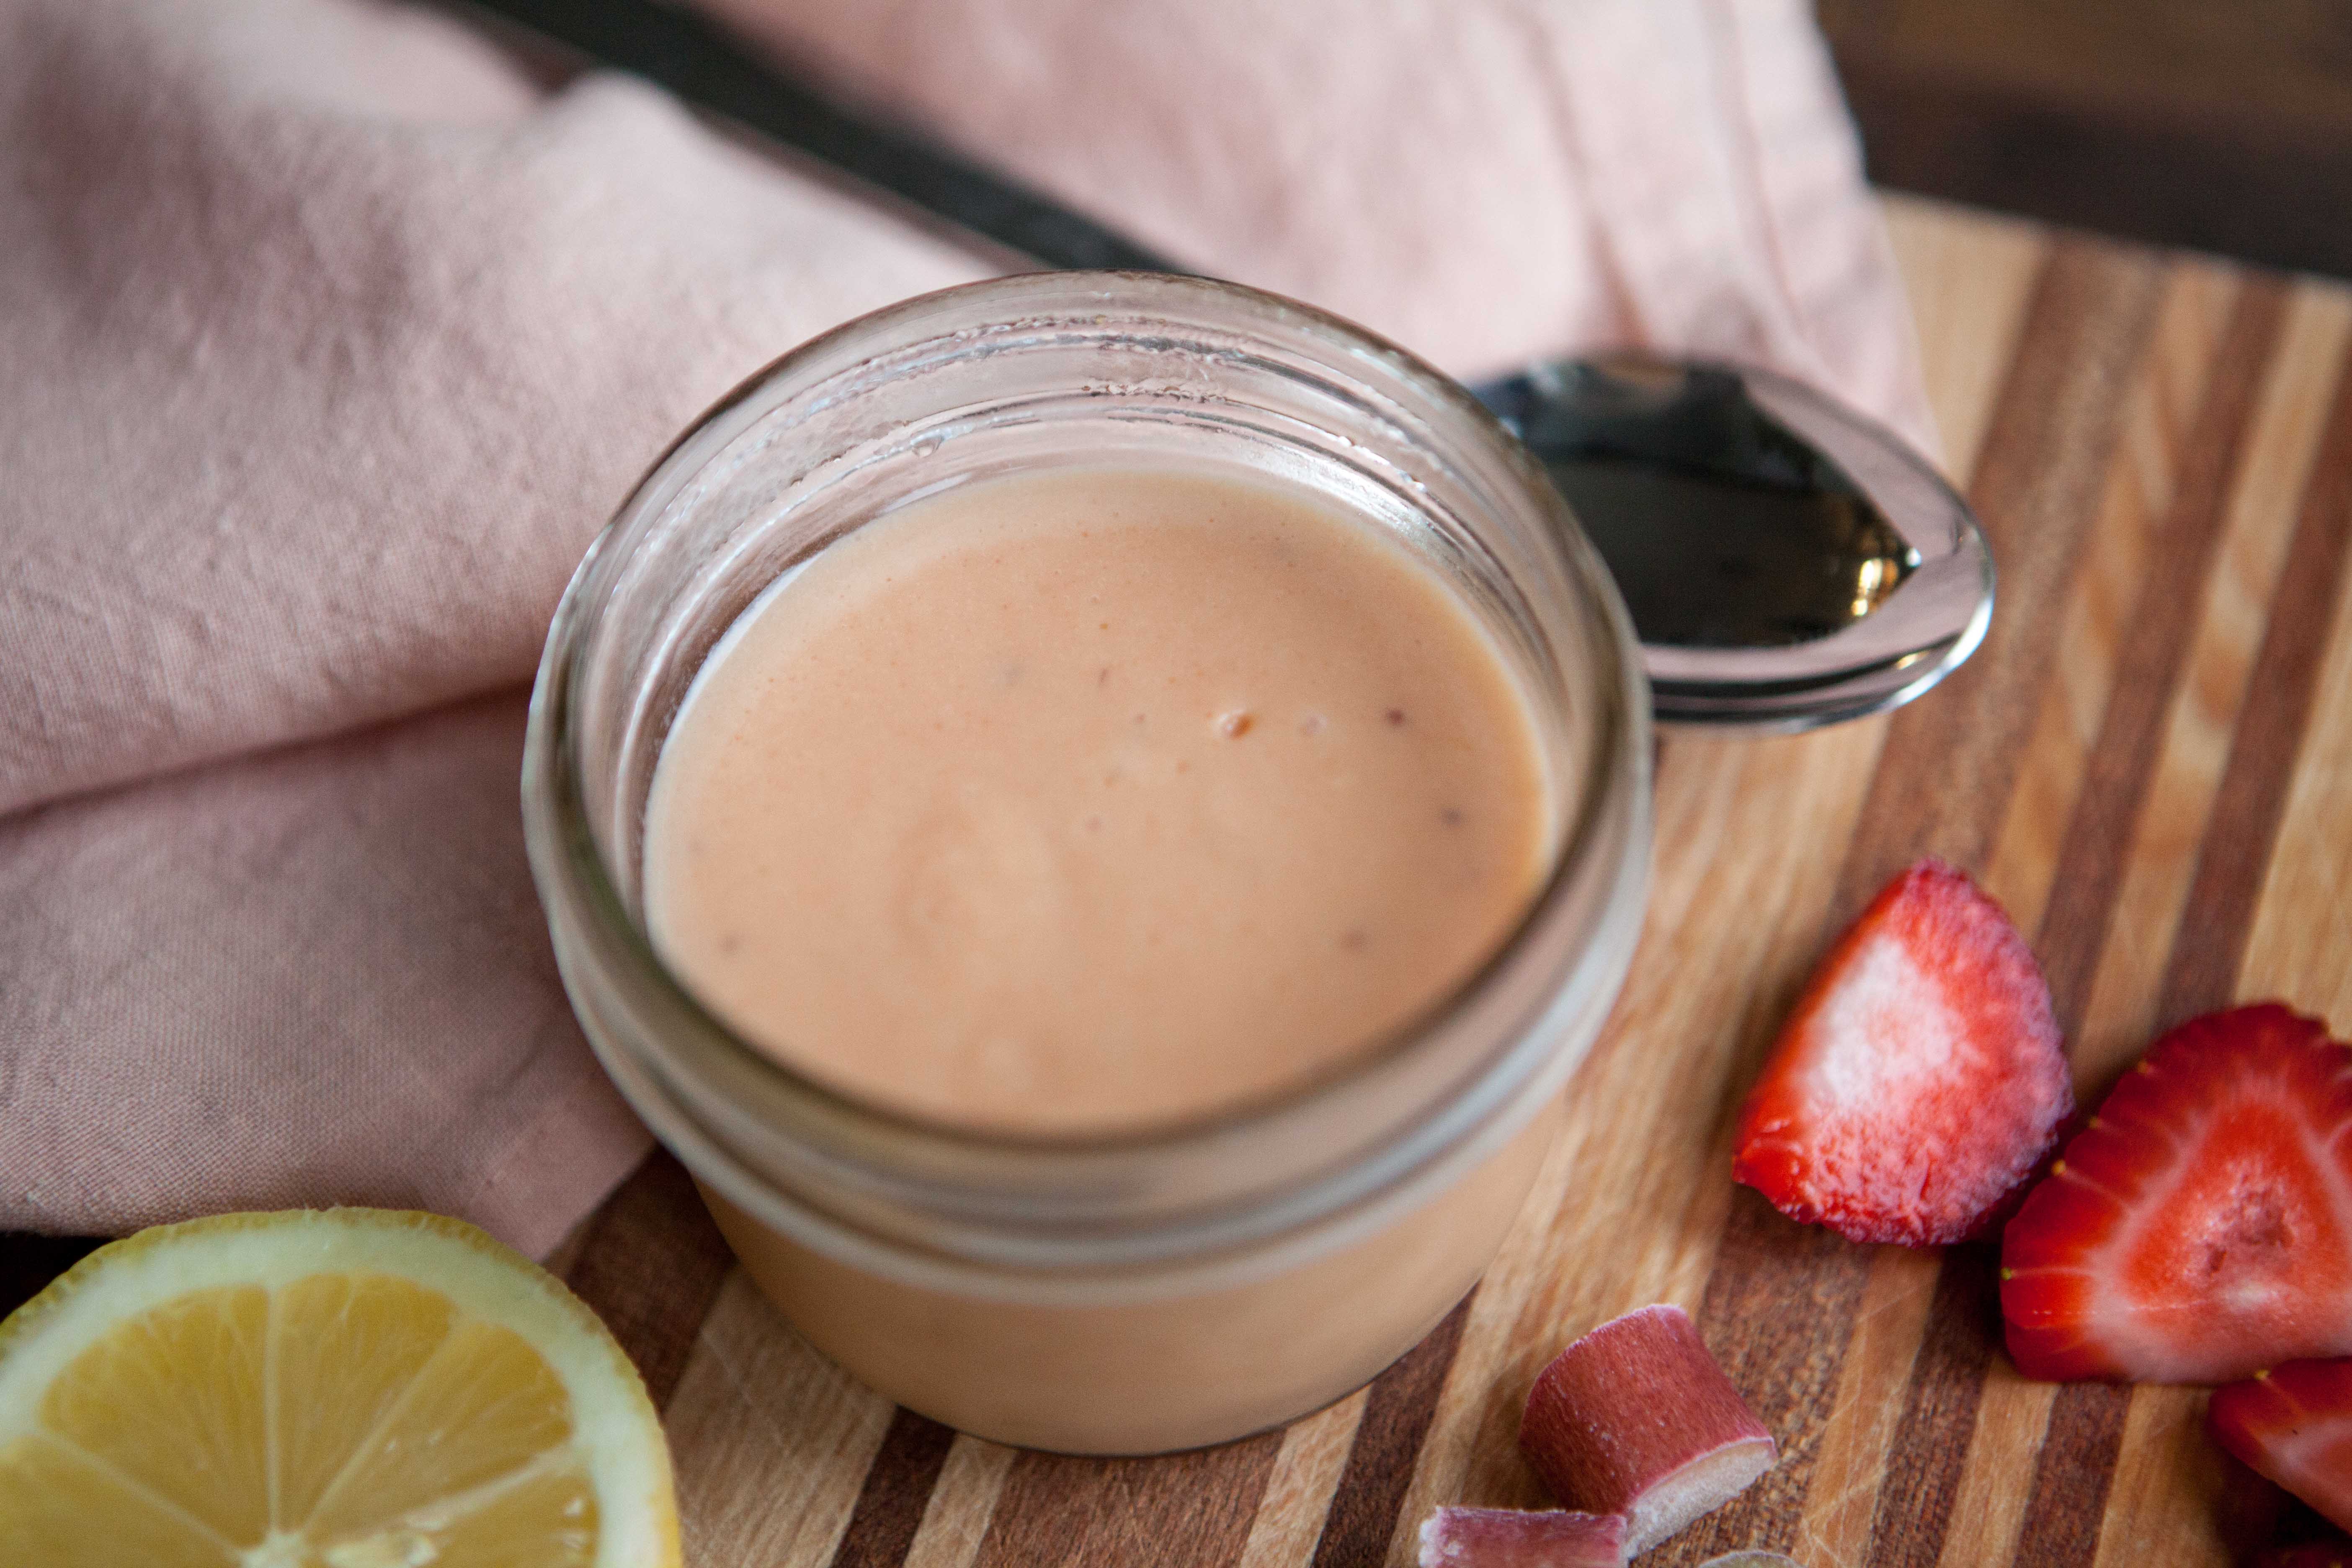
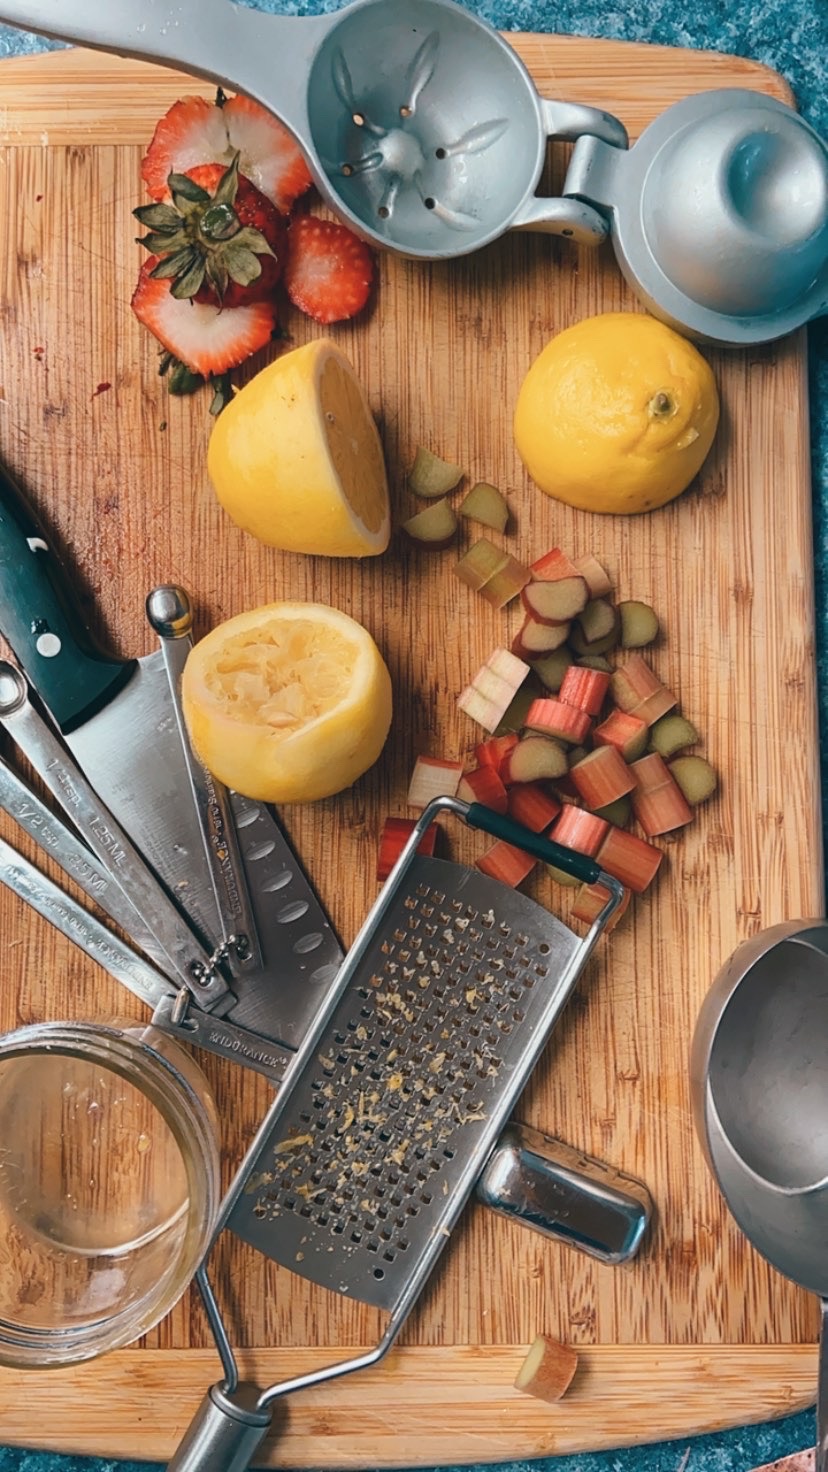
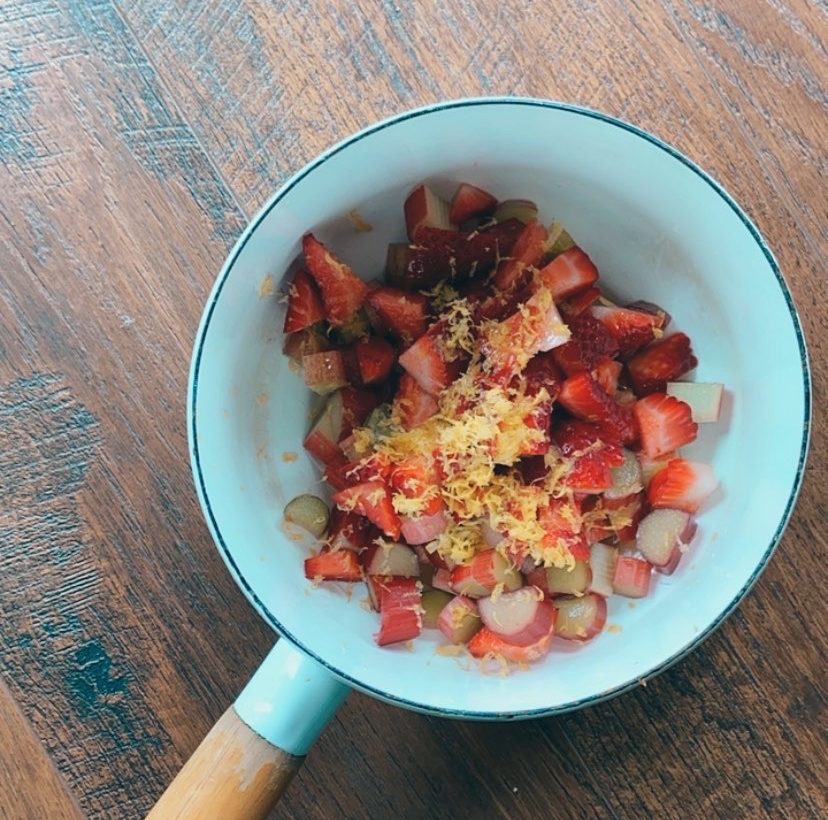
Our new home has a rhubarb plant – the first one I’ve ever owned. And that means so many possibilities…for crumbles, crisps and pies. I’m not a fan of crumbles, crisps or pies, so I’m on a mission to find other recipes that use this super-tart plant.
I came across this recipe for a curd, which is sort of like a pudding. I tweaked it slightly and accidentally doubled the sugar, which turned out quite nice! Turns out curd is a really forgiving recipe, so it’s ok if you have more or less of an ingredient.
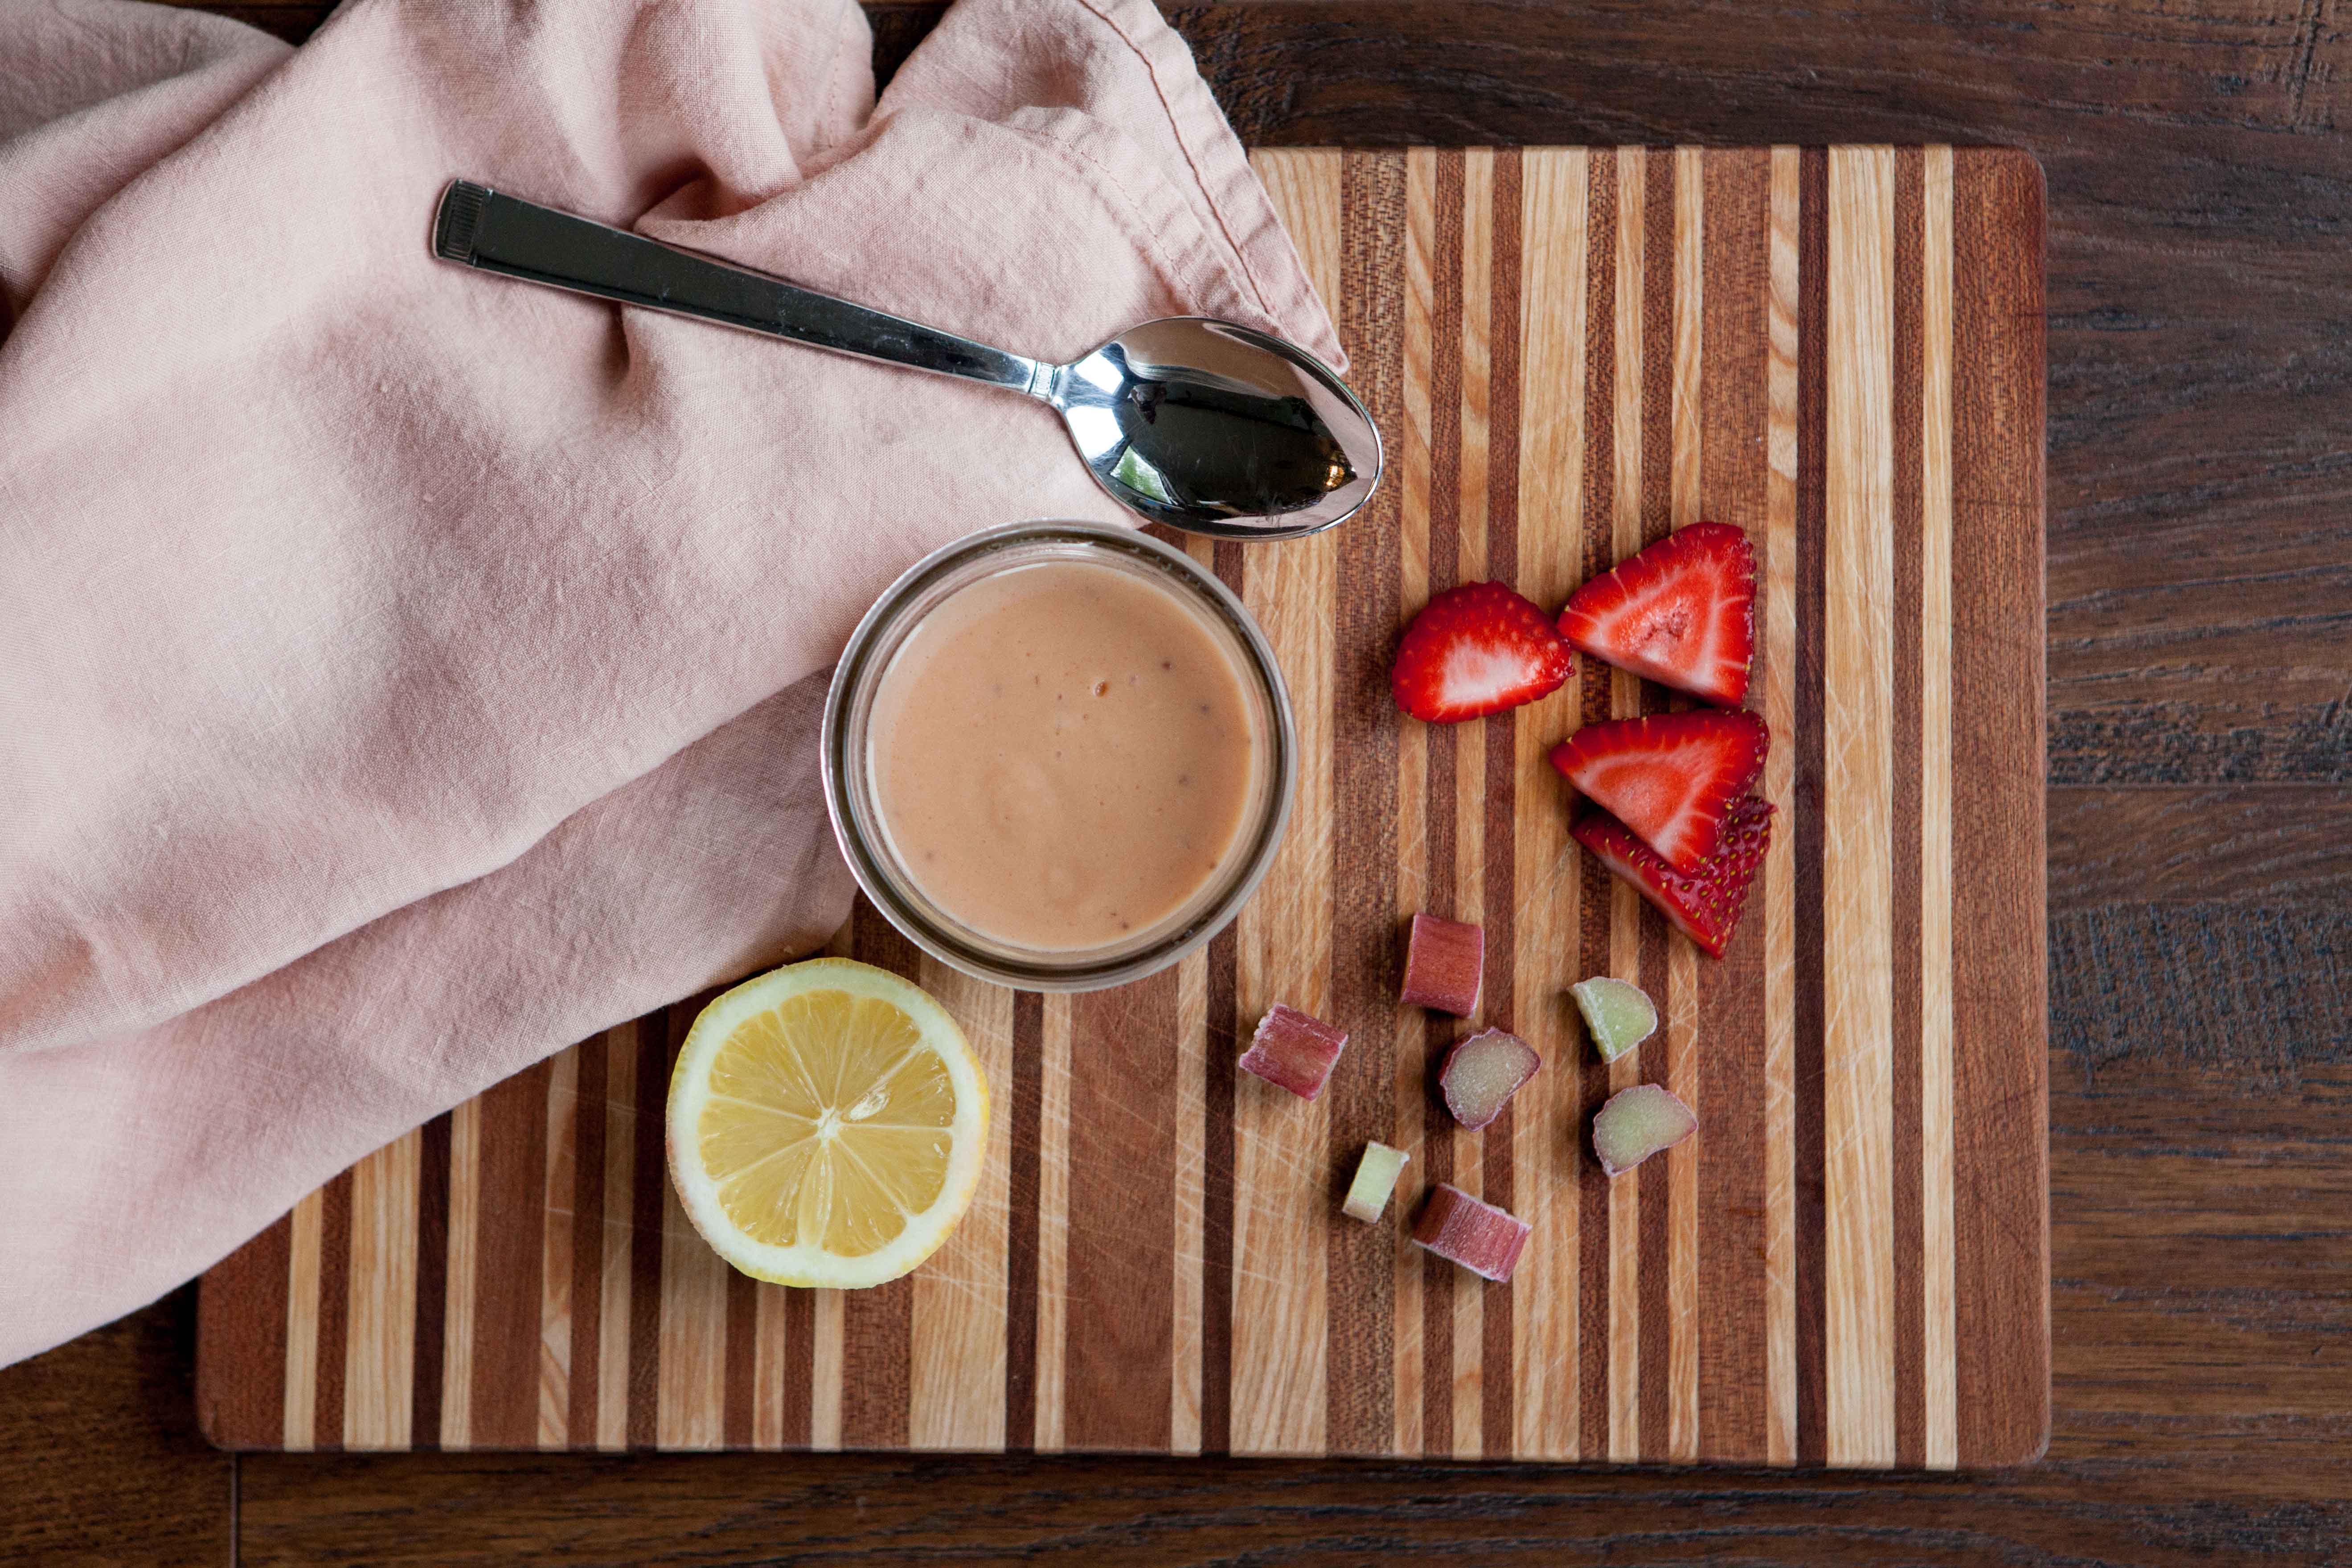
This turned out so perfectly delicious. Tart, sweet, creamy – a wonderful alternative to the typical strawberry rhubarb fare. I enjoy it straight out of the jar, but you could put it in crêpes, on toast, on pancakes, the world is your rhubarb curd!
Strawberry Rhubarb Curd
Makes about 4 servings.
Ingredients:
150 g chopped rhubarb, fresh or thawed
100 g chopped strawberries
zest of 1 lemon
3 tablespoons fresh lemon juice
3 eggs
1 egg yolk
1/3 to 1/2 cup sugar (depending on your sweetness preference)
2 tablespoons butter
Directions:
In a small saucepan, combine the rhubarb, strawberries, zest and lemon juice. Heat over medium flame till simmering, cover and simmer on low for about 7 minutes. Mash with a potato masher after a few minutes to break it up as it softens.
Purée the mixture using either a food processor or immersion blender. Set aside.
Using a double boiler or two small saucepans that can stack, fill the bottom pot with 1 inch of water. Bring to a simmer, turn to med/low flame, and add the other pot on top. Whisk together the eggs, yolk and sugar until sugar is well incorporated.
While constantly whisking, slowly add the rhubarb purée. It will thicken as you whisk, turning a lighter color. Whisk until it’s thick enough to coat the back of a spoon.
Stir in the butter till melted. Pour into small jars, add lids, and let cool to room temperature before placing in the fridge. Curd should keep for a couple of weeks, but it may get eaten up before then!
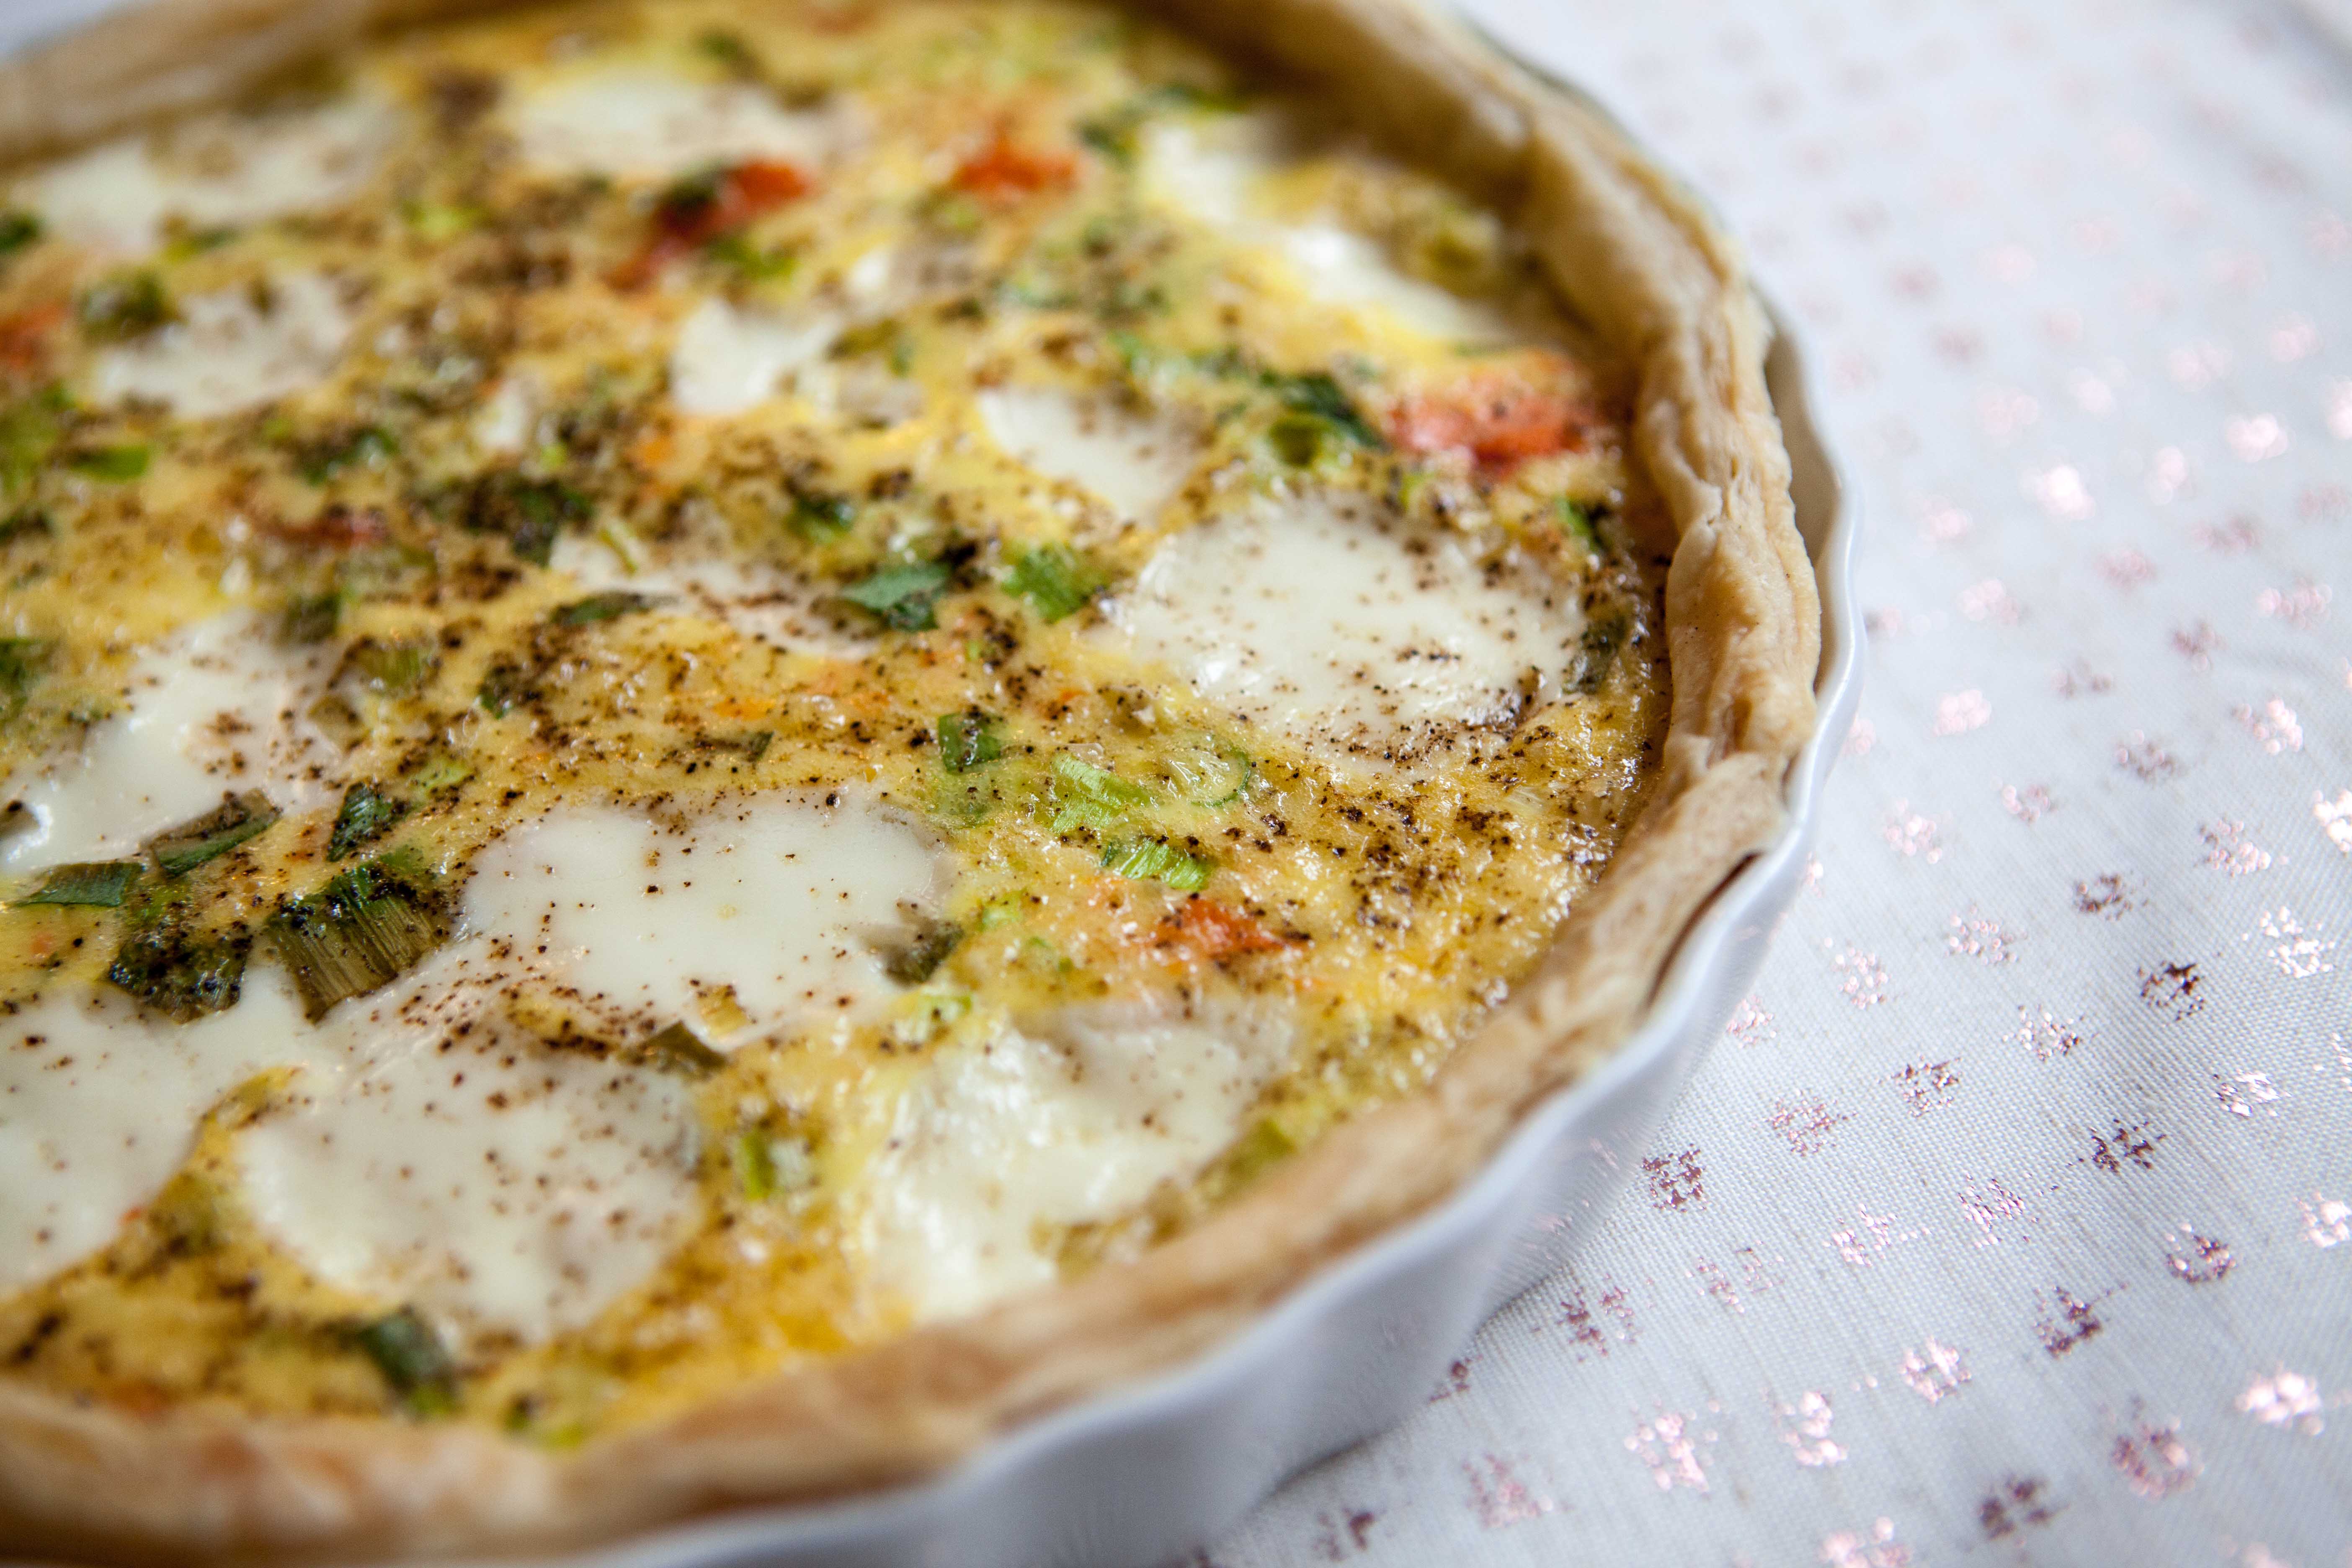
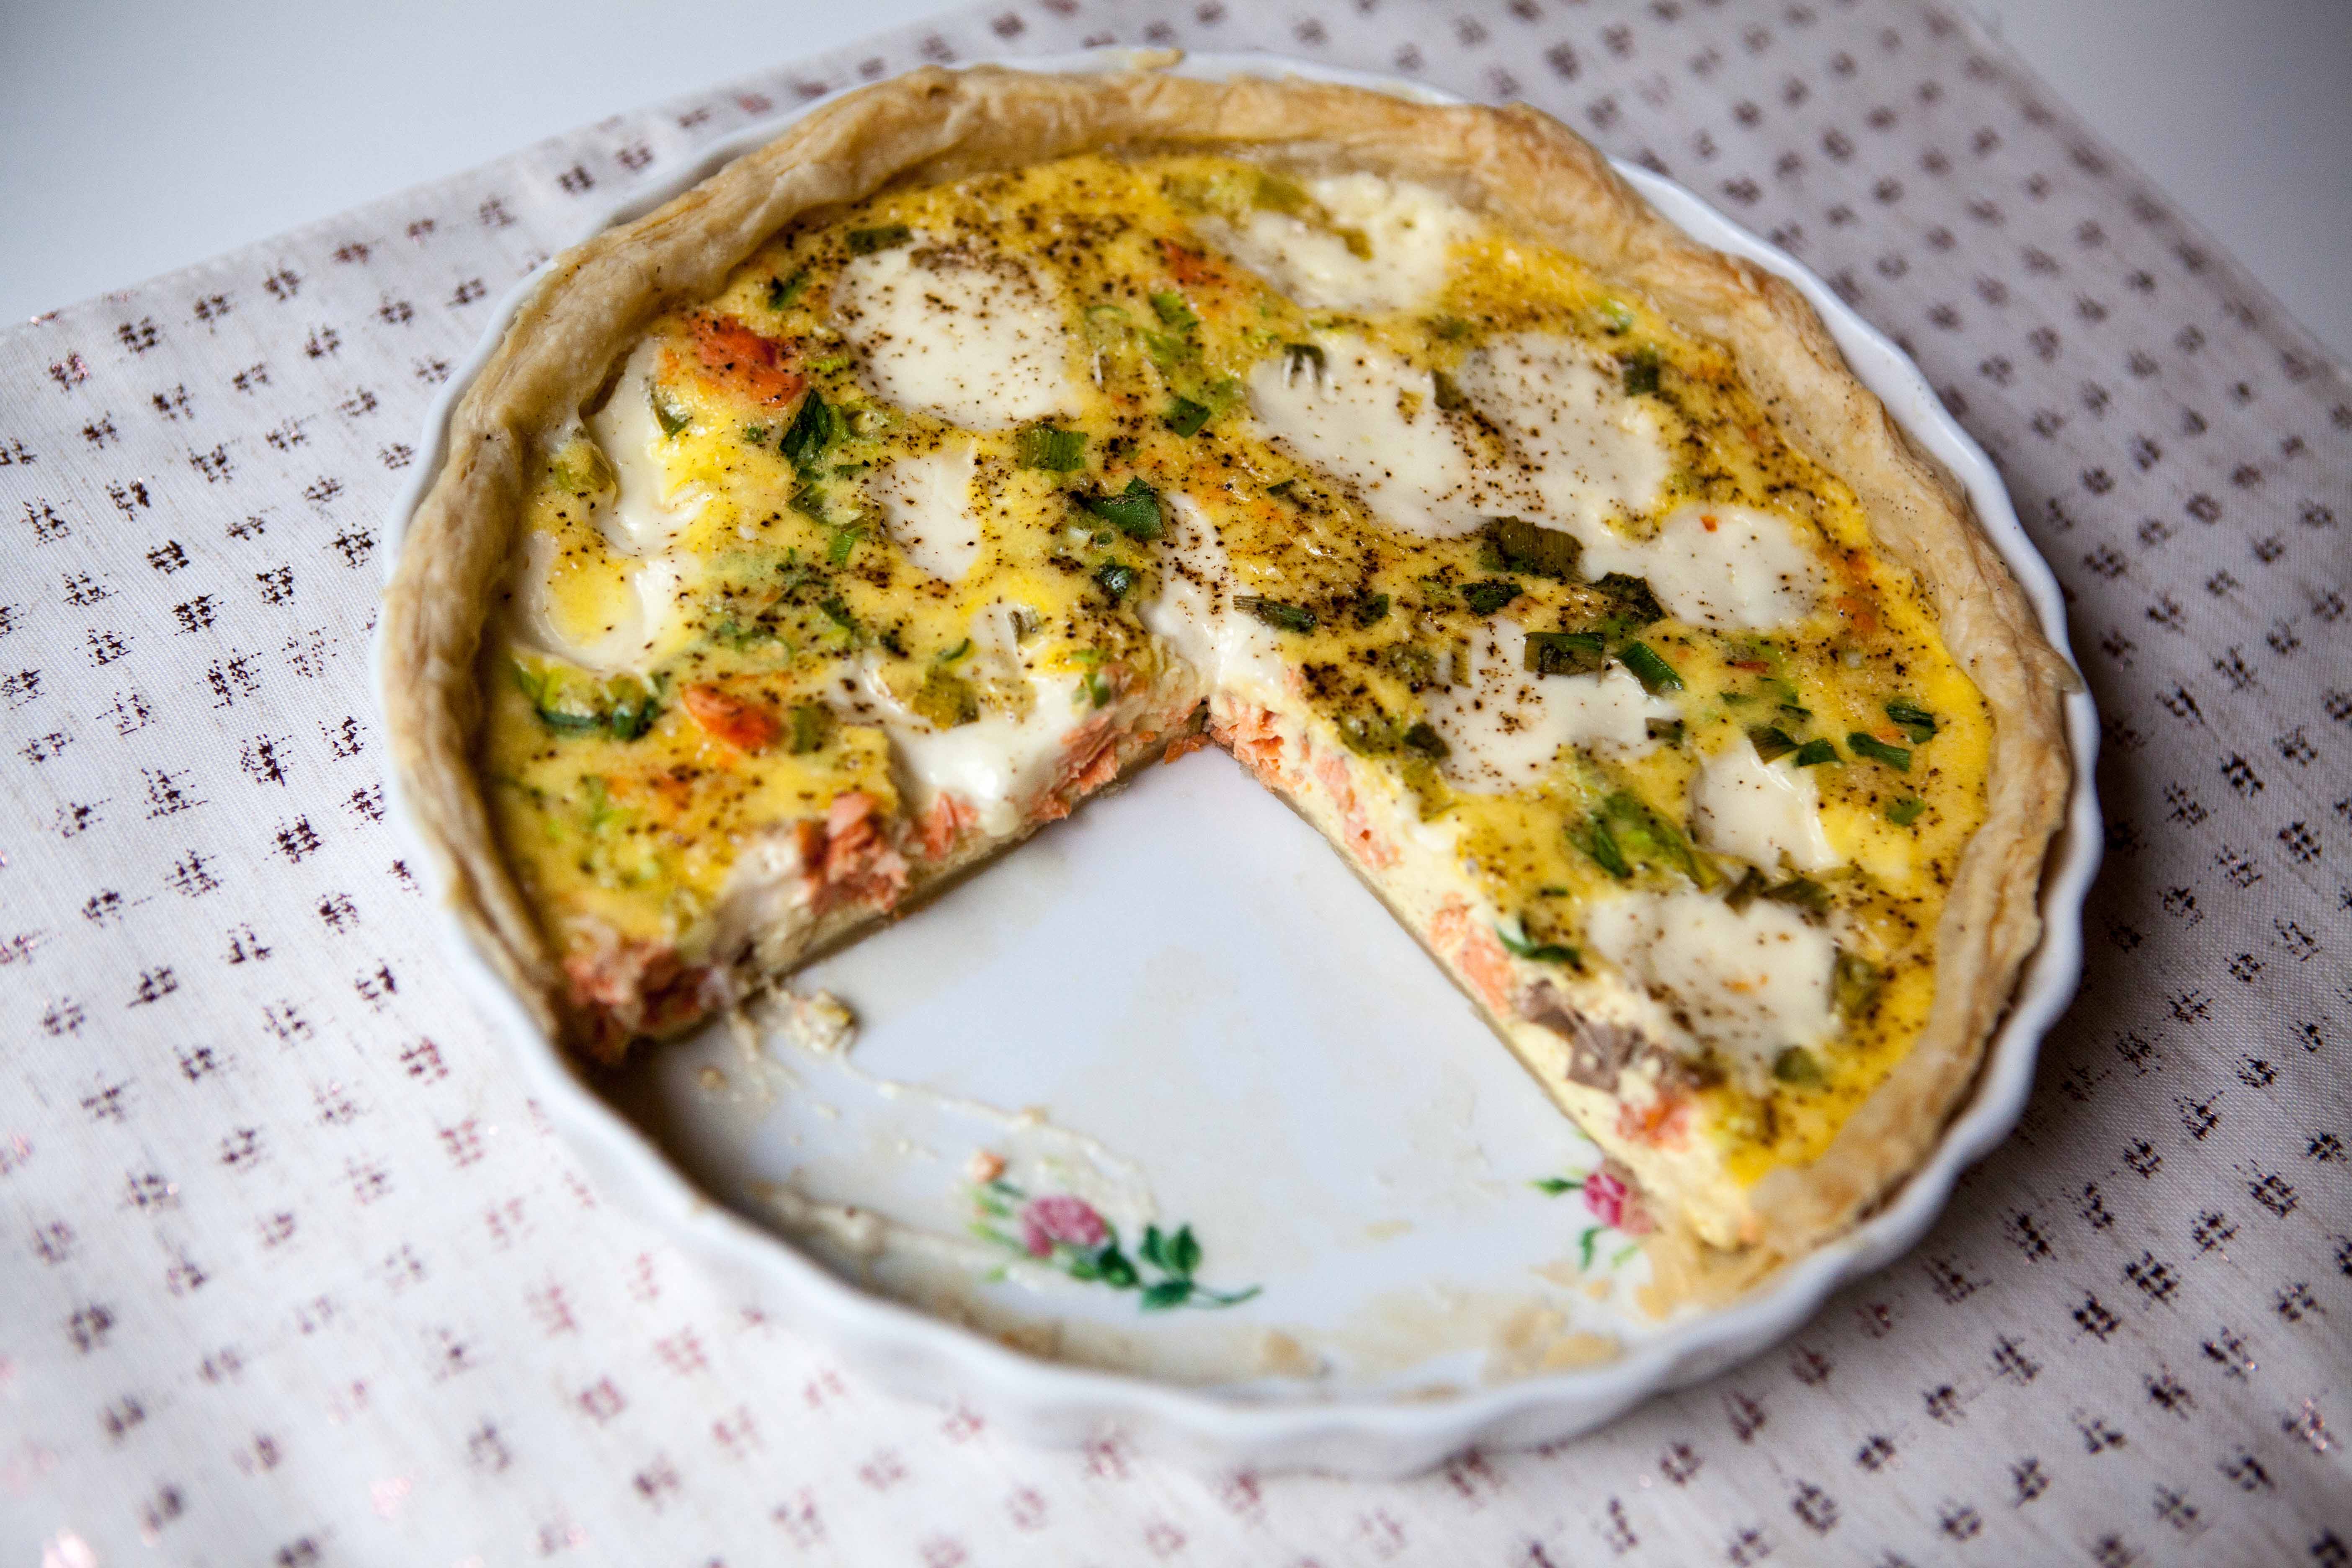
It’s summer in Alaska and that means fresh, wild, delicious salmon. It also means fresh, wild, delicious salmon leftovers (just once in a while). I’m not a huge fan of leftover salmon and the typical recipes that use cooked salmon such as salmon burgers, but here I was last night, with a tasty leftover grilled salmon steak. What was I to do?
Make a quiche, that’s what I did!
I’ve made about three quiches in my life and they haven’t been great. They turn out tasting more like scrambled eggs, and I’m not a fan of that texture. I want a more solid quiche that’s salty and tastes better than a scrambled egg.
So I found a recipe for smoked salmon quiche and then found these helpful tips from Saveur. After a few tweaks I felt confident and equipped to make a delicious, creamy quiche. It worked!
Leftover Salmon Quiche
Serves 4
Ingredients:
1 sheet store-bought puff pastry (I found it in the refrigerated aisle by the pie crusts but if you only find it frozen make sure it’s thawed)
4 eggs
1 cup whipping cream
1/2 teaspoon salt
freshly ground pepper, to taste
dash liquid smoke (optional)
a couple of dashes of Tabasco Sauce
1 teaspoon flour
leftover cooked salmon, about 1 cup
1/2 cup crème fraîche (sour cream or cream cheese would probably work instead)
1/4 cup chopped green onions
Directions:
Preheat oven to 375 F. Unfurl the puff pastry on a lightly floured surface and use a rolling pin to smooth it out. Place the sheet in a pie pan and push the dough down so it gets into the corners and up the sides of the pan. Use kitchen shears to trim away the excess so the dough is flush with the top edge of the pan. Prick it several times with a fork and completely cover with foil. Weigh it down with pie weights, uncooked beans, or in my case, a smaller pie pan. Bake for 10 minutes.
Remove from heat and turn oven down to 300 F.
In a large liquid measuring cup, gently whisk together the eggs, whipping cream, salt, pepper, liquid smoke, Tabasco Sauce and flour. Pour the mixture into the pie pan. Sprinkle the salmon so it’s evenly distributed. Add dollops of crème fraîche all around then sprinkle the green onions all over.
Place in oven and bake uncovered for 1 hour. Remove from oven and let sit 10-20 minutes before serving.
Delight in the fact that you made a quiche that didn’t suck (hopefully).
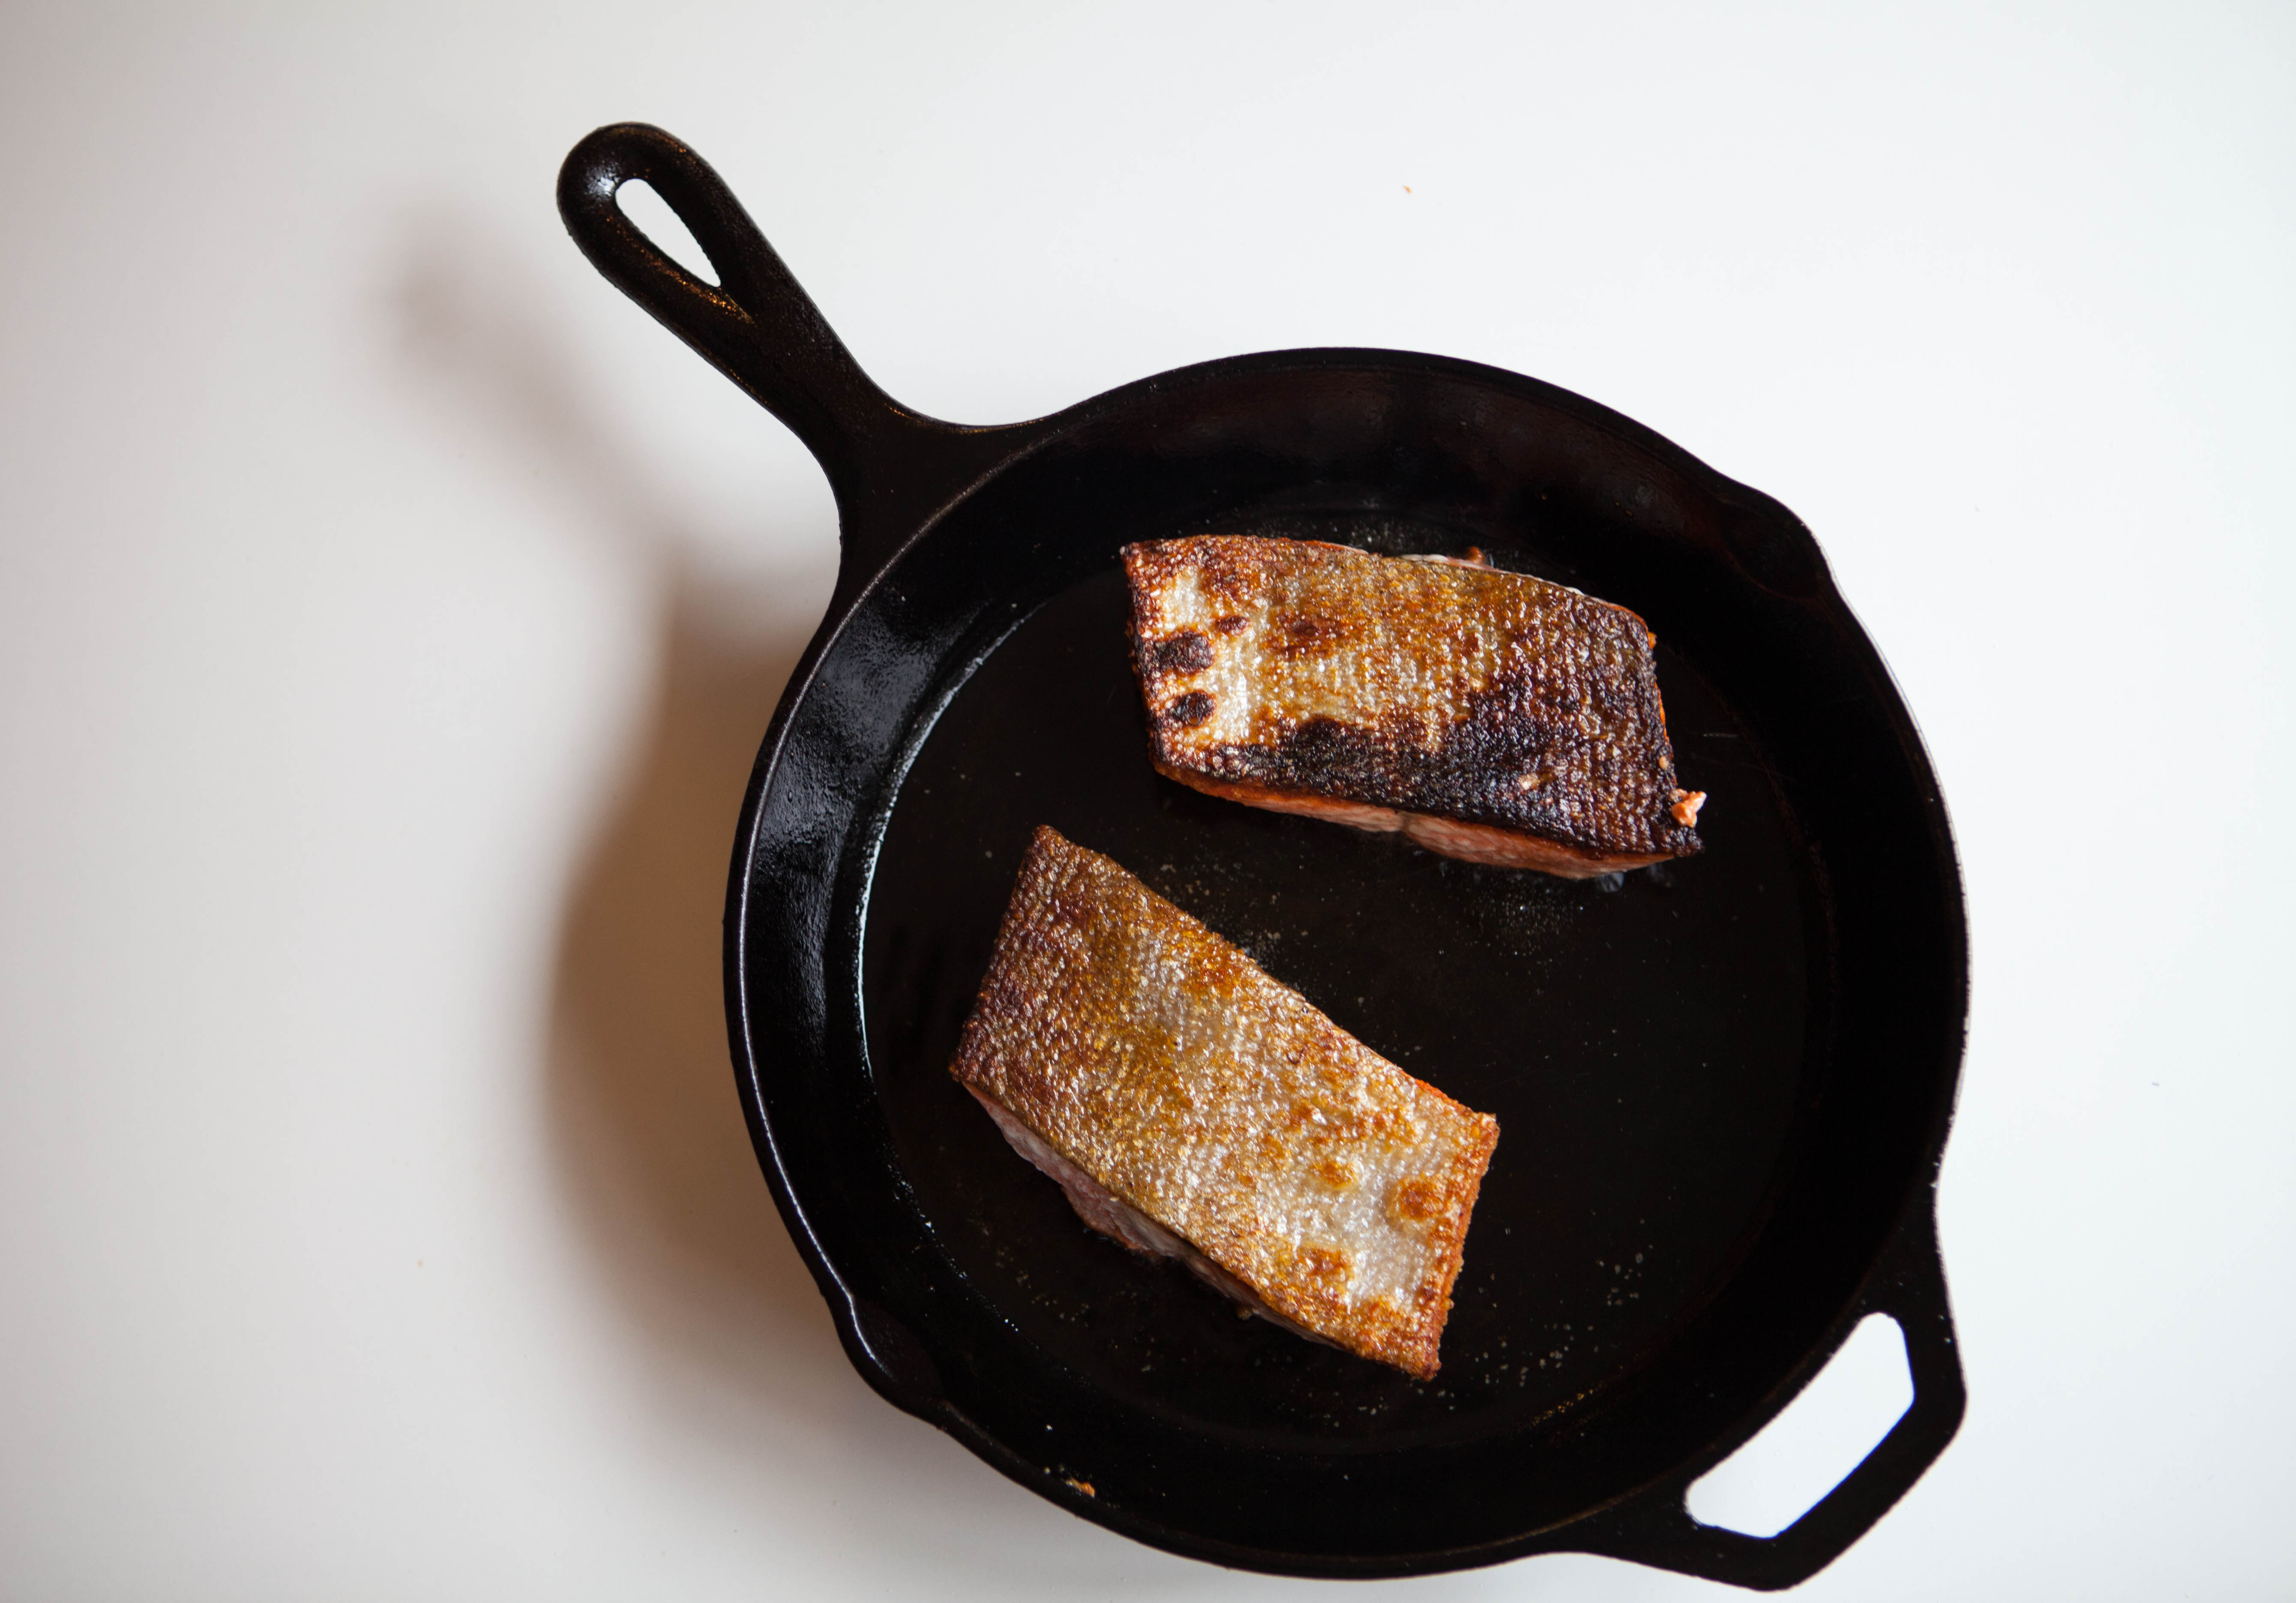
Whenever my family sits down to a salmon dinner we always have the same debate: do you eat the crispy, burnt salmon skin or does it go to the side of the plate with the stray bones?
My mother is a member of Club No Salmon Skin, which works out in my favor if I’m quick enough to get to her plate before my dad, who is on the same side as me – salmon skin is super delicious when it’s cooked just right.
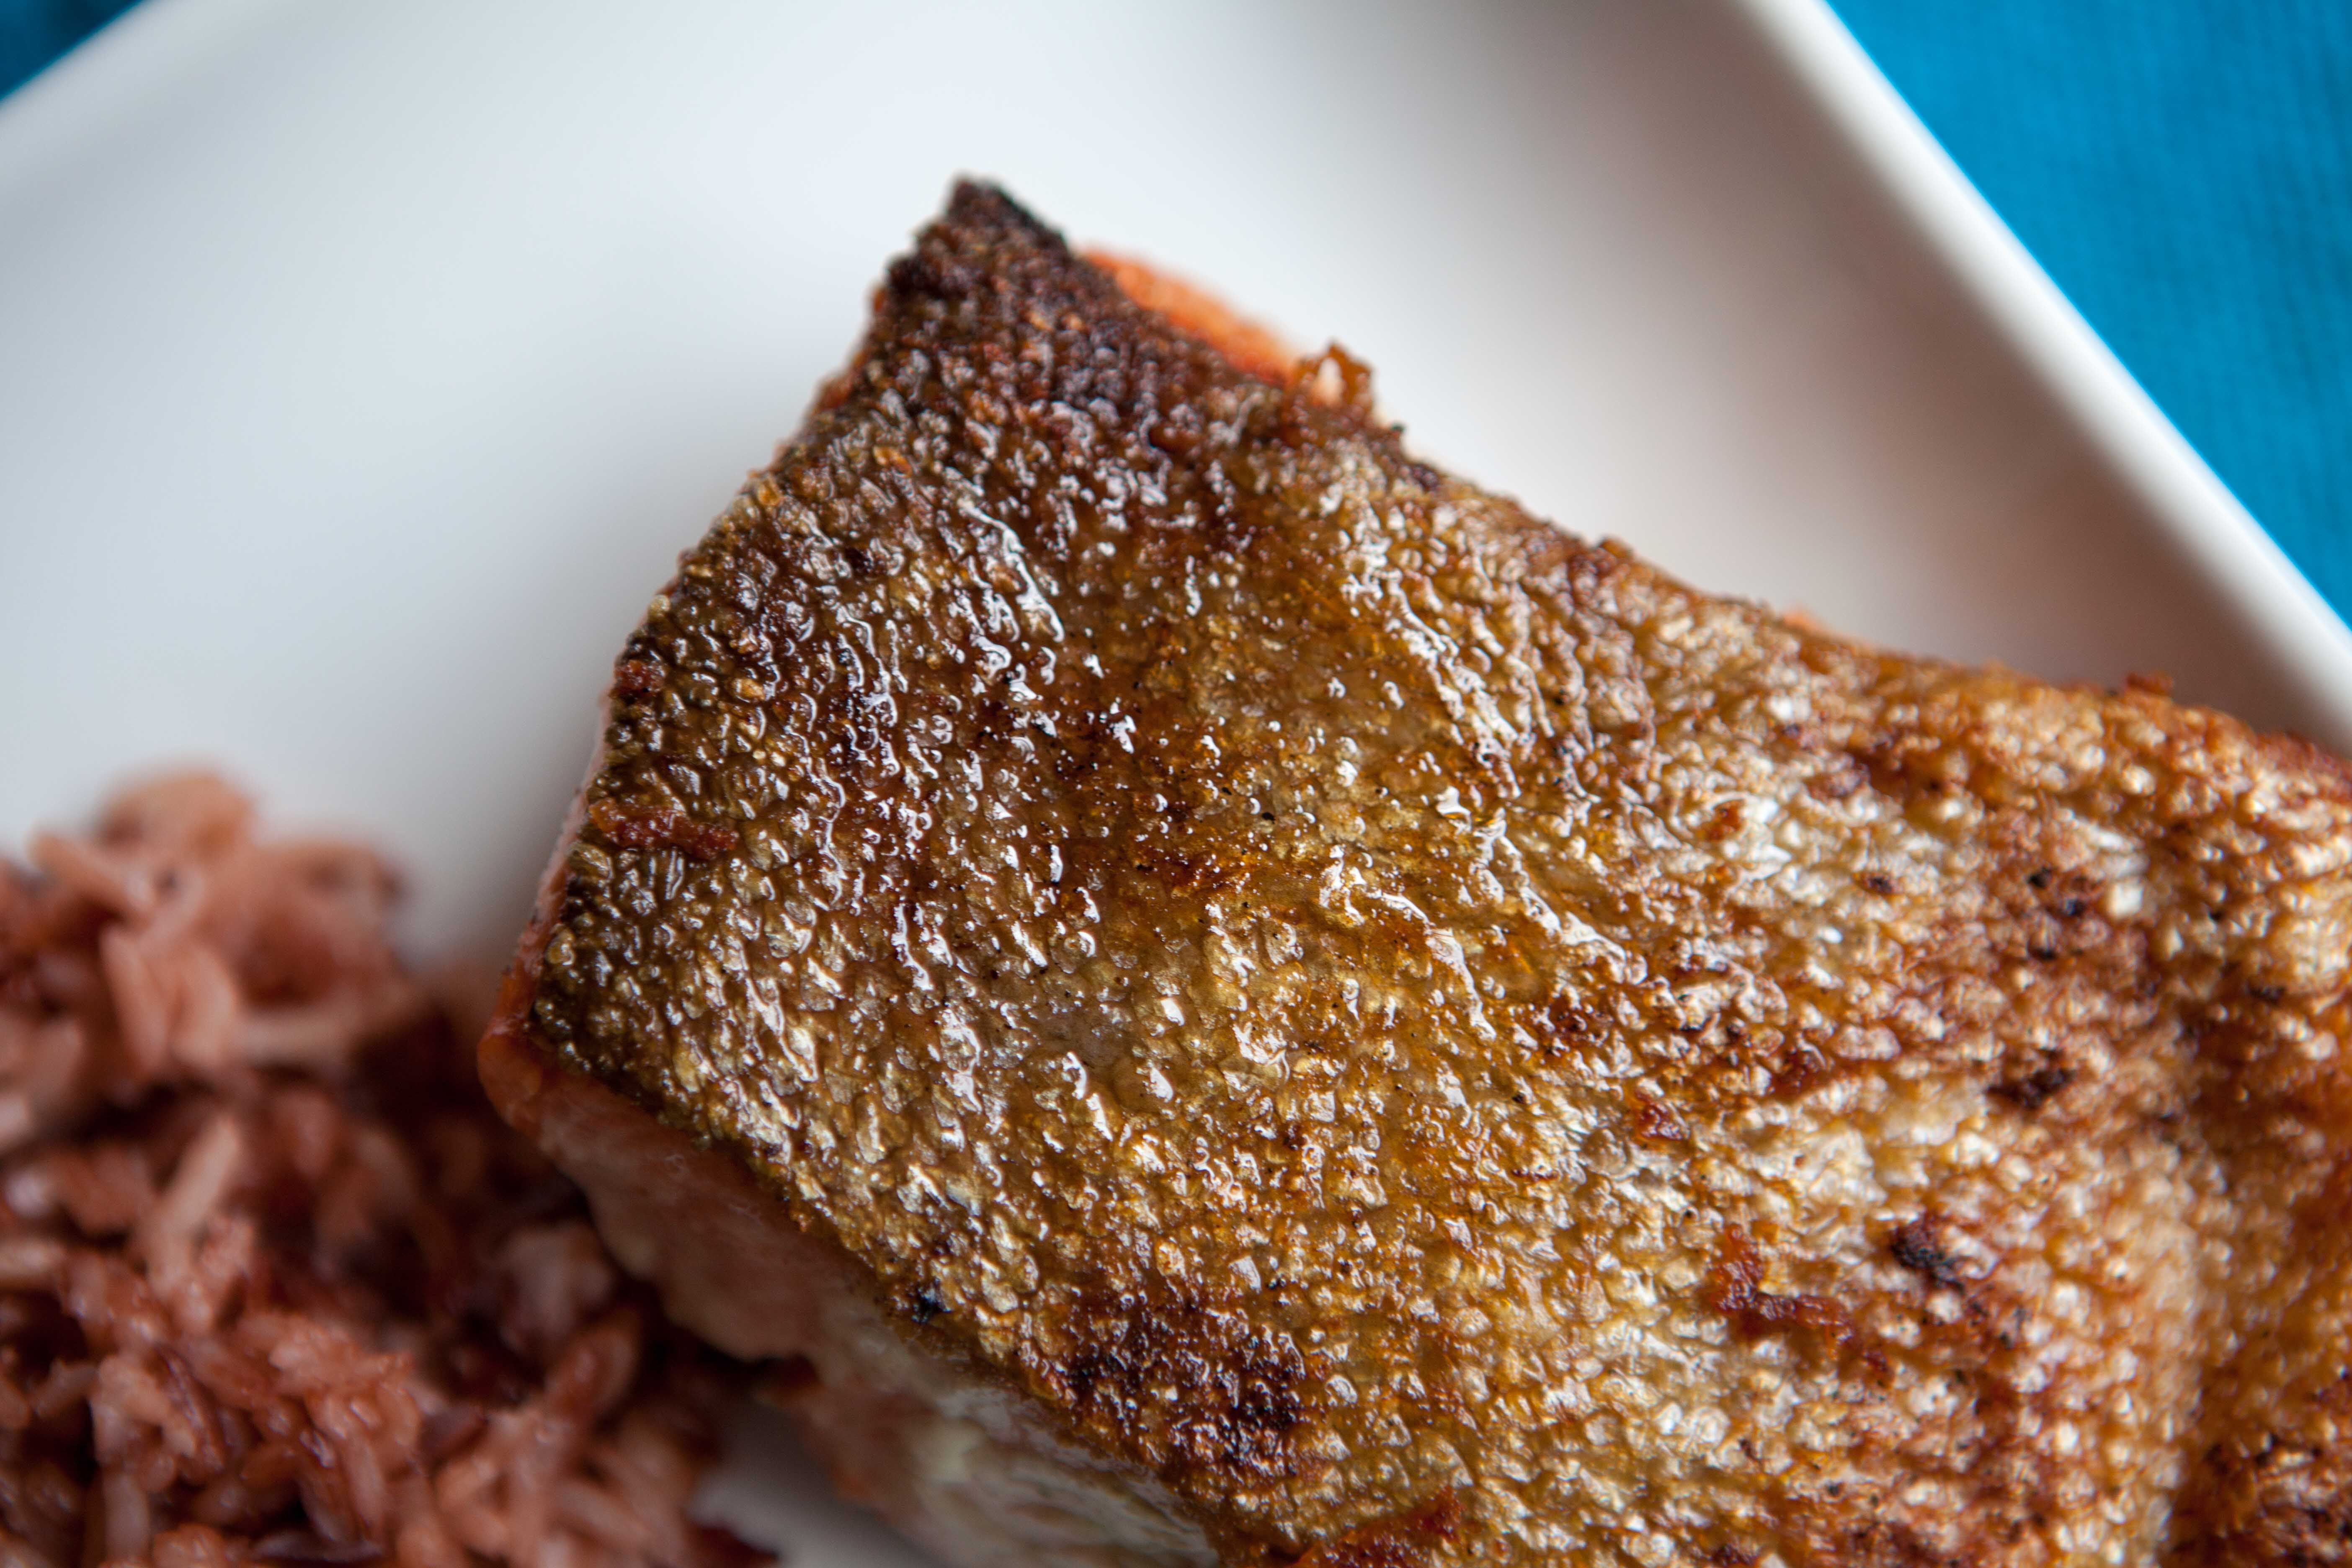
So I set out to cook a salmon fillet with the sole purpose of making the skin crispy. It was surprisingly easy! I tried a couple of methods and found most success with these directions from Bon Appétit.
And don’t worry, if you’re not a fan of salmon skin, just peel it away and still enjoy this delicious method of cooking wild Alaska salmon.
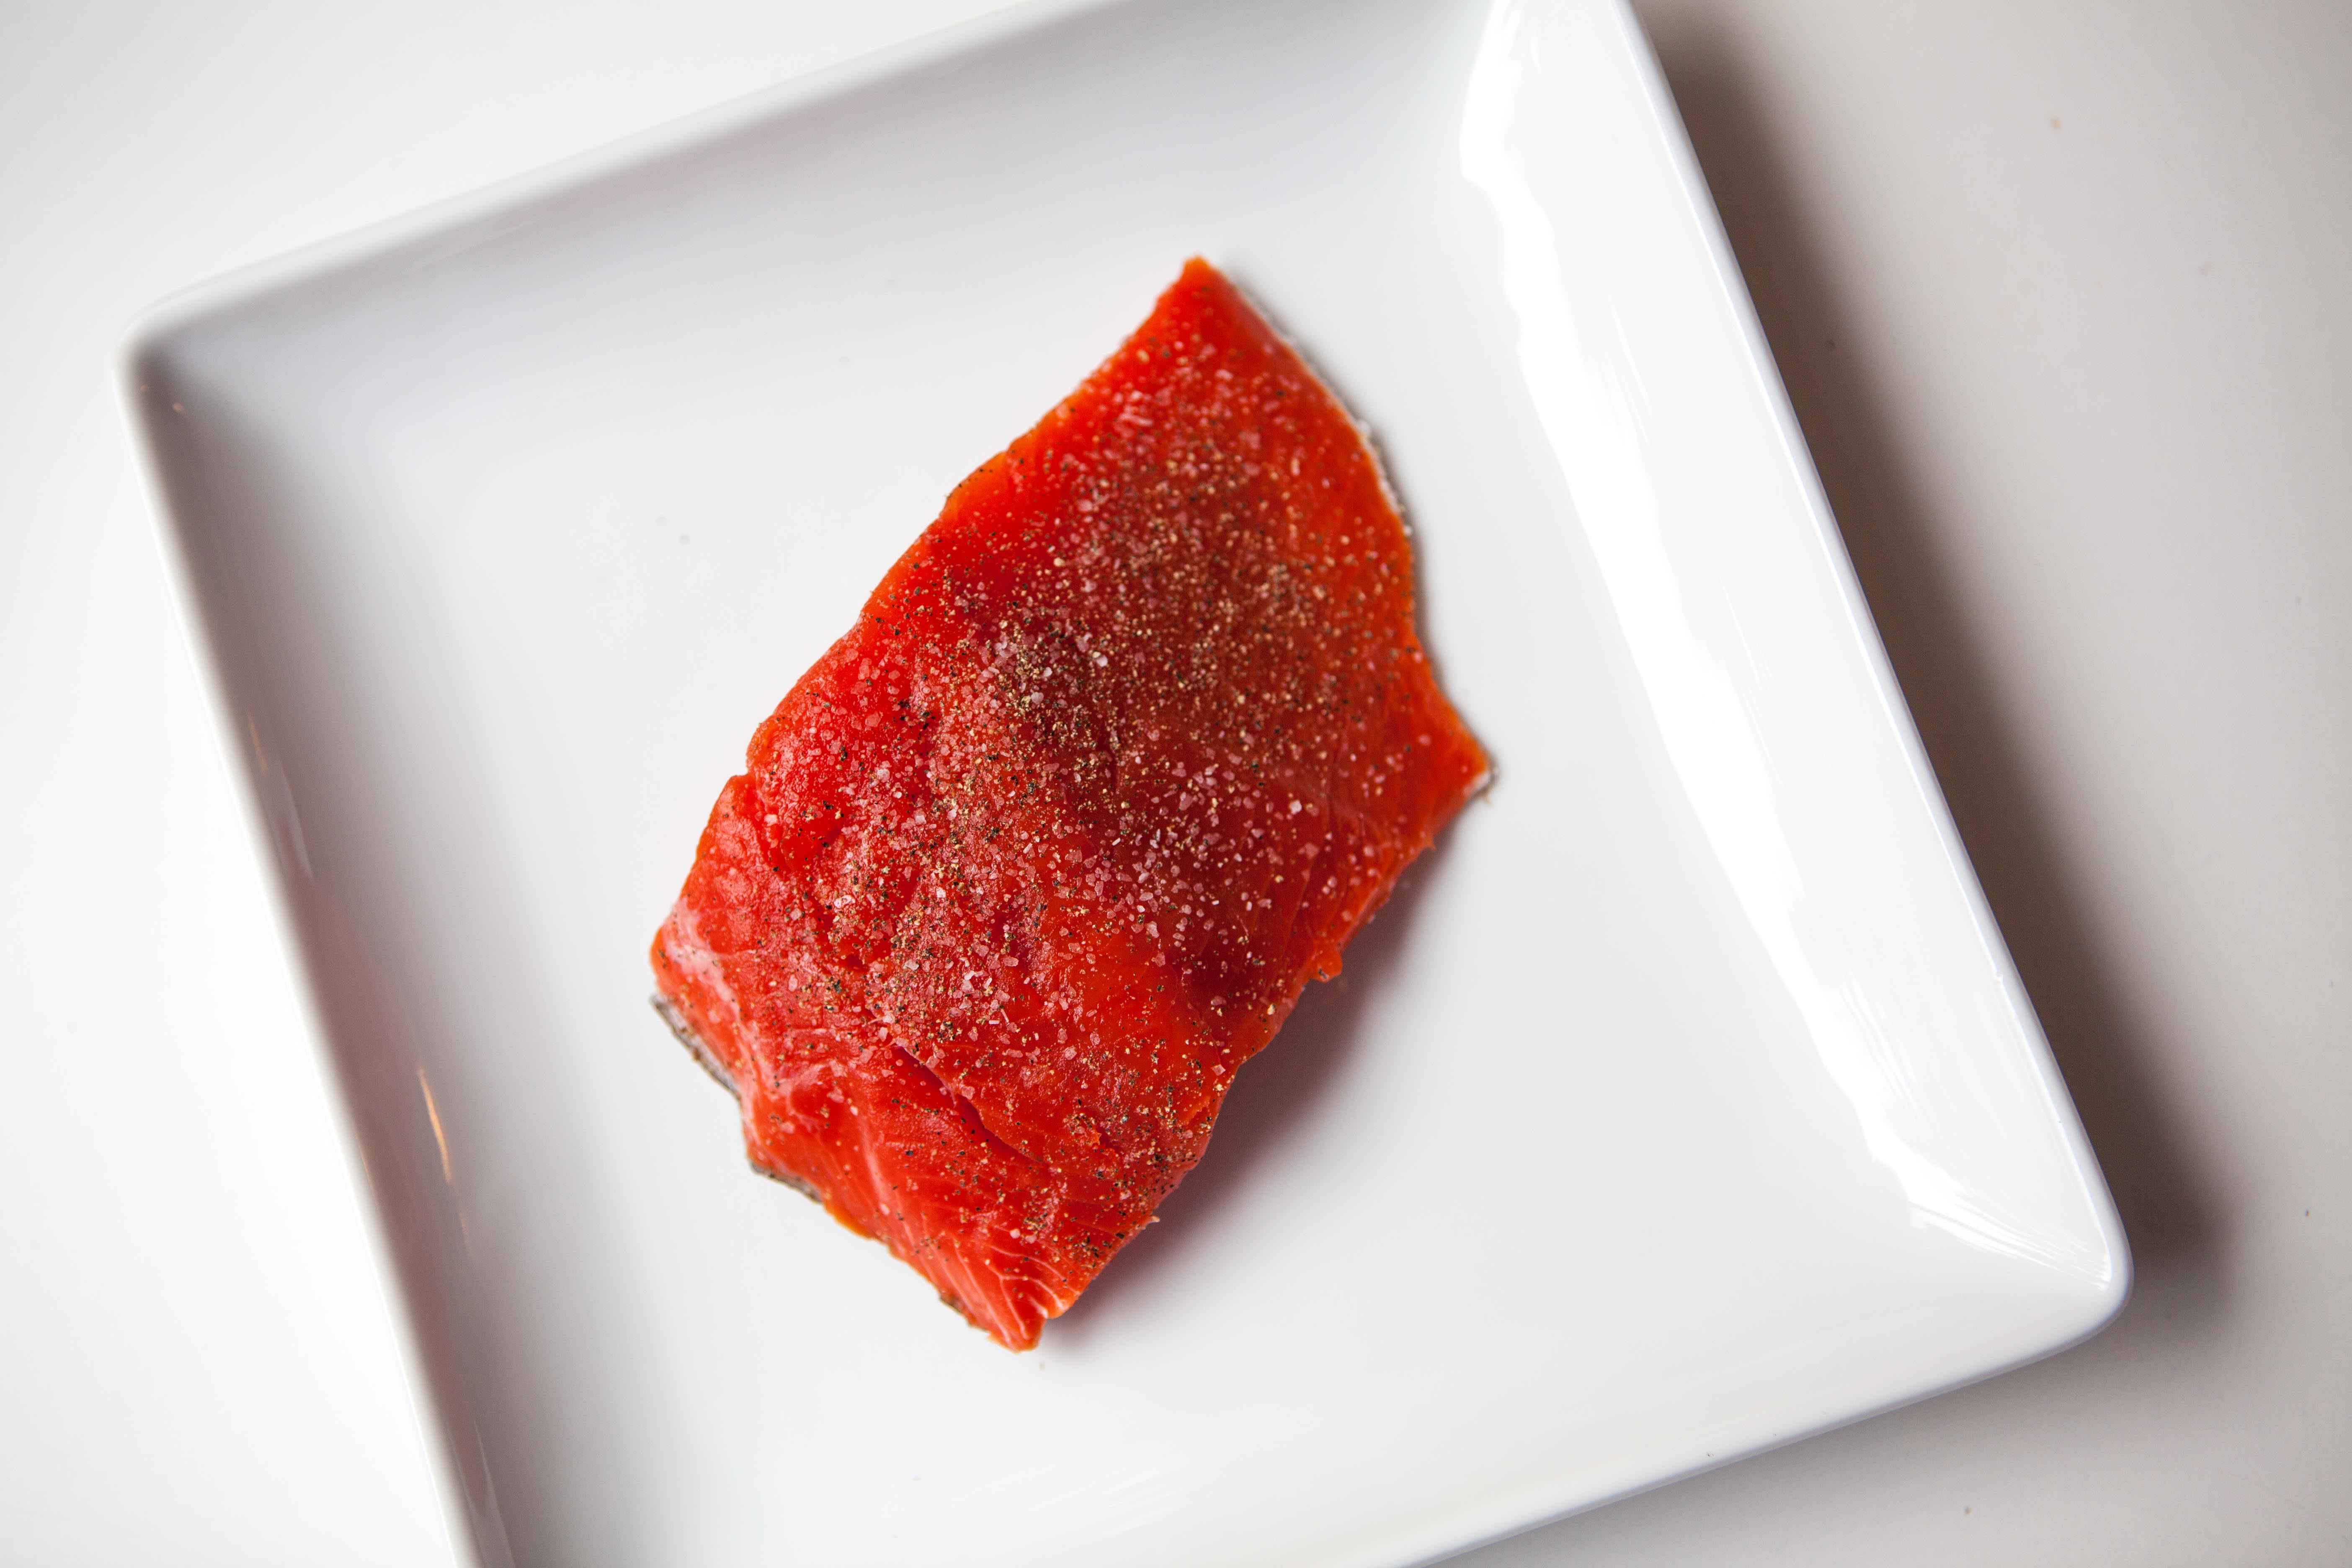
Remove the pin bones from your wild Alaska salmon fillet. A helpful trick is to place a mixing bowl upside-down on the counter and lay the fillet across it. The curvature allows the bones to stick out slightly and makes it easier for needle nose pliers to grasp them.
Slice the fillet into portions about 6-8 ounces each (should make 2-3). Pat them dry on both sides with paper towels and place them skin side up on a plate. Let sit uncovered in the fridge for one hour.
Liberally coat a cast iron skillet with olive oil. Place the salmon skin side down in the pan and turn on the heat to high.
Sprinkle the salmon with salt and pepper. Meanwhile, heat a small saucepan over medium flame and whisk in the butter, lemon zest, lemon juice and mustard. Bring to a light simmer and add pepper to taste. Turn off heat and set aside.
Cook the salmon skin side down for about 7 minutes. There is no exact science to this as some fillets are thicker than others. The flesh should be opaque around the sides and there should be a ring of raw salmon in the middle of the fillet. Turn off the heat and carefully turn the fillets in the pan with a fish spatula. Let cook for another 2-3 minutes from the residual heat of the skillet. This should be enough to cook the salmon through as most of the cooking happened while the skin was getting crispy.
See how lovely and charred your salmon skin is? It’s ok if it’s a little burnt – that’s the good stuff right there.
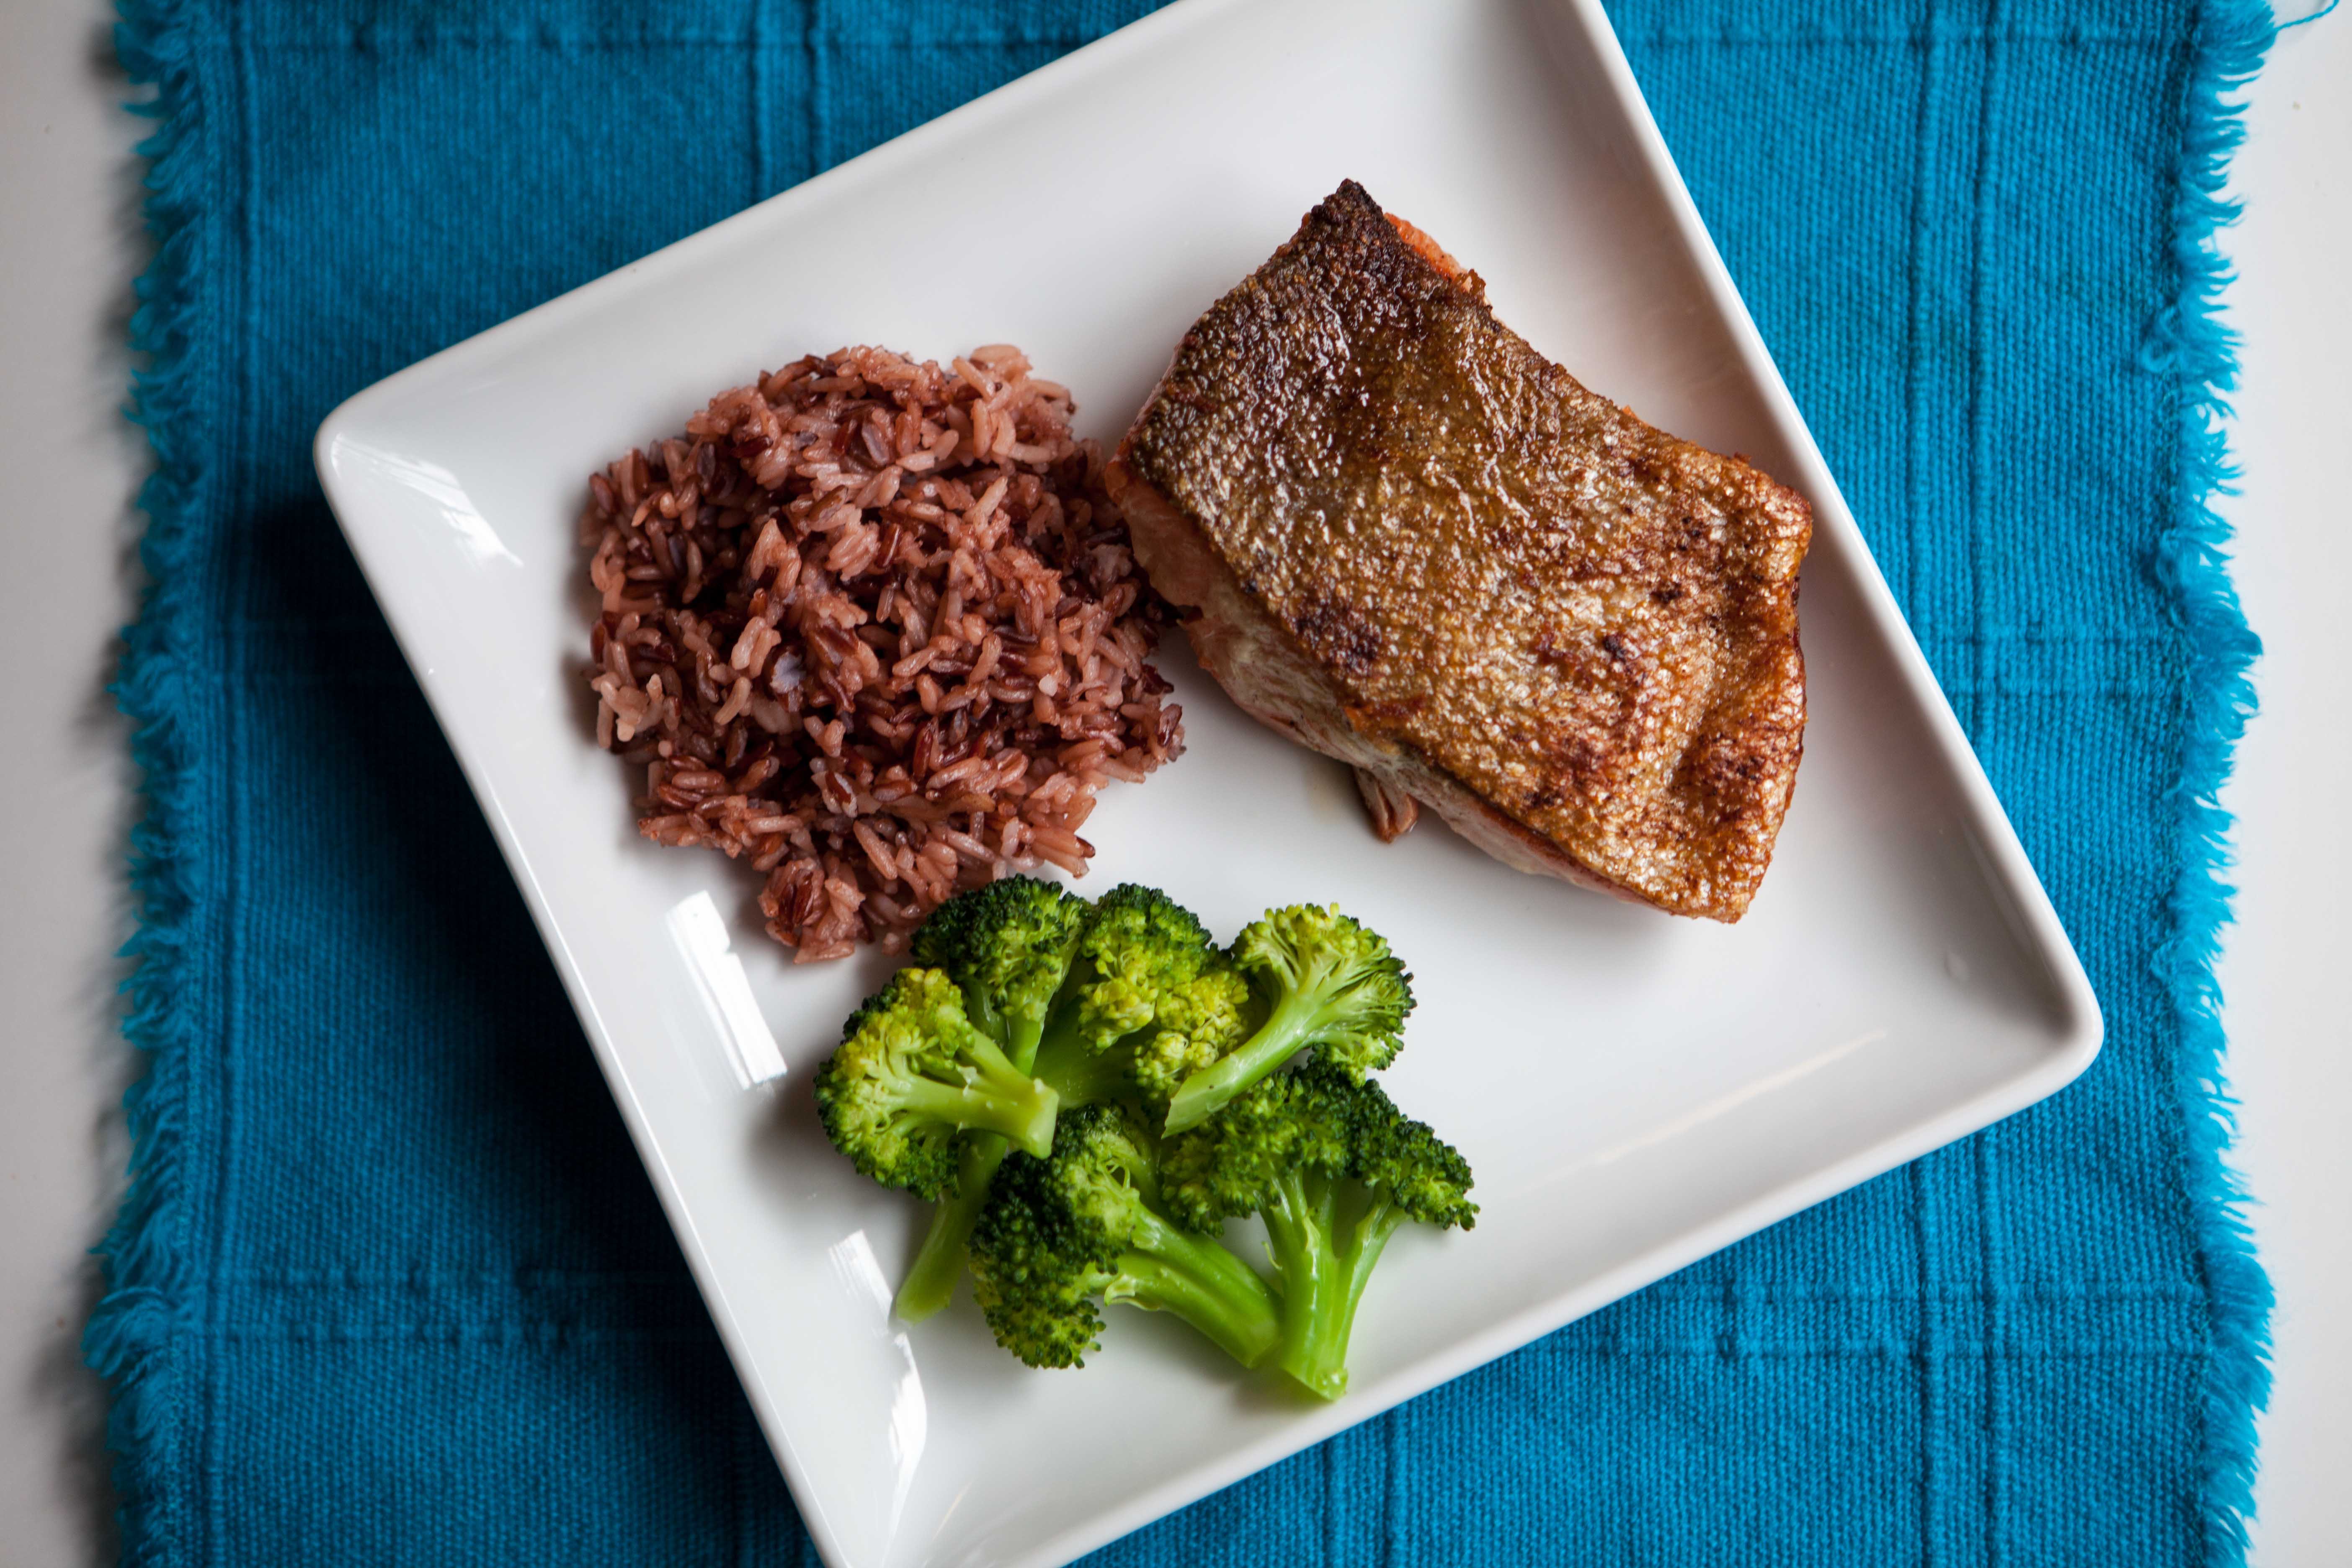
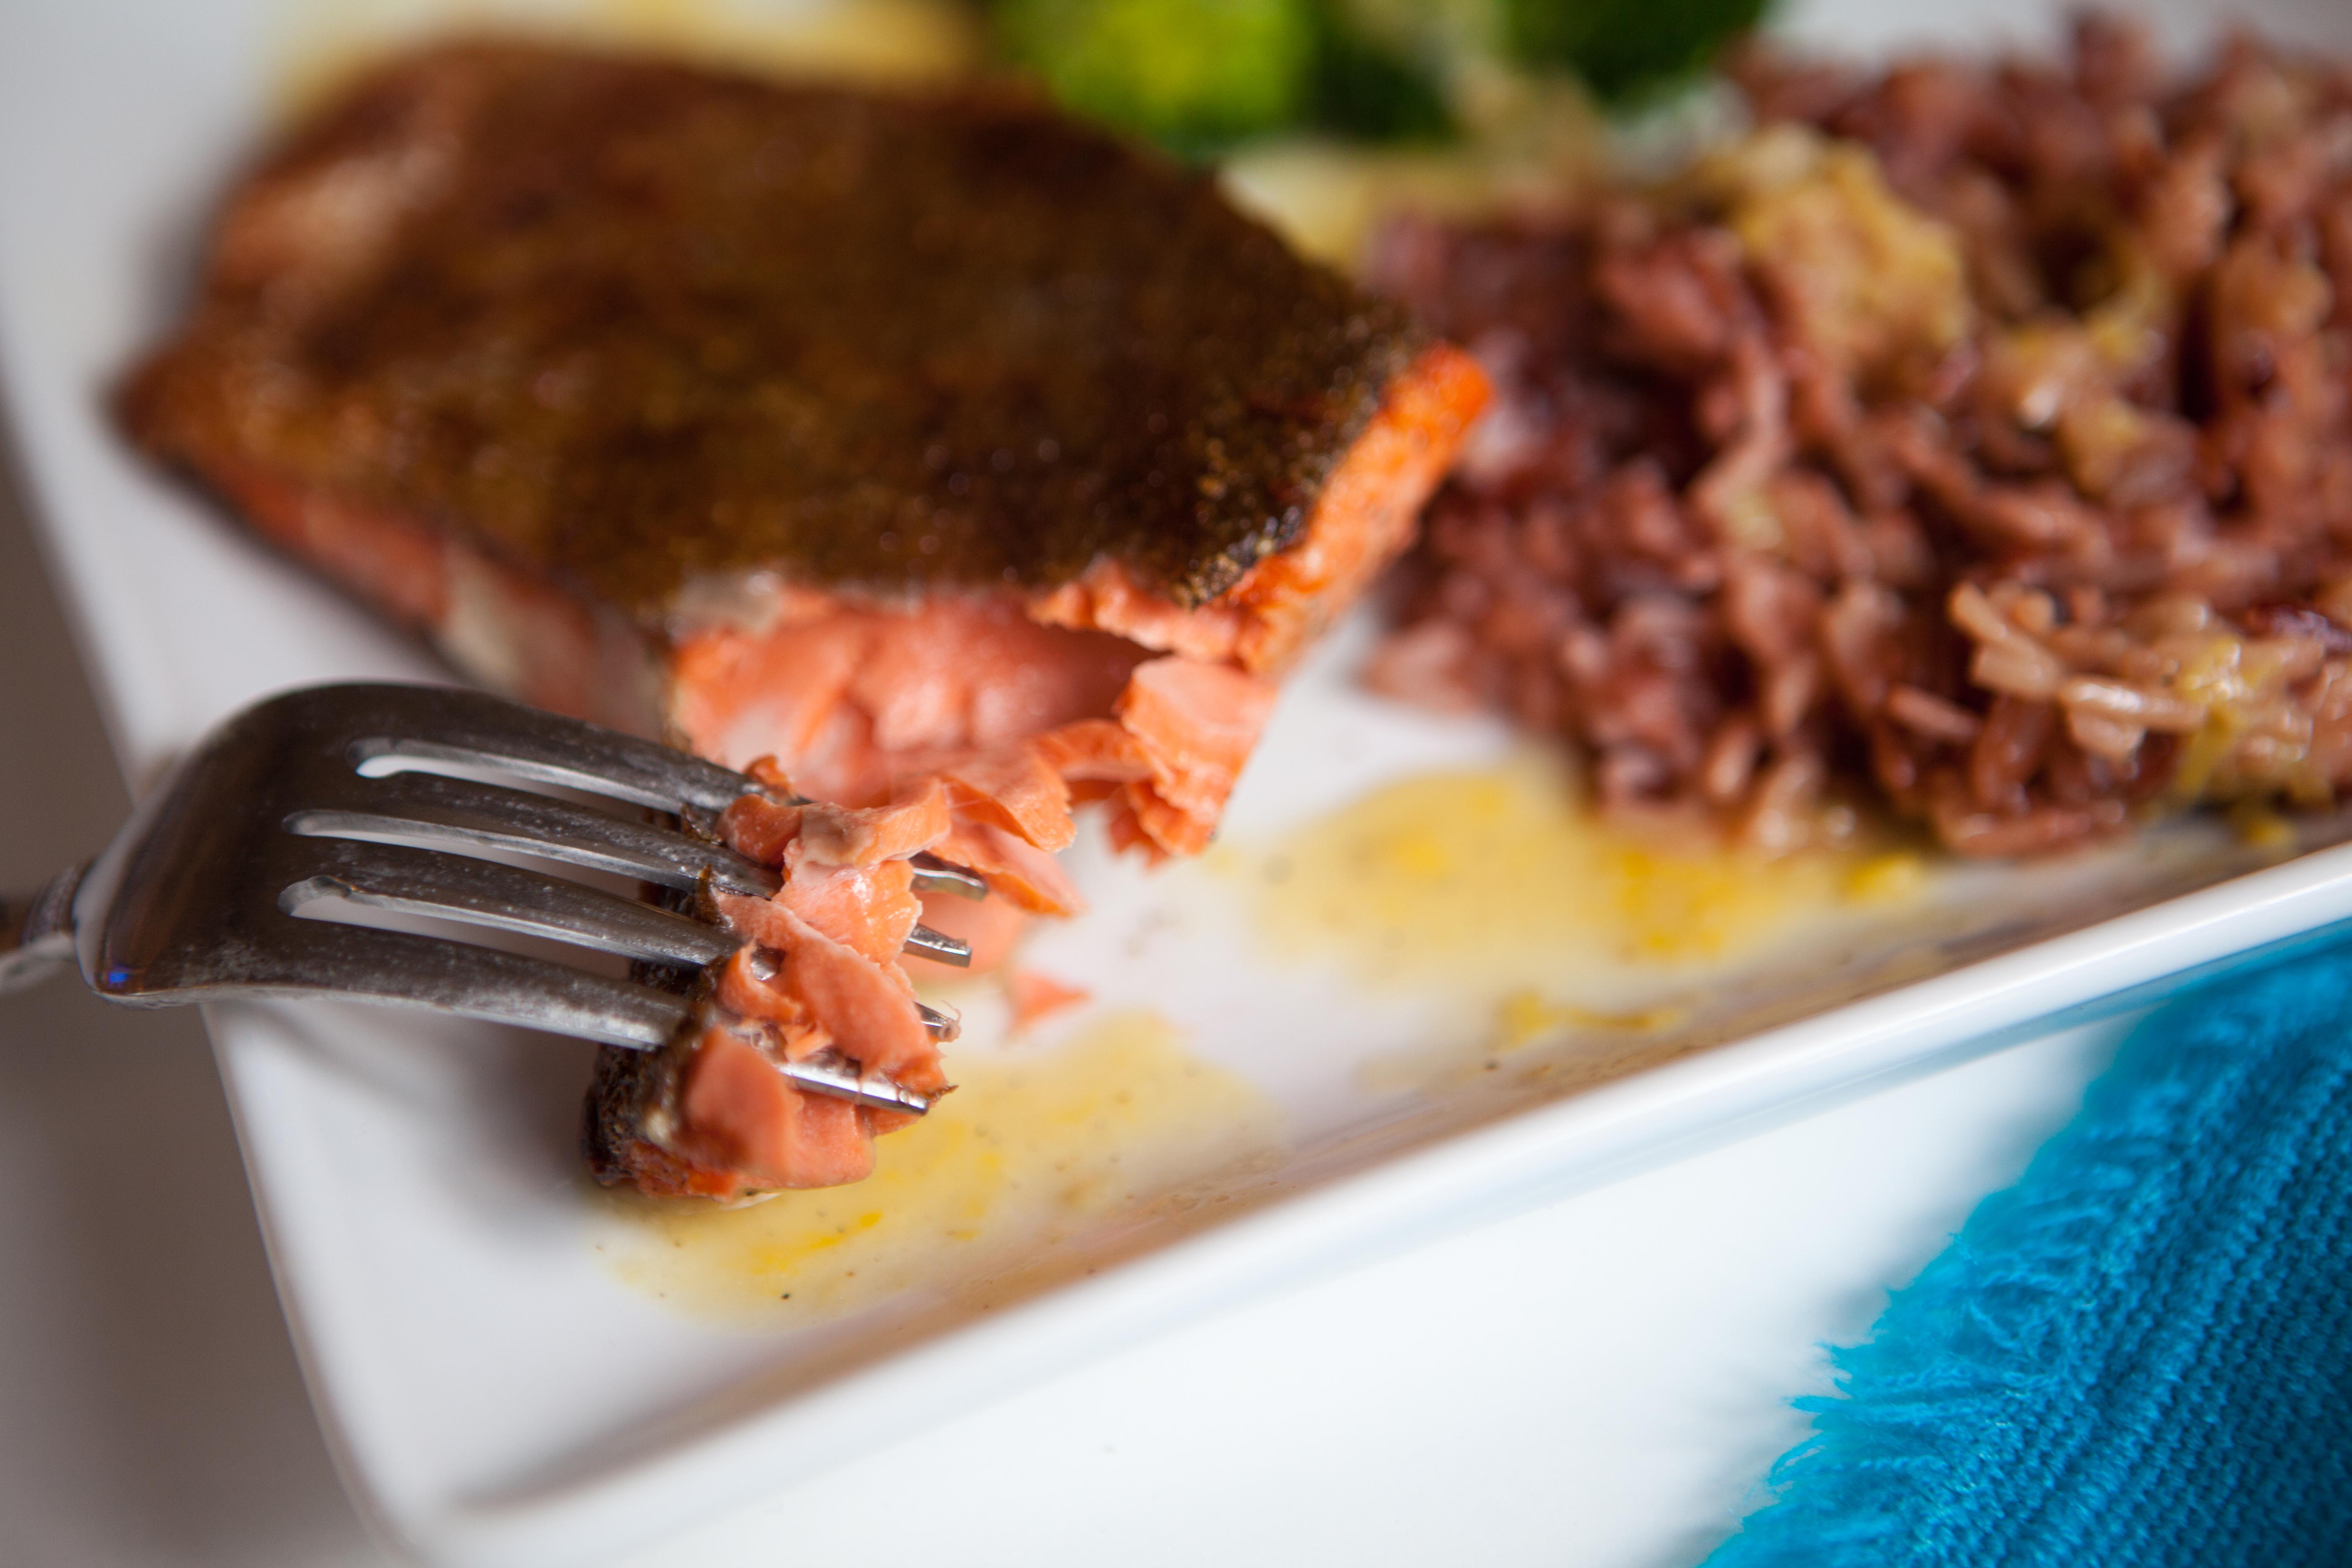
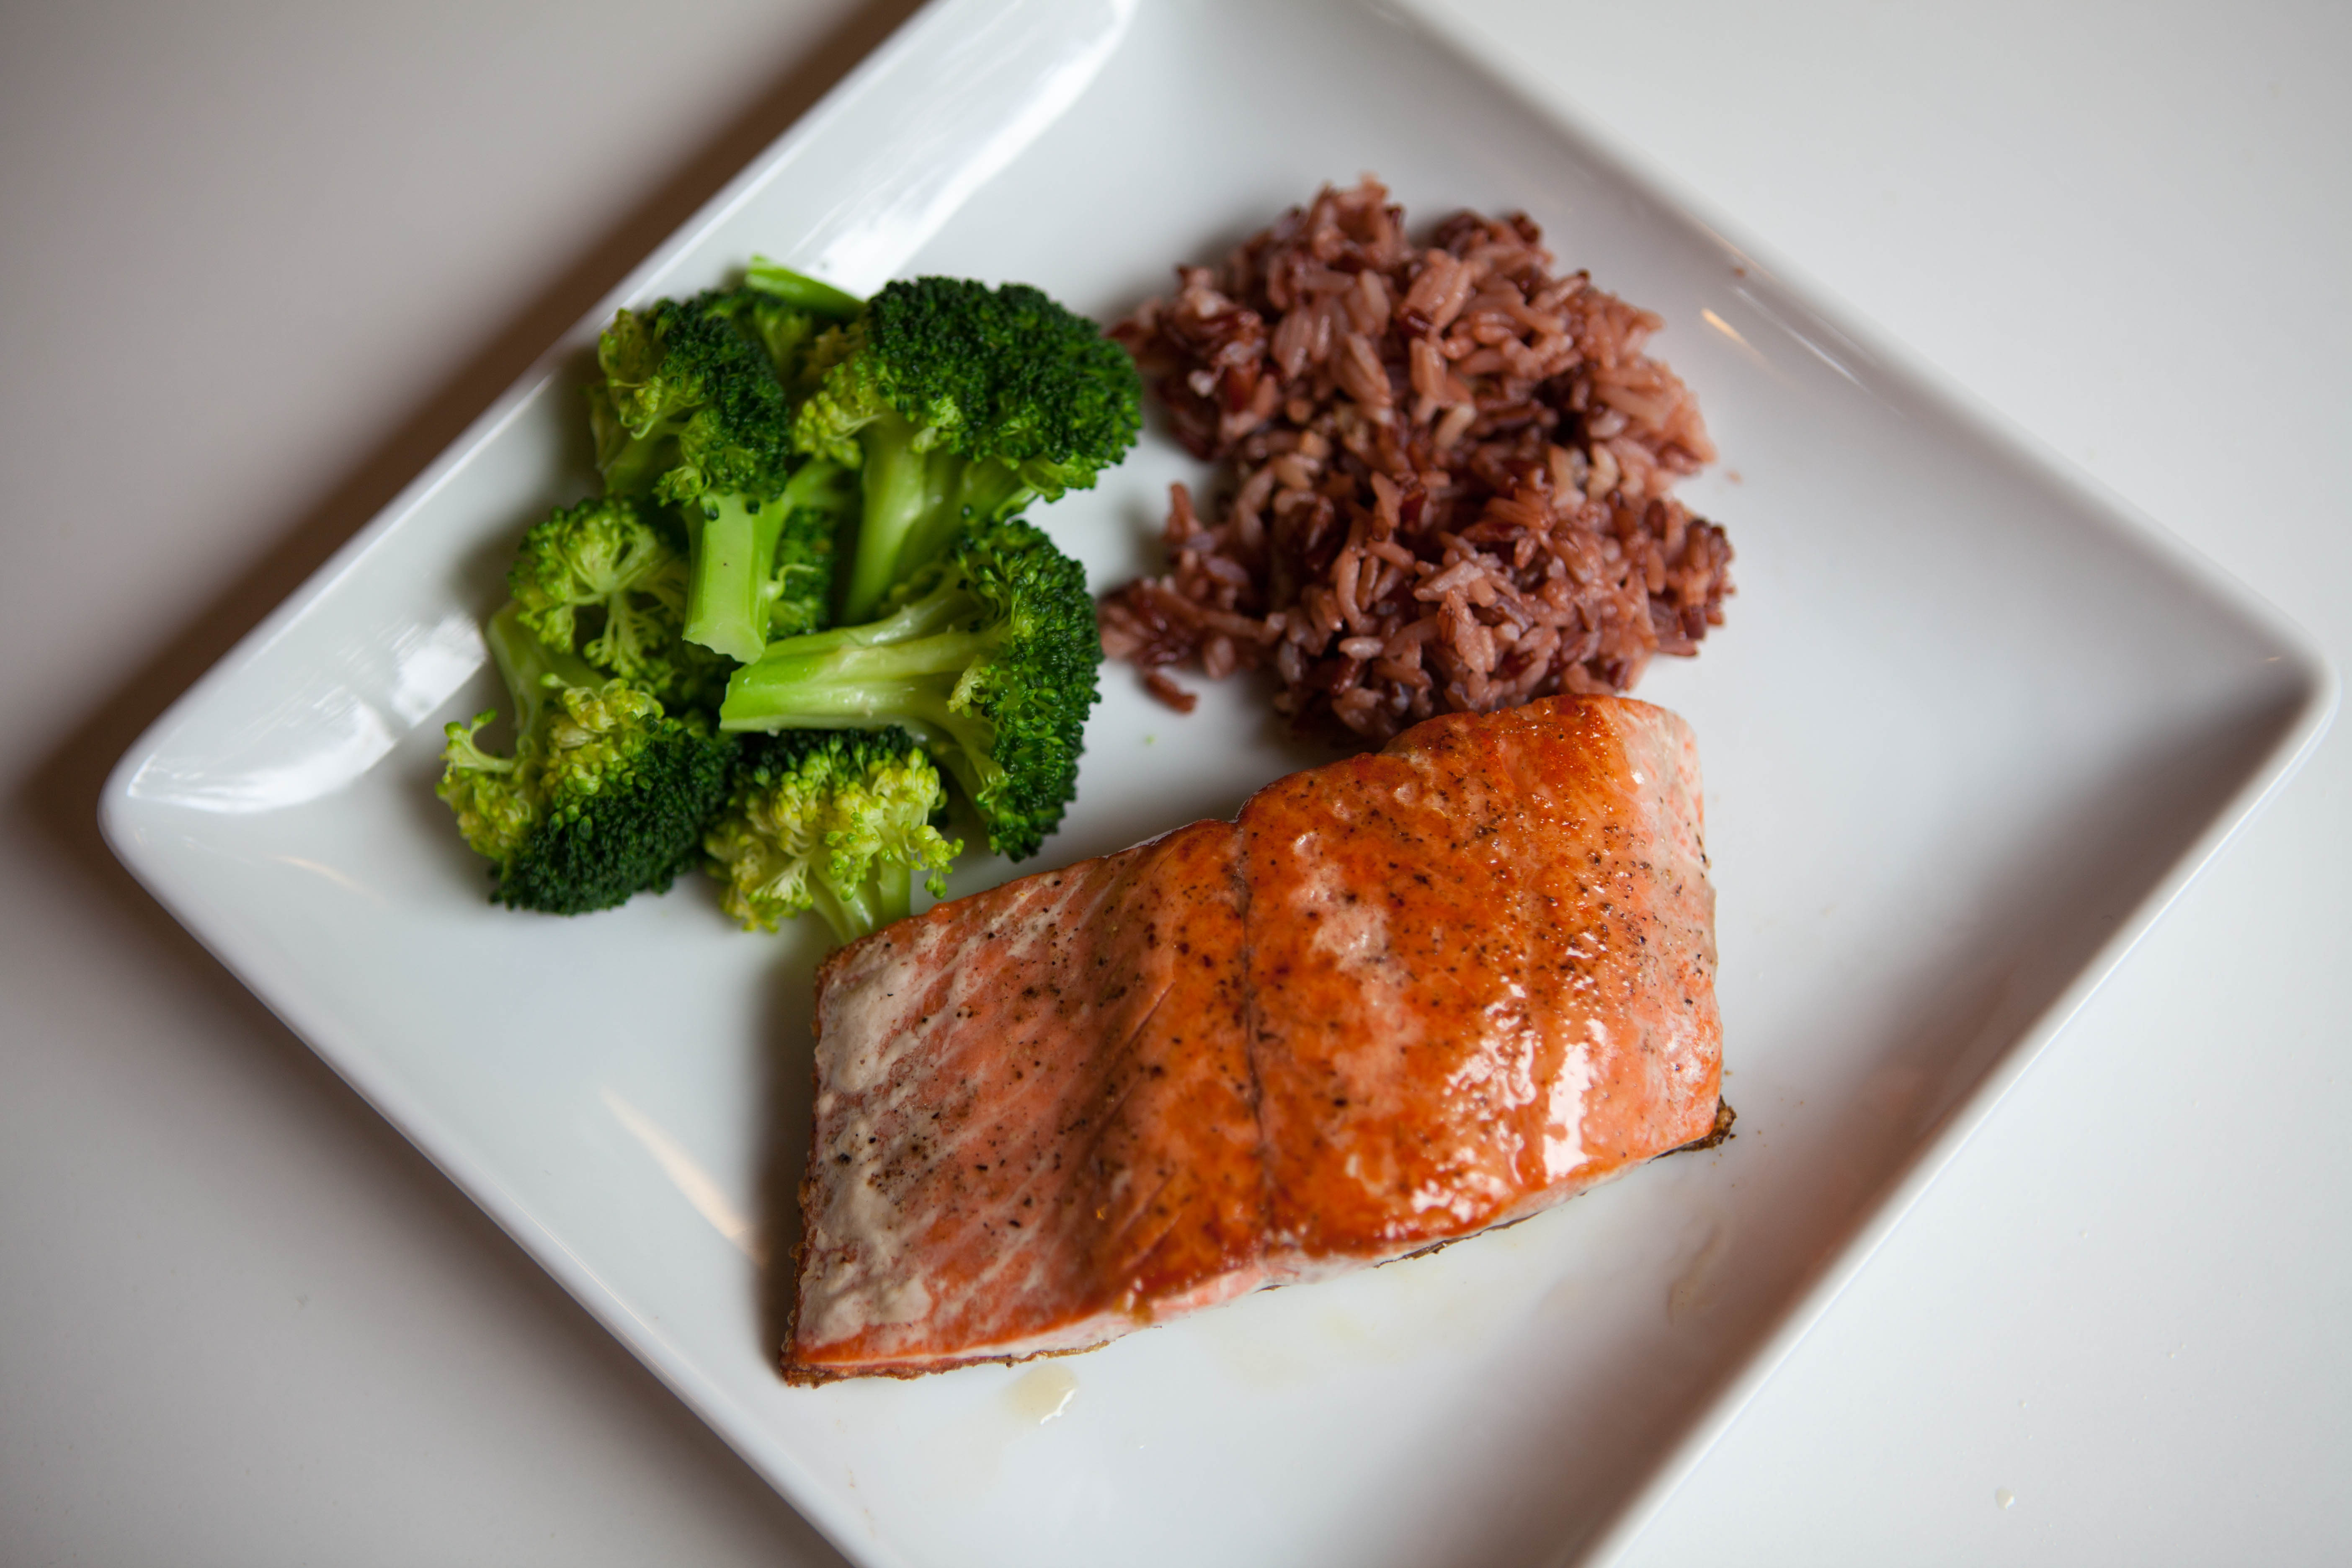
Serve your salmon fillets with rice and veggies. Top the rice and veggies with the lemon Dijon sauce (but don’t pour it over the salmon. You don’t want the skin to get soggy!)
After munching down the salmon skin, sop bites of the salmon in the sauce on your plate. It’s so good!
I know I shouldn’t complain. I know it’s like 102 degrees on the East Coast. But right now it’s 80 degrees outside my Alaska home and it’s TOO DANG HOT.
All we can really do is sit around and complain about how hot it is, so we might as well drink while we’re doing it.
I came up with this delightful fizzy concoction that’s sure to quench your thirst on the most sizzling day.
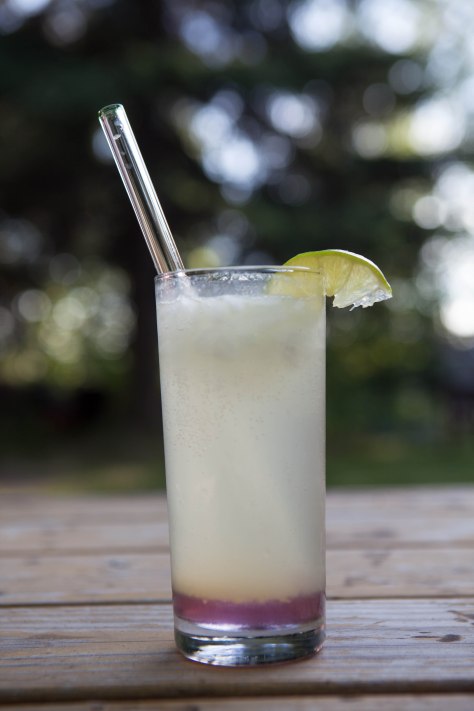
Lavender Gin Fizz
Ingredients
Ice
2 oz. gin
1.5 oz. pineapple juice
juice of 1 lime
1 oz. lavender simple syrup (rose syrup would be tasty too)
Club soda
Fill a tumbler with crushed ice. Add the gin, pineapple juice, lime juice, lavender syrup and top with soda. Stir and serve with a lime wedge.
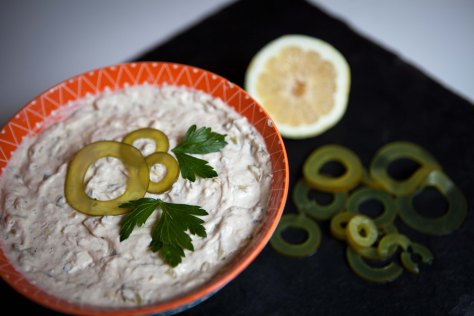
I recently read a story about a Juneau-based company that made food out of kelp. I was immediately intrigued by the idea. One of the best dishes I’ve ever eaten was when I spent a summer in Kodiak and a Chinese woman prepared braised fresh kelp for me.
Barnacle uses bull kelp to make salsa, spice blends and pickles. Their Instagram account displays gorgeous photos of Southeast Alaska along with how they prepare their products and what to serve with them.
Their dill kelp pickles are tangy, slightly sweet and, well, of the sea. What a perfect ingredient to add to a smoked salmon dip.
This dip comes together in no time and is a real crowd-pleaser. Impress your dinner guests by revealing its secret ingredient — wild kelp!
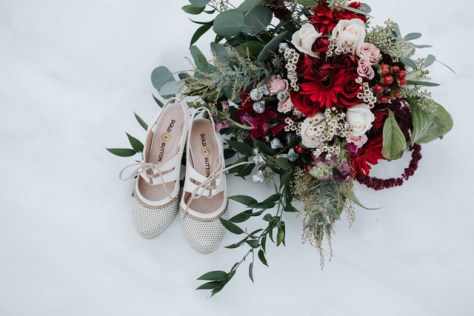
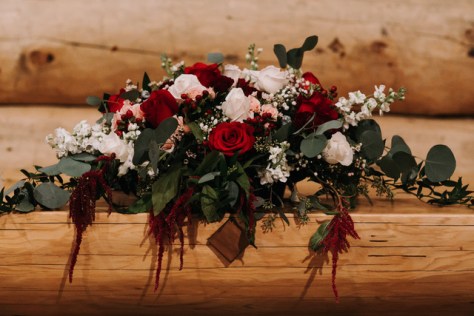
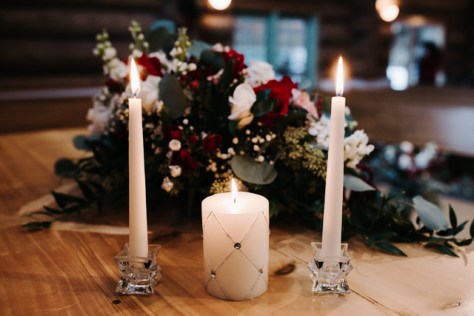
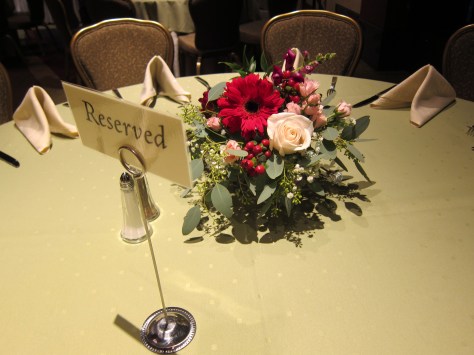
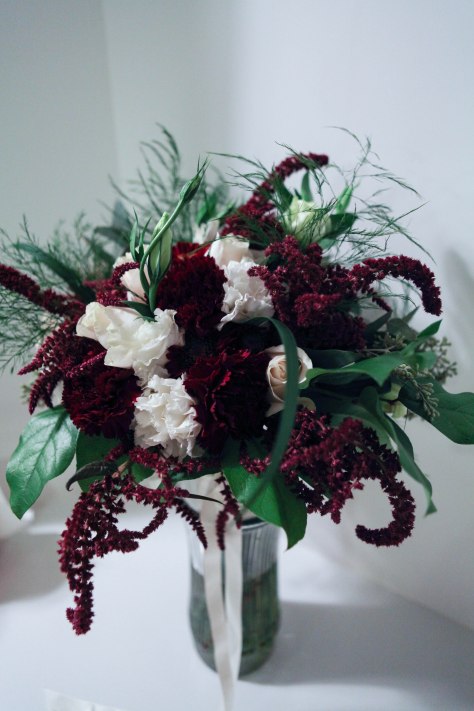
In December I had the opportunity to create wedding flowers at Our Lady of The Snows Chapel in Girdwood. I’ve seen many photos of this quaint cabin in the woods but there was something special about being there in person for the first time.
Olivia and Neil were looking for a wintery floral decor without too much of a Christmas look so I used flowers in deep magenta and scarlet.
A huge thanks to Grace Adams Photography for her breathtaking photos. She’s one of my favorite wedding photographers and I was thrilled to finally be able to work with her.
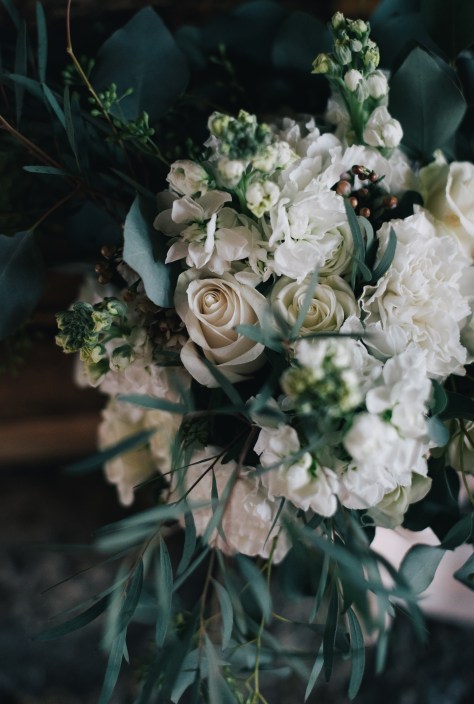
The bride’s bouquet was brimming with the most exquisite white waxflower. She had wanted anemones in her bouquet but they unfortunately weren’t available. I was so happy Olivia was open to my using burgundy gerber daisies instead. Their dark centers gave the look of anemones and are much more durable a flower.
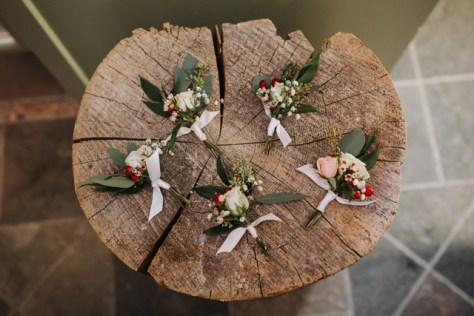
The altar centerpiece was one of my pride and joys. Trailing amaranthus was spilling over the sides and with the eucalyptus, stock and waxflower filled in between the roses it smelled so good!
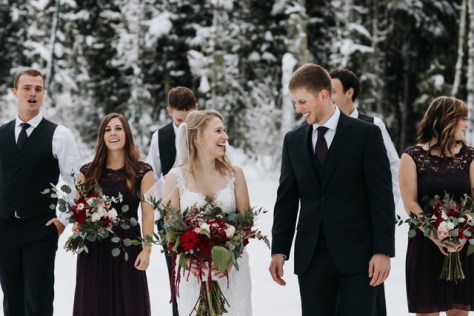
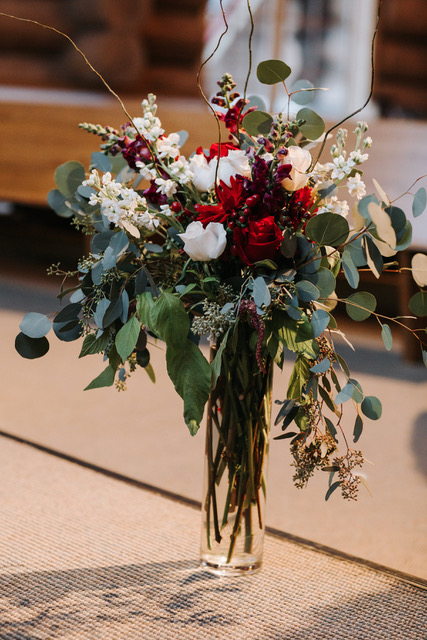
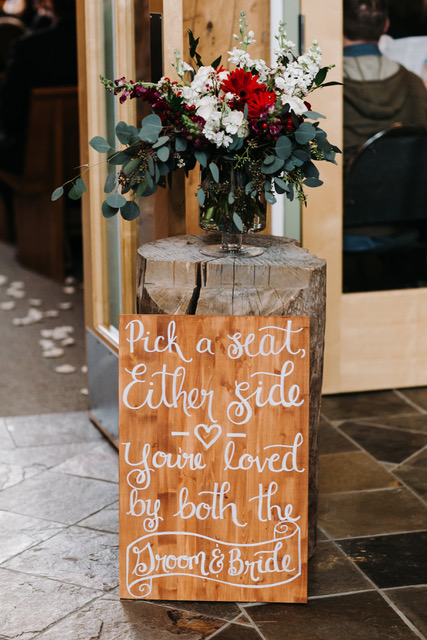
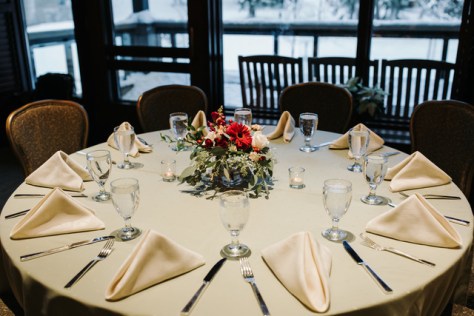
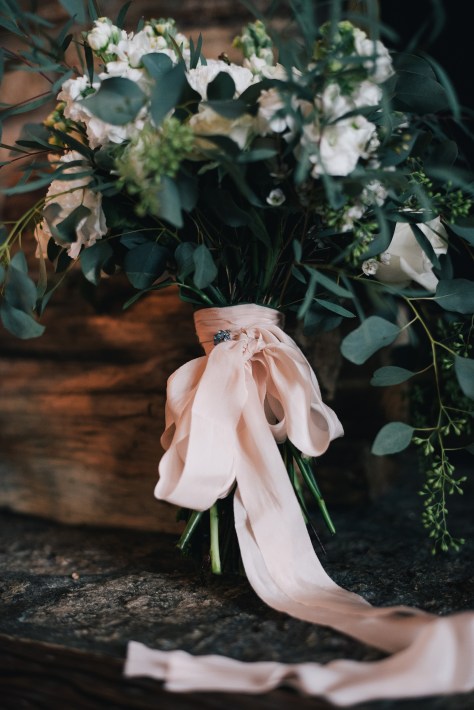
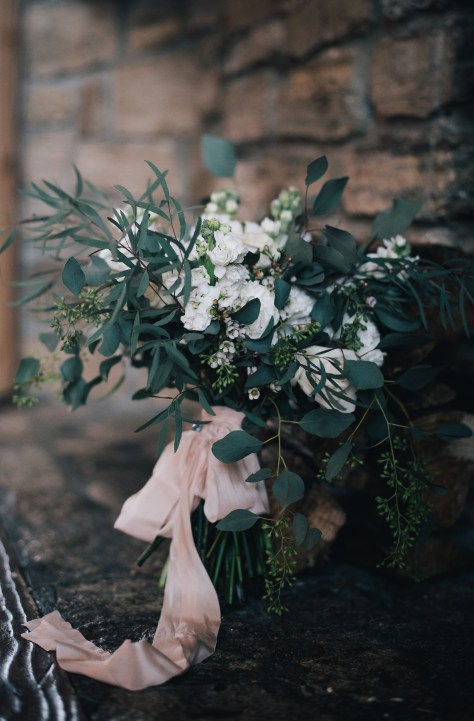
I don’t have the opportunity to do winter wedding flowers too often. Alaskans make the most of their summer and usually get married from June-August. When bride Caitlin hired me for her January wedding I was thrilled. She wanted all white and greenery.
Caitlin and Jason lucked out – the morning of their wedding it was like a magical snowy fairy land. Anchorage has been severely lacking in snow for the past four winters and this year hasn’t disappointed. We got about 18 inches on their wedding day.
Caitlin had me wrap her bouquet in blush silk ribbon. I was overjoyed to finally have the opportunity to use this. It was a dream to wrap and tie! She had me add a little “something blue” at the last minute.
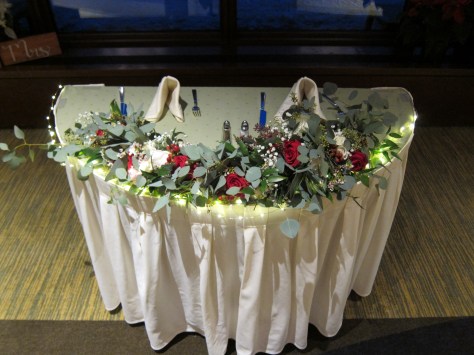
I’m always learning something new with each wedding. With Ariel and Erik it was sending fresh flowers nearly 1,200 miles. This couple lives in Unalaska and for the first time I shipped my floral creations far, far away.
Last summer a friend commissioned me to knit her a slouchy Alaska Flag Hat. It turned out to be a hit and I knit more than 30 of them for various Alaskans. Several asked for a kids or non-slouchy version as we can’t all look as spectacular as Fernanda in a slouchy hat.
I’ve been meaning to rewrite the pattern for months but have been overwhelmed by my floral business. But when a friend of mine texted me her family photo this year, I knew it was time.