It’s been a fun couple of weeks here in Alaska blogland, with akshopgirl taking the lead in week one with “Where the Wild Things Are,” and the whimsical wonders of week two’s “Woodland Creature” theme.
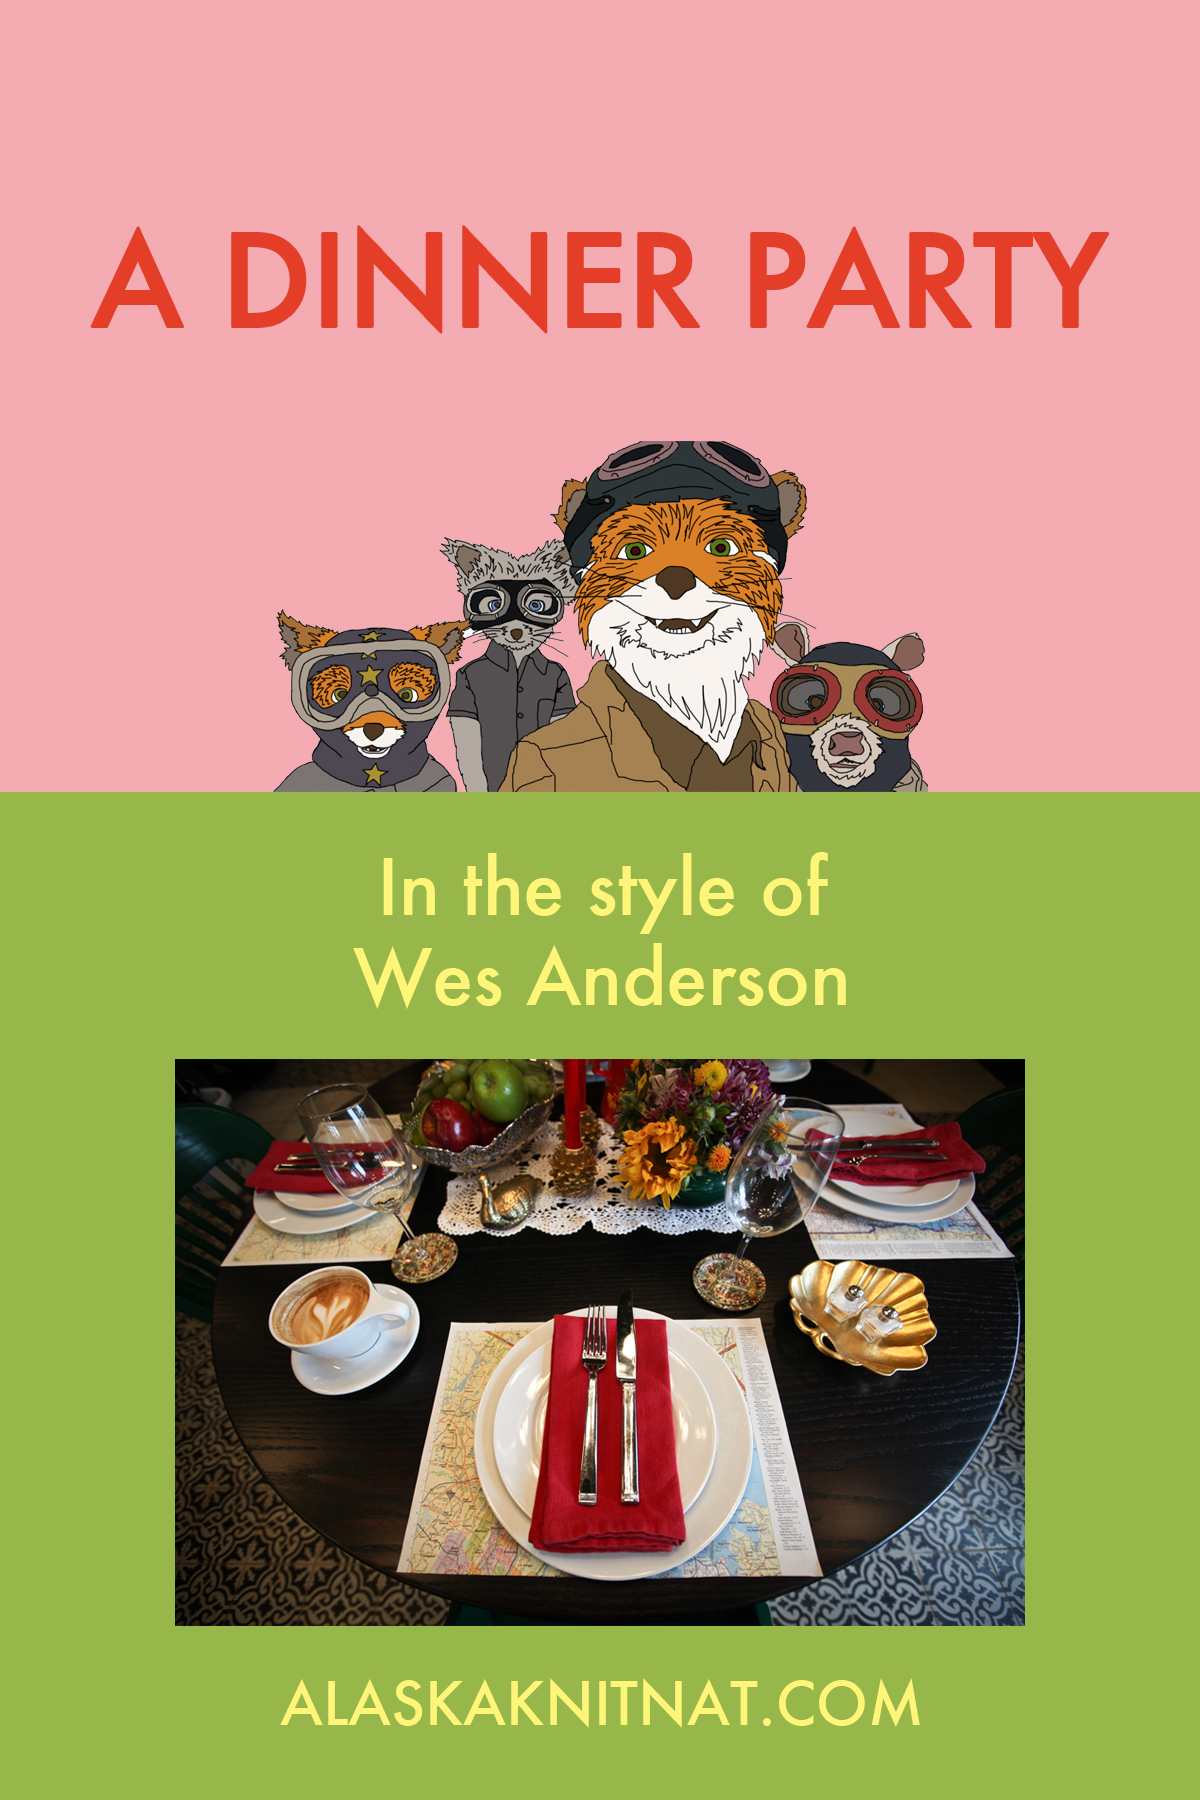
In a similar vein, we are dedicating this week to Wes Anderson. We’ve got costume ideas, knitting patterns, cocktails, music mixes, and in this post I’ll show you how to set your table for a Wes Anderson theme party.
We’re all adults here. Our days of Halloween ragers have long passed, but that doesn’t mean we can’t celebrate. This theme party is for the folks who have left their kids with the grandparents for the night. It’s fun, it’s classy and you can probably find all the materials in your house (I raided my parents’ place, which, as it turns out, is very Tenenbaum-esque).
A huge thanks to Black Cup for letting us stage our tablescape in their remodeled cafe. The floor tiles alone would make Royal Tenenbaum stop and smirk. If you haven’t had a chance to take a look at Cafe Del Mundo’s makeover, I highly recommend it.
Here’s what you’ll need to host your very own Wes Anderson dinner party.
It’s T-minus 12 days till Halloween and if you haven’t pre-ordered your costume then that means you’re like me and you leave it to the last minute, thrift stores and luck.
In Anchorage, one of the best places to build your own costumes is the Bishop’s Attic on Gambell. This place is ’80s costume heaven (and keep it in mind for those ugly sweater parties during the holidays).
And this week’s theme is definitely thrift store appropriate. We’re dedicating the week to all things Wes Anderson.
So here are three Wes Anderson costumes that are easy to slap together with a visit or two to your local thrift shop and some rummaging through your closet.
This outfit was easy to find at the thrift store. I recommend washing the beret before wearing. And if you’re able to use your own pea coat you’ve just created a perfect Alaska-friendly costume (yay for staying warm!)
Accoutrements:
Binoculars
Retro suitcase
Pea coat
Knee-high socks
Saddle shoes
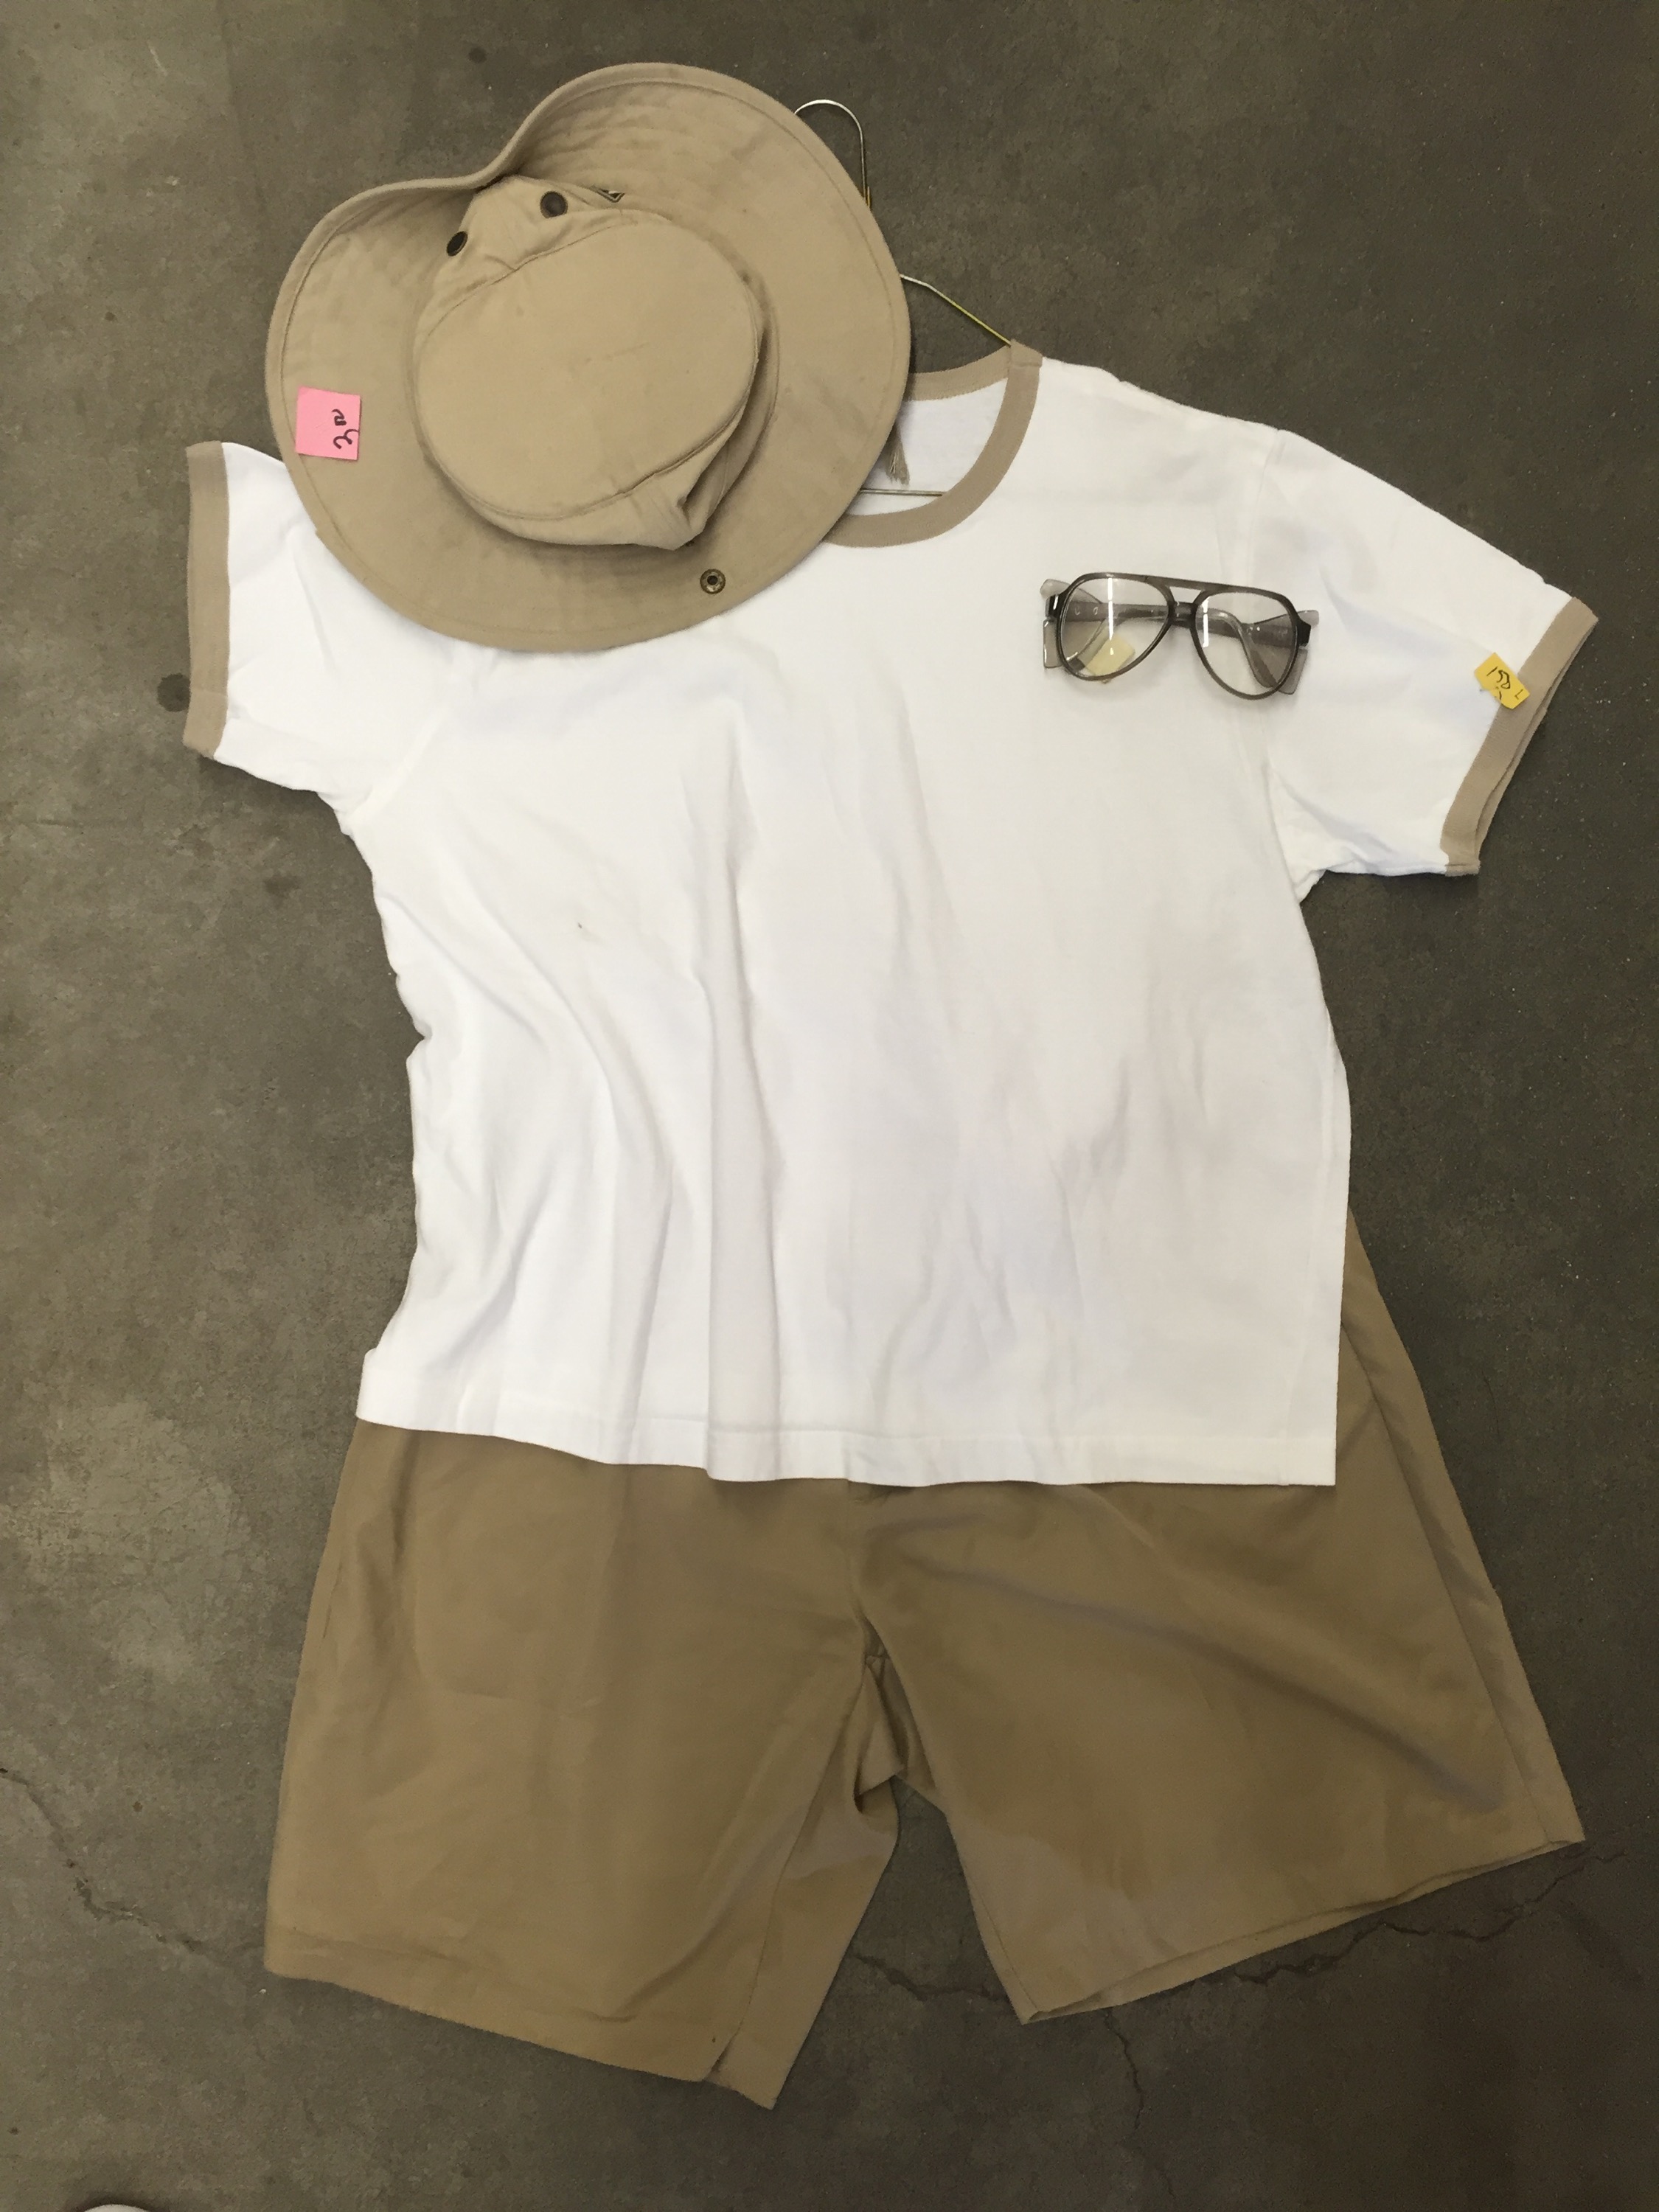
2. Dudley from “The Royal Tenenbaums”
Beautiful artist’s rendering photographed by Will Laren on flickr.
From the thrift store:
Retro t-shirt
Cargo shorts
Safari Hat
’80s glasses
This costume needs no additional elements. It’s perfect. But some Croakies couldn’t do any harm.
3. Team Zissou from “The Life Aquatic”
By John Lester (Flickr: Zissou)
This is the simplest costume I was able to find at the thrift store. Just have a look in the uniforms section of the shop and grab some hospital scrubs. Top it off with a red hat and you’re solid. Go the extra mile and print off this free logo and tape it to the shirt.
If you have a spare few hours this week, knit yourself a Zissou cap using my free pattern.
And stay tuned for more Wes Anderson delights this week from me, akshopgirl and TessieStyle.
It’s week two of our Halloween Blog Party and the theme is “Woodland Creatures.” So far we’ve had fairy flower crown and forest garland tutorials, a woodland fairytale mix by DJ Spencer Lee and today I’ve got a super quick baby costume that requires minimal crafty skills and a shoestring budget.
This was my son’s first Halloween costume and I love it so.
“Step off. Don’t make me sick my Jeremy Fisher on you.”A while back AK Shopgirl was inspired by our little gnome. She decided to dress up her twin baby boys as more traditional David the Gnome.
Here’s all you need to achieve a gnome-tastic baby outfit:
*If you aren’t a knitter, I suggest making a gnome hat the way AK Shopgirl did using a sheet of red craft foam fashioned into a cone, adhered with a hot glue gun. Ohhappyday.com has a free template here, if you want to get technical.
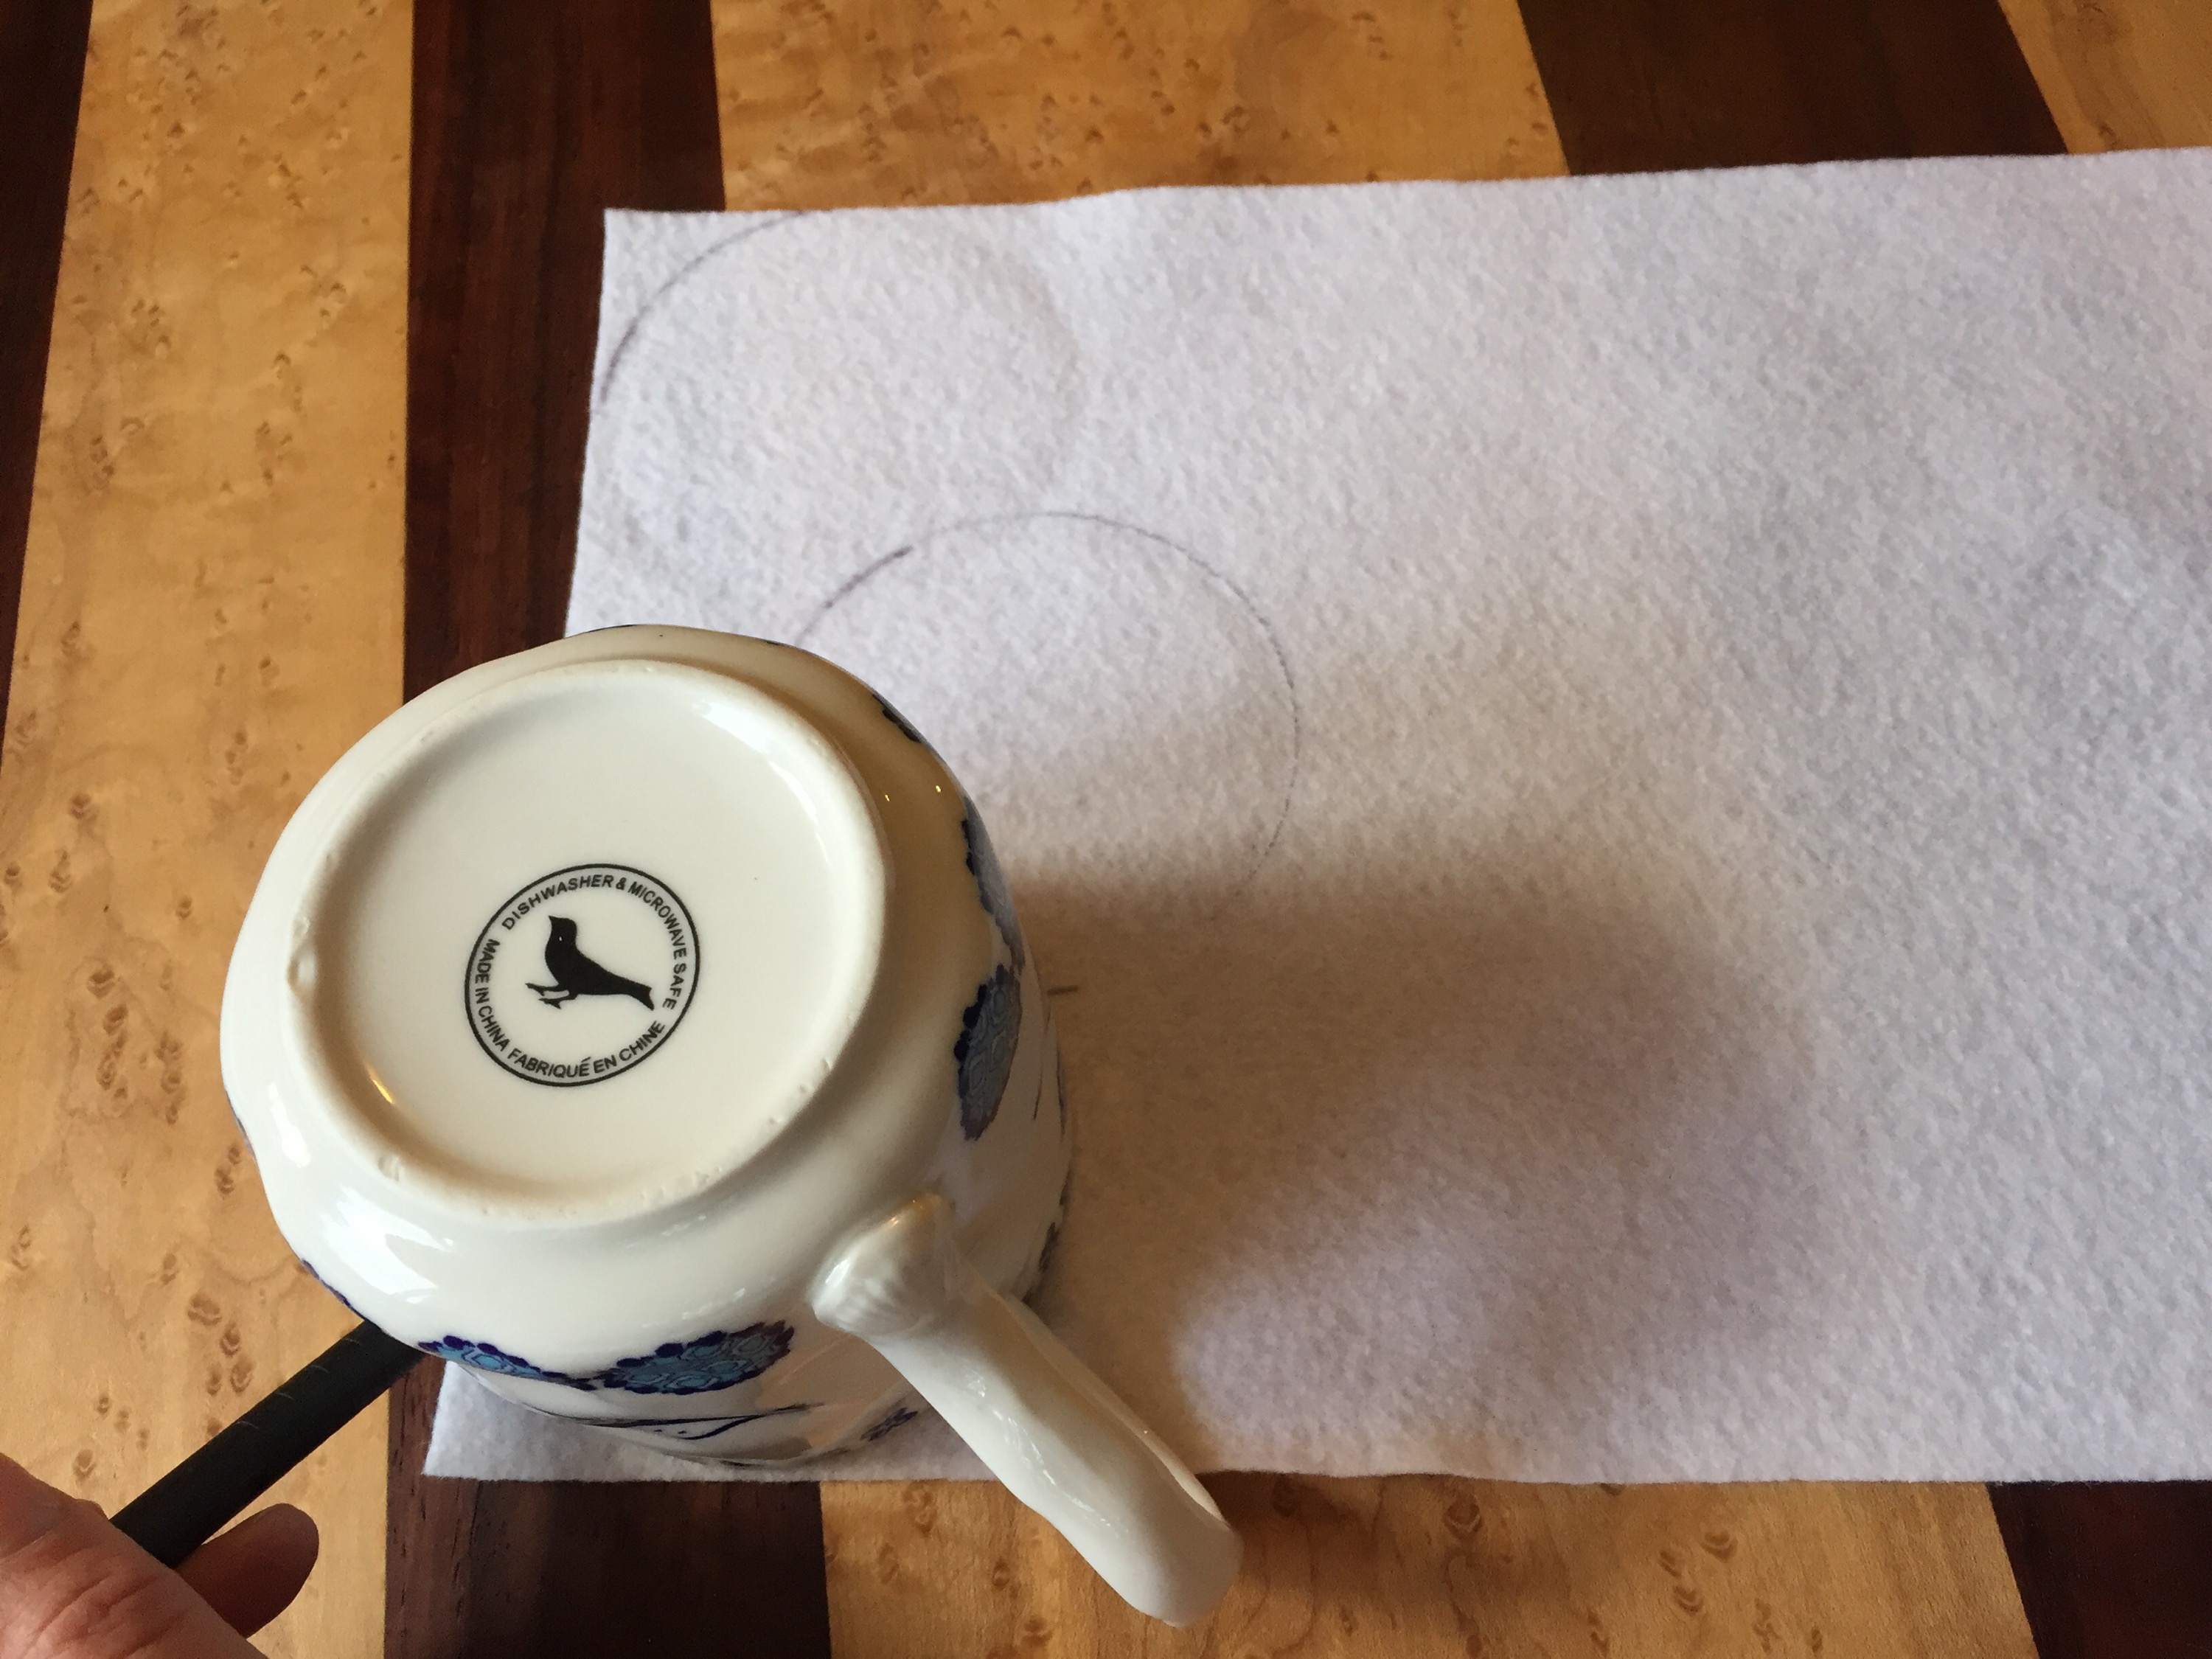
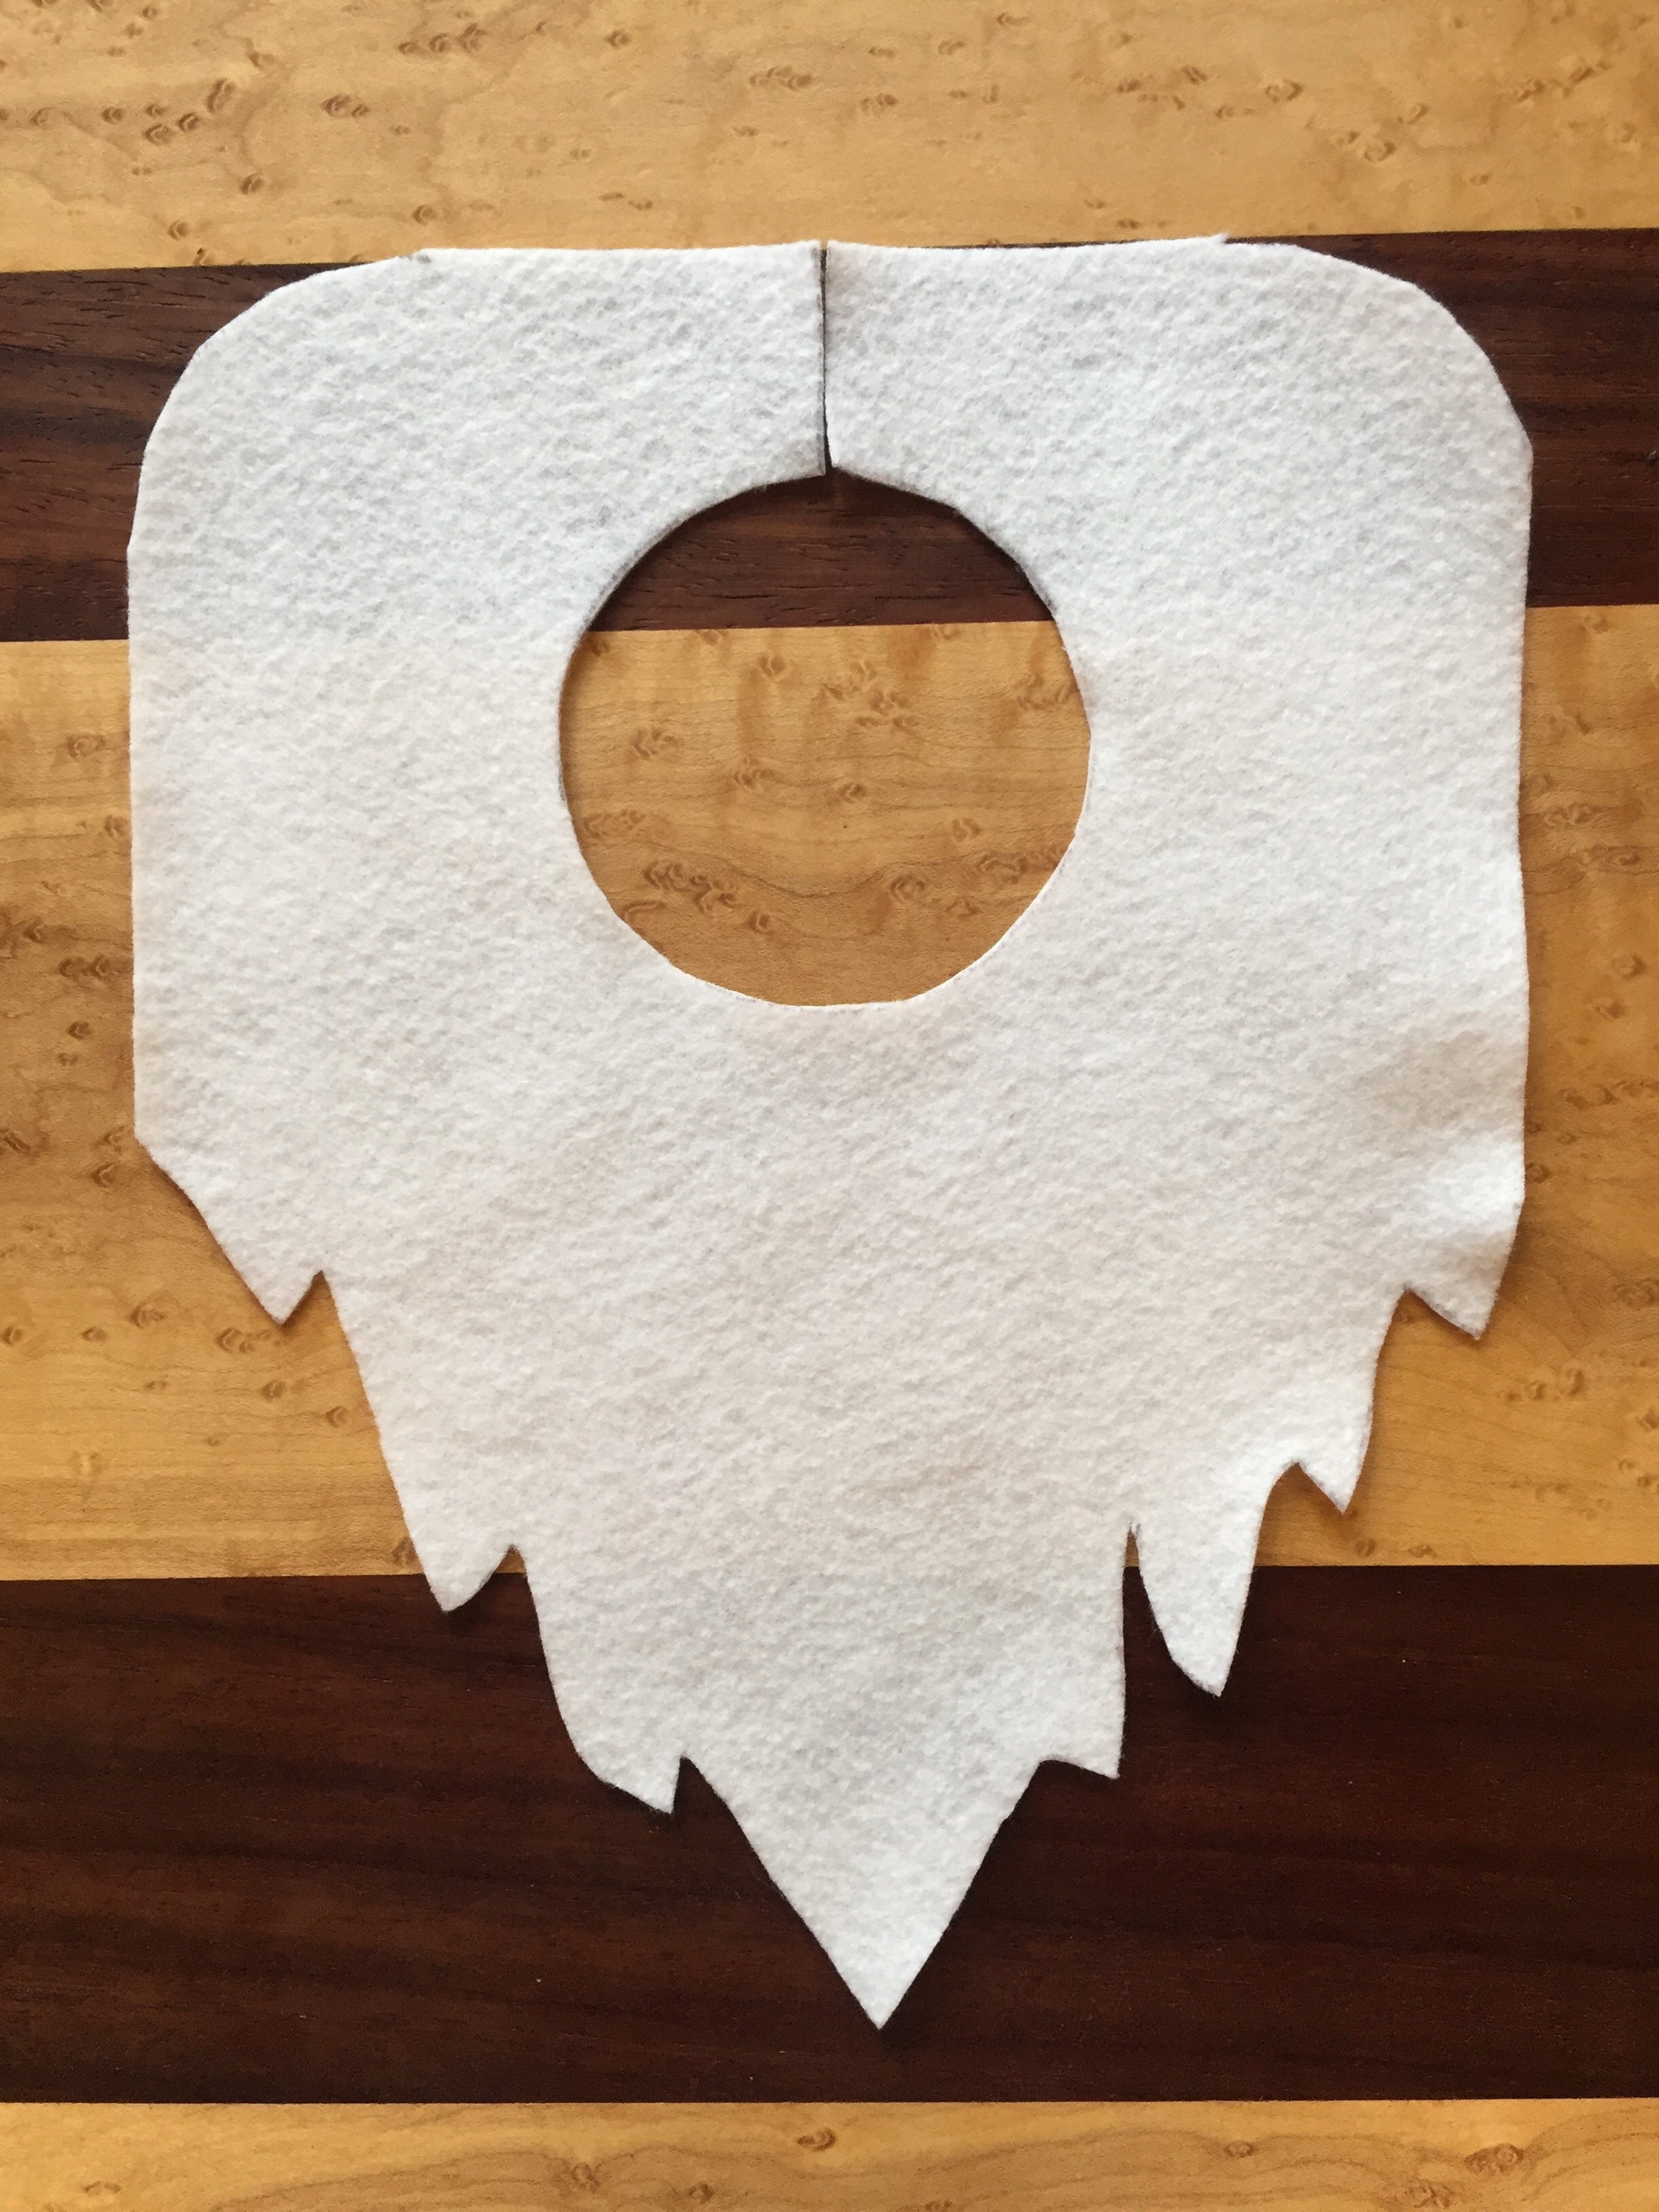
How to make the beard
Place the mug upside down in the middle of the white felt, 1.5 inches down from the top edge. Trace a circle for the neck hole.
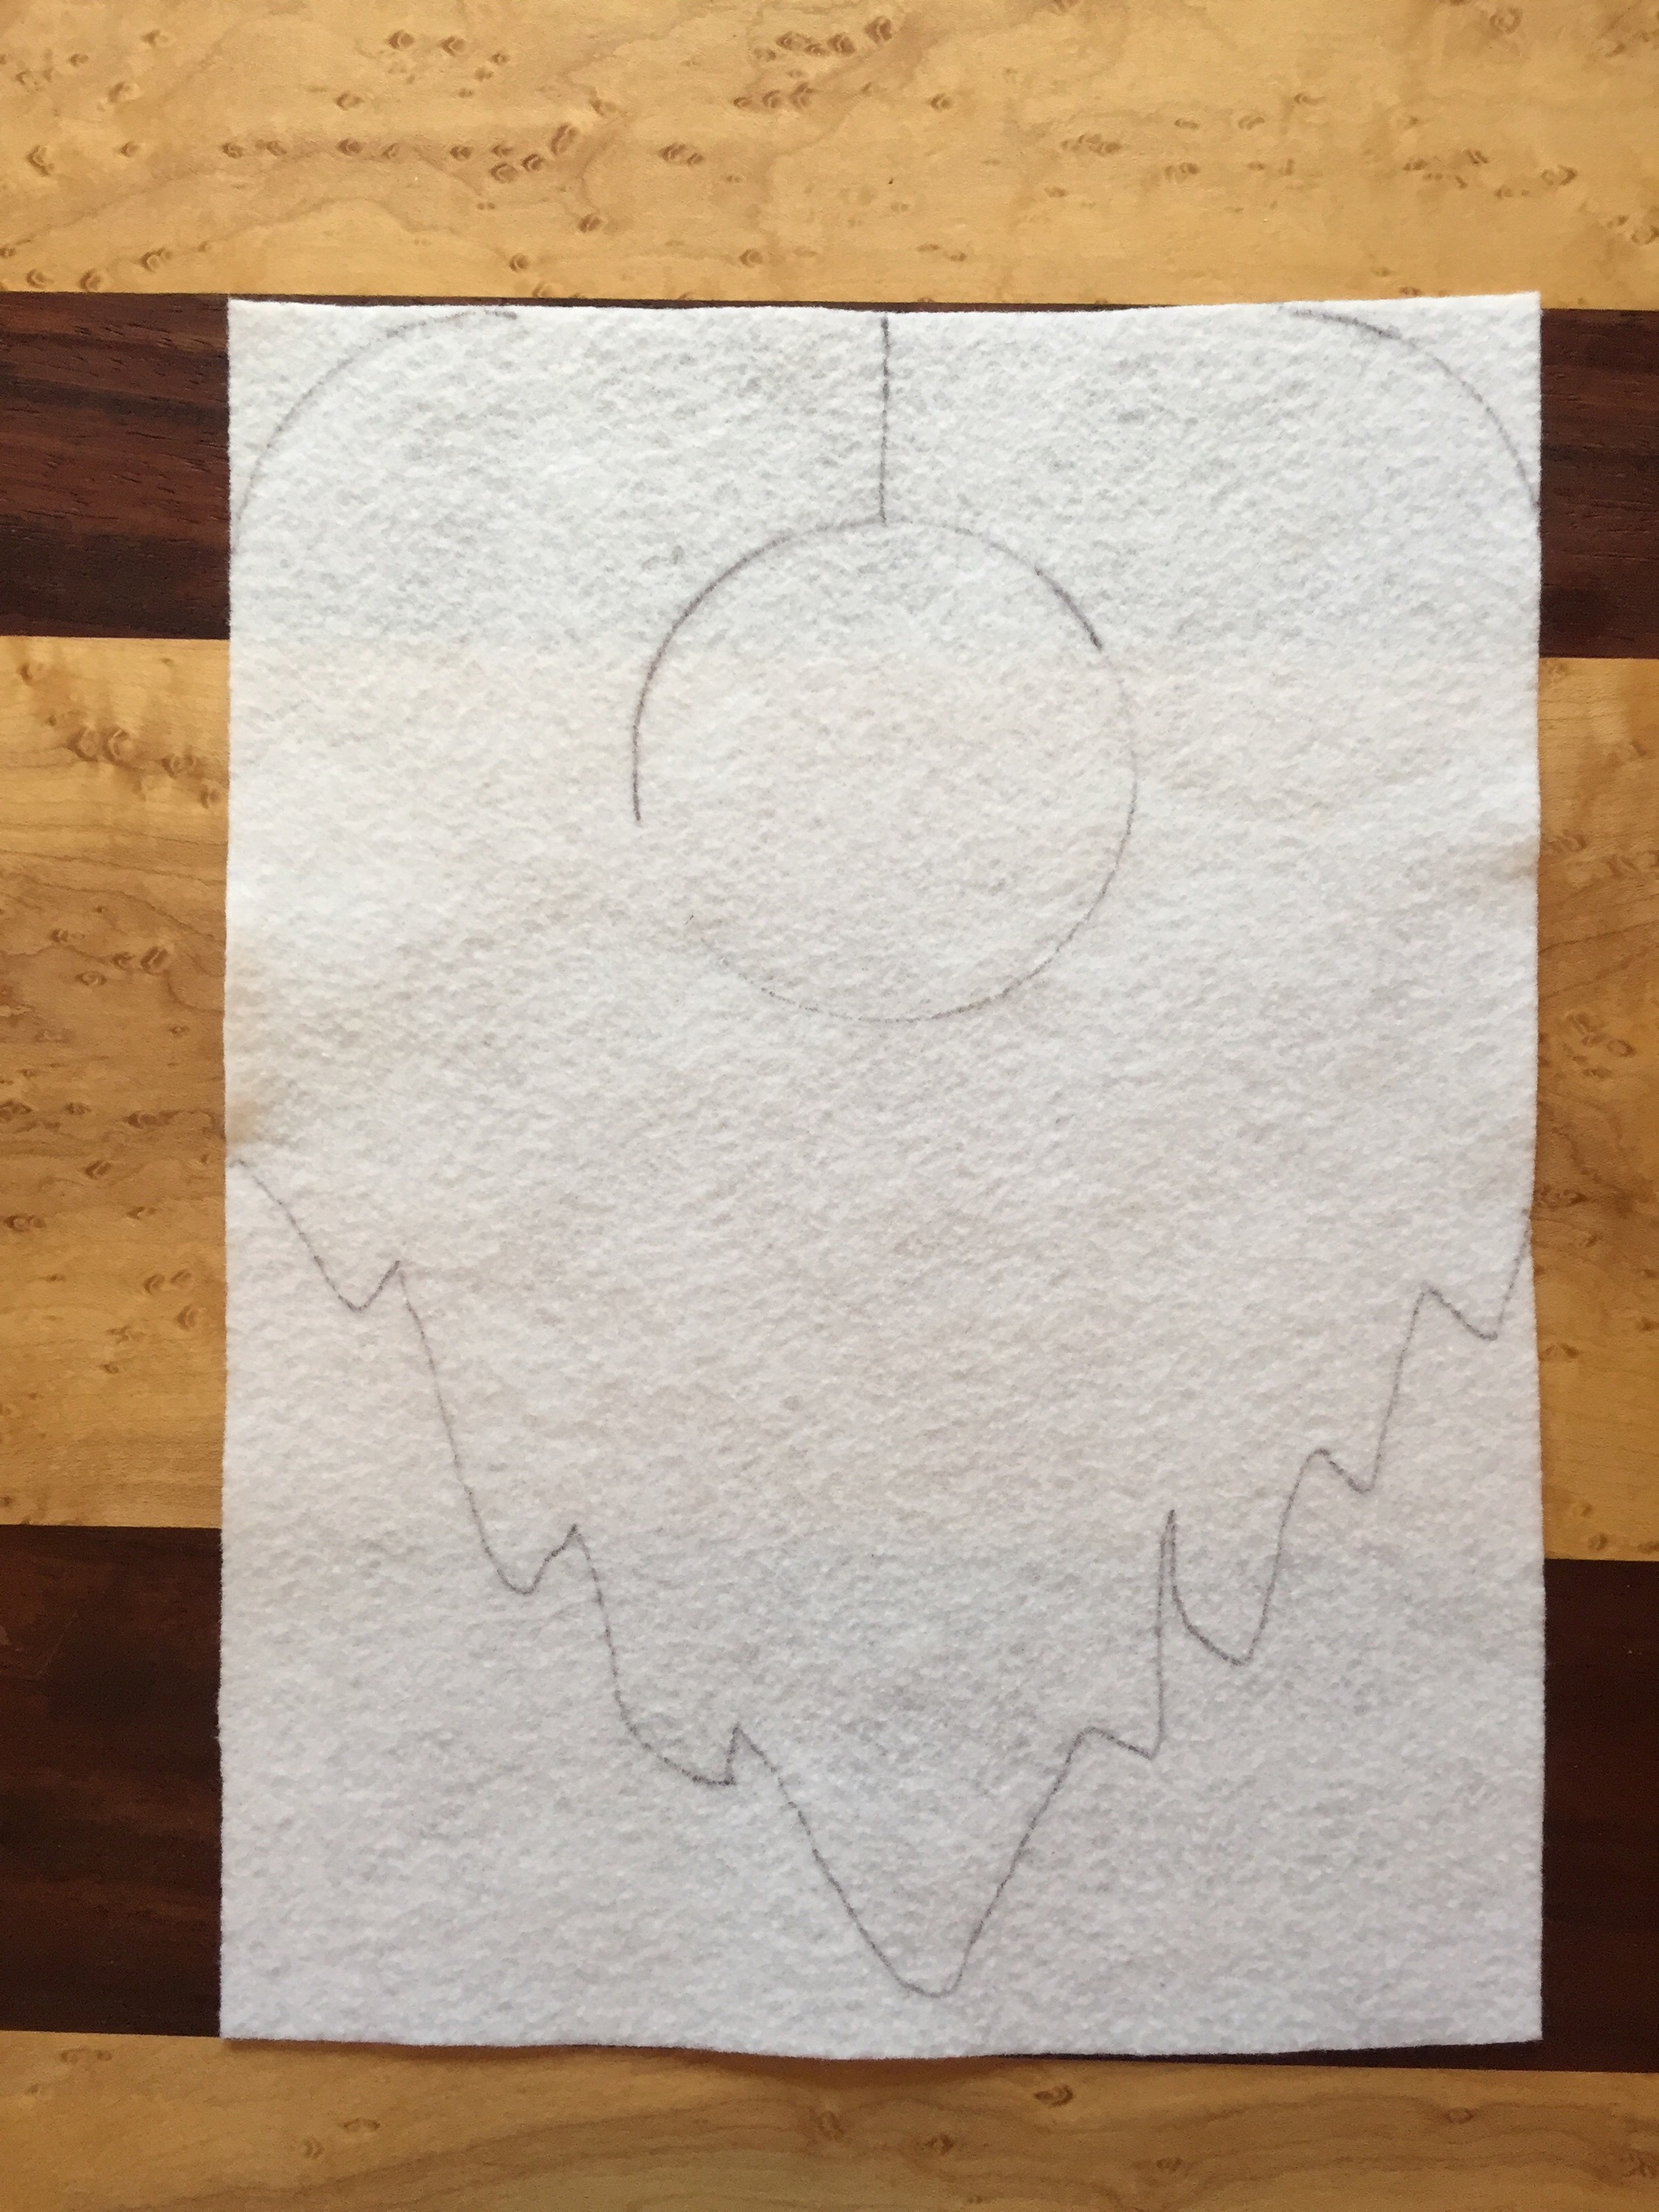
Use the mug to shape the corners of the beard bib.
Draw a line at the top of the neck hole to the top edge of the felt. This will be the opening of the beard bib. I just love saying “beard bib.”
Freehand the shape of the beard. Cut out your beard bib.
Dress up baby of choice in the onesie, pants and booties. Use a safety pin to connect the back edges of the beard bib. Place pointy hat atop baby.
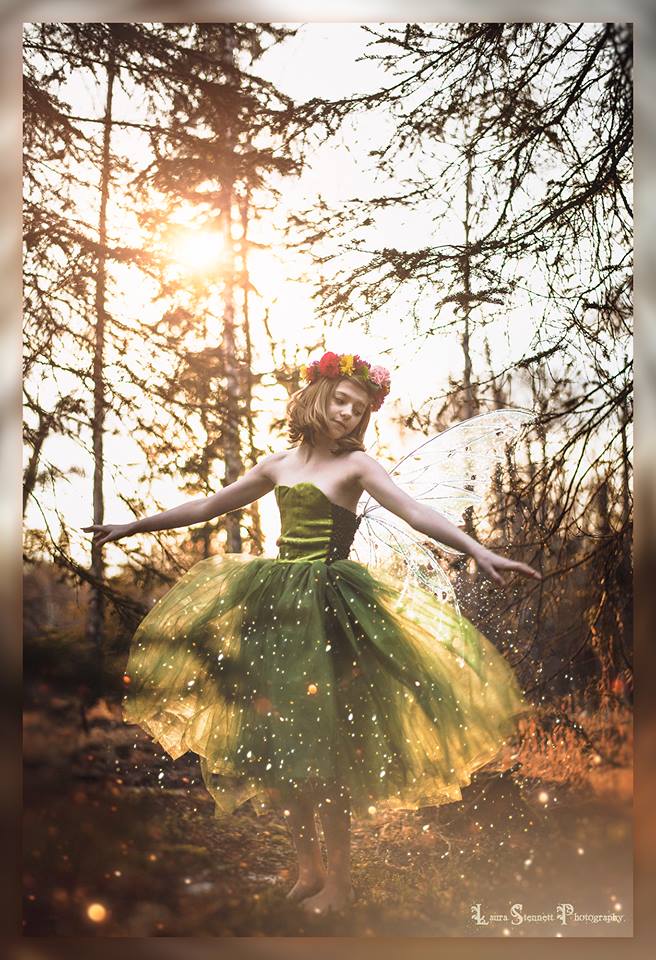
Flower crowns are my thing. I love making them and I certainly love wearing them. After months of working with Meringue Studio Boudoir and having a couple of booths set up with the Anchorage Downtown Partnership, I’ve had lots of people ask me if I have a tutorial for my flower crowns.
Check all three of our sites this week for costume ideas, décor, music mixes and more.
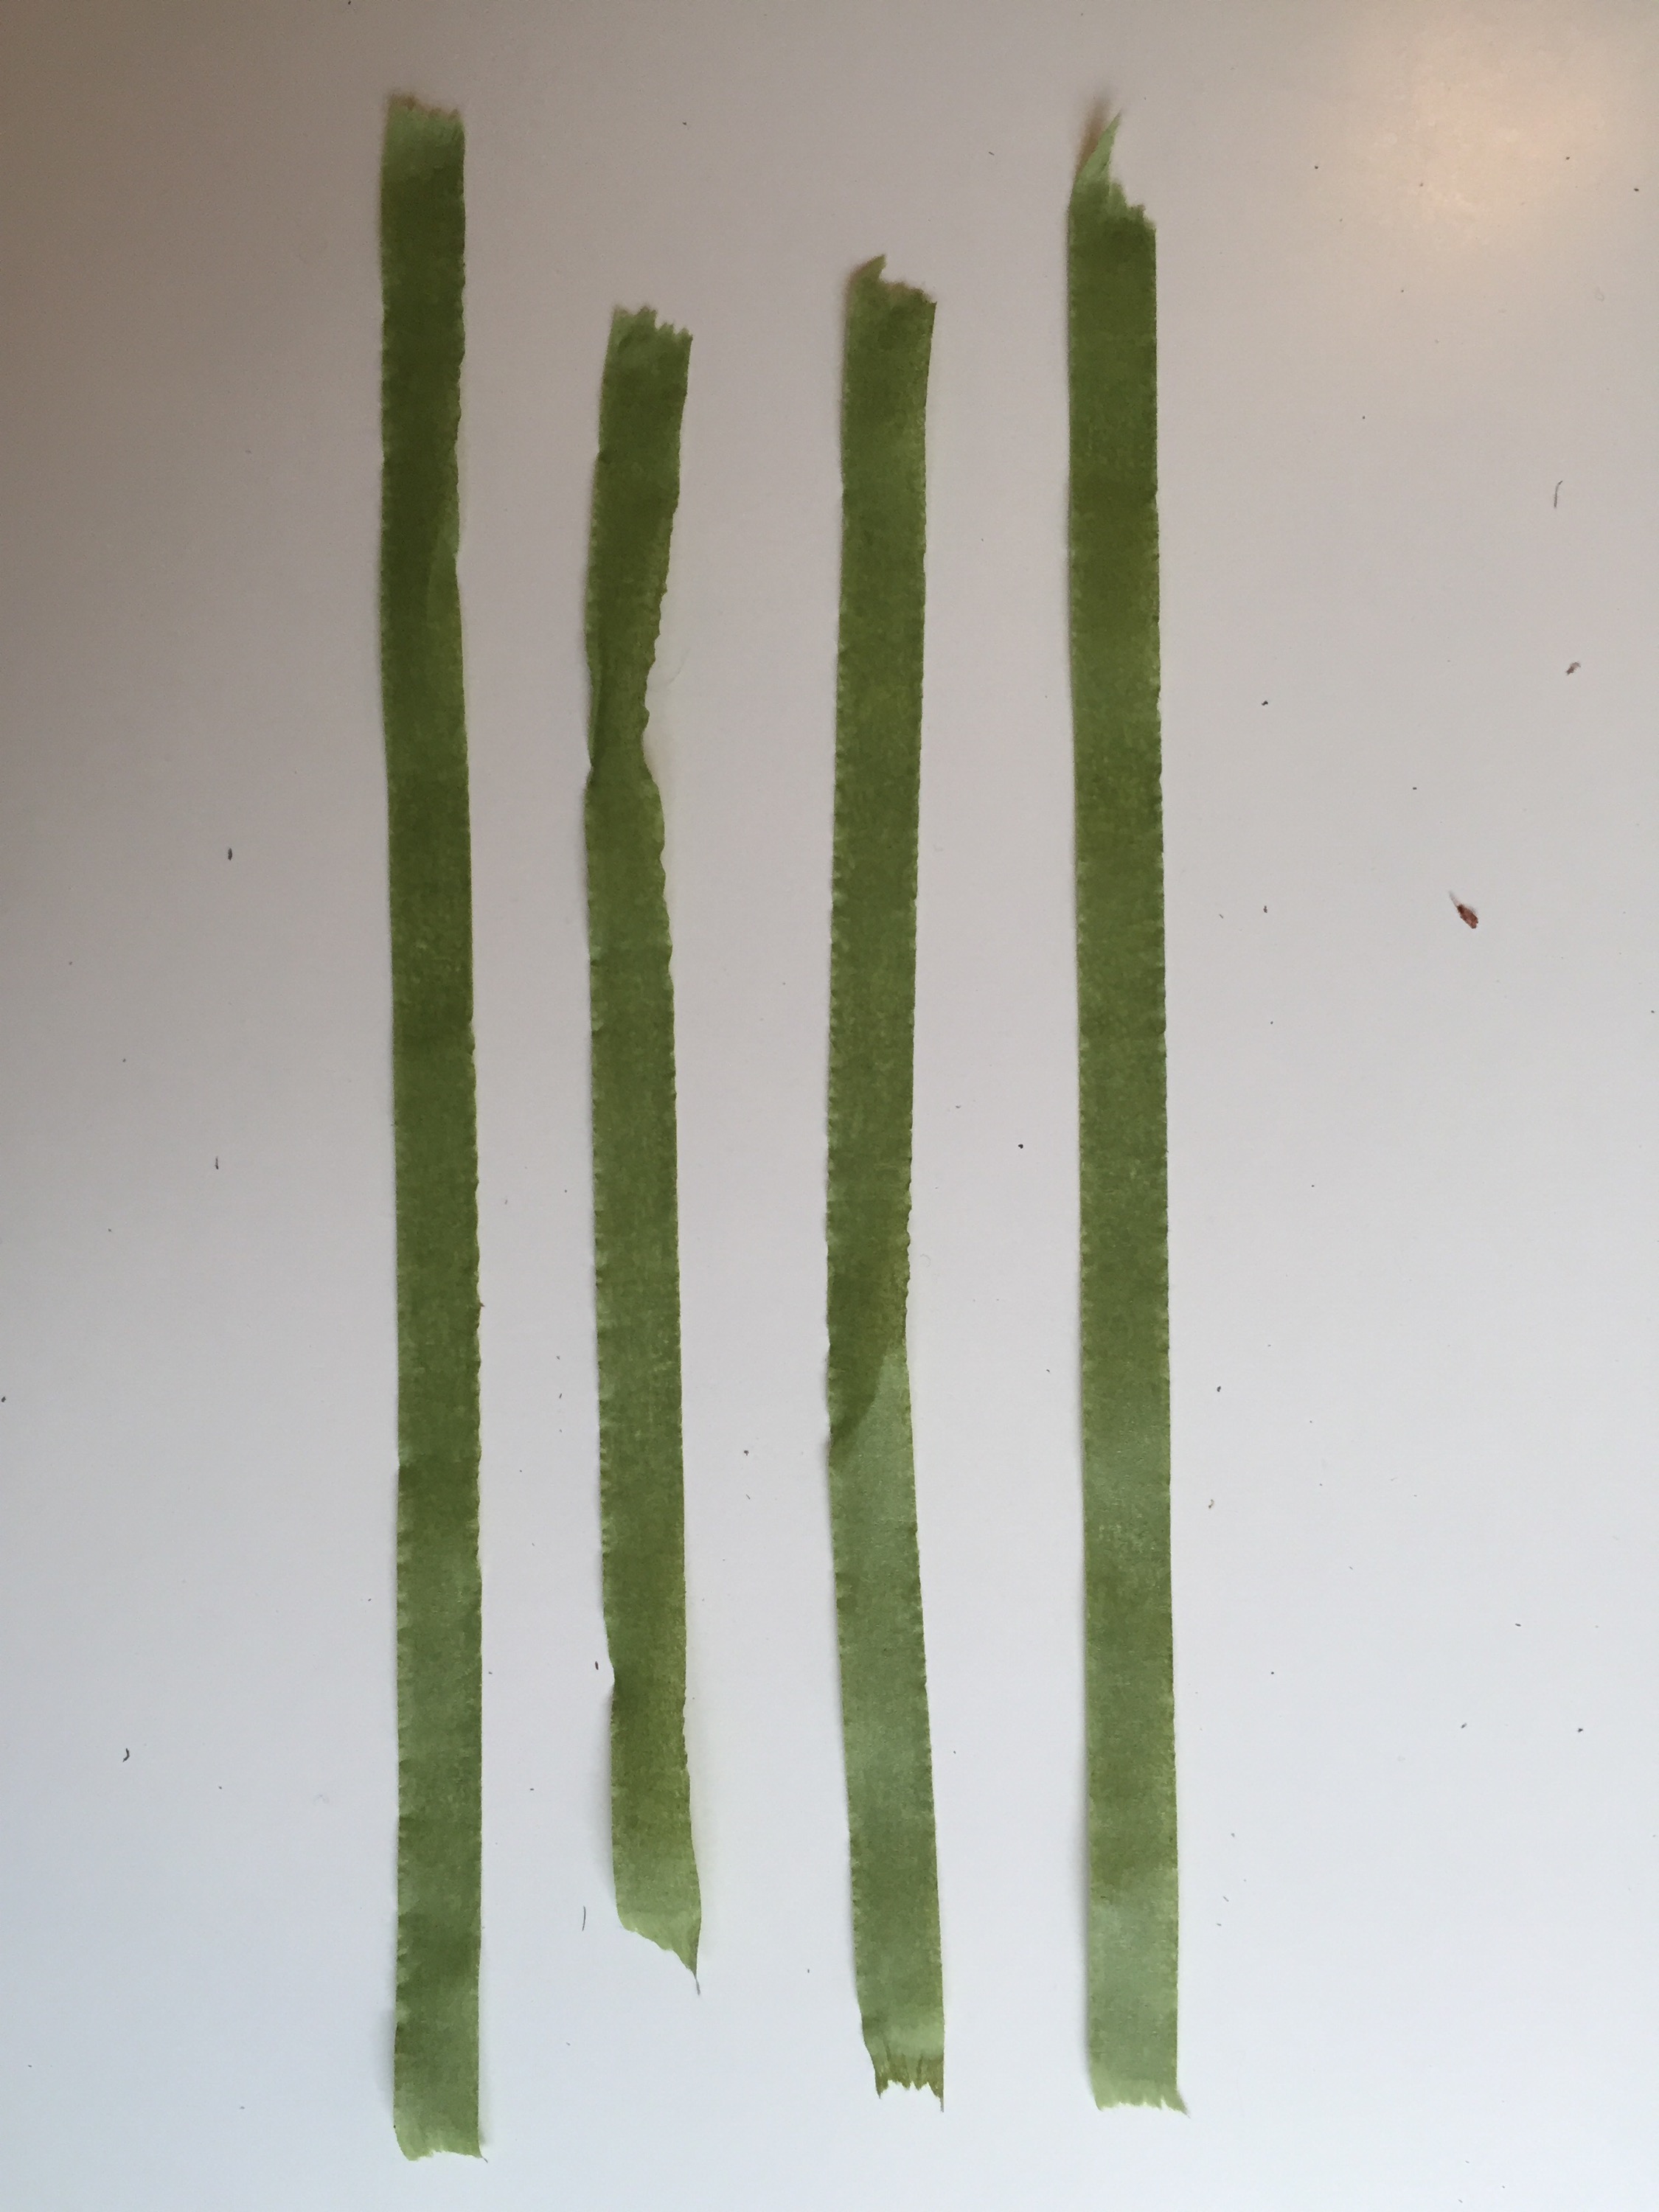
My flower crowns are no trade secret (although you do have to have a florist business license to acquire the light green floral tape). I’ve been held up by simple technological difficulties (I don’t have a tripod that allows for bird’s eye view).
I asked my husband to figure it out. Five minutes and some duct tape later, he had rigged up a suitable bird’s eye camera. Thanks to The Alaska Life for the free selfie stick — I finally found a non-silly way to use it ;).
Whether you’re dressing up yourself or your little girl this Halloween, there’s no reason you shouldn’t have a fresh flower crown to compliment your fairy costume.
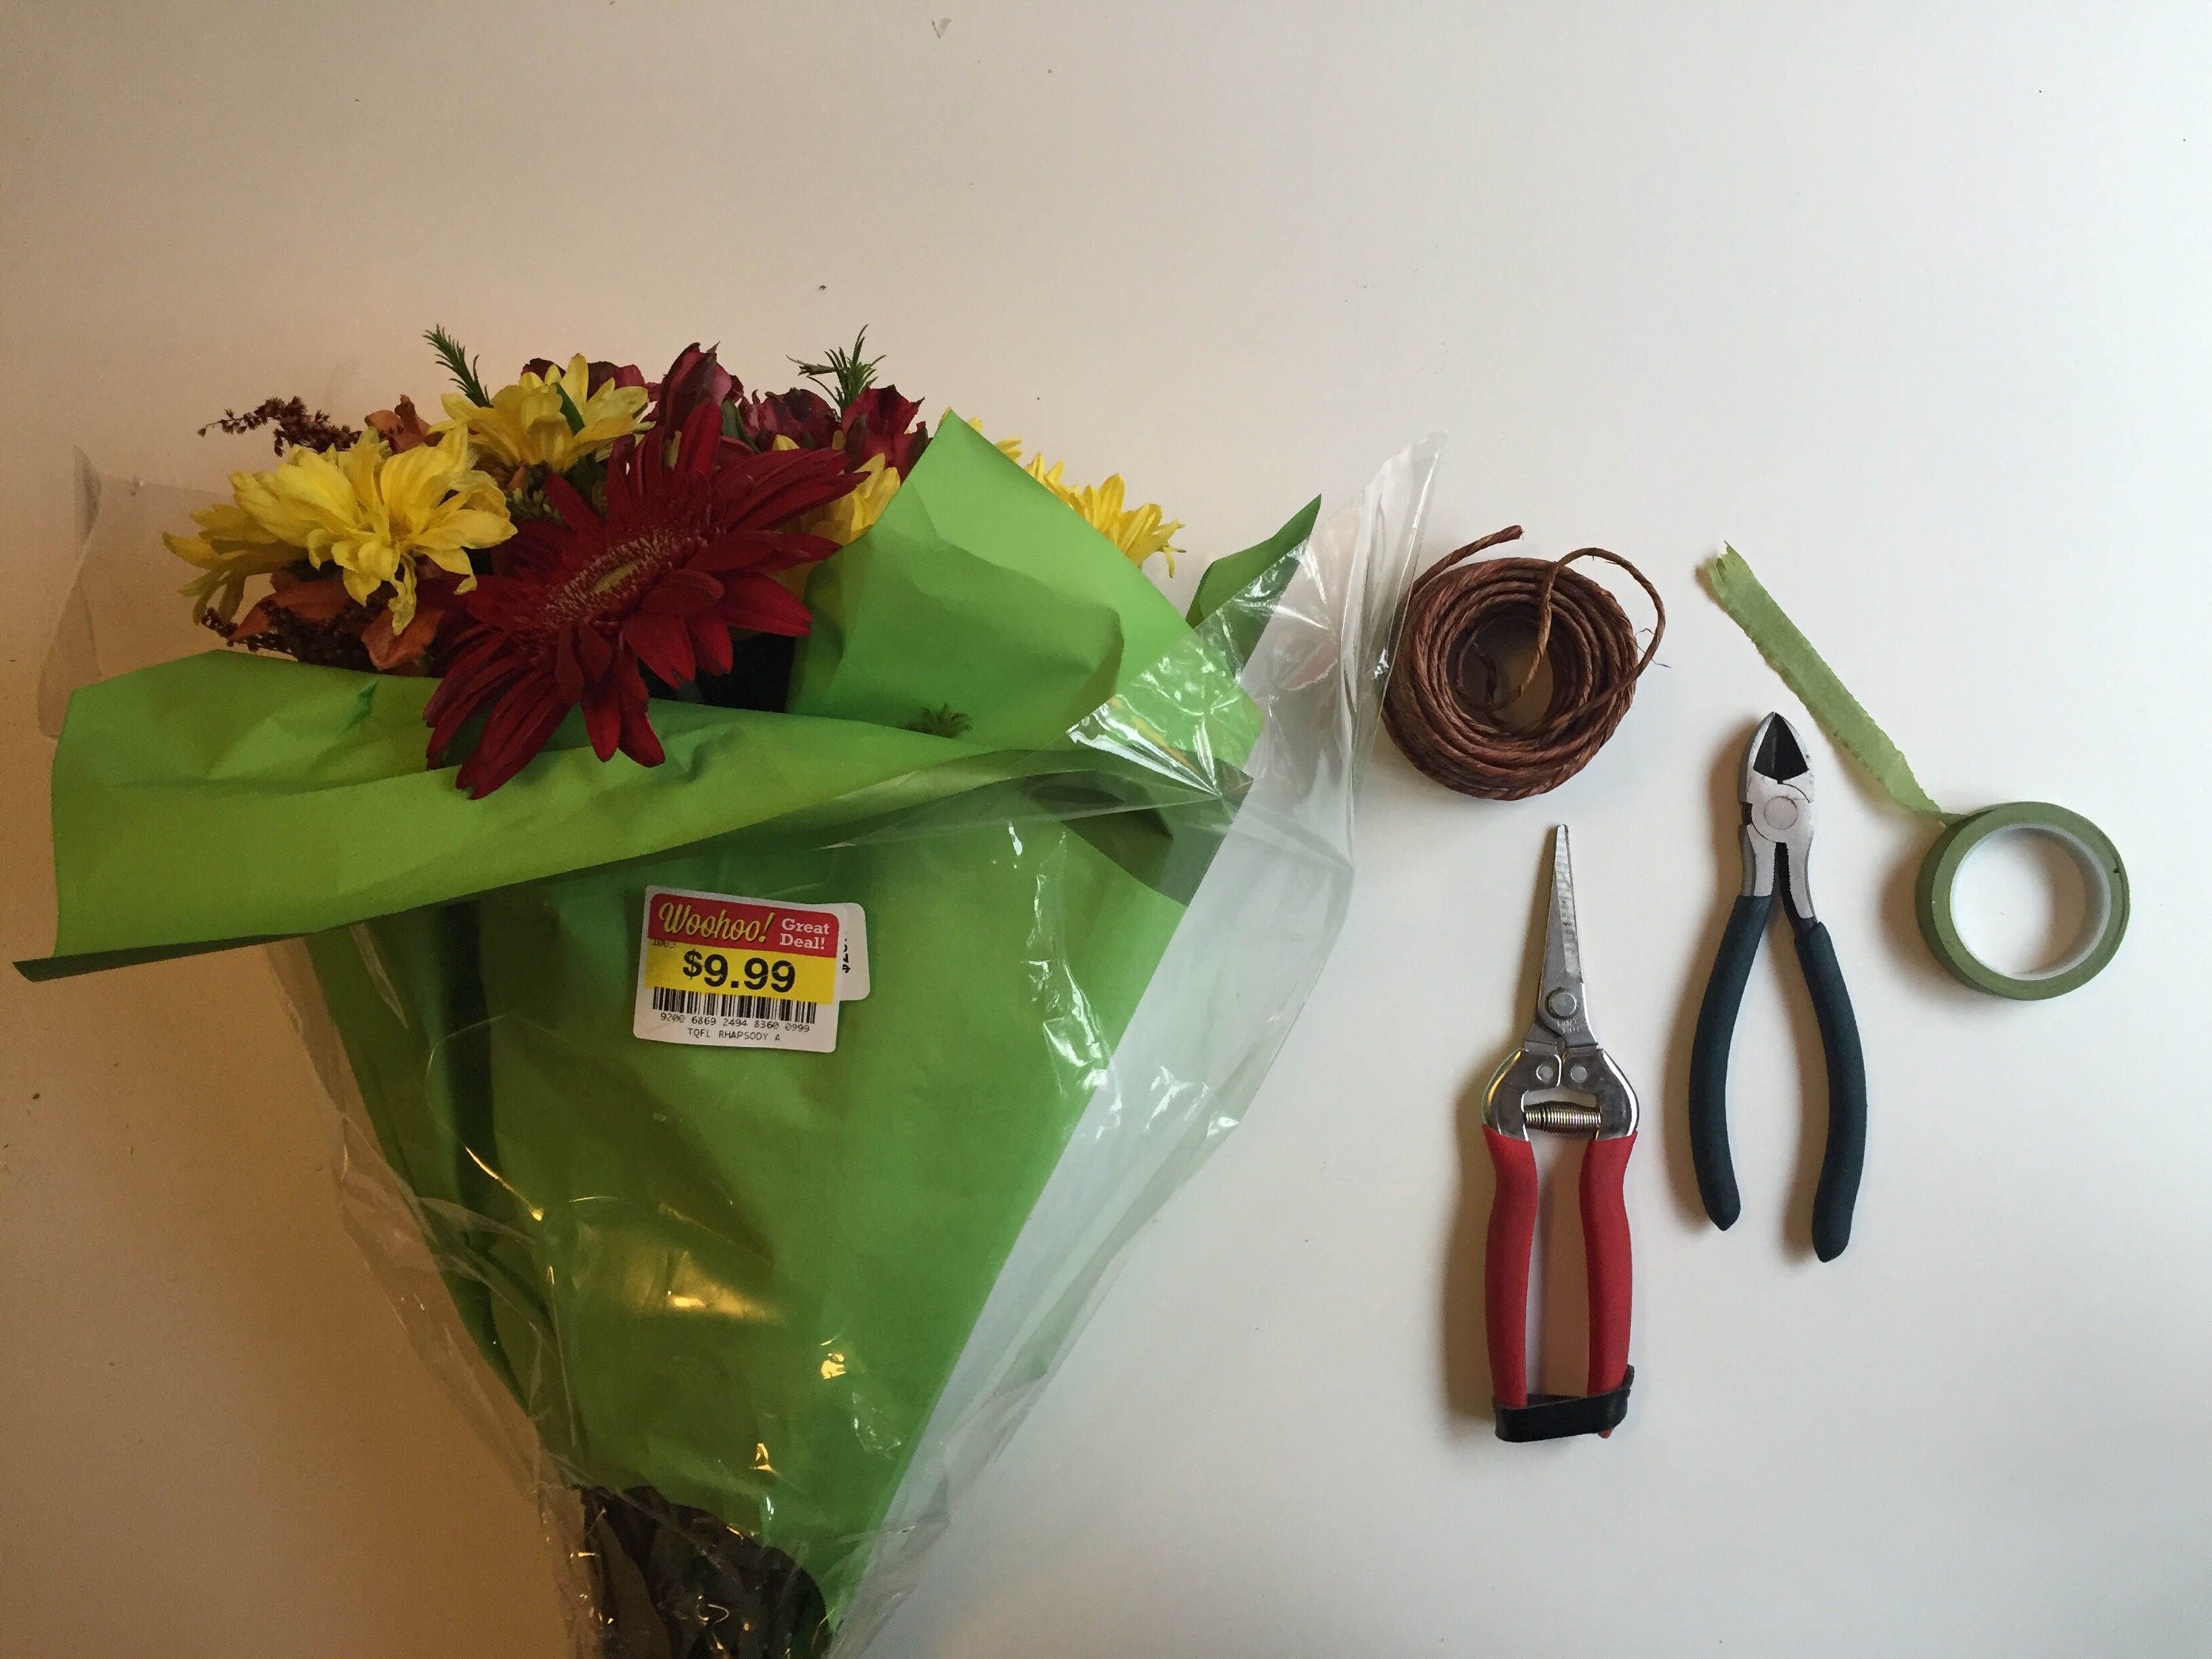
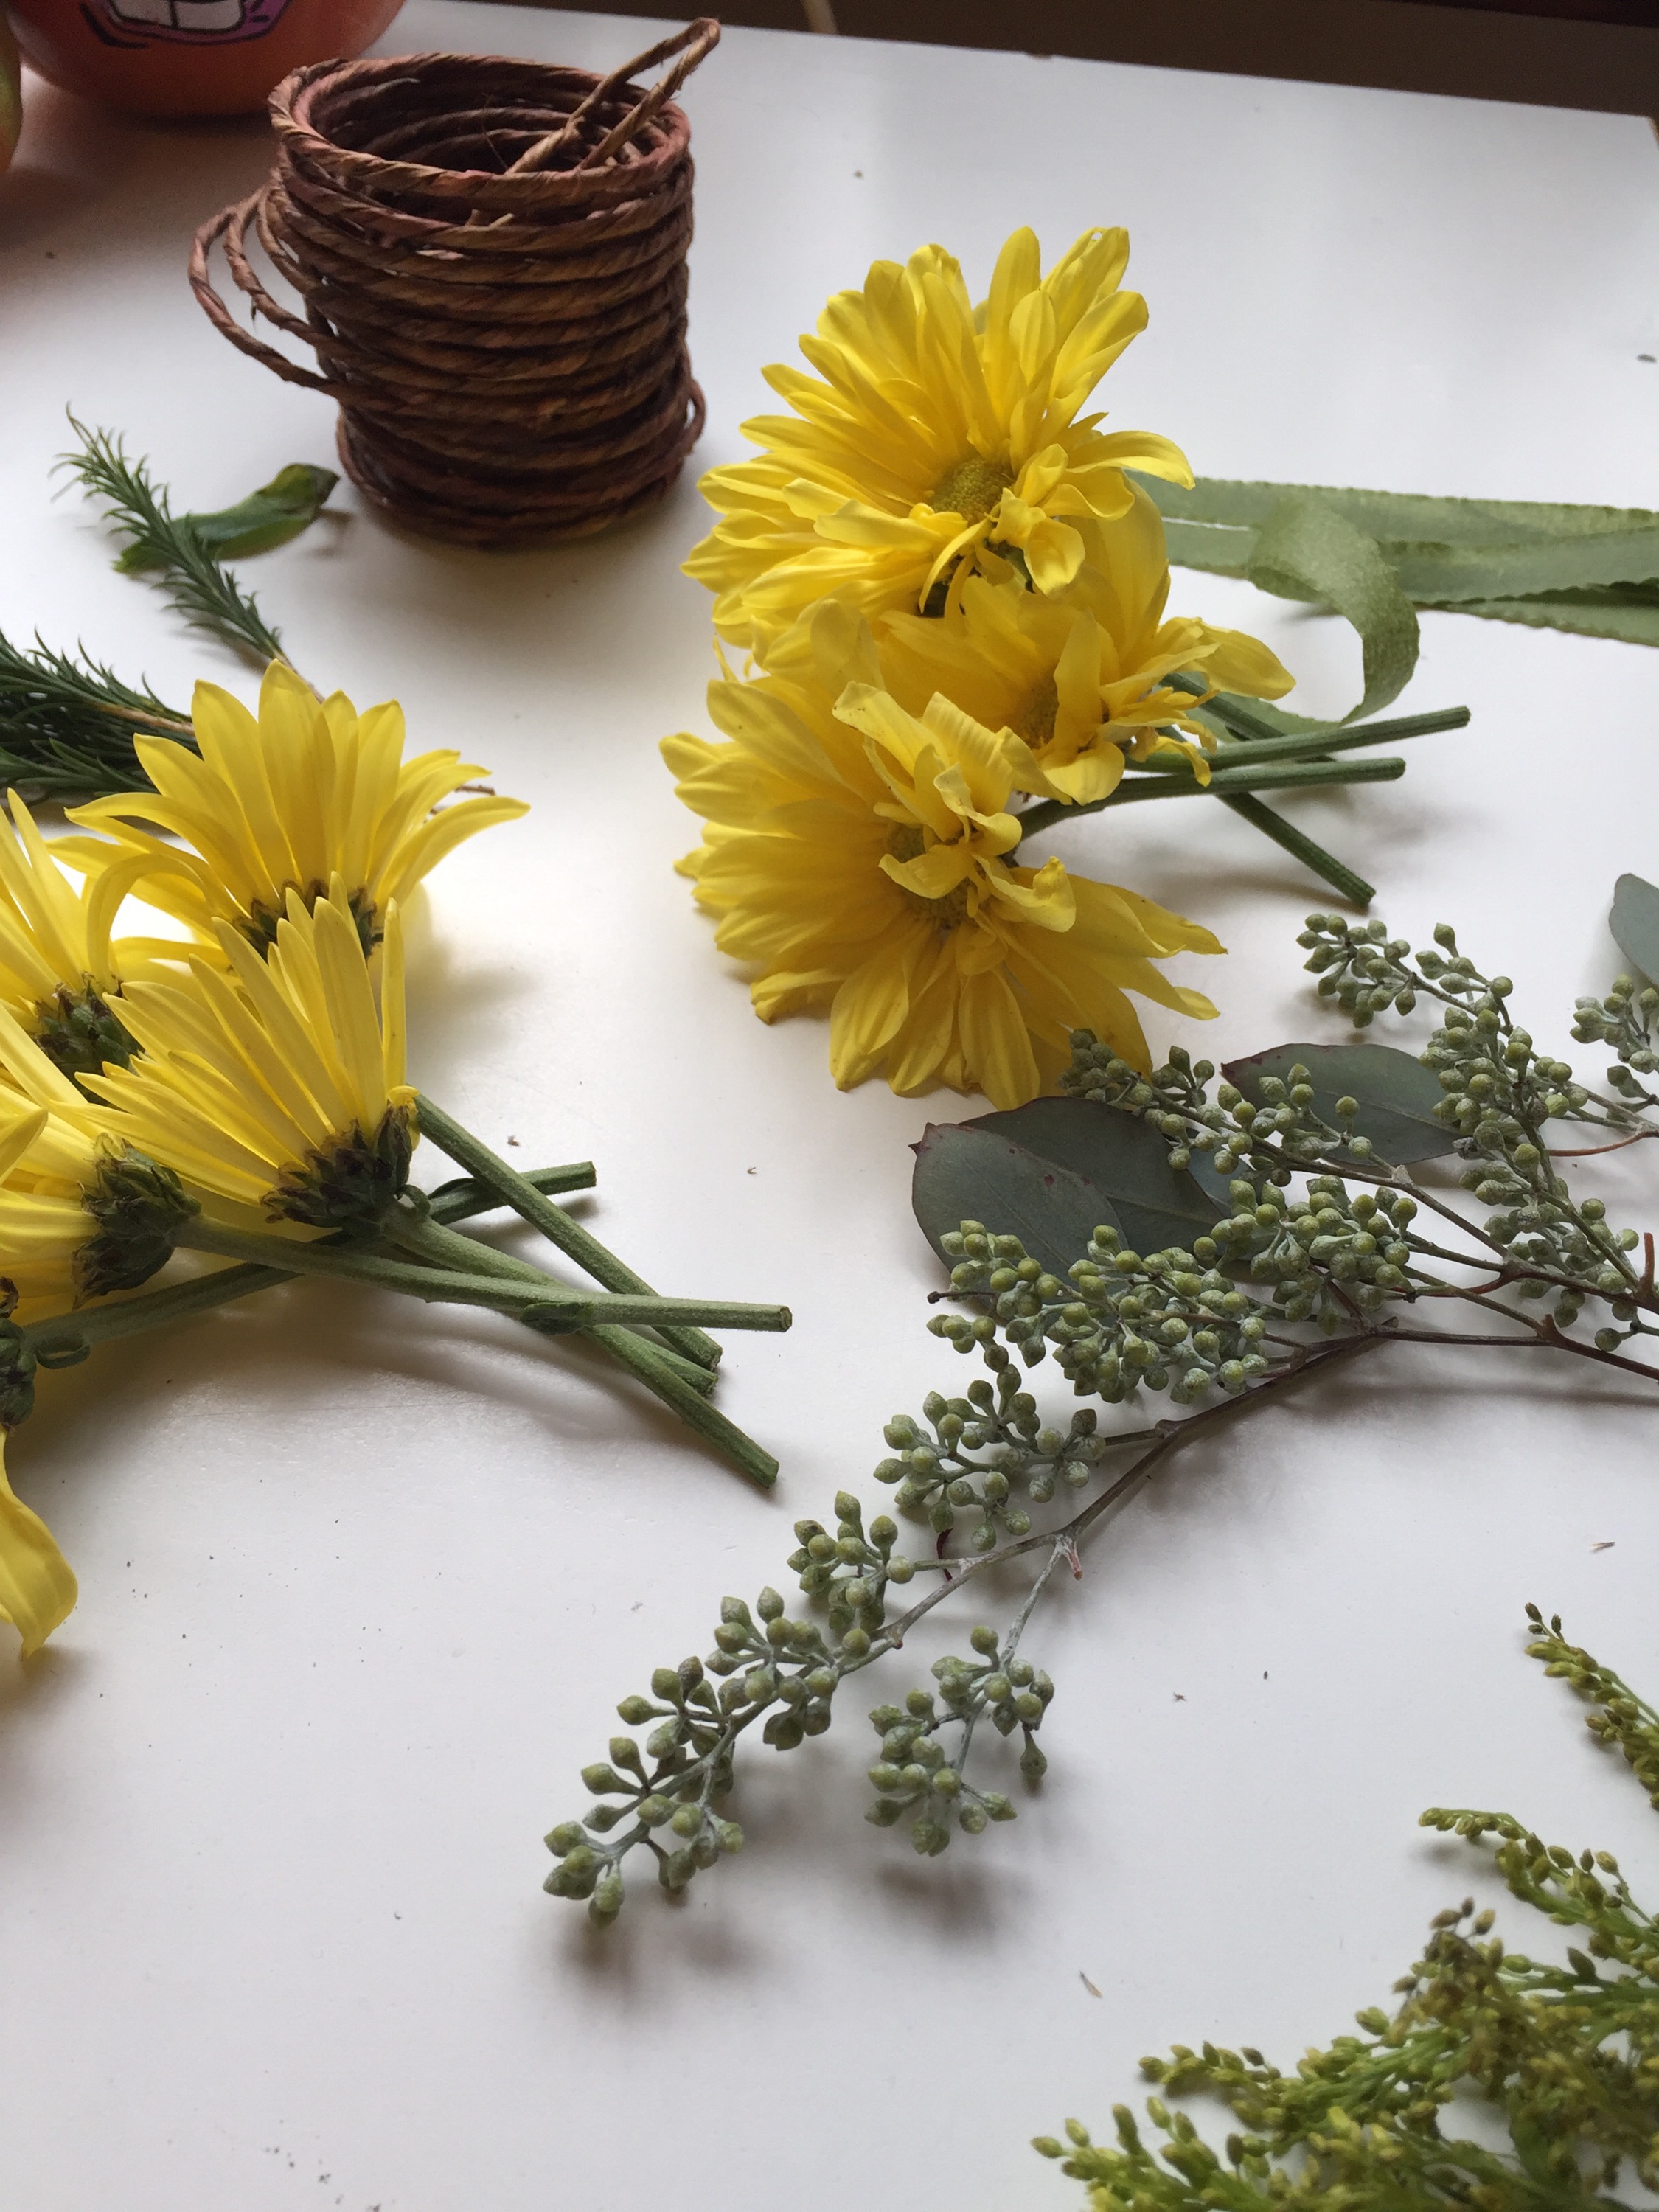
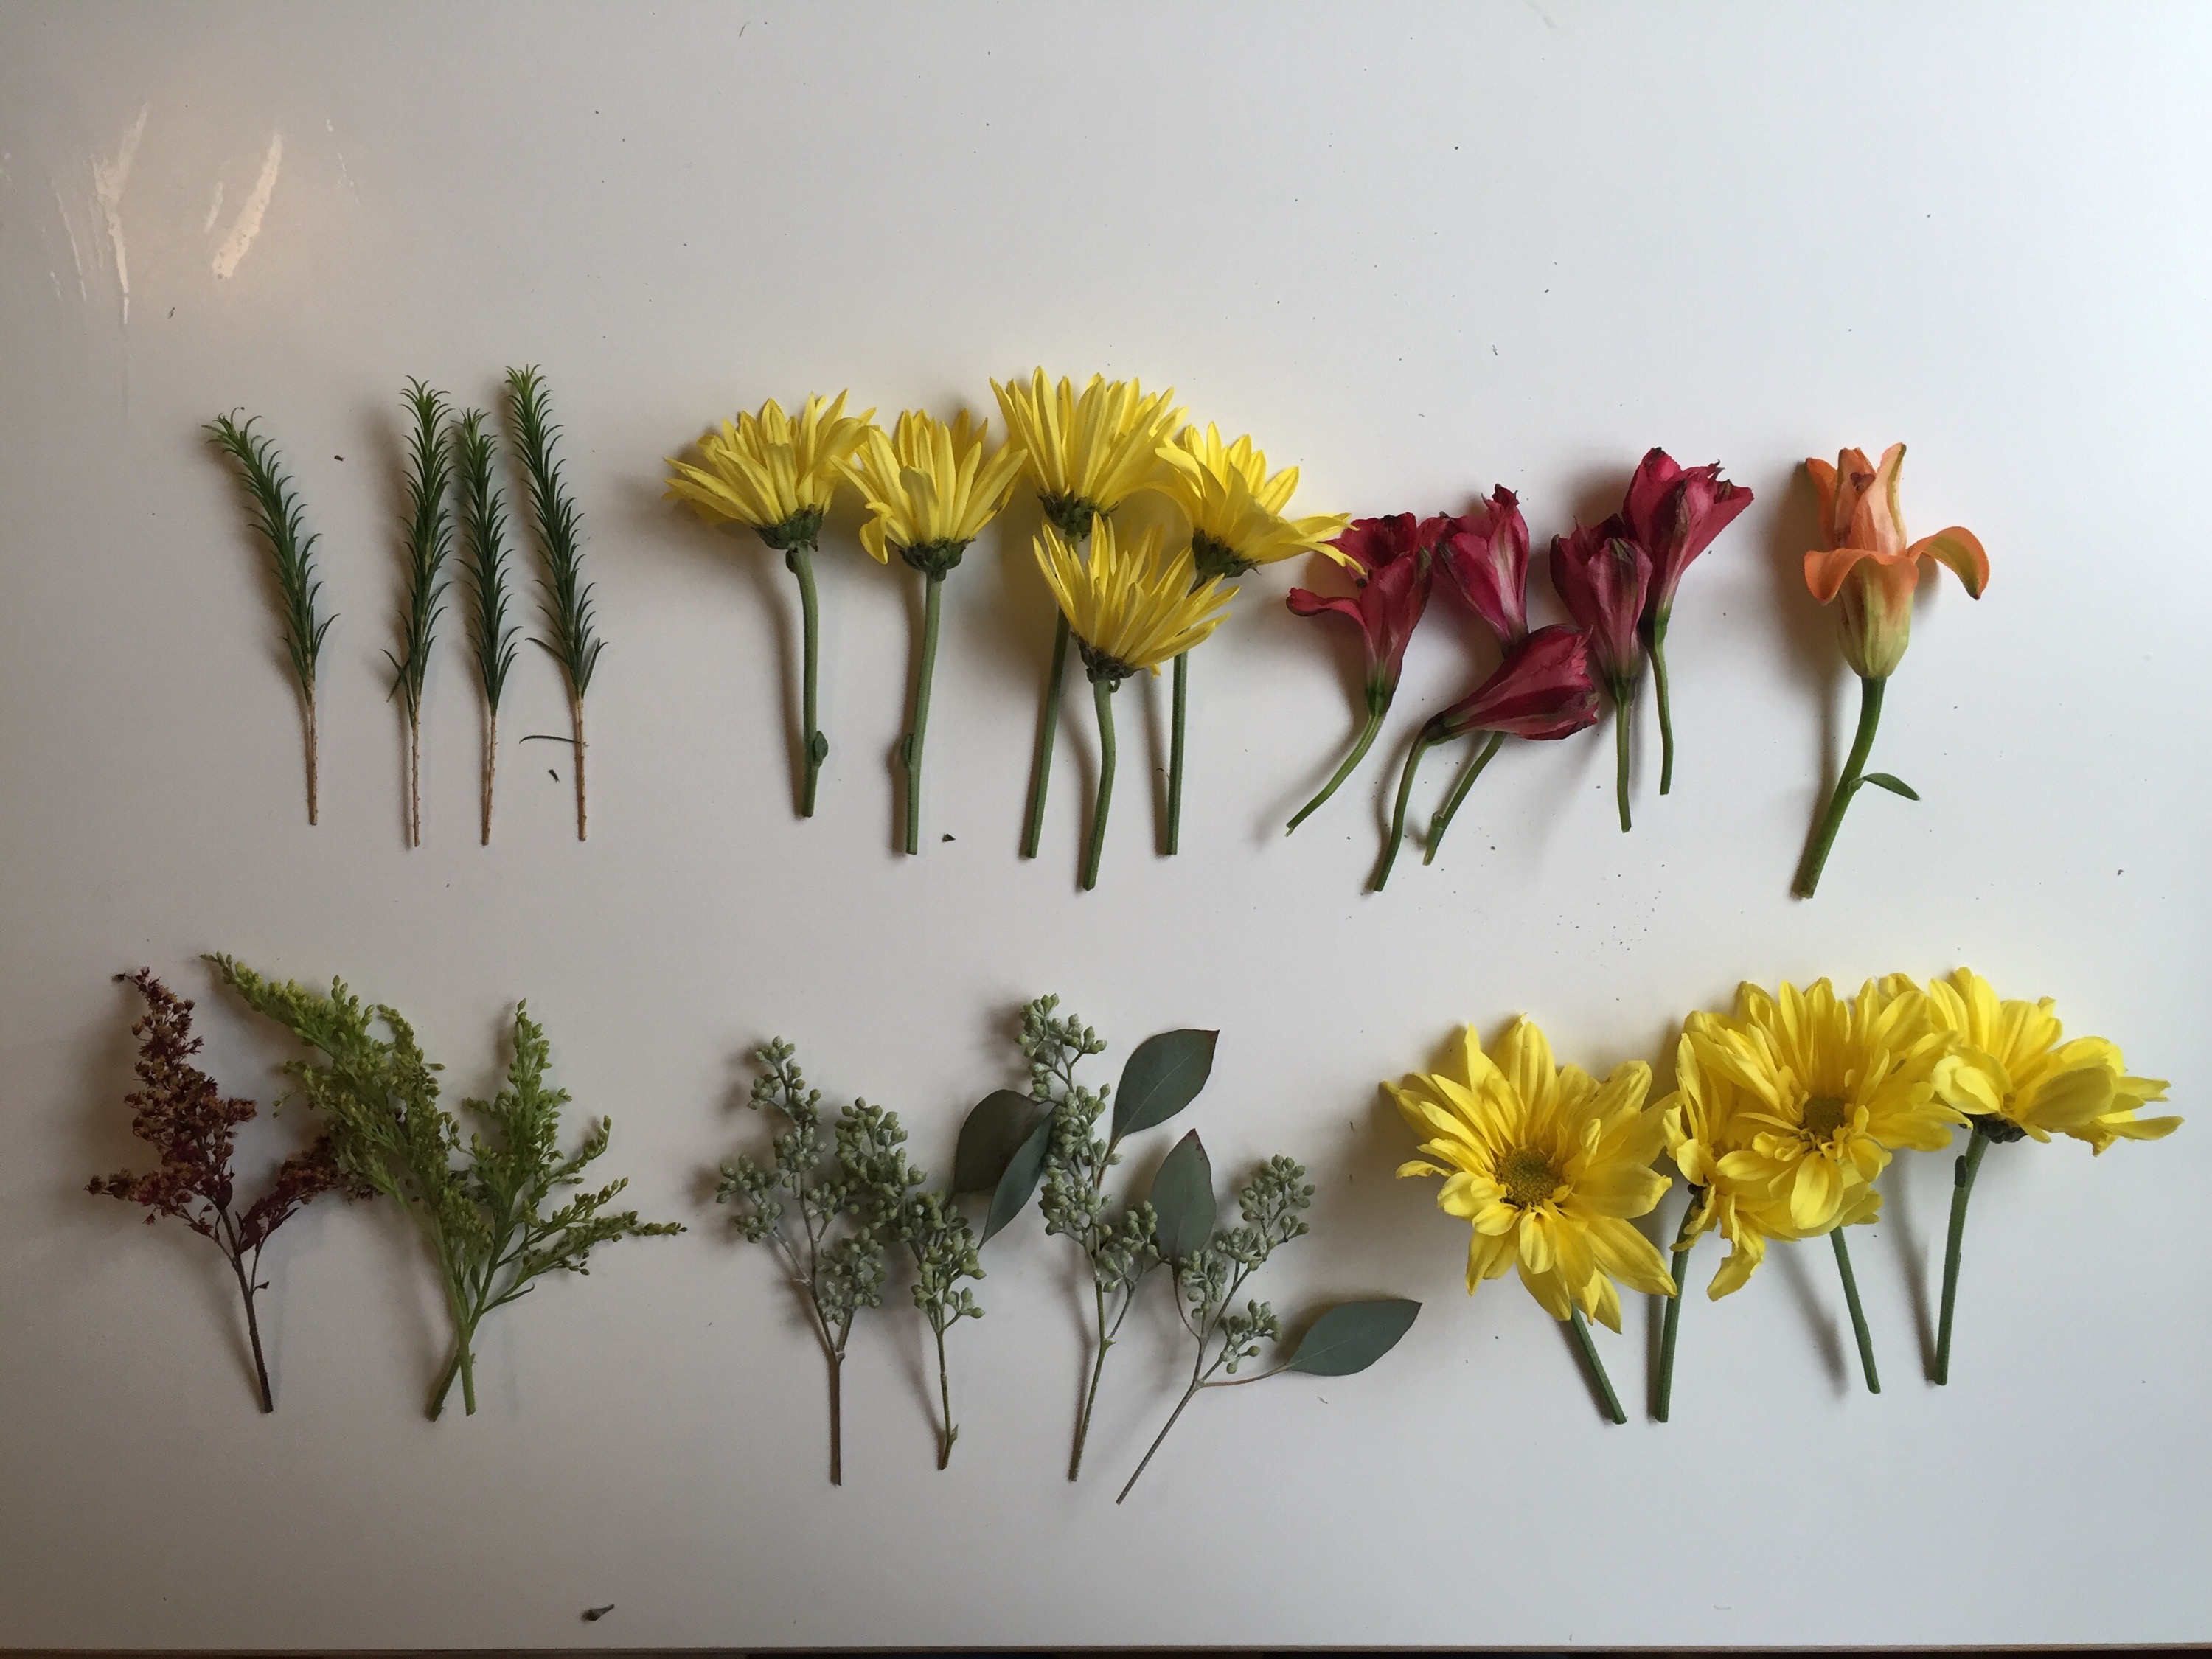
Flowers and greens (in this tutorial I used chrysanthemums, alstroemeria, eucalyptus, and saladago)
Directions:
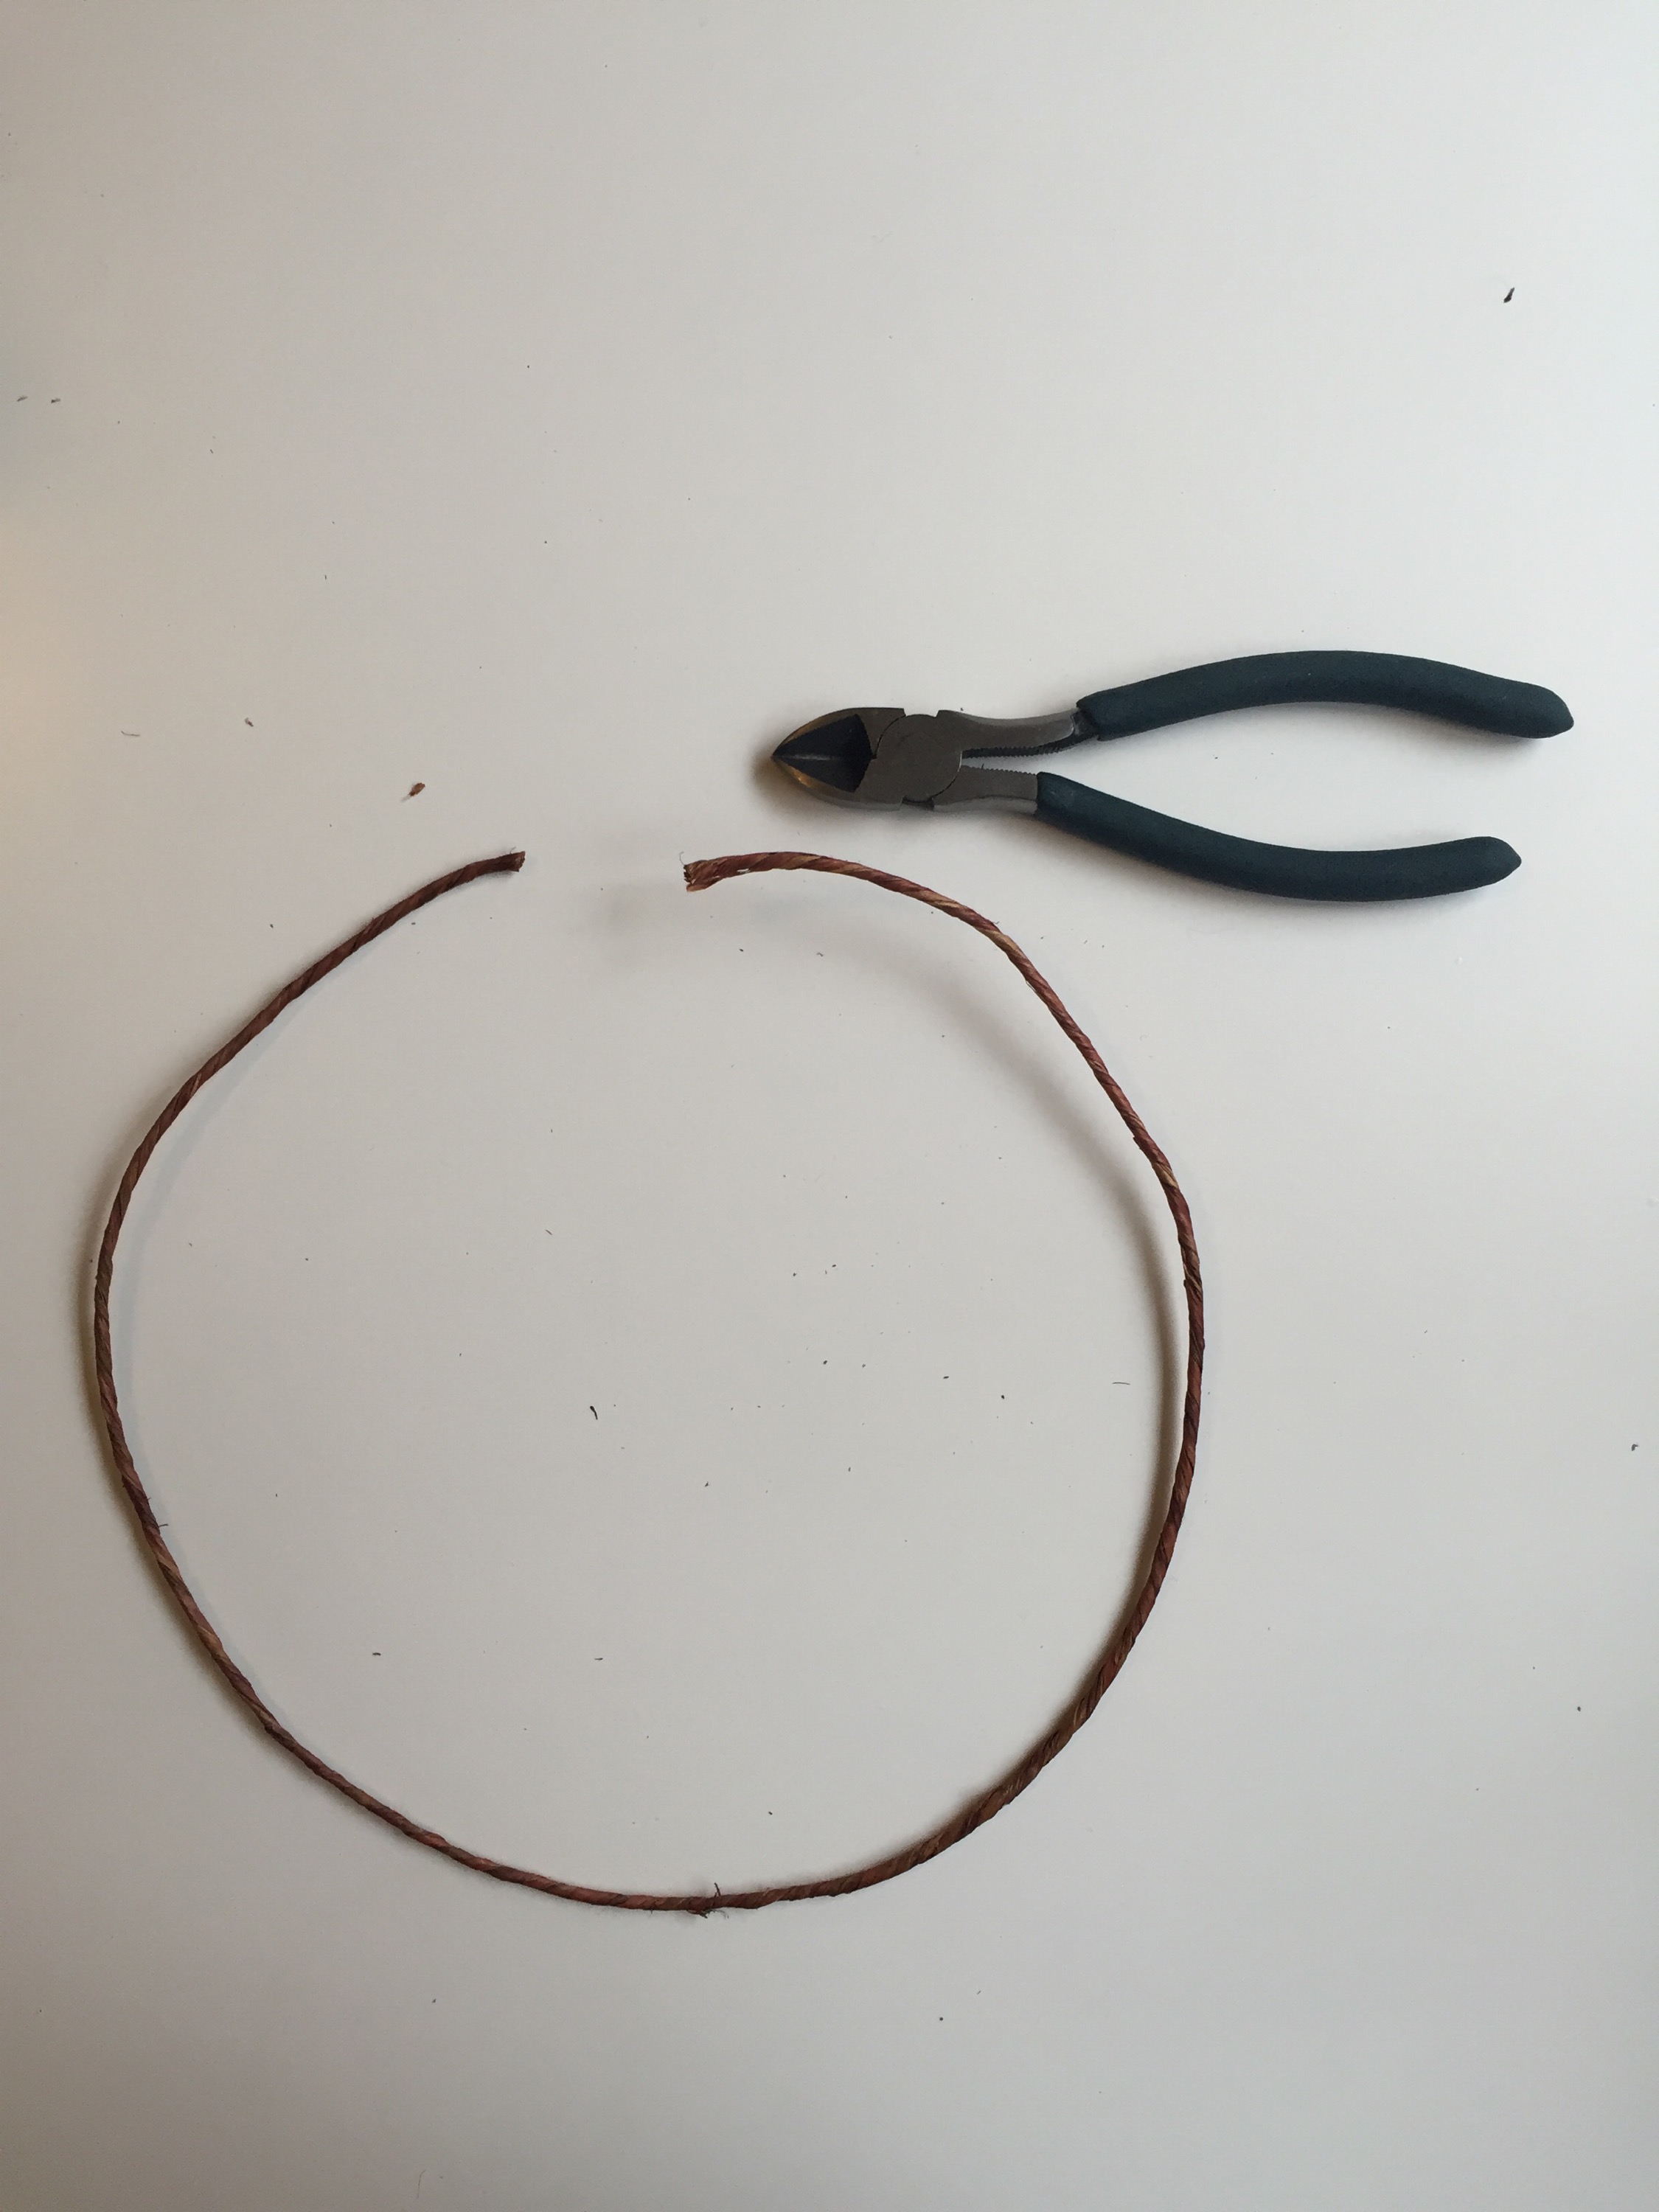
Measure your wire around your head and cut the wire with four inches extra length.
Tear off pieces of floral tape about six inches long. You’ll need several, but I usually tear off five at a time.
In this time lapse video I show you how I construct a partial crown, which is worn off to the side. I usually start in the middle of the wire and work my way toward the edge. If you want a full flower crown, start about three inches from one end and work your way toward the other end.
Prepare your flowers and greens by leaving two inches of stem remaining. Trim away any excess leaves or buds.
Starting at the middle of the crown, lay a green against the wire and tightly wrap the tape around it, working your way down the stem. Add a new flower to the wire and position it to cover the first wrapped stem. Tightly wrap this stem with the floral tape.
Work your way down the wire, positioning the flowers and greens in a herringbone fashion. I usually wrap a green tilting toward the left, then a flower tilting toward the right, a flower tilting toward the left and a green tilting toward the right.
Use your best judgment to nestle greens and flowers together. Pay attention to the natural curve of each flower and place them so they are featured in a pleasing way.
When you have about three inches remaining on the wire, stop adding more flowers. Wrap the ends of the wire around each other so it fits your head well.
Store in the fridge whenever you’re not wearing it. It should last for a few days.
Here is a one-minute time lapse of my making a flower crown. Pretty neat! View the long version here.
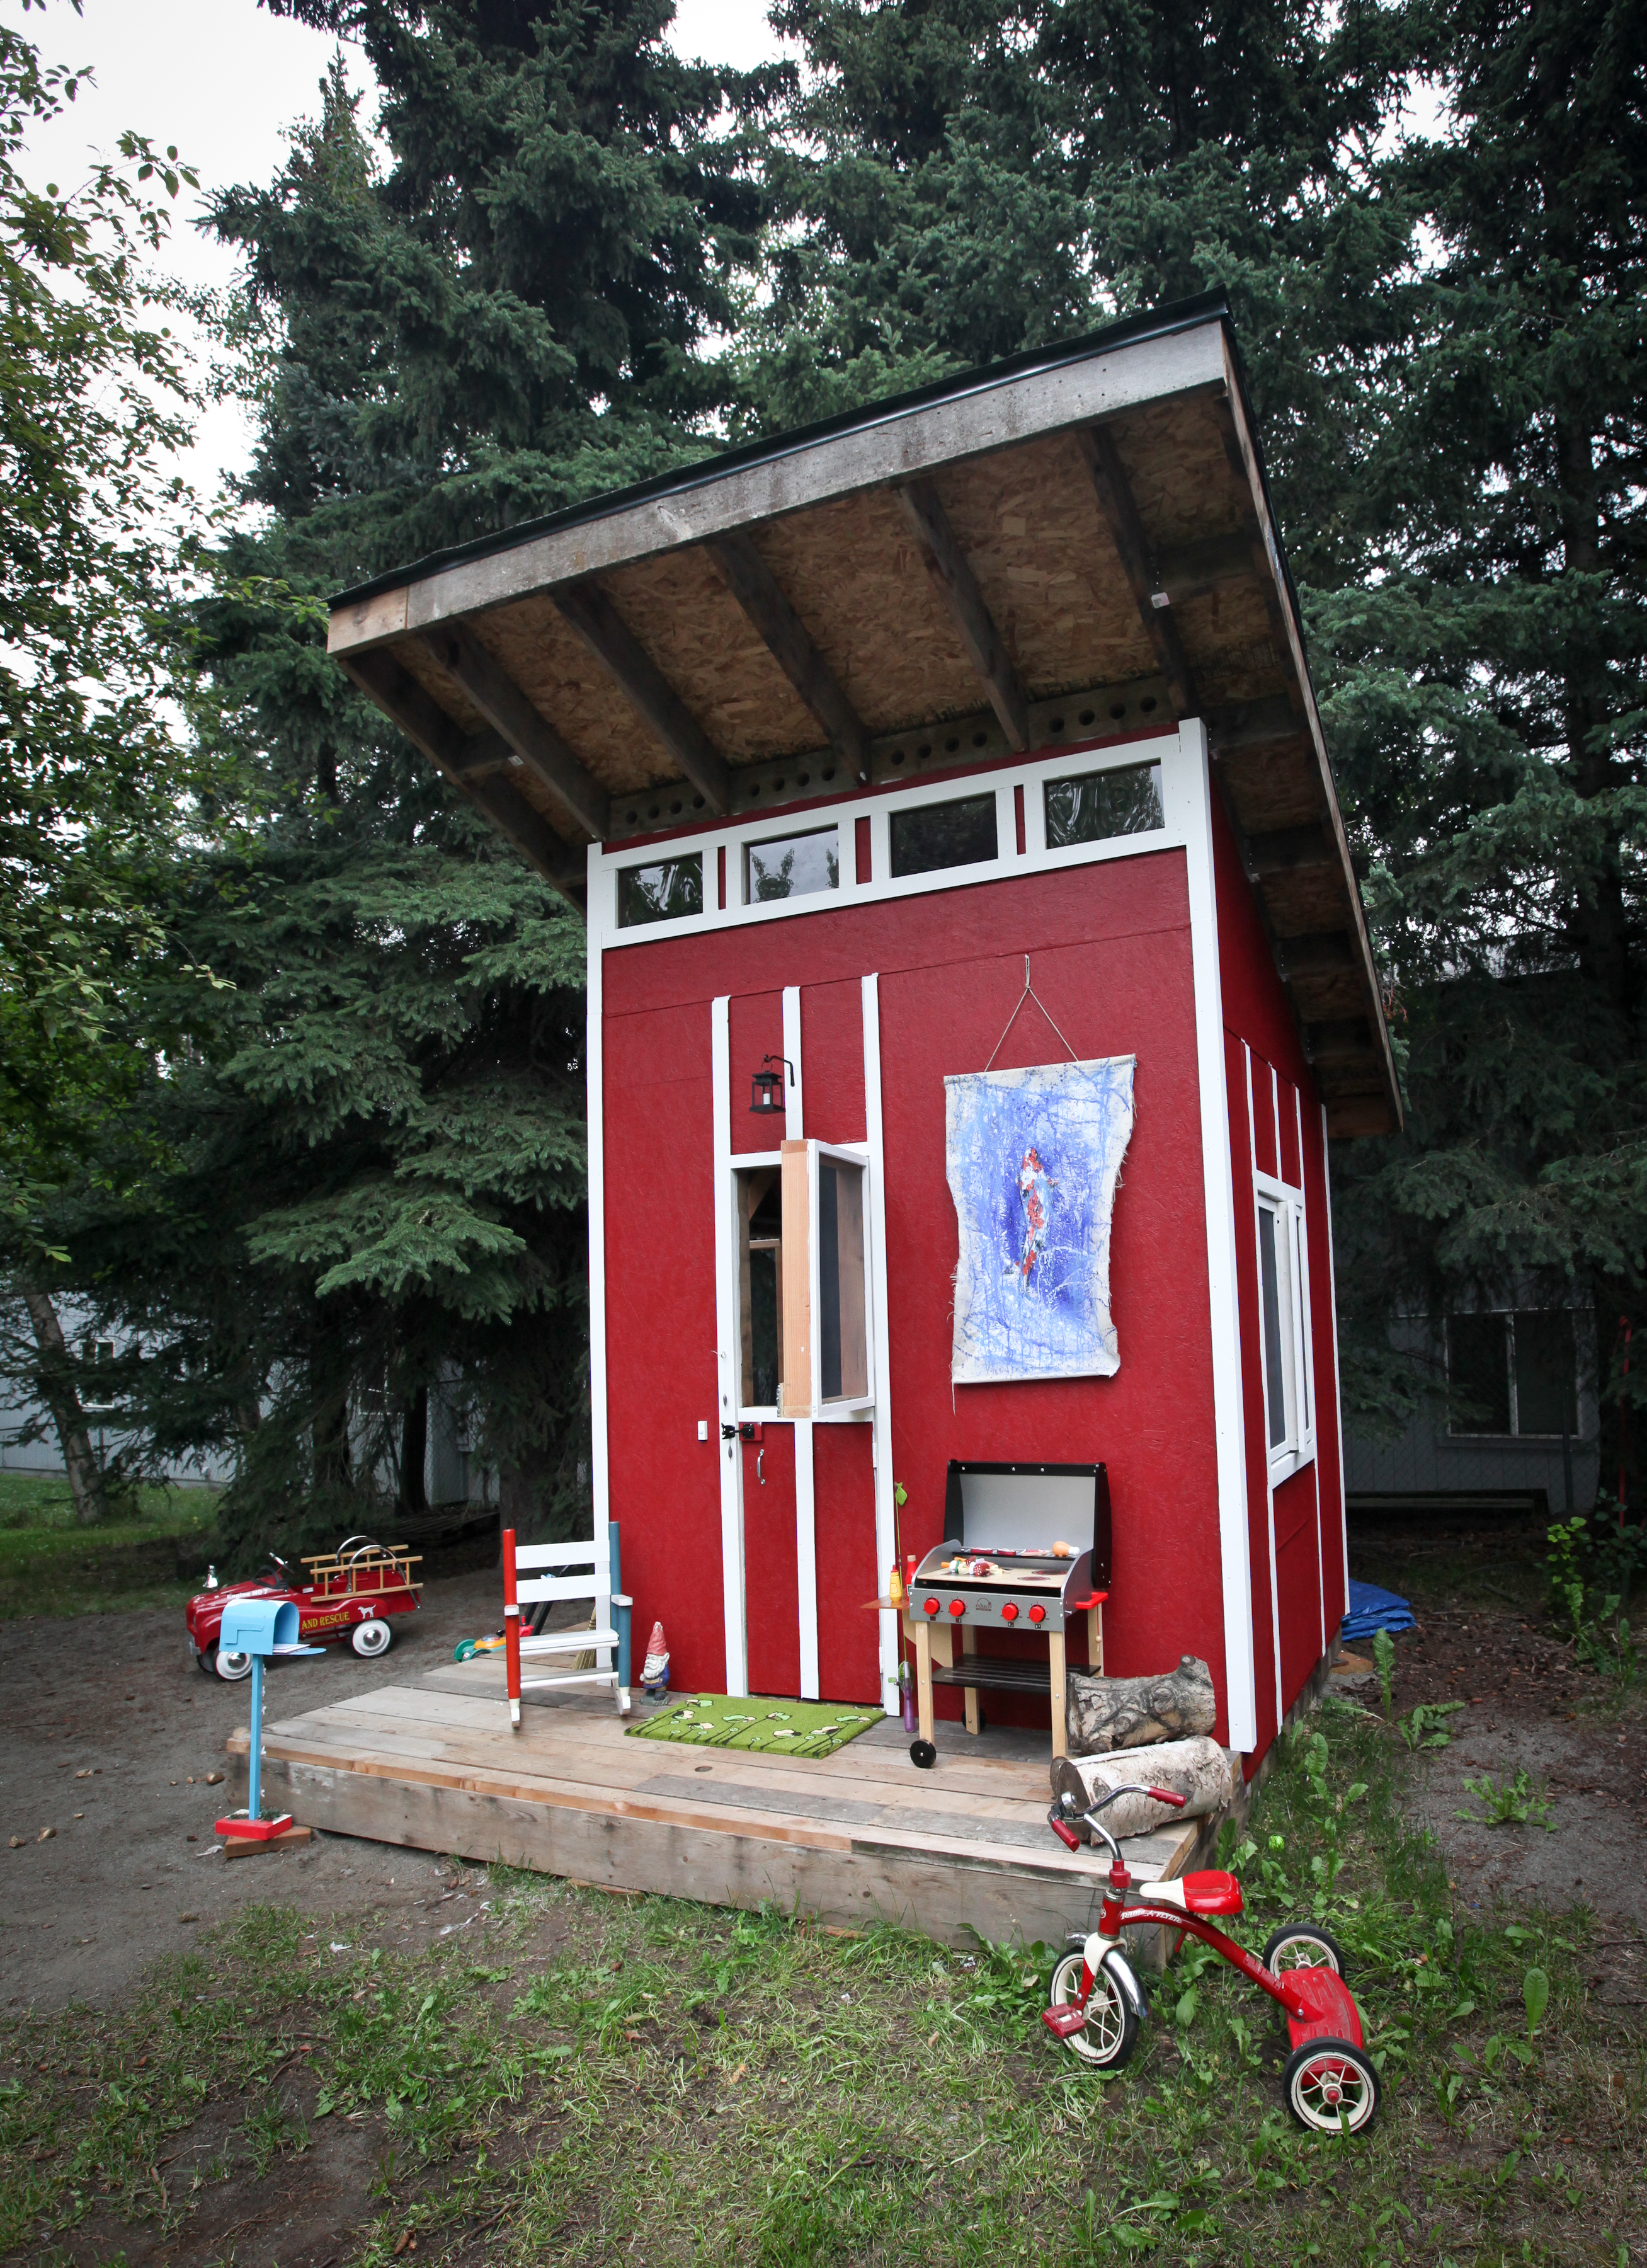
All summer my husband has been the quintessential handyman — ladder leaning against the house, body splayed across the roof, a hammer hanging from his Carhartts, screws sticking out of his mouth. Only this house is 10 square feet and lives in our back yard.
Last year my husband, Stephen, became my father’s apprentice and took up woodworking with unbridled gusto. We are slowly replacing our particle-board furniture with hardwood heirlooms. He has thoroughly impressed every one of our family and friends. I’ve even made him his own hashtag (#hubbycraft, if you’re interested in seeing some of his projects on Instagram).
My parents recently replaced their deck and Stephen diligently ran every discarded board through a planer. Twenty-five-year-old faded, mossy cedar planks turned out to be healthy, sturdy wood perfect for reuse.
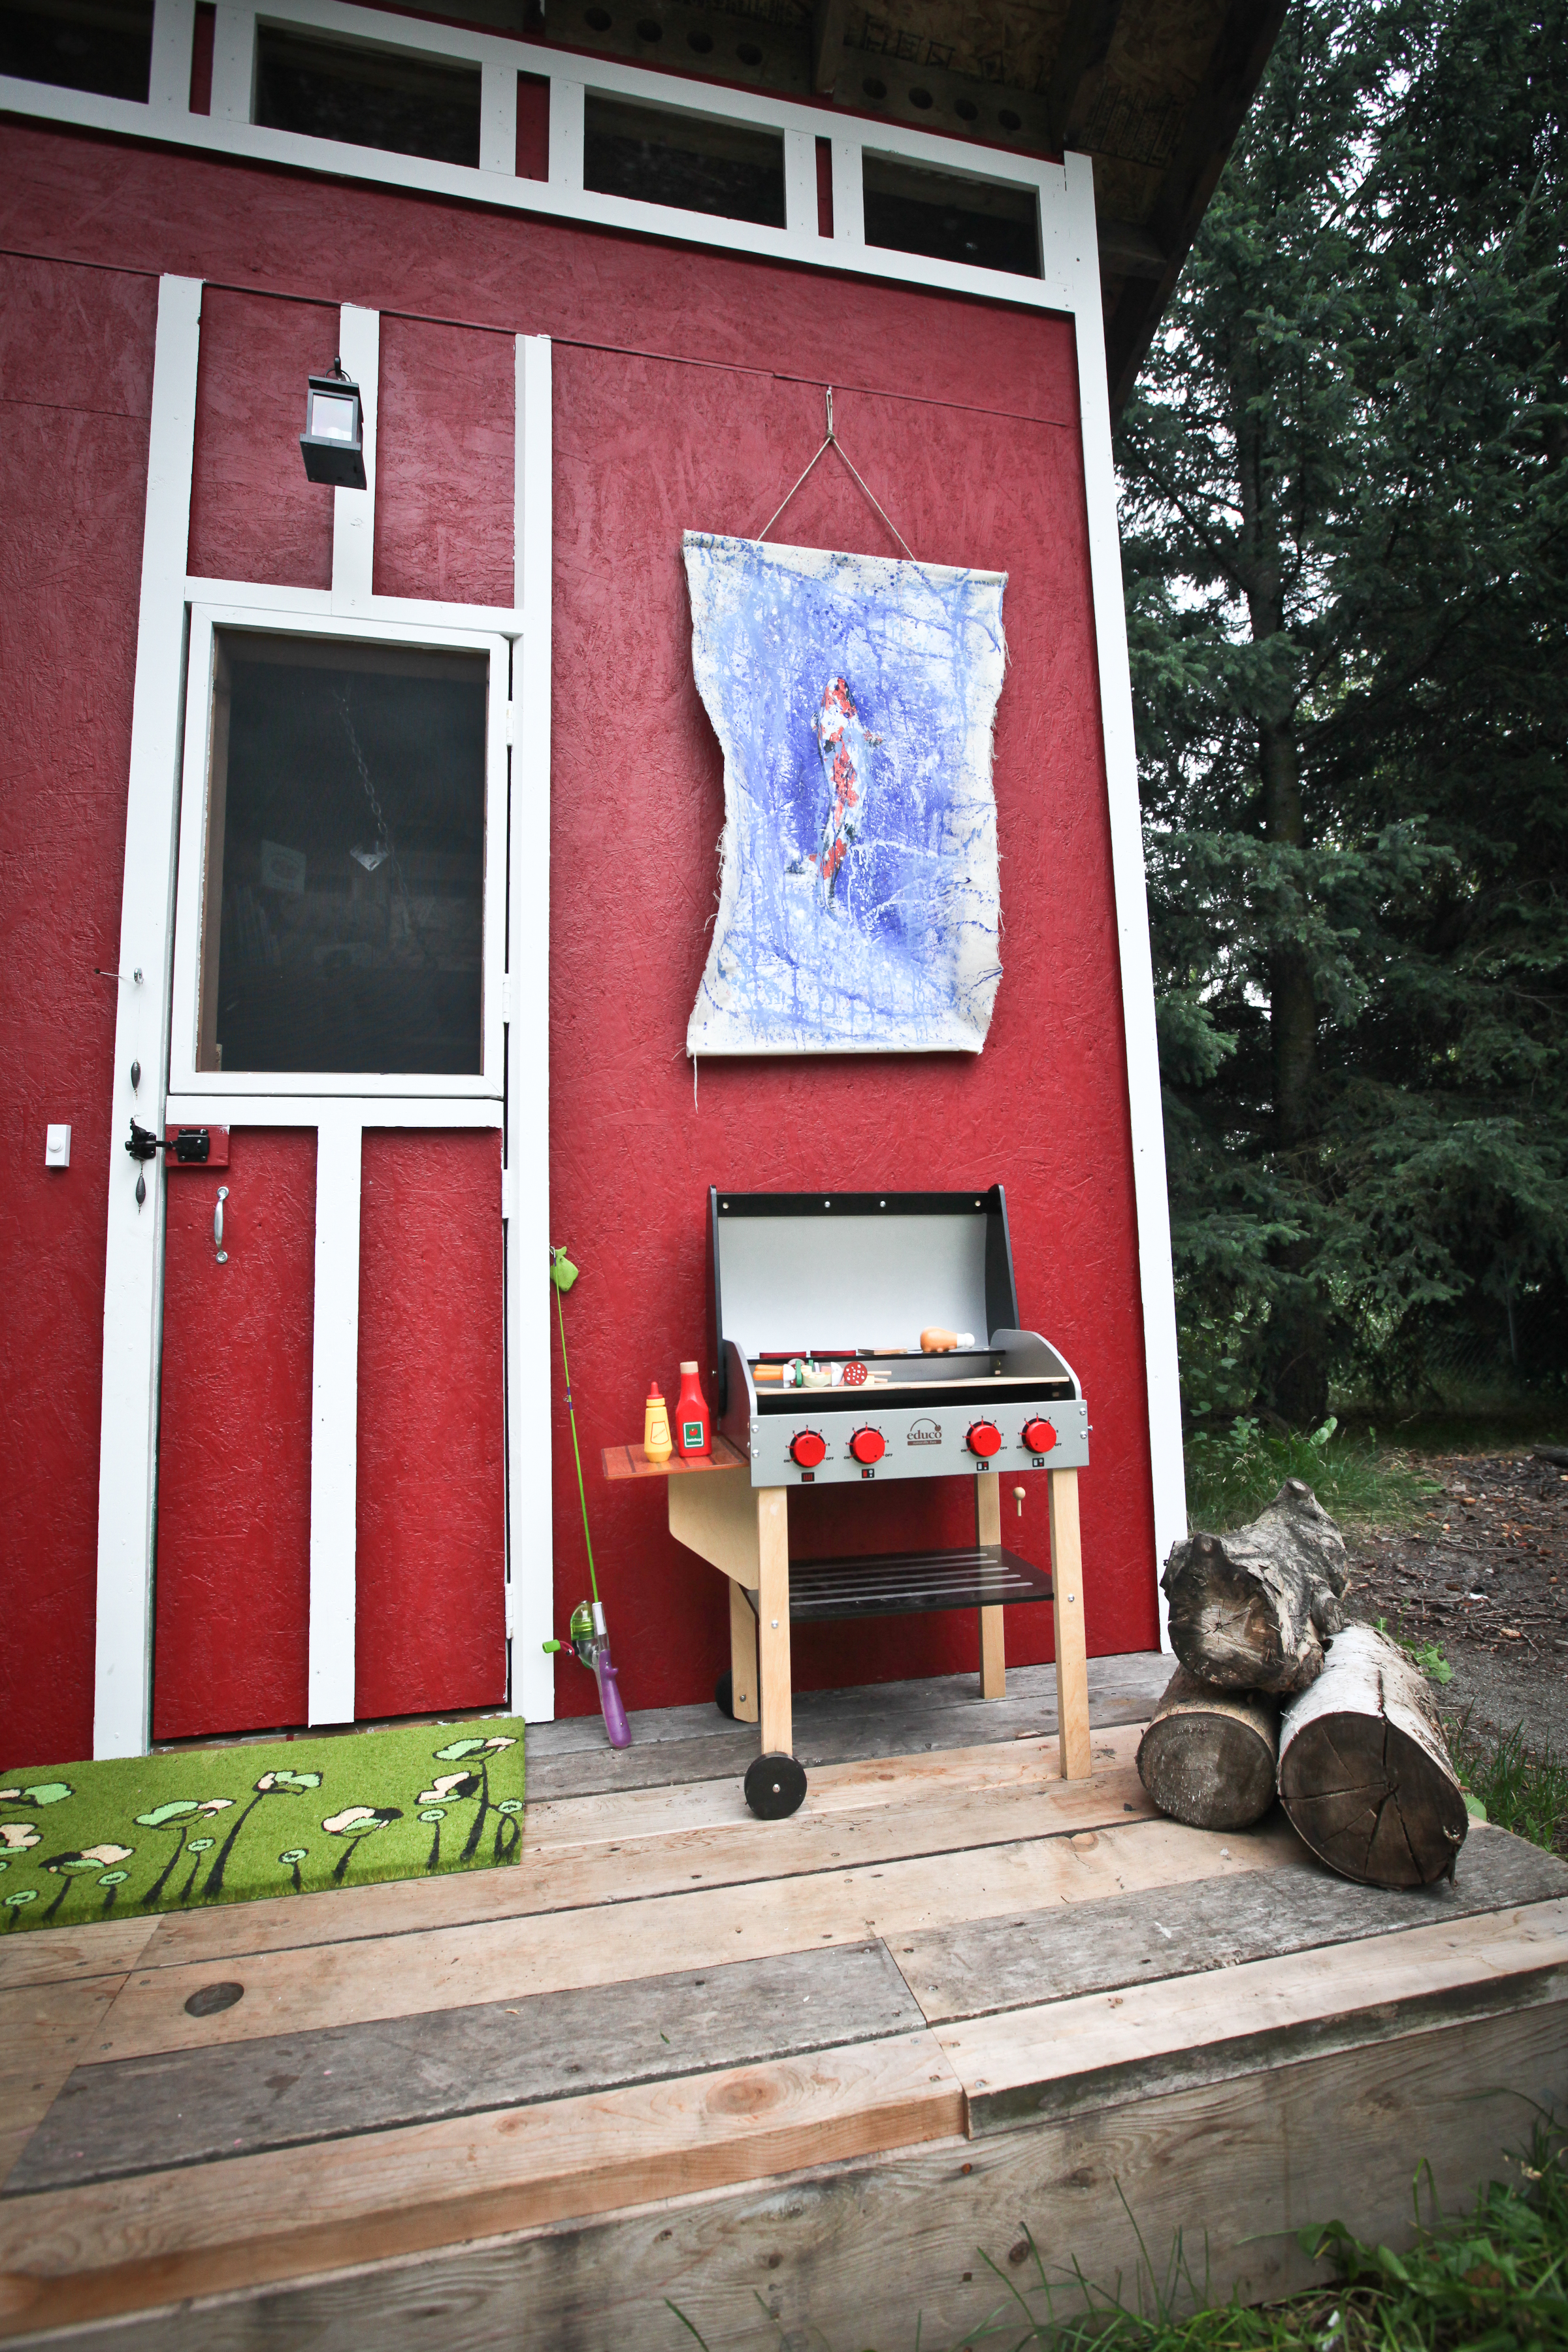
In May, Stephen started working on the plans for our son Jack’s playhouse. He used the repurposed deck planks for the frame and the miniature wrap-around porch. He spent every non-working and sleeping moment perfecting the playhouse from the screened vents under the roof to the retractable rope ladder leading up to the loft.
At the end of July we were finally ready for the playhousewarming party. All of Jack’s buddies gathered for food, treasure hunts, pool splashing and a chance to break in the new house.
Stephen estimates he spent about $500 on the house — a worthwhile investment for years of yard fun.
Thanks to the interior design expertise of Fernanda Conrad. She was an immense help in staging the playhouse. Check out some of her regular-sized designs here.
The toy grill was a $60 Craigslist score. The little lantern is solar powered and flickers in the night. The cheerful doormat was just $12 at Fred Meyer.
Every time I travel to Mexico I can’t resist buying a meter or two of brightly colored oilcloth. You see it everywhere down there, mostly as cheerful tablecloths. I use it for just about everything. I cover cans with it, I reupholstered my dining chairs and I love to use it for coin purses.
I have a simple pattern for my coin purses. You could use any fabric you like, but since the oilcloth is so thick I don’t have to use any stabilizer. That cuts down on project time, which is good because I have a really short attention span for sewing.
Oilcloth coin purse: a free tutorial from Alaska Knit Nat
Materials:
2, 6×8-inch pieces of oilcloth
one long, nylon zipper (9 inches or longer makes it easier)
As a lifelong Alaskan I am familiar with how unpredictable the weather is. We tend to hope for the best and plan for the worst, which is why I’ve decided to design a winter hat in the summertime.
Fourth of July in Alaska can be a bit of a downer. For one thing, the sun doesn’t really set so fireworks are pretty lame. Also, it’s sometimes cold, rainy and windy; but we Alaskans don’t let a little crappy weather get in the way of summer holiday fun.
So I’ve designed a Fourth of July hat. No one in the rest of the contiguous 48 states (or Hawaii, for that matter) would find this hat particularly useful in the middle of summer, but hey, you can be patriotic year round, right?
Old Glory Slouchy Hat — a free knitting pattern from Alaska Knit Nat
Last week was our son’s third birthday party. He requested it be Lorax themed, which is fitting because his birthday is on Earth Day. Although I consider myself of the crafty variety, birthdays are overwhelming to me and going all out is too exhausting. So I choose activities and decorations with minimal prep work.
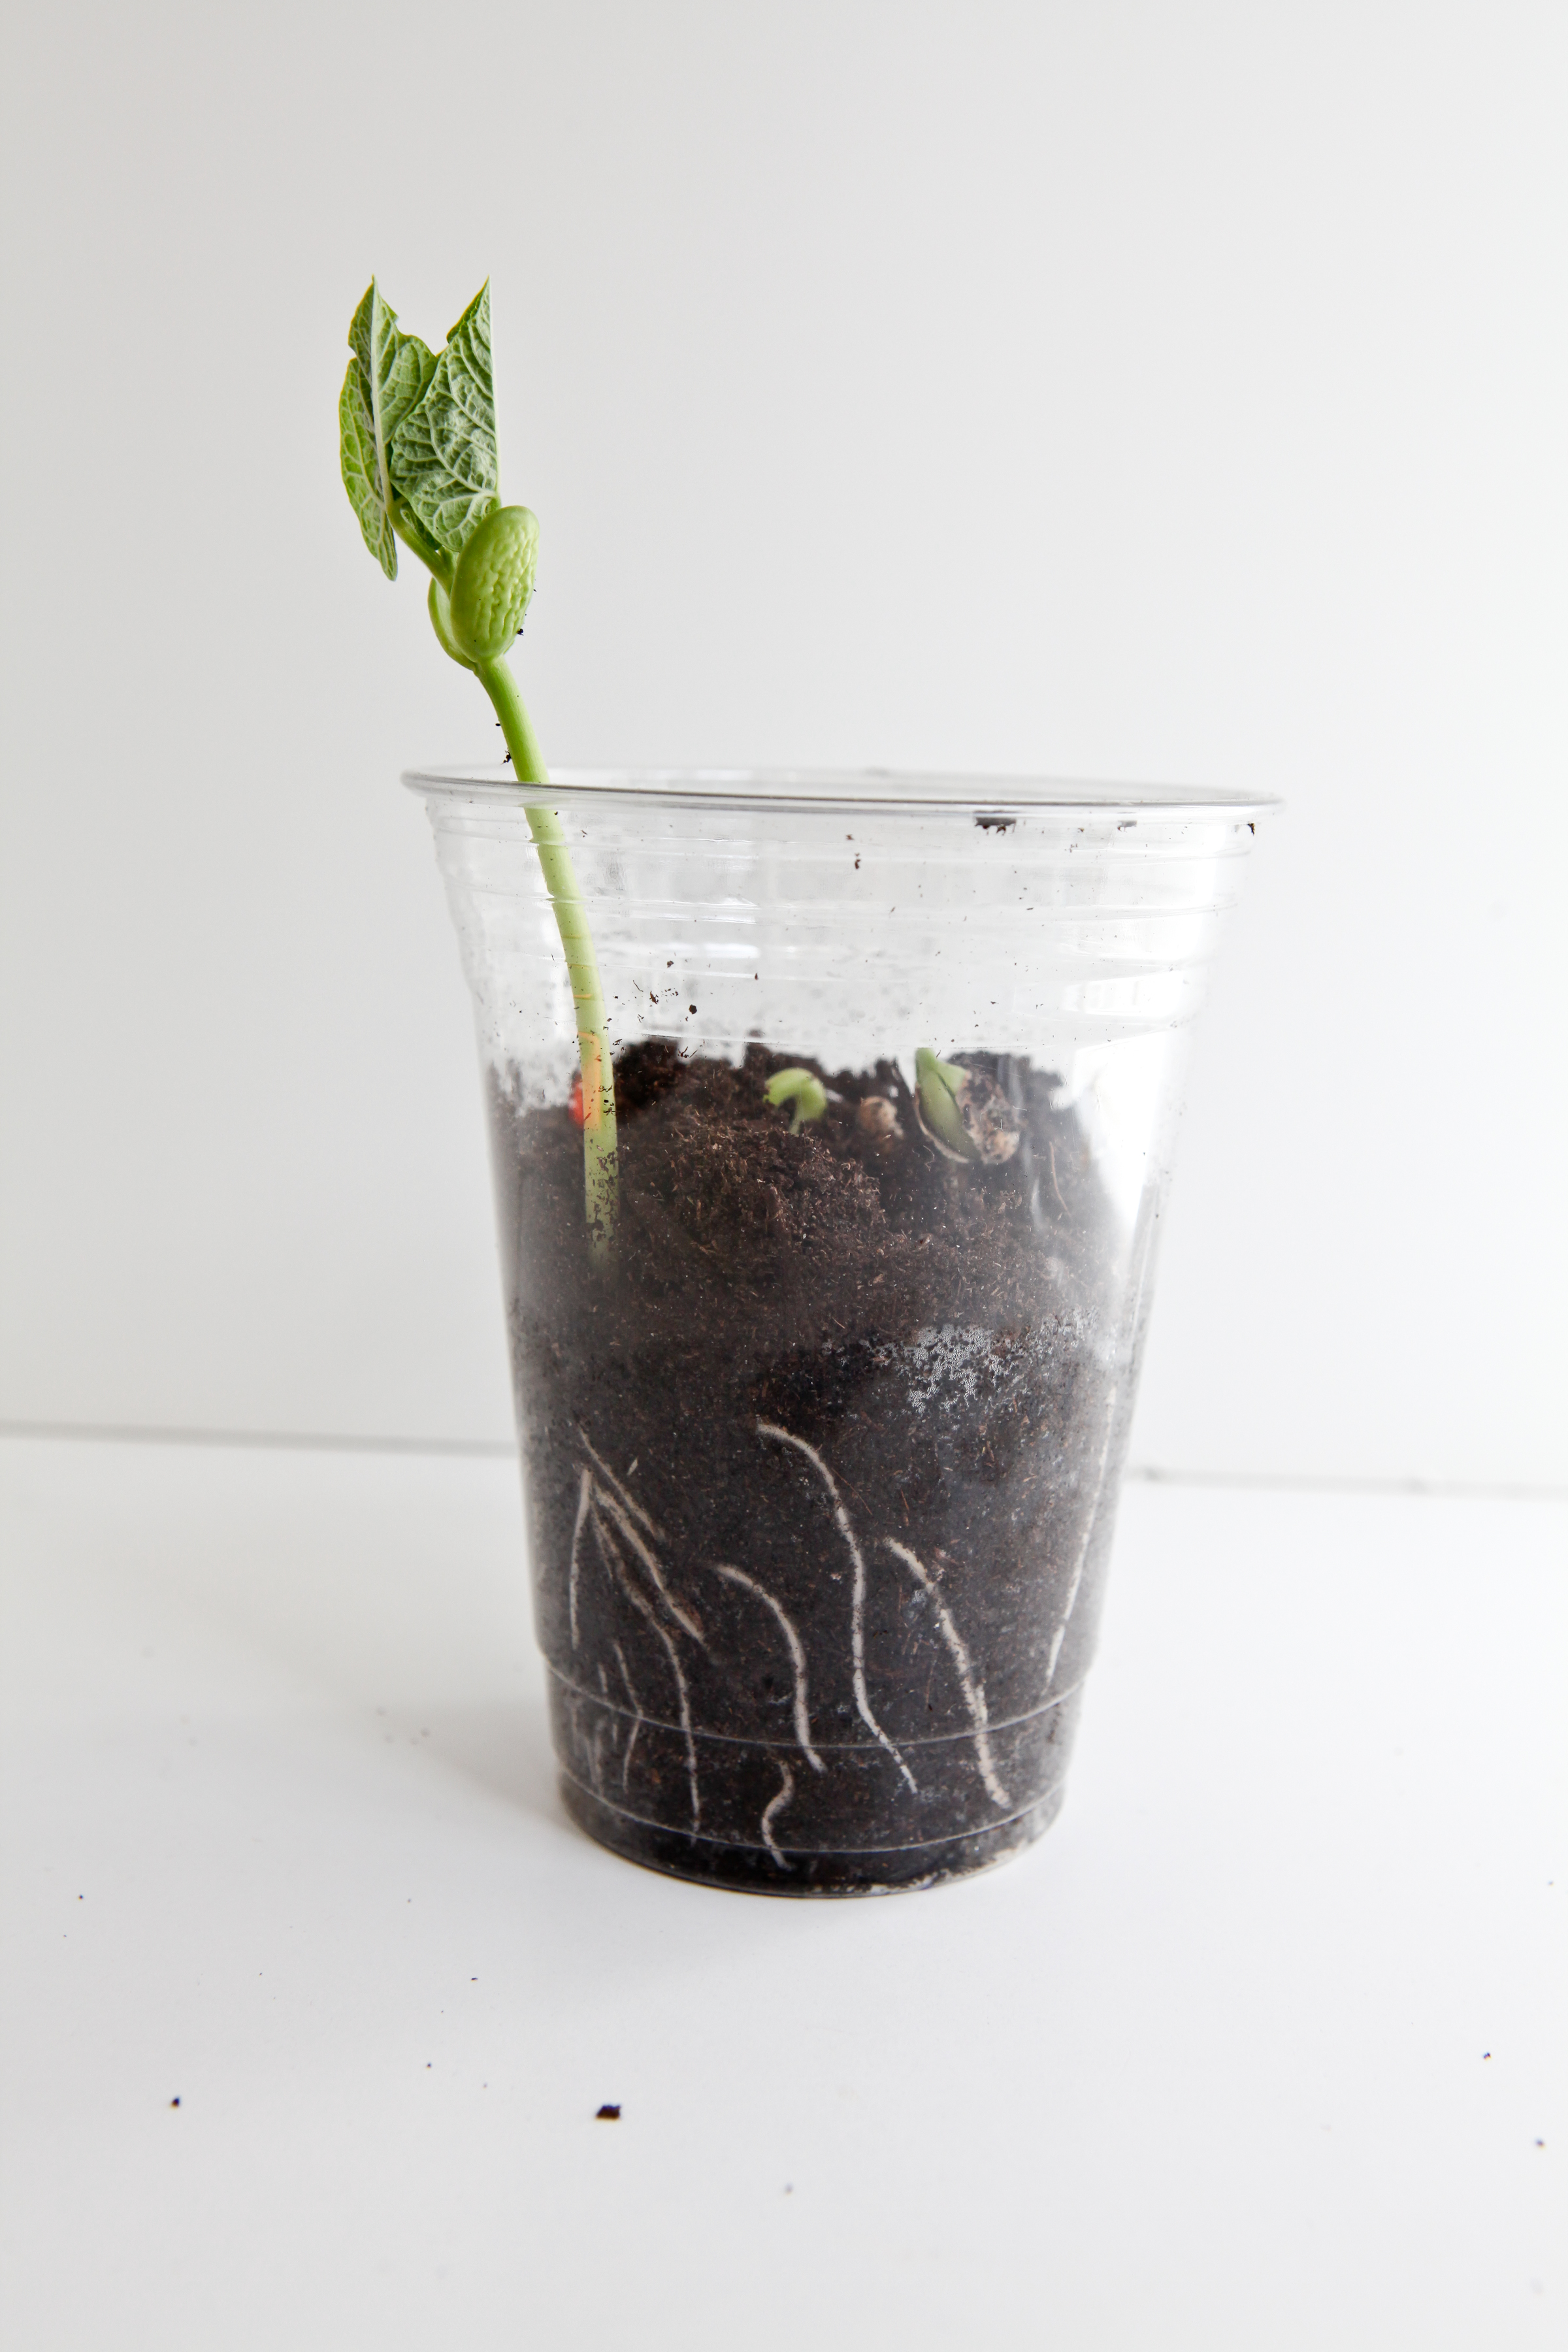
One of the save-the-trees crafts I put together was a miniature greenhouse where the kids could plant a seed, create the greenhouse, take it home and watch it grow. It was a hit among two partygoers and that’s a success in my book for a 3-year-old birthday.
DIY mini greenhouses
Materials:
Clear plastic cups
Potting soil
Dry beans
Painter’s tape
Knife
Directions:
Fill a plastic cup halfway with potting soil. Wet the soil so it’s moist, but not sopping.
With a knife, poke three holes in the bottom of another cup. Set aside.
Let your little one plant two or three beans in the soil. There’s no wrong way to do it. Jack barely put them beneath the soil and they still sprouted.
Place the other cup on top and affix a few pieces of painter’s tape to hold the cups in place.
Set in a sunny window. No need to water it. About three or four days later your beans should sprout. You can transfer your sprout to a small pot if you like. Be sure there is a drainage hole.
I’ve been pretty intimidated by the vast creativity on Etsy that I’ve been hesitant to open up shop. It’s a humble start — so far just custom-made flower crowns — but I hope you’ll take a look! Thanks to my friend Kate for being my model today.
Easter is an unfamiliar holiday for our family, but that doesn’t mean we can’t get creative with hard-boiled eggs.
Pinterest will show you endless egg possibilities but I’m frankly too lazy to attempt most of them. I also don’t have egg dye.
We decided to bust out our $2 water colors and paint our eggs. It turned out to be far less messy than egg dye and our 3-year-old had a great time coloring his eggs.
We baked the eggs to prevent cracking. Then we just set them out in a muffin tin with some water colors and markers and let our son go to town. Fun!