Category Archives: Crafts

Reversible chevron scarf

A couple of weeks ago I was packing for a two-week vacation in Mexico. Our family trips consist of sleeping, eating and lying around, so I have a lot of time to knit. I wanted to work on a pattern that was easy and quick to finish.

I’m not usually a fan of knitting scarves as they go on forever and ever, but I realized I don’t have many scarves and the cowls I’ve made muss my hair when I take them off.

I don’t do lacework and cable scarves have a wrong side, which I find unattractive. That’s when I found a free downloadable pattern from Ravelry called the Reversible Chevron Scarf designed by Debbie Seton of The Crimson Rabbit.

Click here for the free pattern.

Reversible chevron scarf in fuchsia | A free pattern by Debbie Seton and featured on Alaskaknitnat.com

Reversible chevron scarf in fuchsia | A free pattern by Debbie Seton and featured on Alaskaknitnat.com

This scarf has a beautiful texture and the design, which is made up of just knits and purls, looks the same on both sides. Just what I wanted!

Continue reading Reversible chevron scarf

Little lady scarf — a free knitting pattern

Last week a friend asked me if I could make a toddler scarf for her little niece, Amelia. The idea of a toddler wearing a scarf is funny to me. I can’t imagine it staying on a wriggling little 2-year-old. But that got me thinking: why not make a scarf that will stay put?

I searched Pinterest and came across the most adorable scarf pattern that uses a bow as a button. This was definitely the right idea. Create a buttonhole near the end of the scarf and secure a knit bow in the buttonhole. That should keep the scarf in place on a hippitty-hoppity hyper toddler.

Little lady (or gent) scarf | an easy, free pattern from Alaskaknitnat.com. I can't get enough of that little bow!

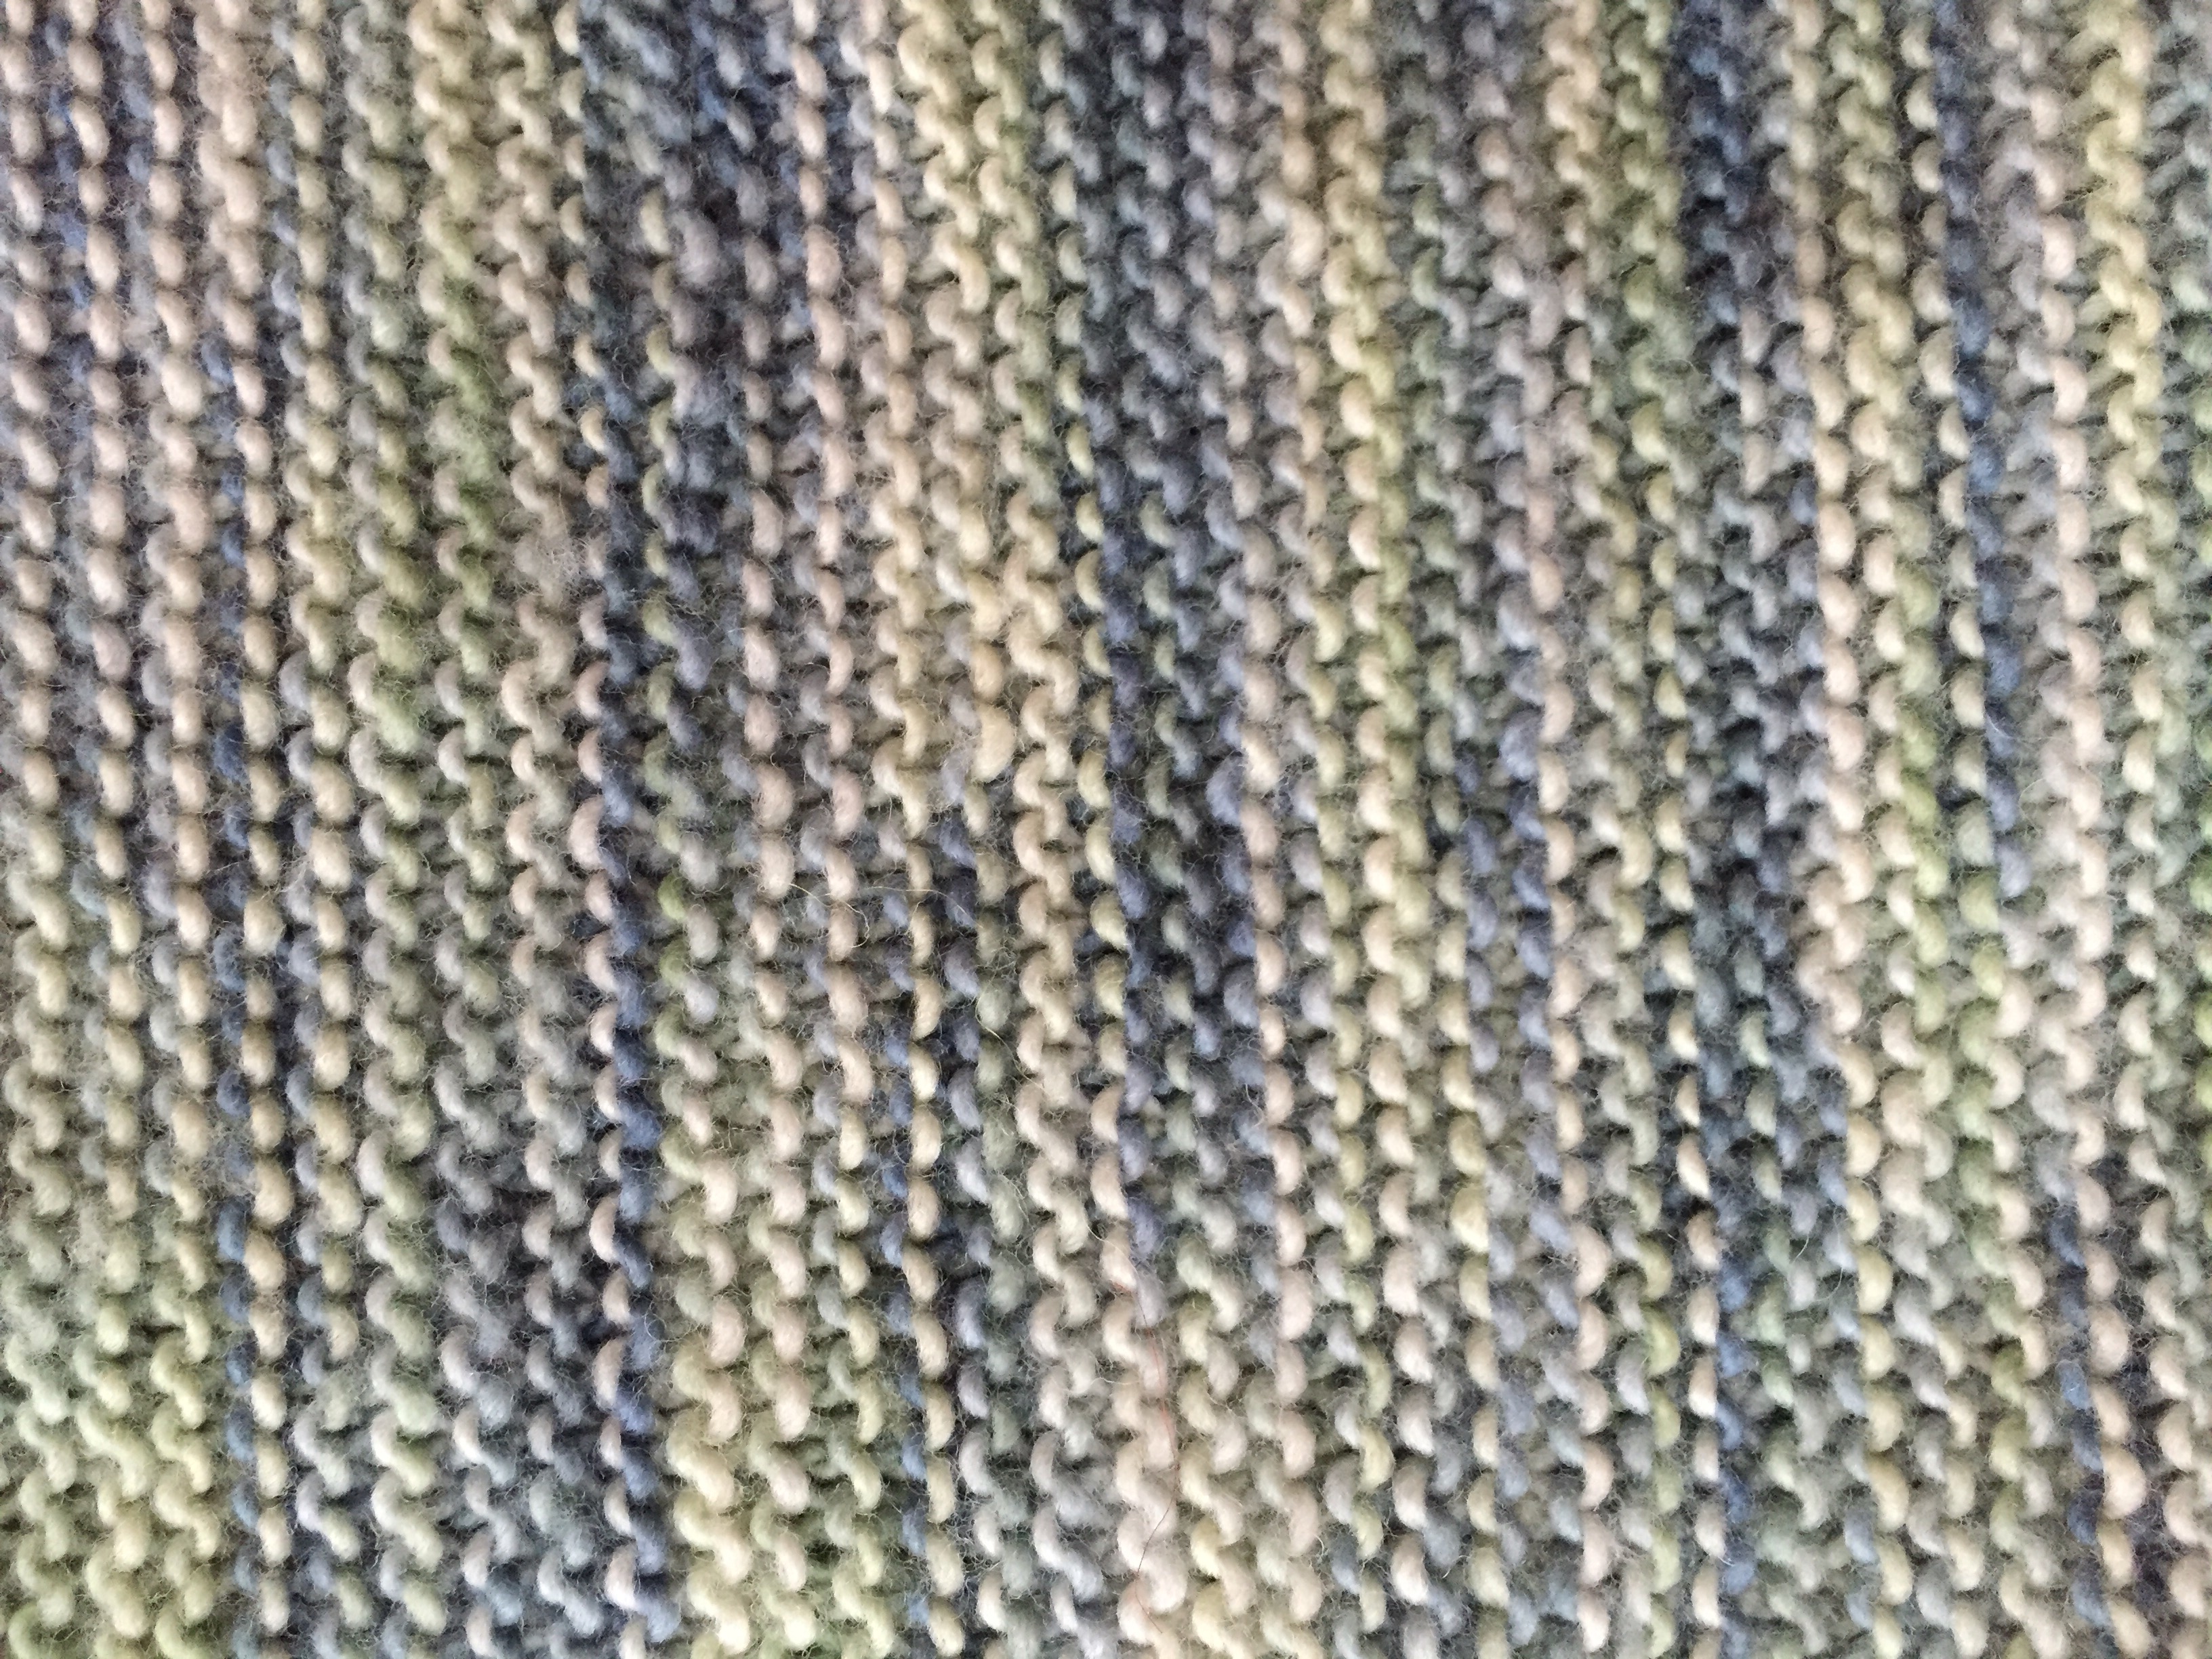
I love the look of seed stitch, a.k.a. moss stitch. It keeps the knit piece from curling on the edges and it looks attractive on both sides of the fabric. And it’s a little fancier than garter stitch.

Little lady (or gent) scarf | an easy, free pattern from Alaskaknitnat.com. I can't get enough of that little bow!

This is a simple weekend project that’s bound to keep your little lady cozy and warm.

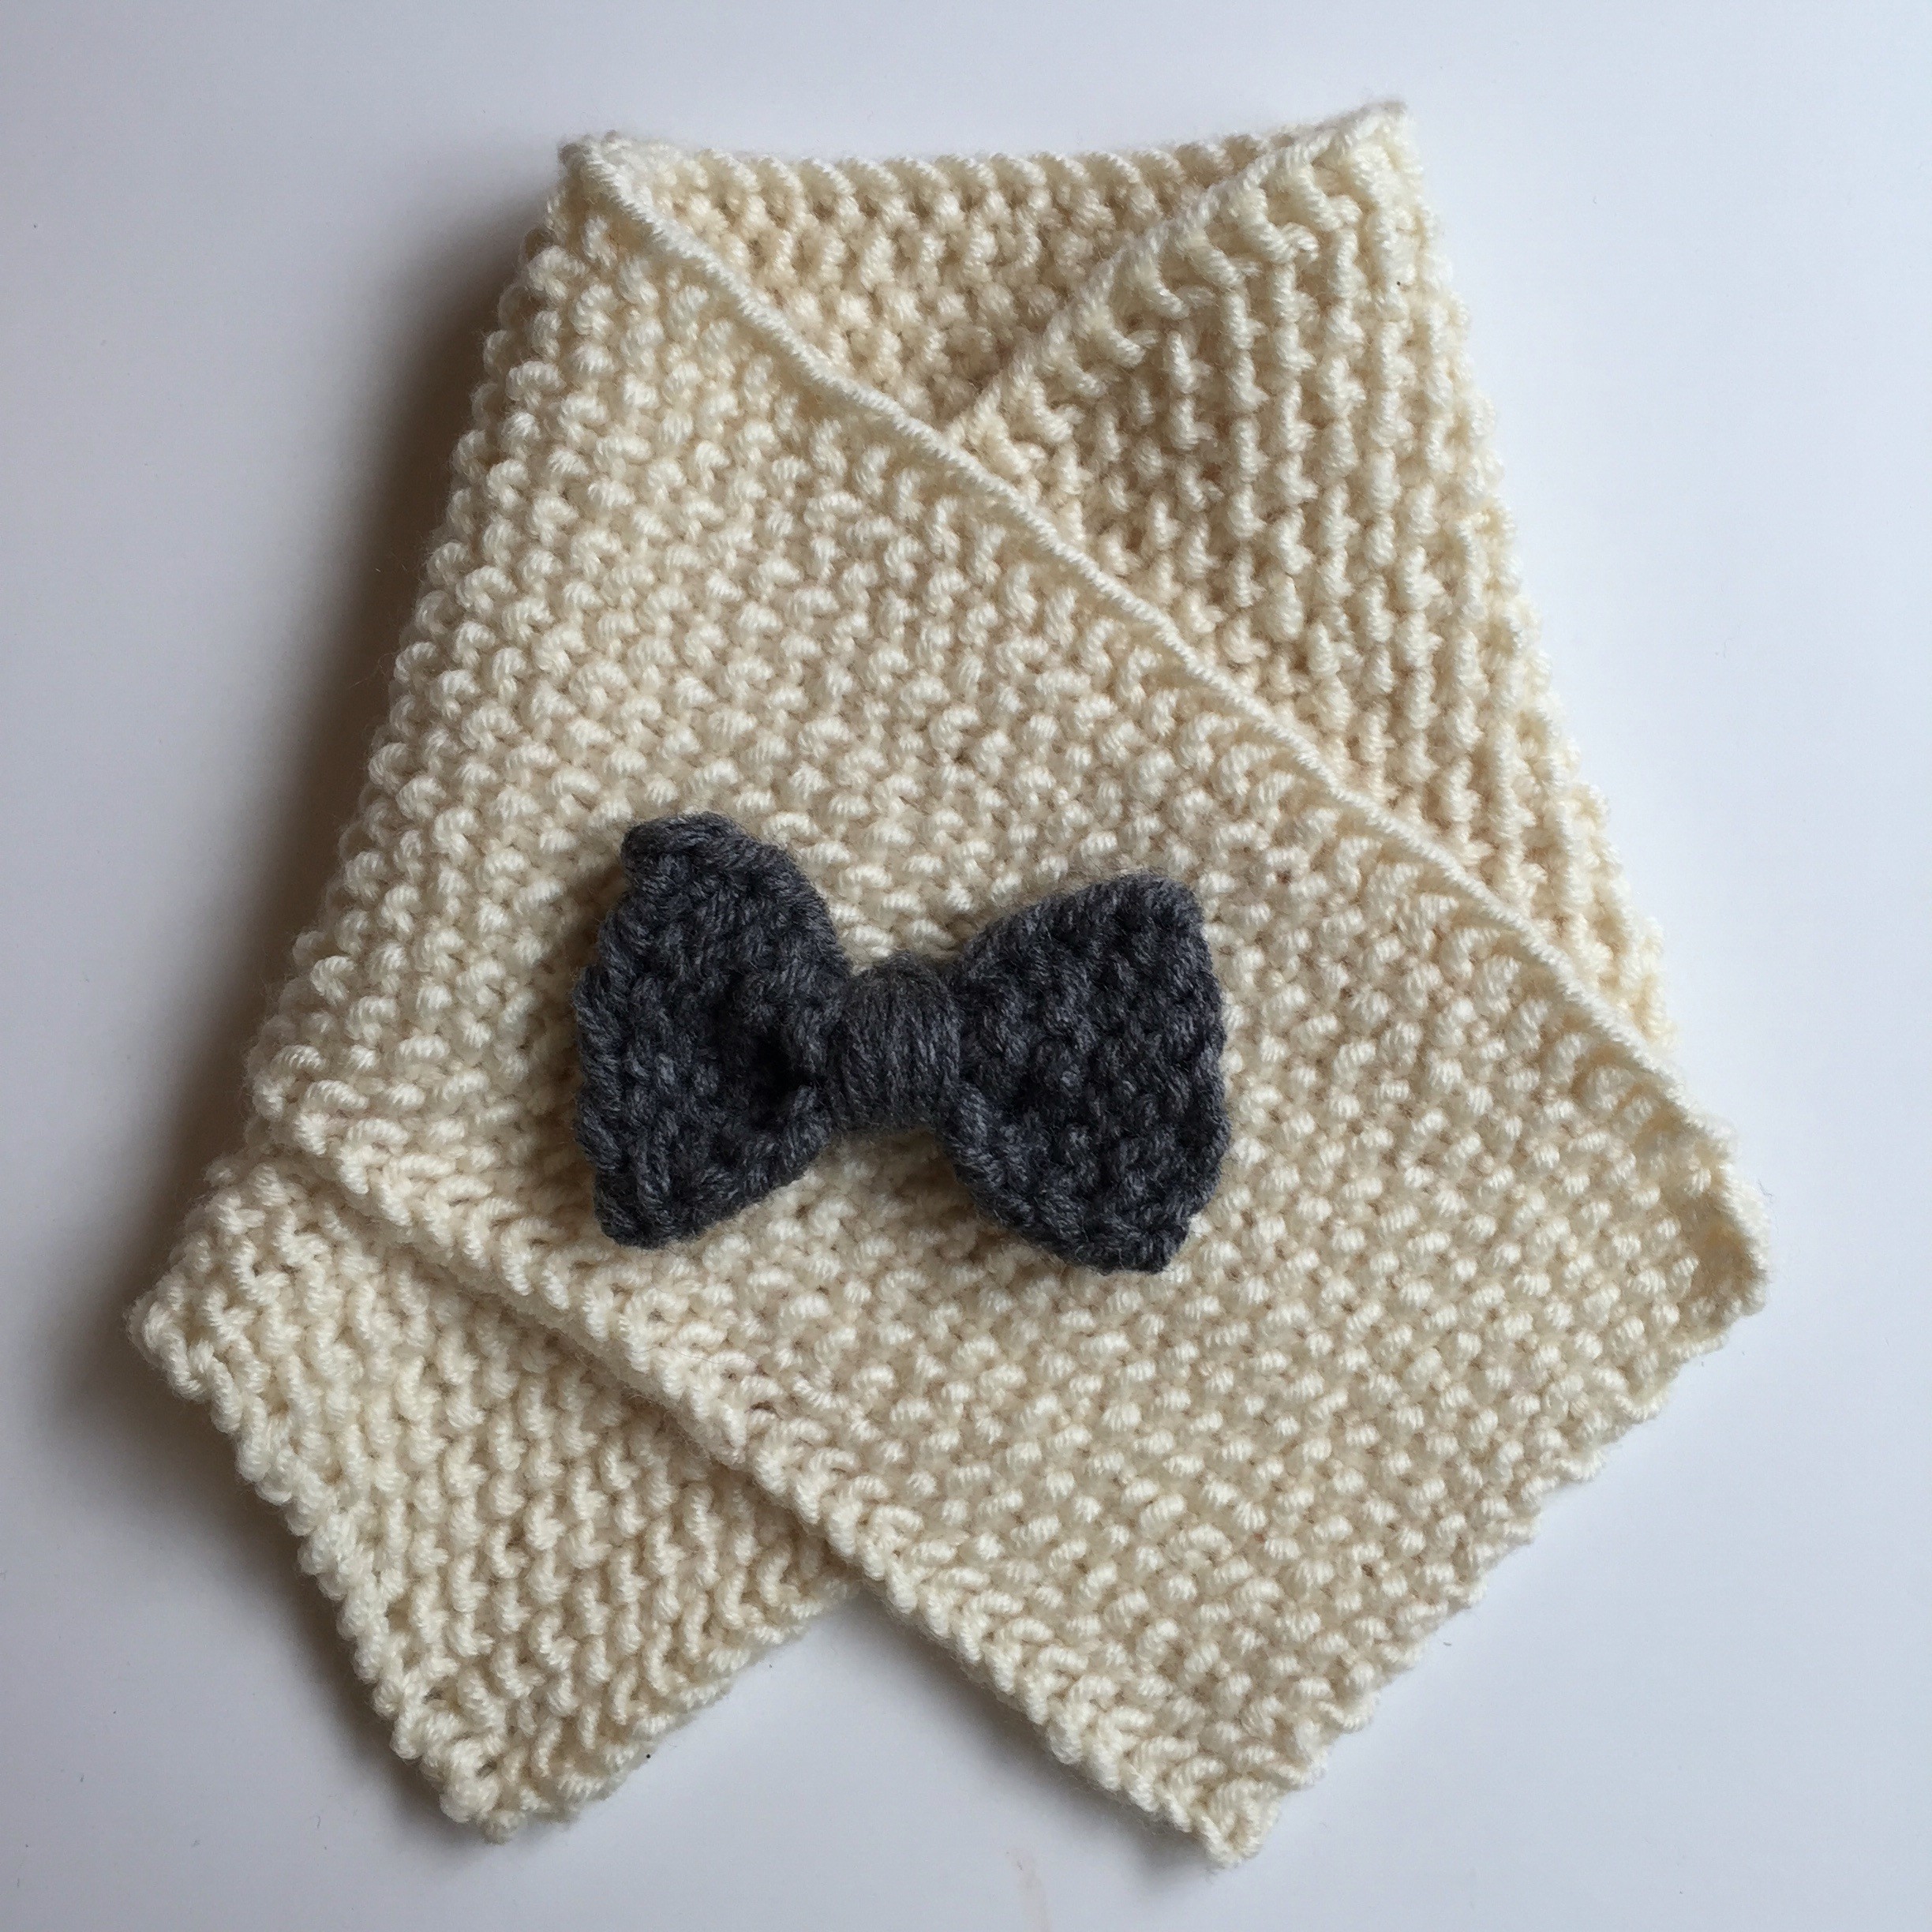
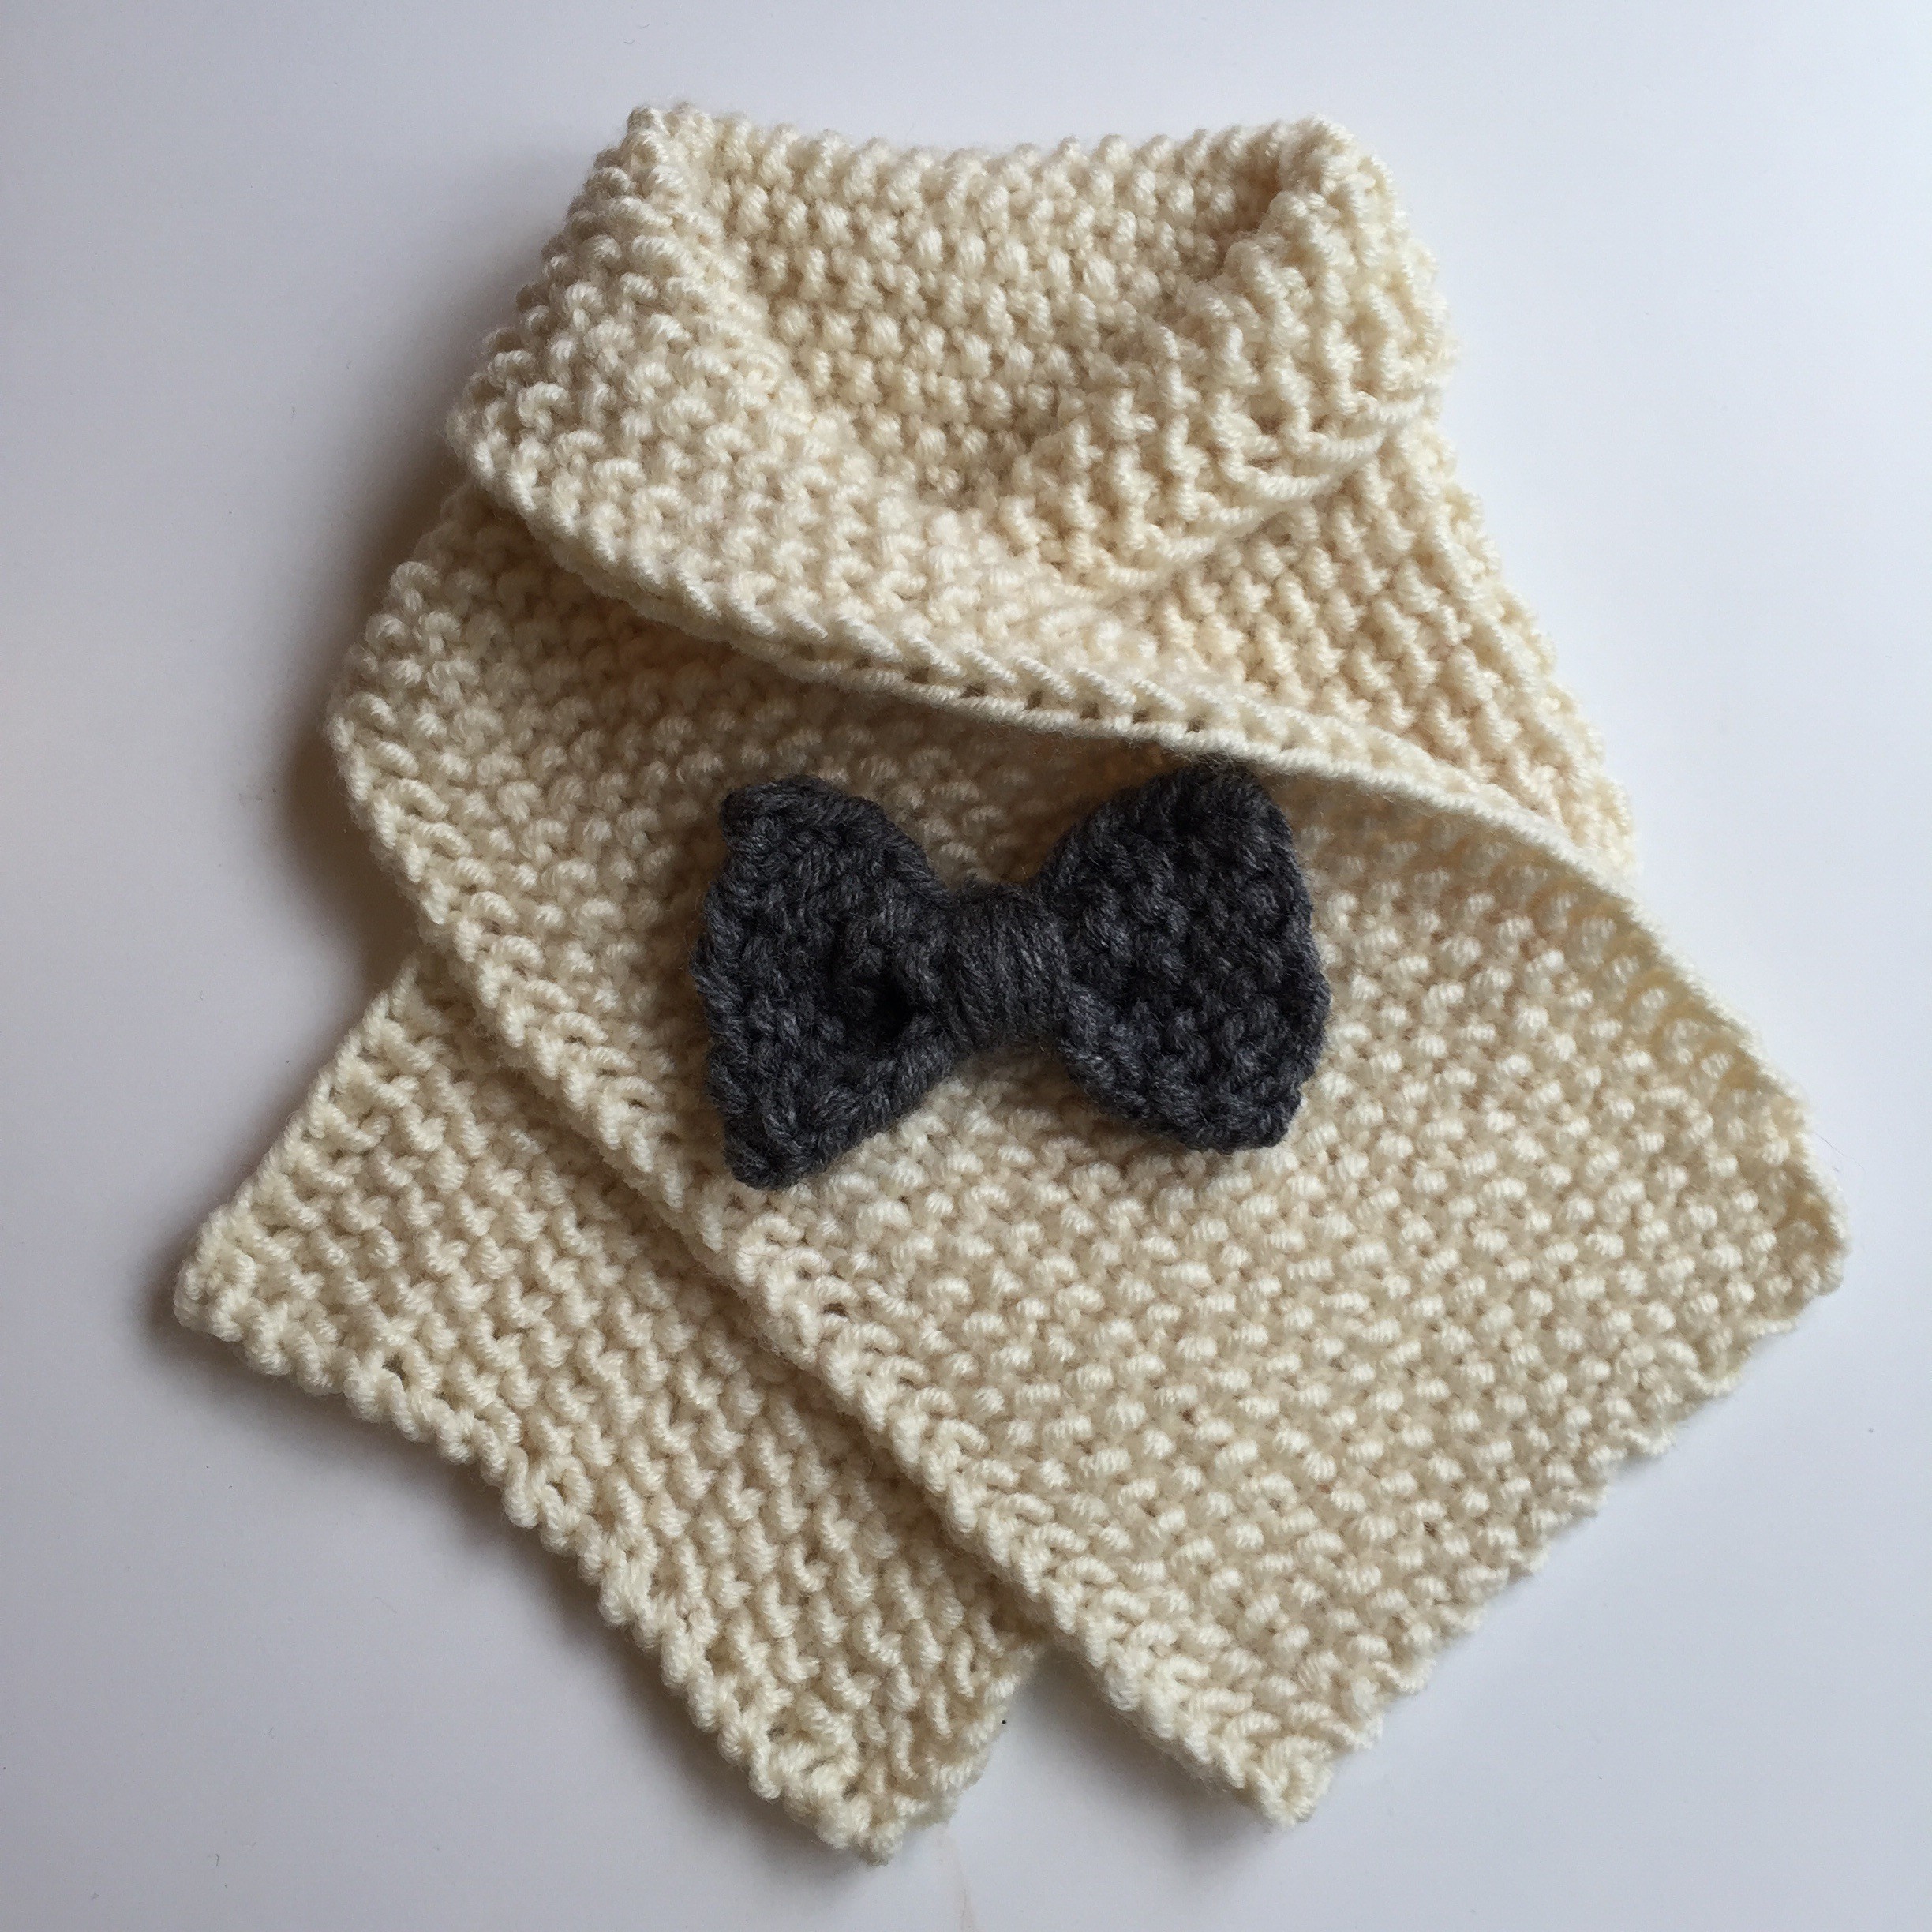
Little lady scarf with bow

Little lady (or gent) scarf | an easy, free pattern from Alaskaknitnat.com. I can't get enough of that little bow!

Materials:

  • 1 skein Lion Brand Woolspun in Fisherman
  • 1 skein Lion Brand Woolspun in Charcoal
  • Size 10 US needles
  • darning needle

Seed stitch:

Row 1: k1, p1 across all stitches

Row 2: p1, k1 across all stitches

Essentially, you knit where there’s a purl and purl where there’s a knit on the previous row.

Little lady (or gent) scarf | an easy, free pattern from Alaskaknitnat.com. I can't get enough of that little bow!

Note: I slip the first stitch of each row, knitwise, and purl the last stitch of every row regardless of where I am in the seed stitch pattern. This creates a neat edge. It is not required and therefore I haven’t included it in the row-by-row instructions below.

Instructions:

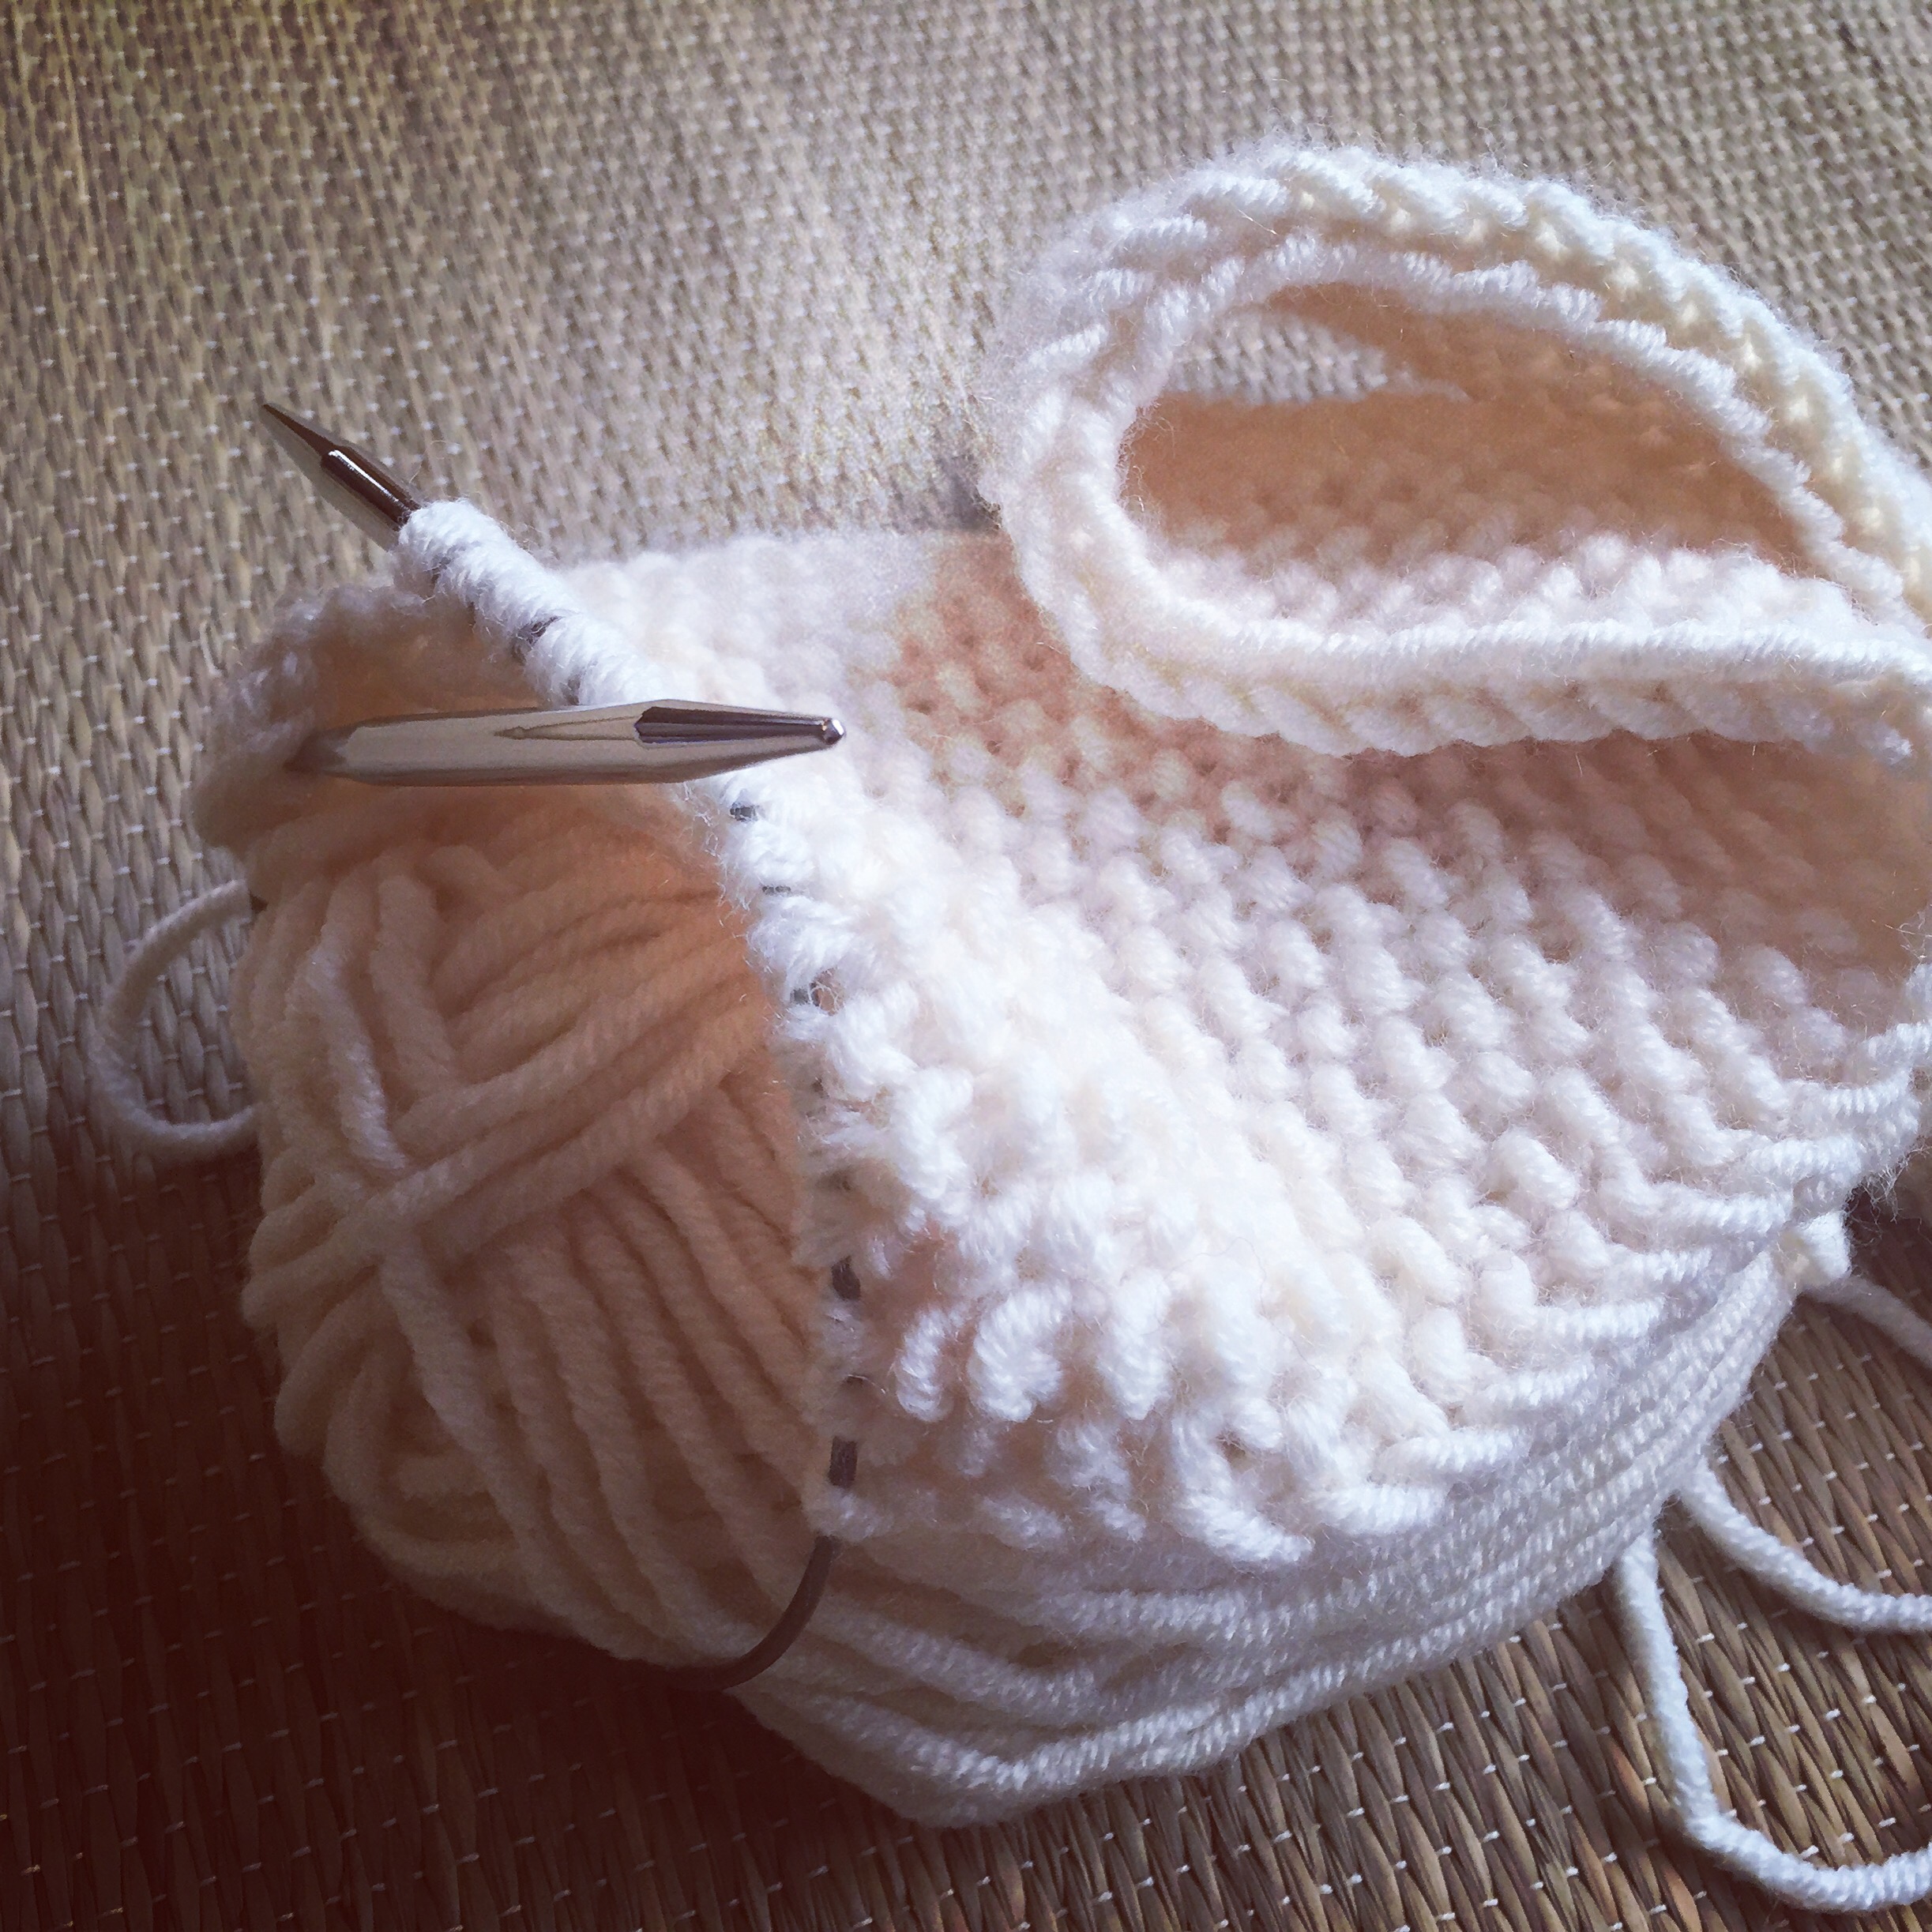
Cast on 20 stitches.

Seed stitch for 18 rows.
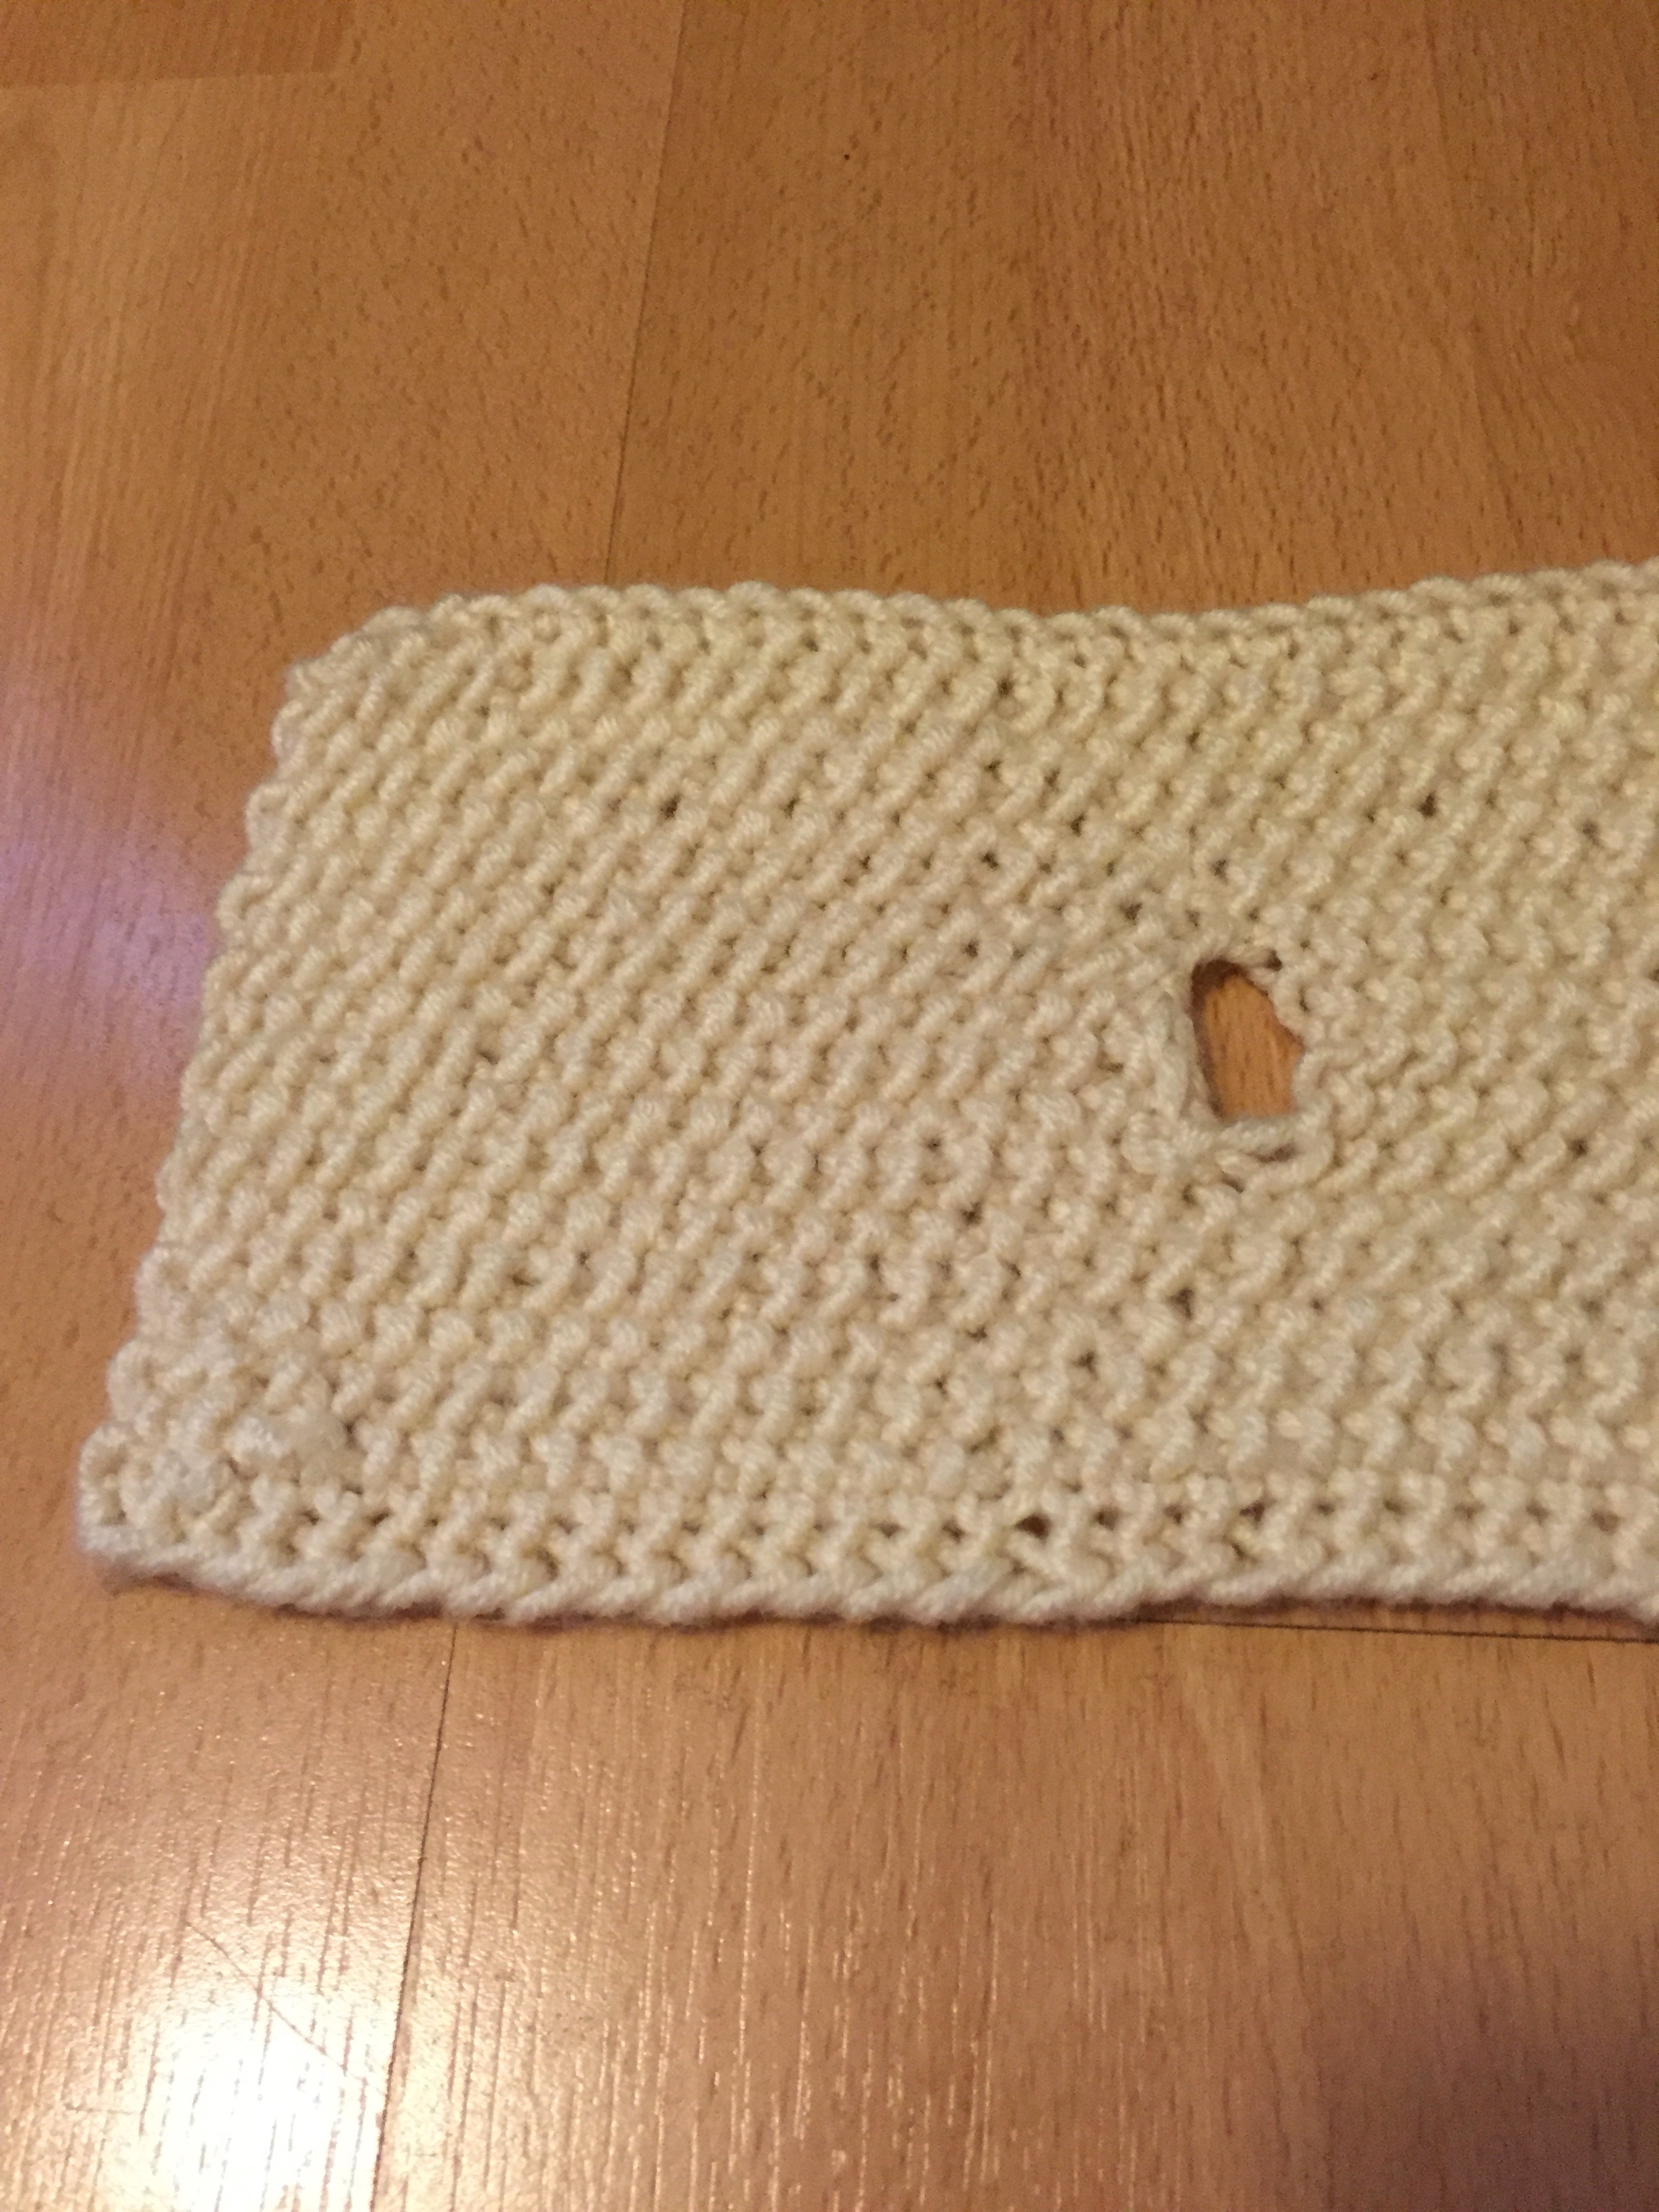
Little lady (or gent) scarf | an easy, free pattern from Alaskaknitnat.com. I can't get enough of that little bow!

For the buttonhole:

Row 1: Slip 1 stitch, seed stitch for 9 stitches. With the left needle, pull one stitch over the other stitch, *knit one, pull the second stitch over the knit one; repeat from the * twice more. You have now cast off 4 stitches. Continue with the seed stitch for the rest of the row. You should have 8 stitches on either side of the cast-off stitches.

Row 2: Slip 1 stitch, seed stitch to button hole, cast on 4 stitches, continue the seed stitch for the rest of the row. – 20 stitches.

Continue the seed stitch pattern until the whole piece measures 25 inches. Cast off and weave in ends.

Little lady (or gent) scarf | an easy, free pattern from Alaskaknitnat.com. I can't get enough of that little bow!

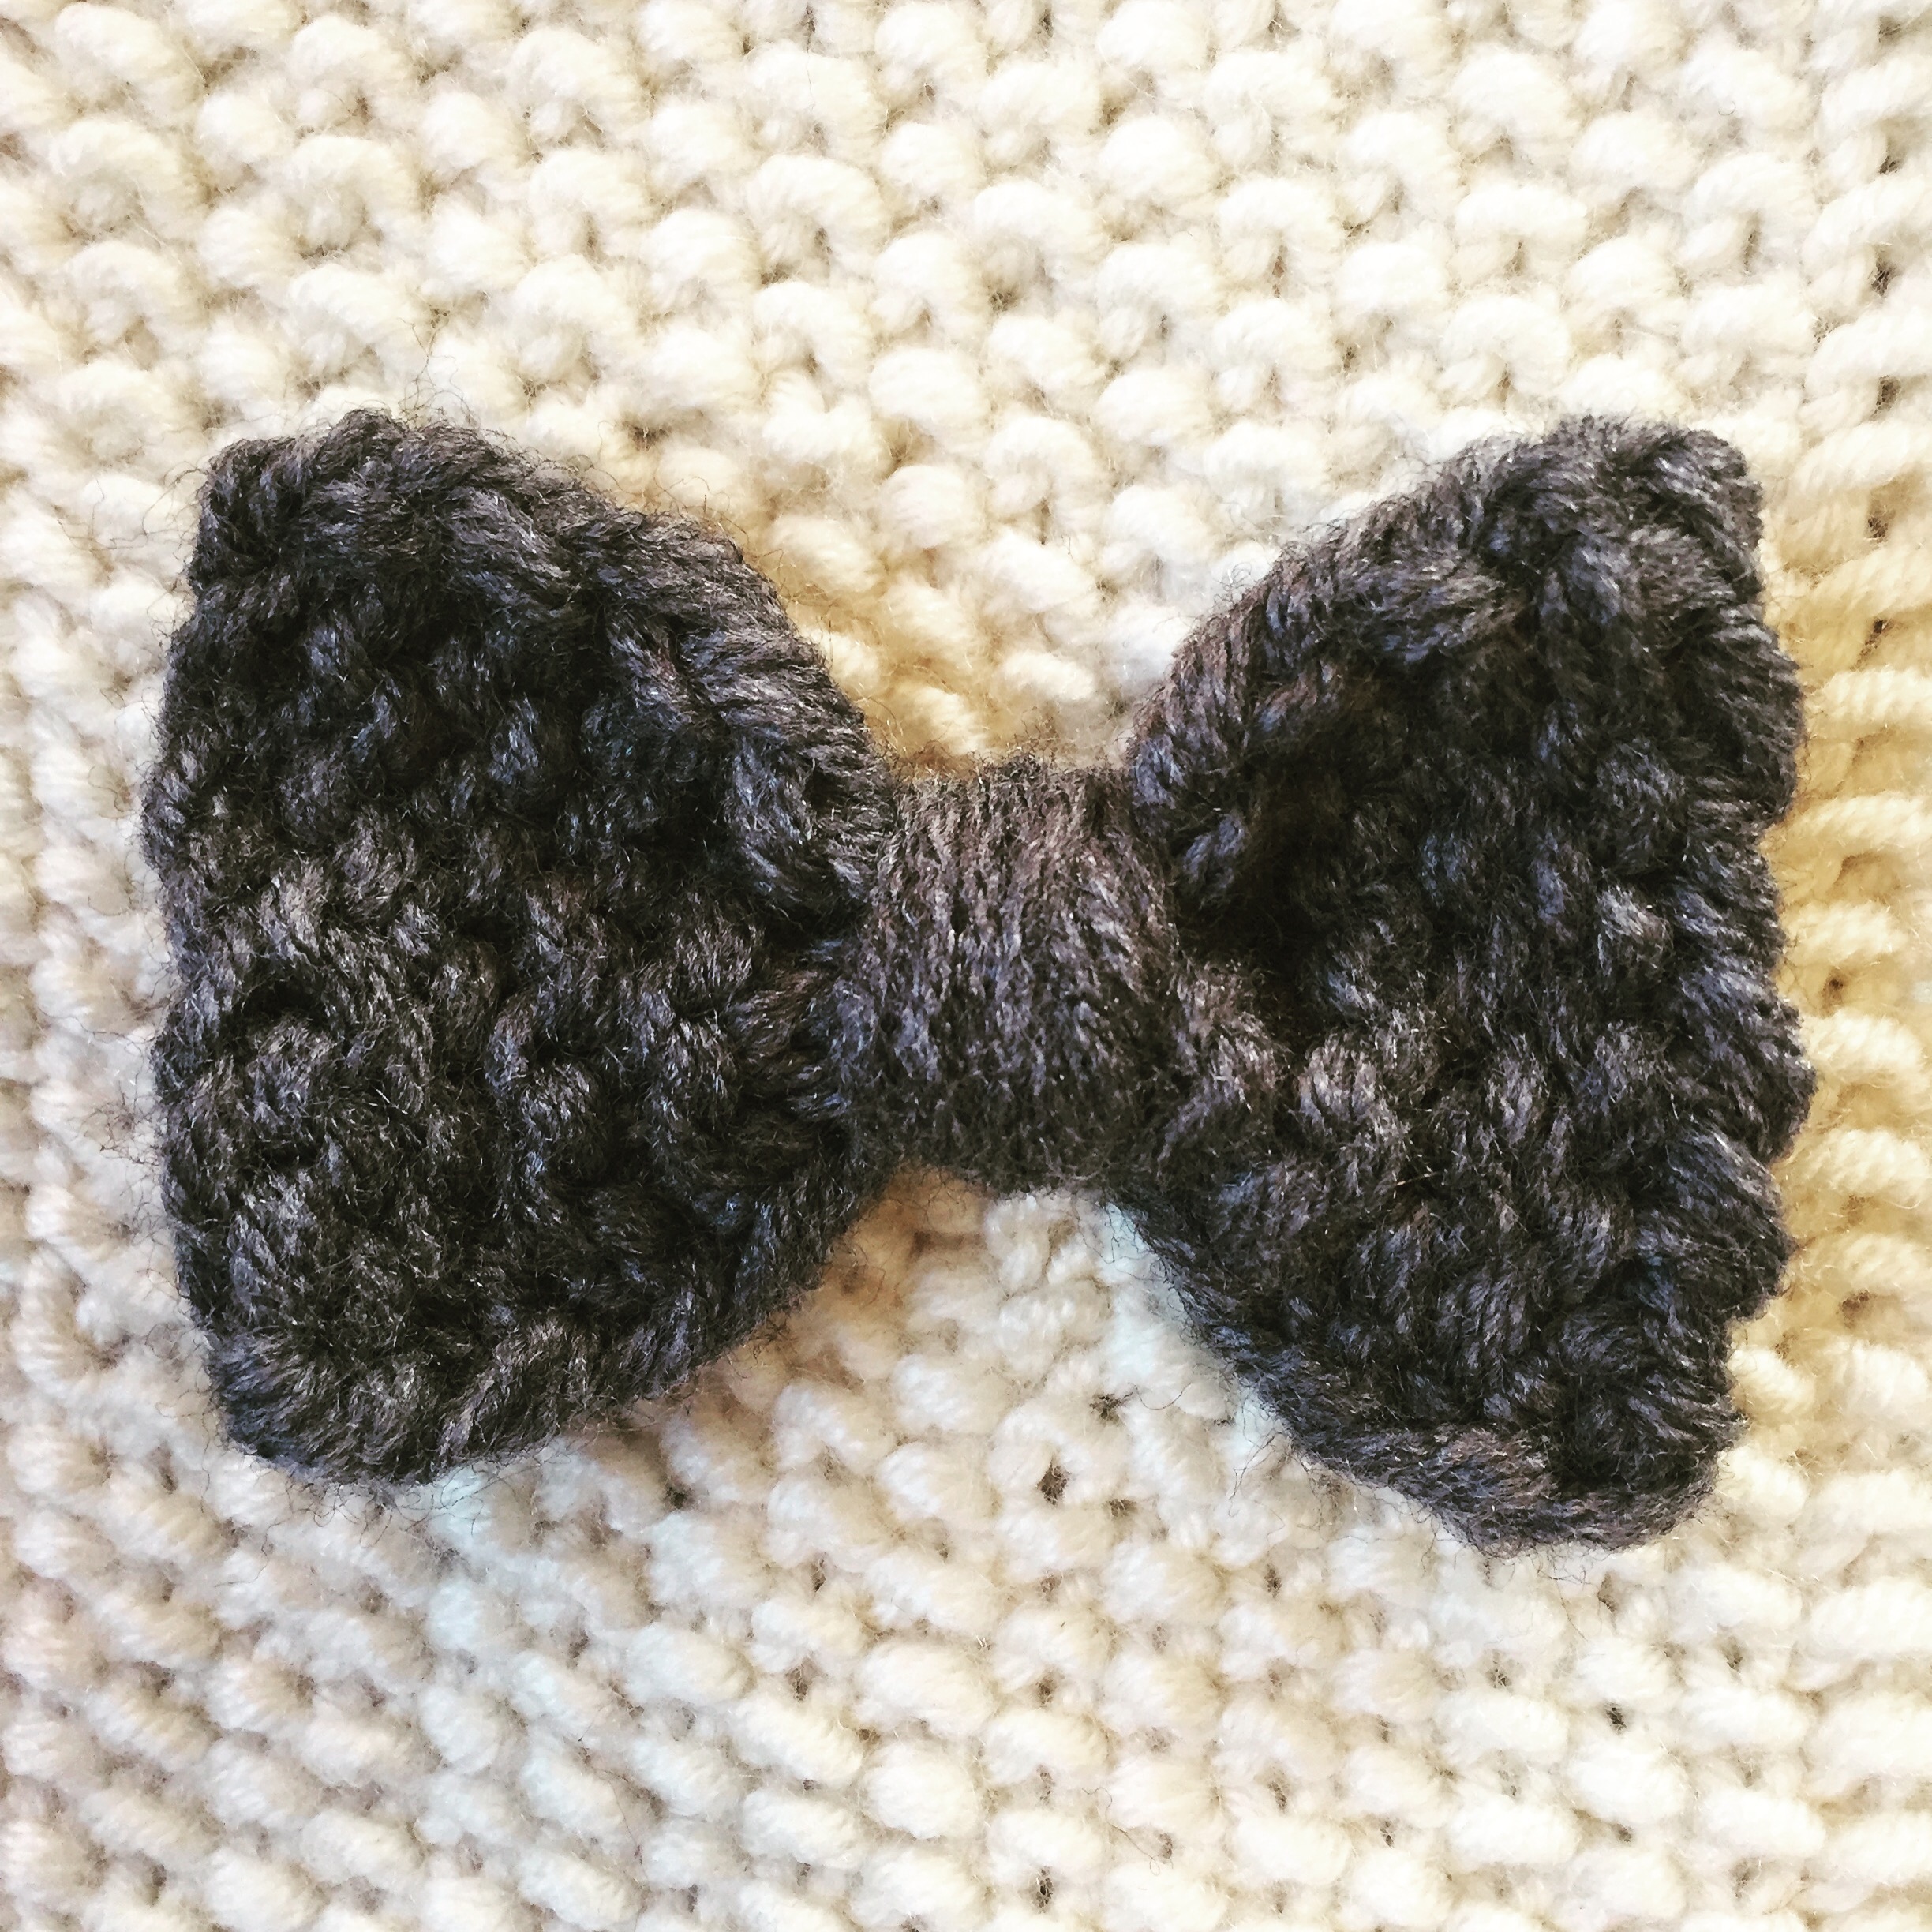
Bow: Cast on 10 stitches and knit in garter stitch for 10 rows. Cast off and weave in ends. Wrap grey yarn around the middle of the strip several times and tie the ends in the back of the bow.

Using the fisherman color yarn and darning needle, sew the bow to the end of the scarf opposite the button hole, the same height as the button hole (about 4 inches from the edge).

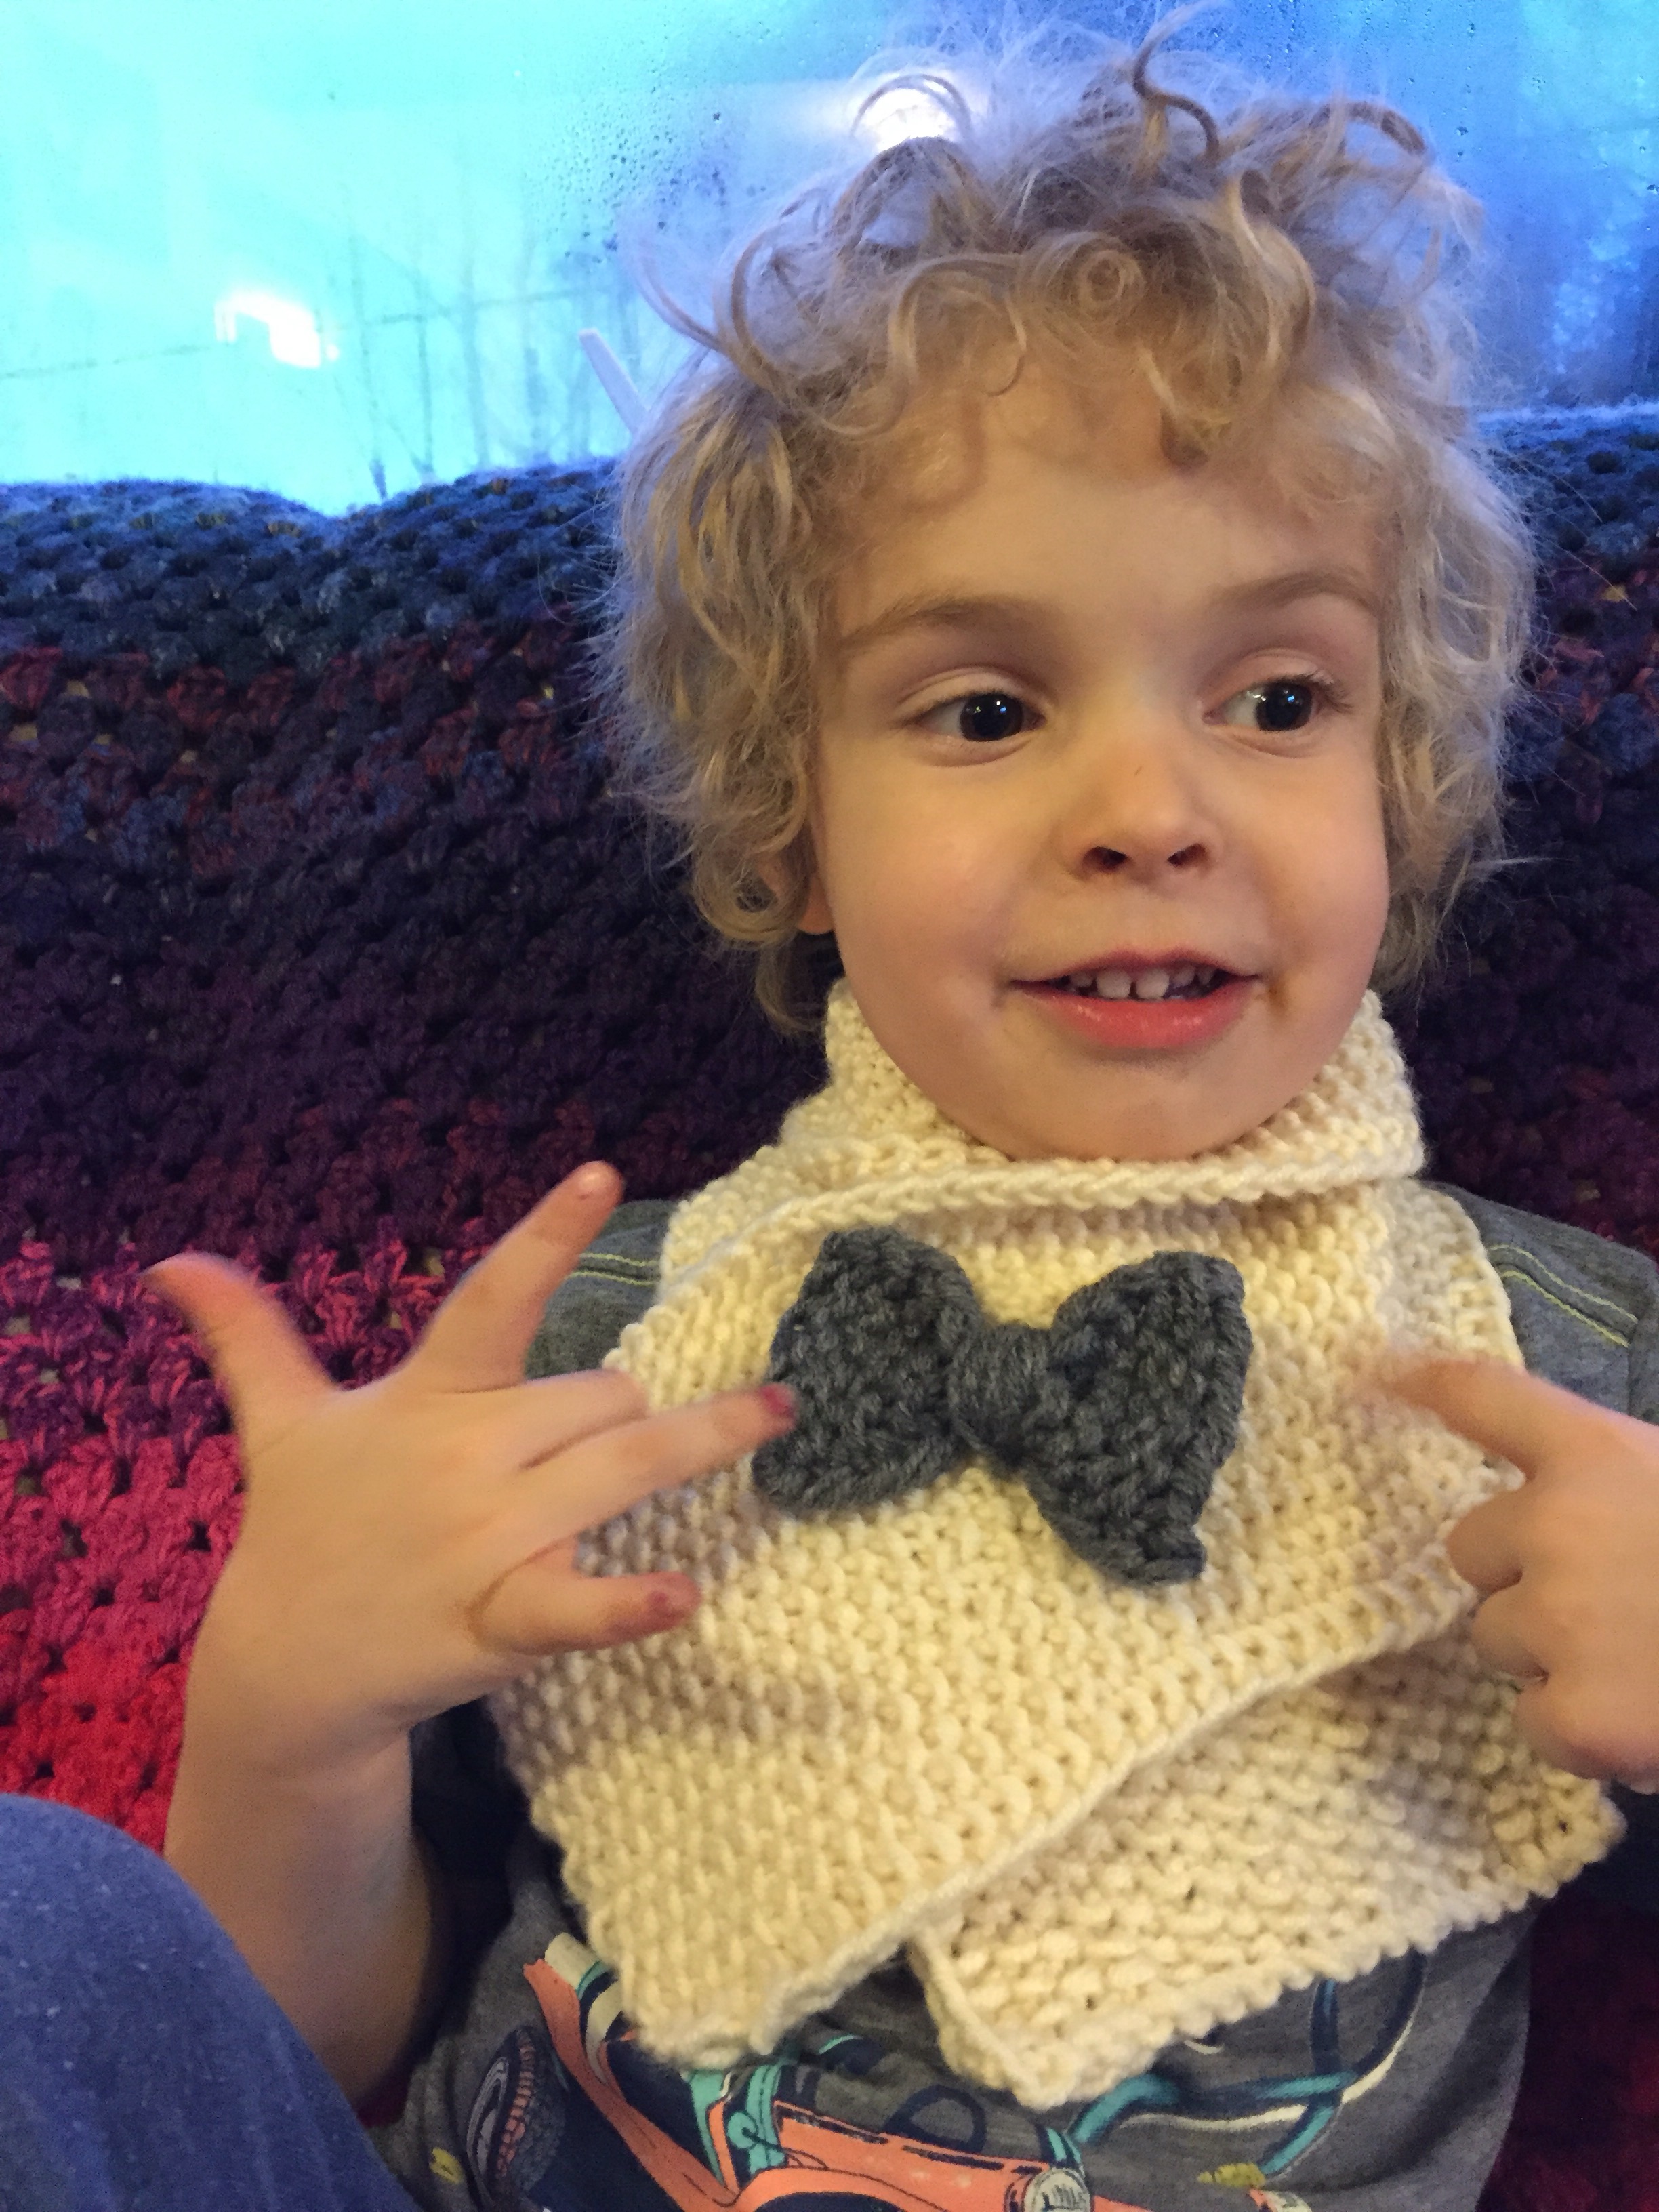
I don’t have a little lady, so my little gent got to be the model. Kind of looks like a bow tie, right?

Little lady (or gent) scarf | an easy, free pattern from Alaskaknitnat.com. I can't get enough of that little bow!

The top can be folded down a bit like a collar to make it a little narrower and warmer.

Little lady (or gent) scarf | an easy, free pattern from Alaskaknitnat.com. I can't get enough of that little bow!

Feather-light triangle scarf

After knitting about 30 Alaska flag hats, I was yearning to knit myself something this winter that I would use every day. I love cowls, but often my hair gets all frumpy and frizzy when I try and put one on over my head. I really wanted a scarf that wouldn’t require a lot of thinking.

After many searches I came across this simple pattern from Leah Michelle Designs. The elongated triangle turns out less like a shawl and more like a bandana scarf. Just my style.

Feather-light triangle scarf | An easy knitting pattern by  Leah Michelle Designs, featured on Alaskaknitnat.com

Feather-light triangle scarf | An easy knitting pattern by  Leah Michelle Designs, featured on Alaskaknitnat.com

I fell in love with Mano de Ururguay’s Clara yarn the other day at the yarn shop. It’s soft, feathery and fluffy. Just my style.

Feather-light triangle scarf | An easy knitting pattern by  Leah Michelle Designs, featured on Alaskaknitnat.com

This pattern is so simple. It increases by one stitch every four rows. No need to count stitches or rows. You just weigh the yarn before starting and increase until you’ve used half the weight, then start decreasing.

Feather-light triangle scarf | An easy knitting pattern by Leah Michelle Designs, featured on Alaskaknitnat.com

I also learned a simple technique that I’ll be applying to all scarf patterns in the future. You slip the first stitch knitwise and purl the last stitch on every row. This creates the perfect edge. I love it!

Feather-light triangle scarf | An easy knitting pattern by Leah Michelle Designs, featured on Alaskaknitnat.com

The Best Gift Box Hack

I worked in retail for six years and by this time during the holiday season our gift wrapping supplies were usually low. Only birthday paper and giant boxes left. When I had a customer wanting a small item wrapped, I came up with this simple hack to make a small box out of the lid of a bigger box.

Here’s your key to being a wrapping genius.


Dress to Apron Refashion – A free tutorial

Sewing is by no means my greatest talent. My mom taught me to sew at a young age, but that doesn’t mean I like it. It’s time consuming to cut out a pattern, cut out the fabric and take out the sewing machine. If I’m going to sew something it’s got to be a two-hour-or-less project.

I love the concept of refashioning clothes; i.e., taking an article of clothing and turning into a different article of clothing. Refashionista is pretty much my sewing/thrifting idol and she’s incredibly cute.

Lately I’ve been noticing gigantic church-lady linen dresses at the thrift shops. My mother loves linen dish towels because they are lightweight and absorbent. I thought about purchasing a linen dress and cutting it into dish-towel rectangles, but the concept didn’t really excite me much.

Last week I saw a lovely linen apron at Anthropologie. I had an “I can make that” moment. I figured an apron was a great way to refashion an old dress.

Years ago I made an apron for my sister and managed to write down the pattern measurements. I have included that pattern in this tutorial. Keep in mind my sewing skills are far from elegant so I’m sure some of you could come up with a prettier apron, but I’m satisfied with what I ended up with and it only took two hours from start to finish.

Be sure to check out the bottom of this post for more clothing refashion tutorials I’ve done over the years.

Refashion a thrift store linen dress into an apron | a free pattern from Alaskaknitnat.com

Continue reading Dress to Apron Refashion – A free tutorial

Pinterest Perfect: DIY Rustic Headboard

I wish my house were magazine-worthy. I wish one interior wall were made of raw brick. I wish I had large windows with endless natural light. I wish I had crisp white linens. I wish I had 11-foot ceilings. I wish I had a subway tile kitchen backsplash.

A woman can dream, right? And that’s what Pinterest is for.

I’m usually a practical pinner. I pin recipes I’ll actually make, knitting techniques I reference over and over, but once in a while I just want to be dazzled by what I call “Pinterest perfectionism.”

My friend Julie’s “For the Home” board is just that — a virtual cork board of immaculate kitchens, bedrooms and dens that are seemingly unattainable. But Julie is a DIY-er. I’ve seen her tackle several projects that require power tools. I’m a crafter, but I can’t get myself to pick up anything heftier than a staple gun.

I thought of Julie last summer when my parents were tearing down their 25-year-old cedar deck. My husband meticulously planed every board that came off of that wrap-around deck. He was left with quite a bit of cedar, which he used to build our son’s playhouse.

In the spring I invited Julie to stop by and pick up some planks because it just looked Pinterest worthy. The last month she sent me photos of what she created — a rustic headboard with personality.

DIY Rustic Headboard | just a few unsanded cedar boards are all you need to easily create your own rustic headboard. Free tutorial from alaskaknitnat.com

I guess this post is an ode to those who actually do it. Her bedroom is a DIY, Pinterest-perfect dream come true. Well done, Julie!

Here’s what Julie had to say about how she made her too-easy-to-be-true, step-by-step instructions for a super cute headboard.

1. Get some awesome friends (wink wink) who offer you already sanded and planed cedar planks AND cut them to the length you want. I did some measuring prior to that and decided how long and tall I wanted the pieces.

2. Lay out your pieces how you want them and use wood glue to glue the sides together. I will admit, it was a little tricky because it was hard to apply enough pressure so that the wood would adhere together. A table with clamps would work a whole lot better than what I did!

3. Once all the pieces are glued together, I waited 24 hours to let the glue set, according to the instructions on the bottle.

DIY Rustic Headboard | just a few unsanded cedar boards are all you need to easily create your own rustic headboard. Free tutorial from alaskaknitnat.com

4. The last thing I did was take the special piece I had picked out to go across the headboard and nail it down. I picked out some 2-inch galvanized nails. I really liked the way they looked with the raw cedar.

DIY Rustic Headboard | just a few unsanded cedar boards are all you need to easily create your own rustic headboard. Free tutorial from alaskaknitnat.com

5. For installation, I was lazy and just set it up behind my bed. But you’re probably more motivated than me and might want to actually take the time to attach some longer pieces on to the sides to give the headboard some more height and screw those into the frame. I’ll probably do that…next summer.DIY Rustic Headboard | just a few unsanded cedar boards are all you need to easily create your own rustic headboard. Free tutorial from alaskaknitnat.comSo that’s it! There’s your new headboard! There’s a lot of creative license with this you can take, so just have fun and make it your own! Enjoy!


Mermaid Hat

Rachel, my best friend from childhood, has been asking me to knit her a hat for three years. When I visited her in Seattle in 2012 we even picked out the yarn and everything.

She requested a cable hat and I’ve never had such a hard time finding a pattern I liked. I started three different patterns including the classic “Stitch ‘n’ Bitch Nation” one, but I just didn’t like them.

So I tucked the ball  of purple yarn away in my stash and temporarily gave up.

Three years later I called Rachel to tell her I was coming back to Seattle for a work trip and asked if she would like me to bring her anything from home. She reminded me of my hat promise. I was determined this time that I would have a finished hat by the time I reached The City of Flowers.

I went back to Ravelry and found just what I was looking for. It must not have been posted when I last looked up cabled hats.

Presenting the Mermaid Hat:

The Mermaid Hat | this gorgeous cable hat knits up in no time on size US 10 needles. Free pattern available at http://s6girl.blogspot.co.uk.

The Mermaid Hat | this gorgeous cable hat knits up in no time on size US 10 needles. Free pattern available at http://s6girl.blogspot.co.uk.

I used Blue Sky Alpaca’s Worsted Hand Dyed yarn in Mulberry. The downside was I only bought one skein and ran out of yarn two rounds before the end. Luckily I had left a long tail when I started so I had to Frankenstein the yarn toward the end, but it all worked out. PHEW!

I really loved the little braided stitch going up the hat between the cables. It is a good pattern for folks who have gotten down cables but are still not ready for anything complicated.

The Mermaid Hat | this gorgeous cable hat knits up in no time on size US 10 needles. Free pattern available at http://s6girl.blogspot.co.uk.

Get the free pattern here.

Choose Your Own Adventure Hat

This morning I found a stack of hats I knitted for my son that he has worn from birth to present.

Choose Your Own Adventure Hat | Make this striped ear flap hat using yarn scraps of all different colors. Free pattern from alaskaknitnat.com

It’s hard to believe he fit into that teeny green hat! The biggest, most worn hat is definitely too small so I decided it was time to make him a new one.

Since Jack is 3 and has all the opinions in the world, I thought it would be fun to let him choose the colors for his hat. I opted for an ear flap hat to keep his body warm during recess.

Choose Your Own Adventure Hat | Make this striped ear flap hat using yarn scraps of all different colors. Free pattern from alaskaknitnat.com

We had a really fun time together today picking colors as we went along. When I sent a photo to a friend she said, “It’s like a Choose Your Own Adventure hat!” We have a title, folks!

Continue reading Choose Your Own Adventure Hat

An East Coast Halloween: 3 tricks and treats

Soon after becoming friends with Kasandra in college I discovered we had one big difference: she celebrated holidays.

An East Coast Halloween | 3 tricks and treats that are affordable and easy from Alaskaknitnat.com

Kasandra is from Connecticut where they have four seasons, a long history, darkness in the summer and tolerable cold in the winter. These reasons are why East Coasters celebrate holidays differently from Alaskans.

“I love that the East Coast celebrates every holiday to the fullest,” Kasandra said. “It makes me look forward to the seasons.”

I visited Kasandra and her husband, Gary, in their hometown seven years ago in May. As she was giving us a driving tour of a road used to deliver mail during the Revolution, I was seeing house after house ridiculously adorned with flags and patriotic banners. I asked, “What the hell is going on here?” and she said “It’s Memorial Day weekend.”

Feel free to contradict me, but Alaskans just don’t celebrate this way. Sure, I’ll carve a pumpkin in October and string up some lights at Christmas, but there isn’t a single house on my block right now with Halloween decorations outside.

So today I wanted to show off a little of what Kasandra has going on in her neck of the woods to hopefully inspire Alaskans this Halloween.

An East Coast Halloween | 3 tricks and treats that are affordable and easy from Alaskaknitnat.com

Kasandra maintains that frugal collegiate spirit but includes East Coast charm and sophistication. All of her crafts are easy, quick and affordable. Here are three that she shared with me.

1. Bedazzled Pumpkin

An East Coast Halloween | 3 tricks and treats that are affordable and easy from Alaskaknitnat.com

Paint a pumpkin. Stick craft store jewels all over it. No glue necessary if the paint is still wet.

2. Mummy cookies

An East Coast Halloween | 3 tricks and treats that are affordable and easy from Alaskaknitnat.com

Melt some white chocolate. Dip Milano cookies halfway into chocolate. Drizzle chocolate over the cookie to make it look like a mummy. Stick on sugar eyes.

3. Monster mouth snacks

An East Coast Halloween | 3 tricks and treats that are affordable and easy from Alaskaknitnat.com

Peel some apples and slice them into wedges. Spread peanut butter on one wedge. Add some yogurt-covered raisins to look like teeth. Top with another apple.

So, get out there, Alaskans, and show some last-minute Halloween spirit!


Babe in Shining Armor

It’s been a busy month here in Alaska blogland. Akshopgirl, Tessie Style, DJ Spencer Lee, The Sawbuck, Fernanda Conrad and I have been providing tips, costume ideas, music mixes, cocktails, decor projects and more for the Halloween season.

This week is dedicated to all those procrastinators. We’ll be featuring last-minute Halloween ideas, but today I wanted to feature a costume that if you have a few hours to spare this week you could still pull off.

My friend Kait sent me photos of her daughter’s costume and it was too darn cute not to share.

DIY Knight in Shining Armor Baby Costume | made from soda pop tabs and jump rings, this DIY baby costume is a great project for those dedicated crafty parents. Featured on Alaskaknitnat.com

Little Bea’s armor is constructed out of soda pop tabs and jump rings. Kait said she used about 350 tabs. Construction wasn’t the hard part, she said. It was collecting the tabs themselves.

“That’s the long game part of it,” she said. “You have to start collecting and asking around if people will help.”

Luckily she was able to find a friend with a whole bag of tabs.

DIY Knight in Shining Armor Baby Costume | made from soda pop tabs and jump rings, this DIY baby costume is a great project for those dedicated crafty parents. Featured on Alaskaknitnat.com

Kait used 10cm jump rings to connect the tabs, but if she were to do it again she said she would use 12 or 14cm instead so it would use fewer tabs and take less time to make.

The dragon emblem was part of a handmade birthday card her husband received in the mail and the belt and crown are made from a belt purchased from a rummage sale.

DIY Knight in Shining Armor Baby Costume | made from soda pop tabs and jump rings, this DIY baby costume is a great project for those dedicated crafty parents. Featured on Alaskaknitnat.com

Bea’s costume doesn’t stop here. Bea’s father is going to be her damsel in distress and Kait will be dressed up as a dragon.

Kait is already planning for next year.

“I’m thinking famous scientists.”