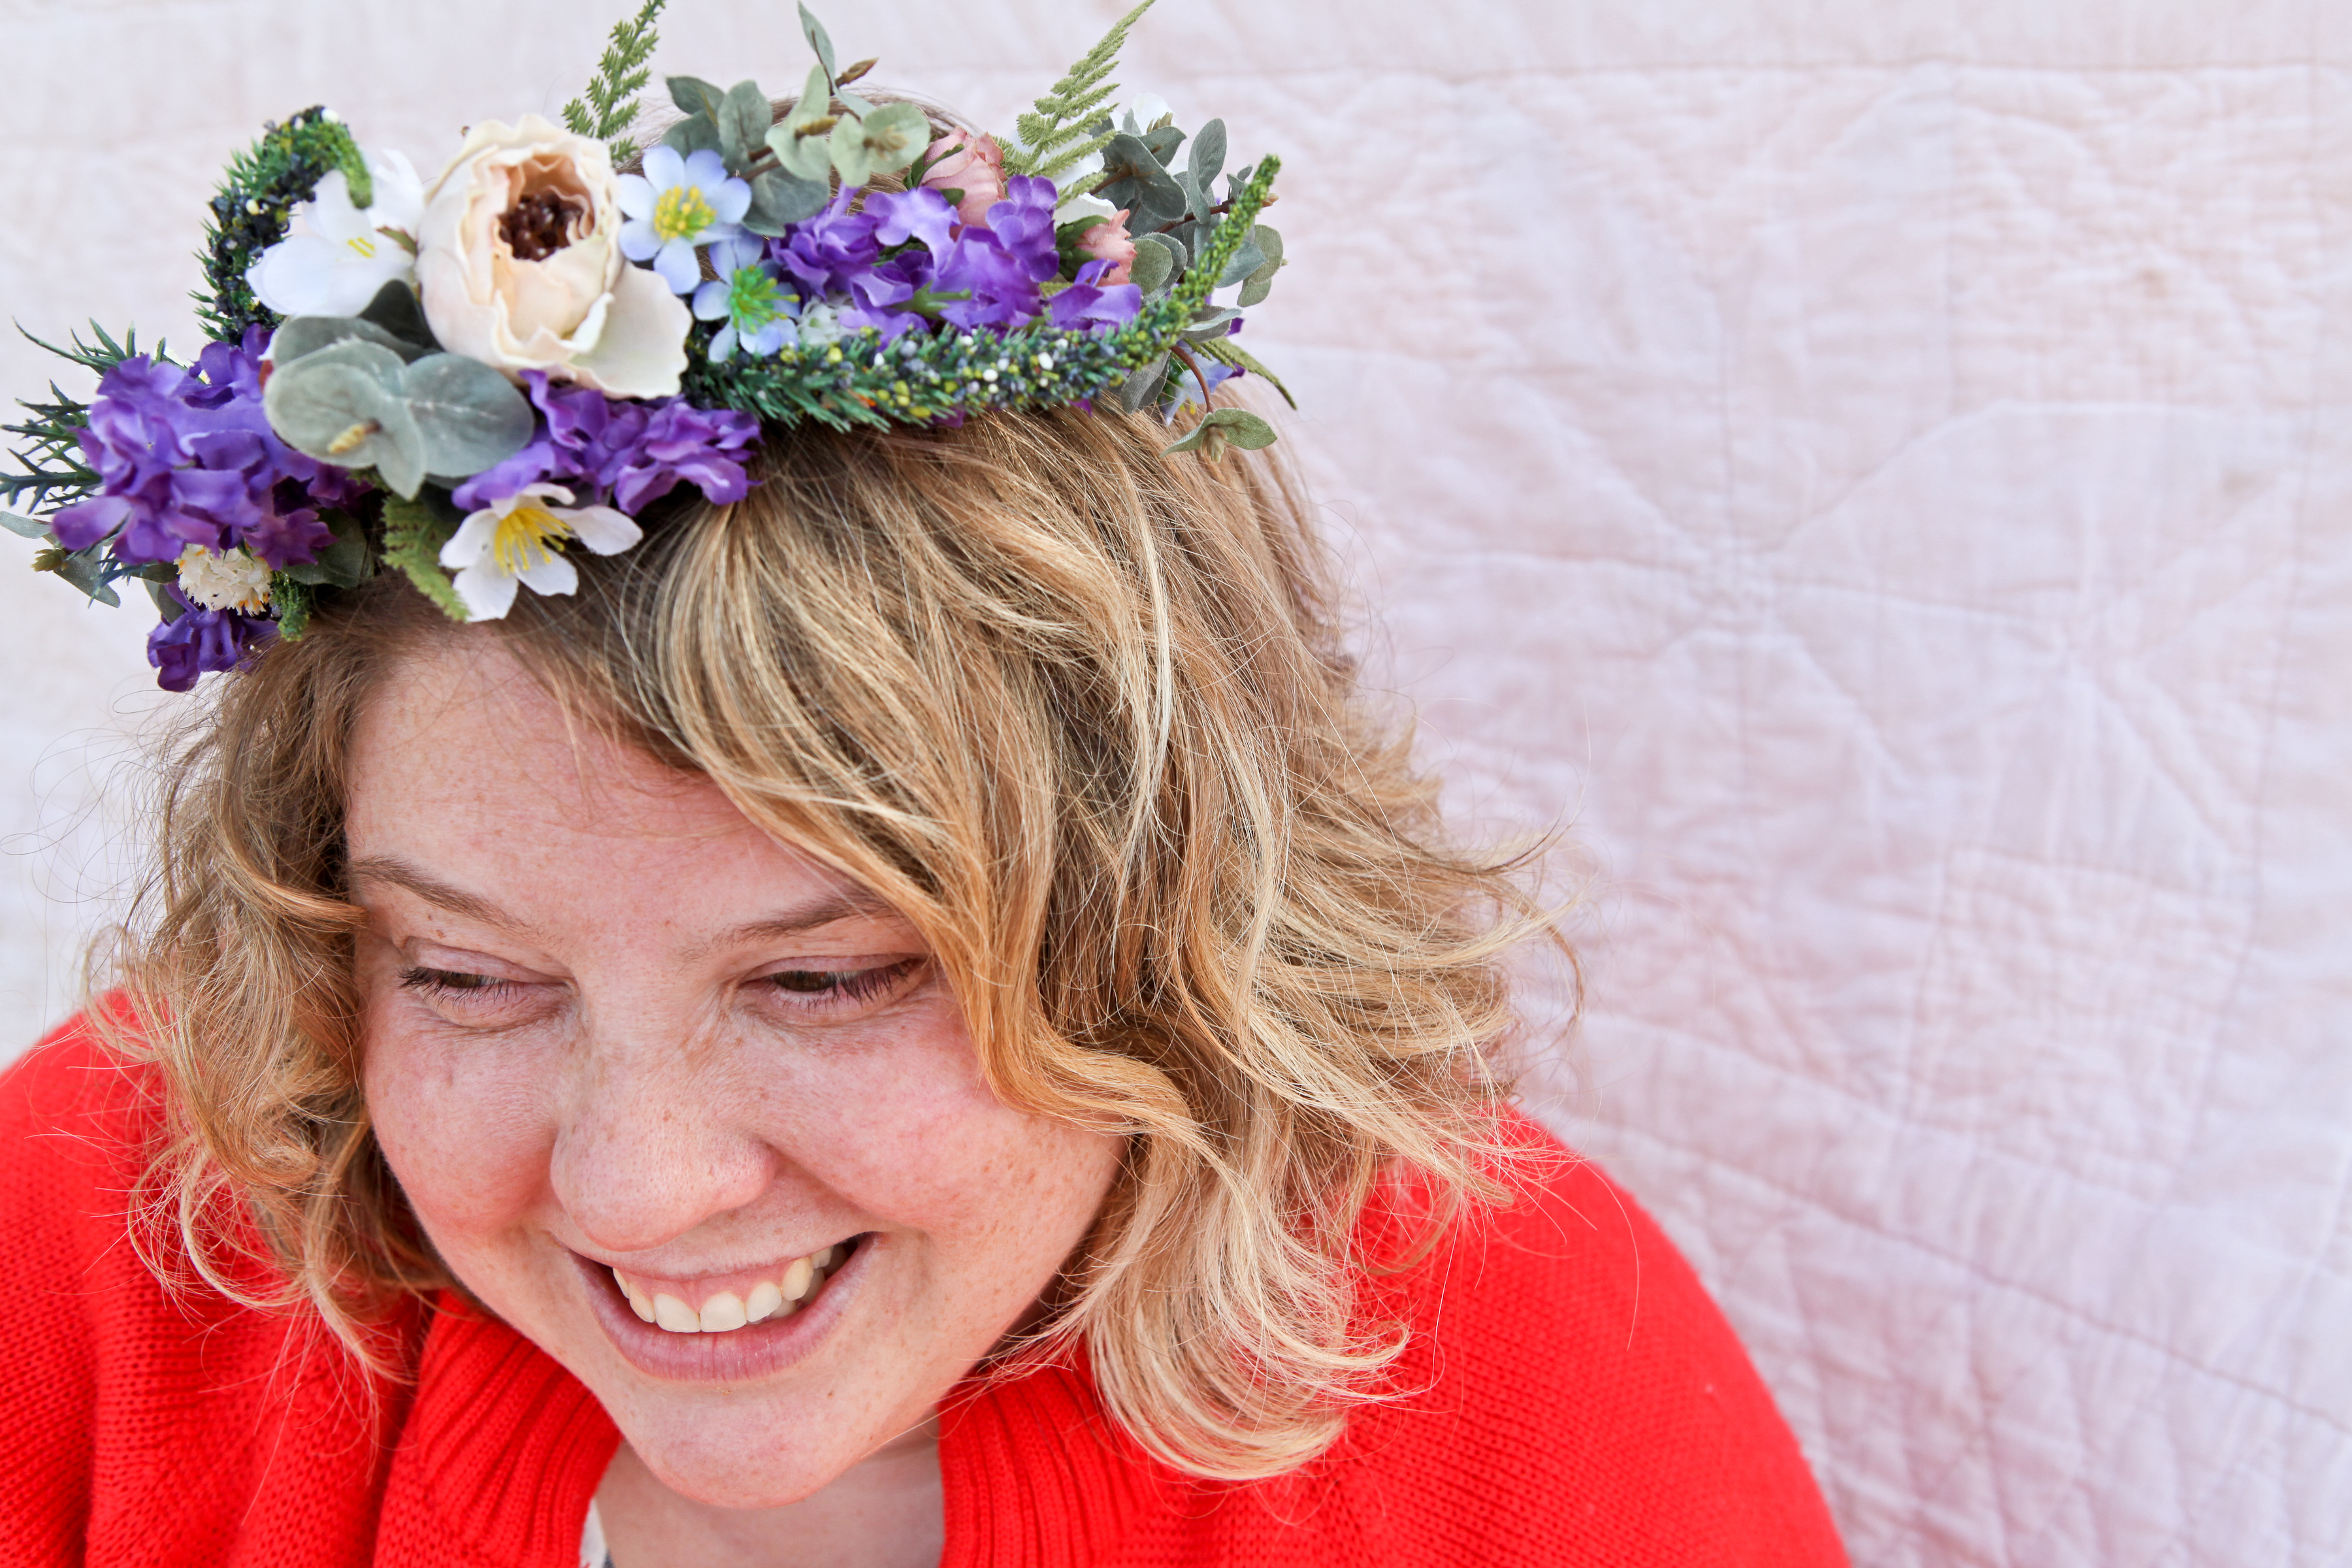
I’ve been pretty intimidated by the vast creativity on Etsy that I’ve been hesitant to open up shop. It’s a humble start — so far just custom-made flower crowns — but I hope you’ll take a look! Thanks to my friend Kate for being my model today.
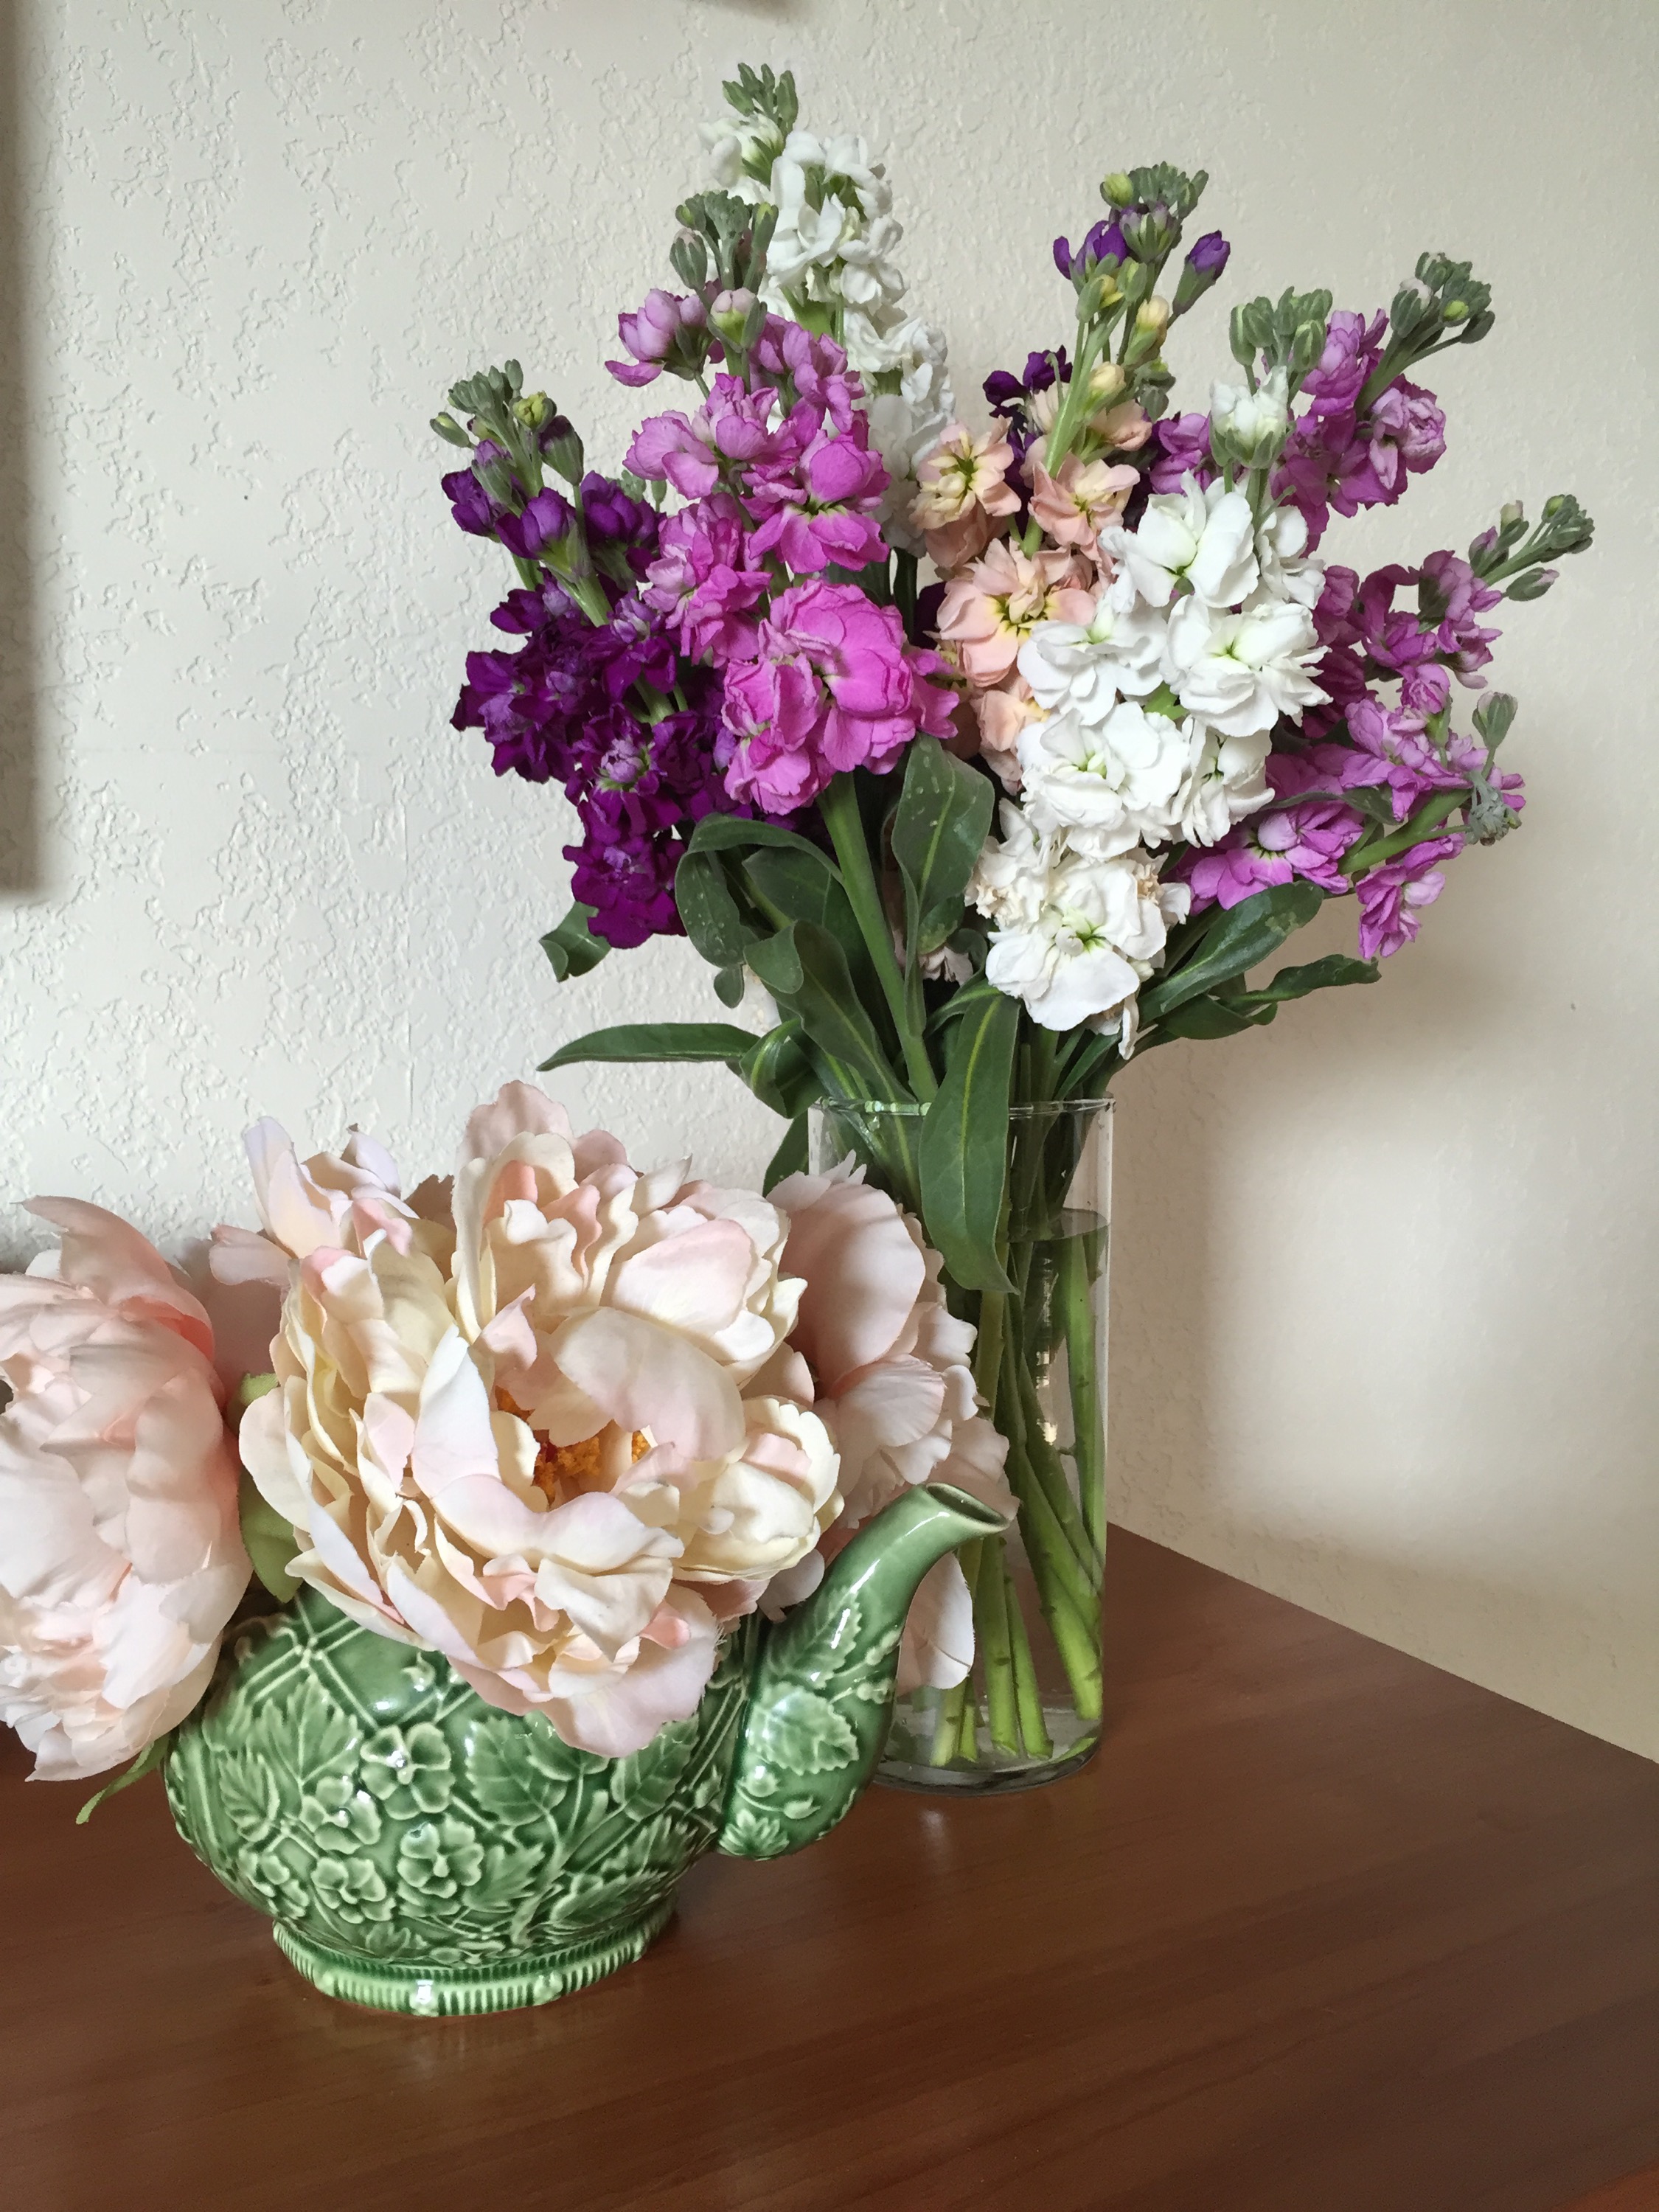
Yesterday was my birthday and I’m fortunate to have friends and family who know me well enough to buy me flowers on my special day. Fresh flowers add so much cheer to my home, but this simple luxury isn’t something I can always afford. That’s why I like to make my fresh flowers last as long as possible before having to toss them.
Here are some simple ways you can make your grocery store flowers liven up your home for several days.
1. Buy fresh flowers
This may seem like a no-brainer, but the less time the flowers have been in the grocery store, the longer you can enjoy them in your home before they wilt. Look for blooms that haven’t yet fully opened. If you’re buying lilies or daffodils, select a bouquet where only a couple have opened and several are still closed up. This will ensure you will have blooms for days to come. If purchasing roses, avoid the romantically opened blooms. Those will only go bad quickly. Here’s a rose tip: gently squeeze the base of the bloom. It should feel sort of firm like a golf ball. If it’s squishy, then that rose is on its way out.
Last year my knitting friend Lina asked if I would design the flowers for her wedding. When she described the colors she wanted there was no way I could say no. She envisioned a wild, rainbow bouquet.
I created a slightly unkempt bouquet of peonies (from her own garden), Japanese asters, mini sunflowers, green trick dianthus, bupleurum, gerber daisies, spray roses, wild daisies, wild grass cattails and wild yarrow.
Lina had saved pussy willow branches from the spring, which I used on the boutonnières.
The groom’s boutonnière mimics the bridal bouquet with a small band of lace wrapped around the fuchsia stem.
Billy balls are the perfect accompaniment to fuchsia spray roses and iridescent fuchsia ribbon gave everything a polished look with great pops of color.
Because the bride selected so many types of flowers I was left with an excess of product. I decided to make flower crowns for her daughter and niece who were flower girls. My mother models it here.
Marigolds and pale pink rosebuds from my garden were a necessary addition to the garlands.
I had yet even more product, including a full peony (no way I was wasting that!) so I created a draping arrangement in an antique orange vase, which I left on the dining table in the wedding party’s bed and breakfast.
Pink, fuchsia, orange, green, purple and yellow — a magical array of color for a perfect summer day.
Congratulations, Lina and Bill!
I was lucky to find pale pink yarrow growing wild in field by my local grocery store.
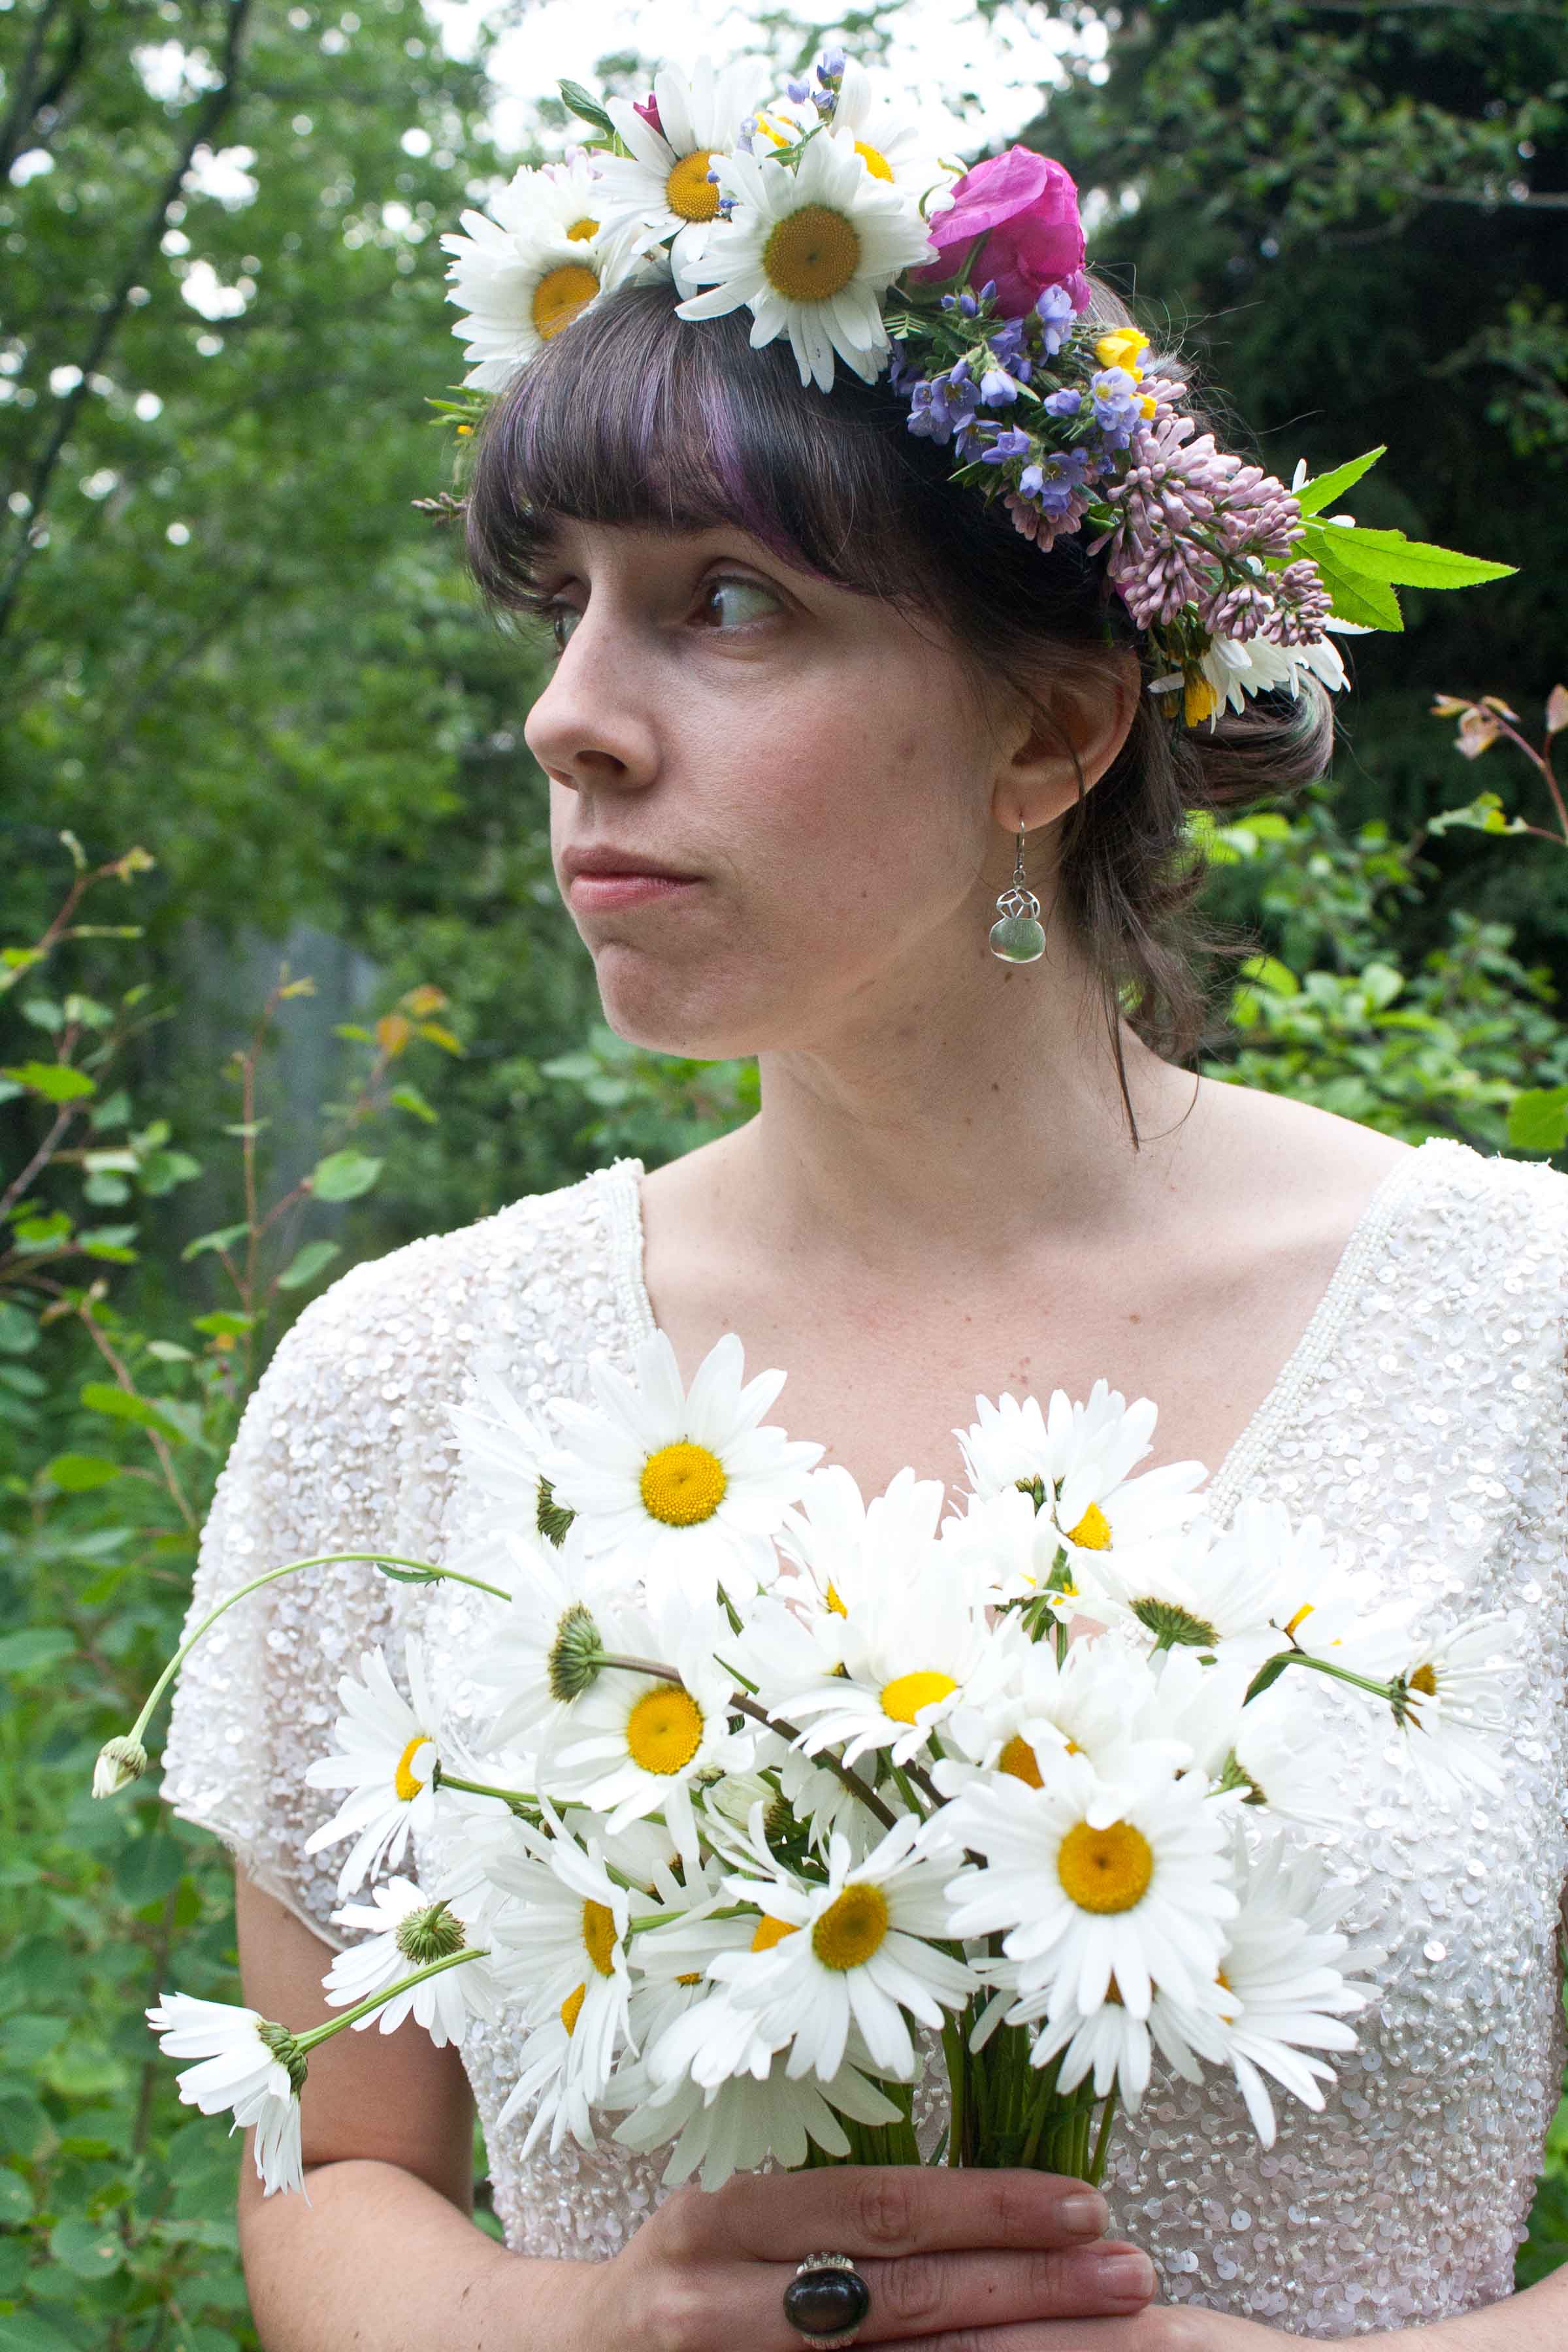
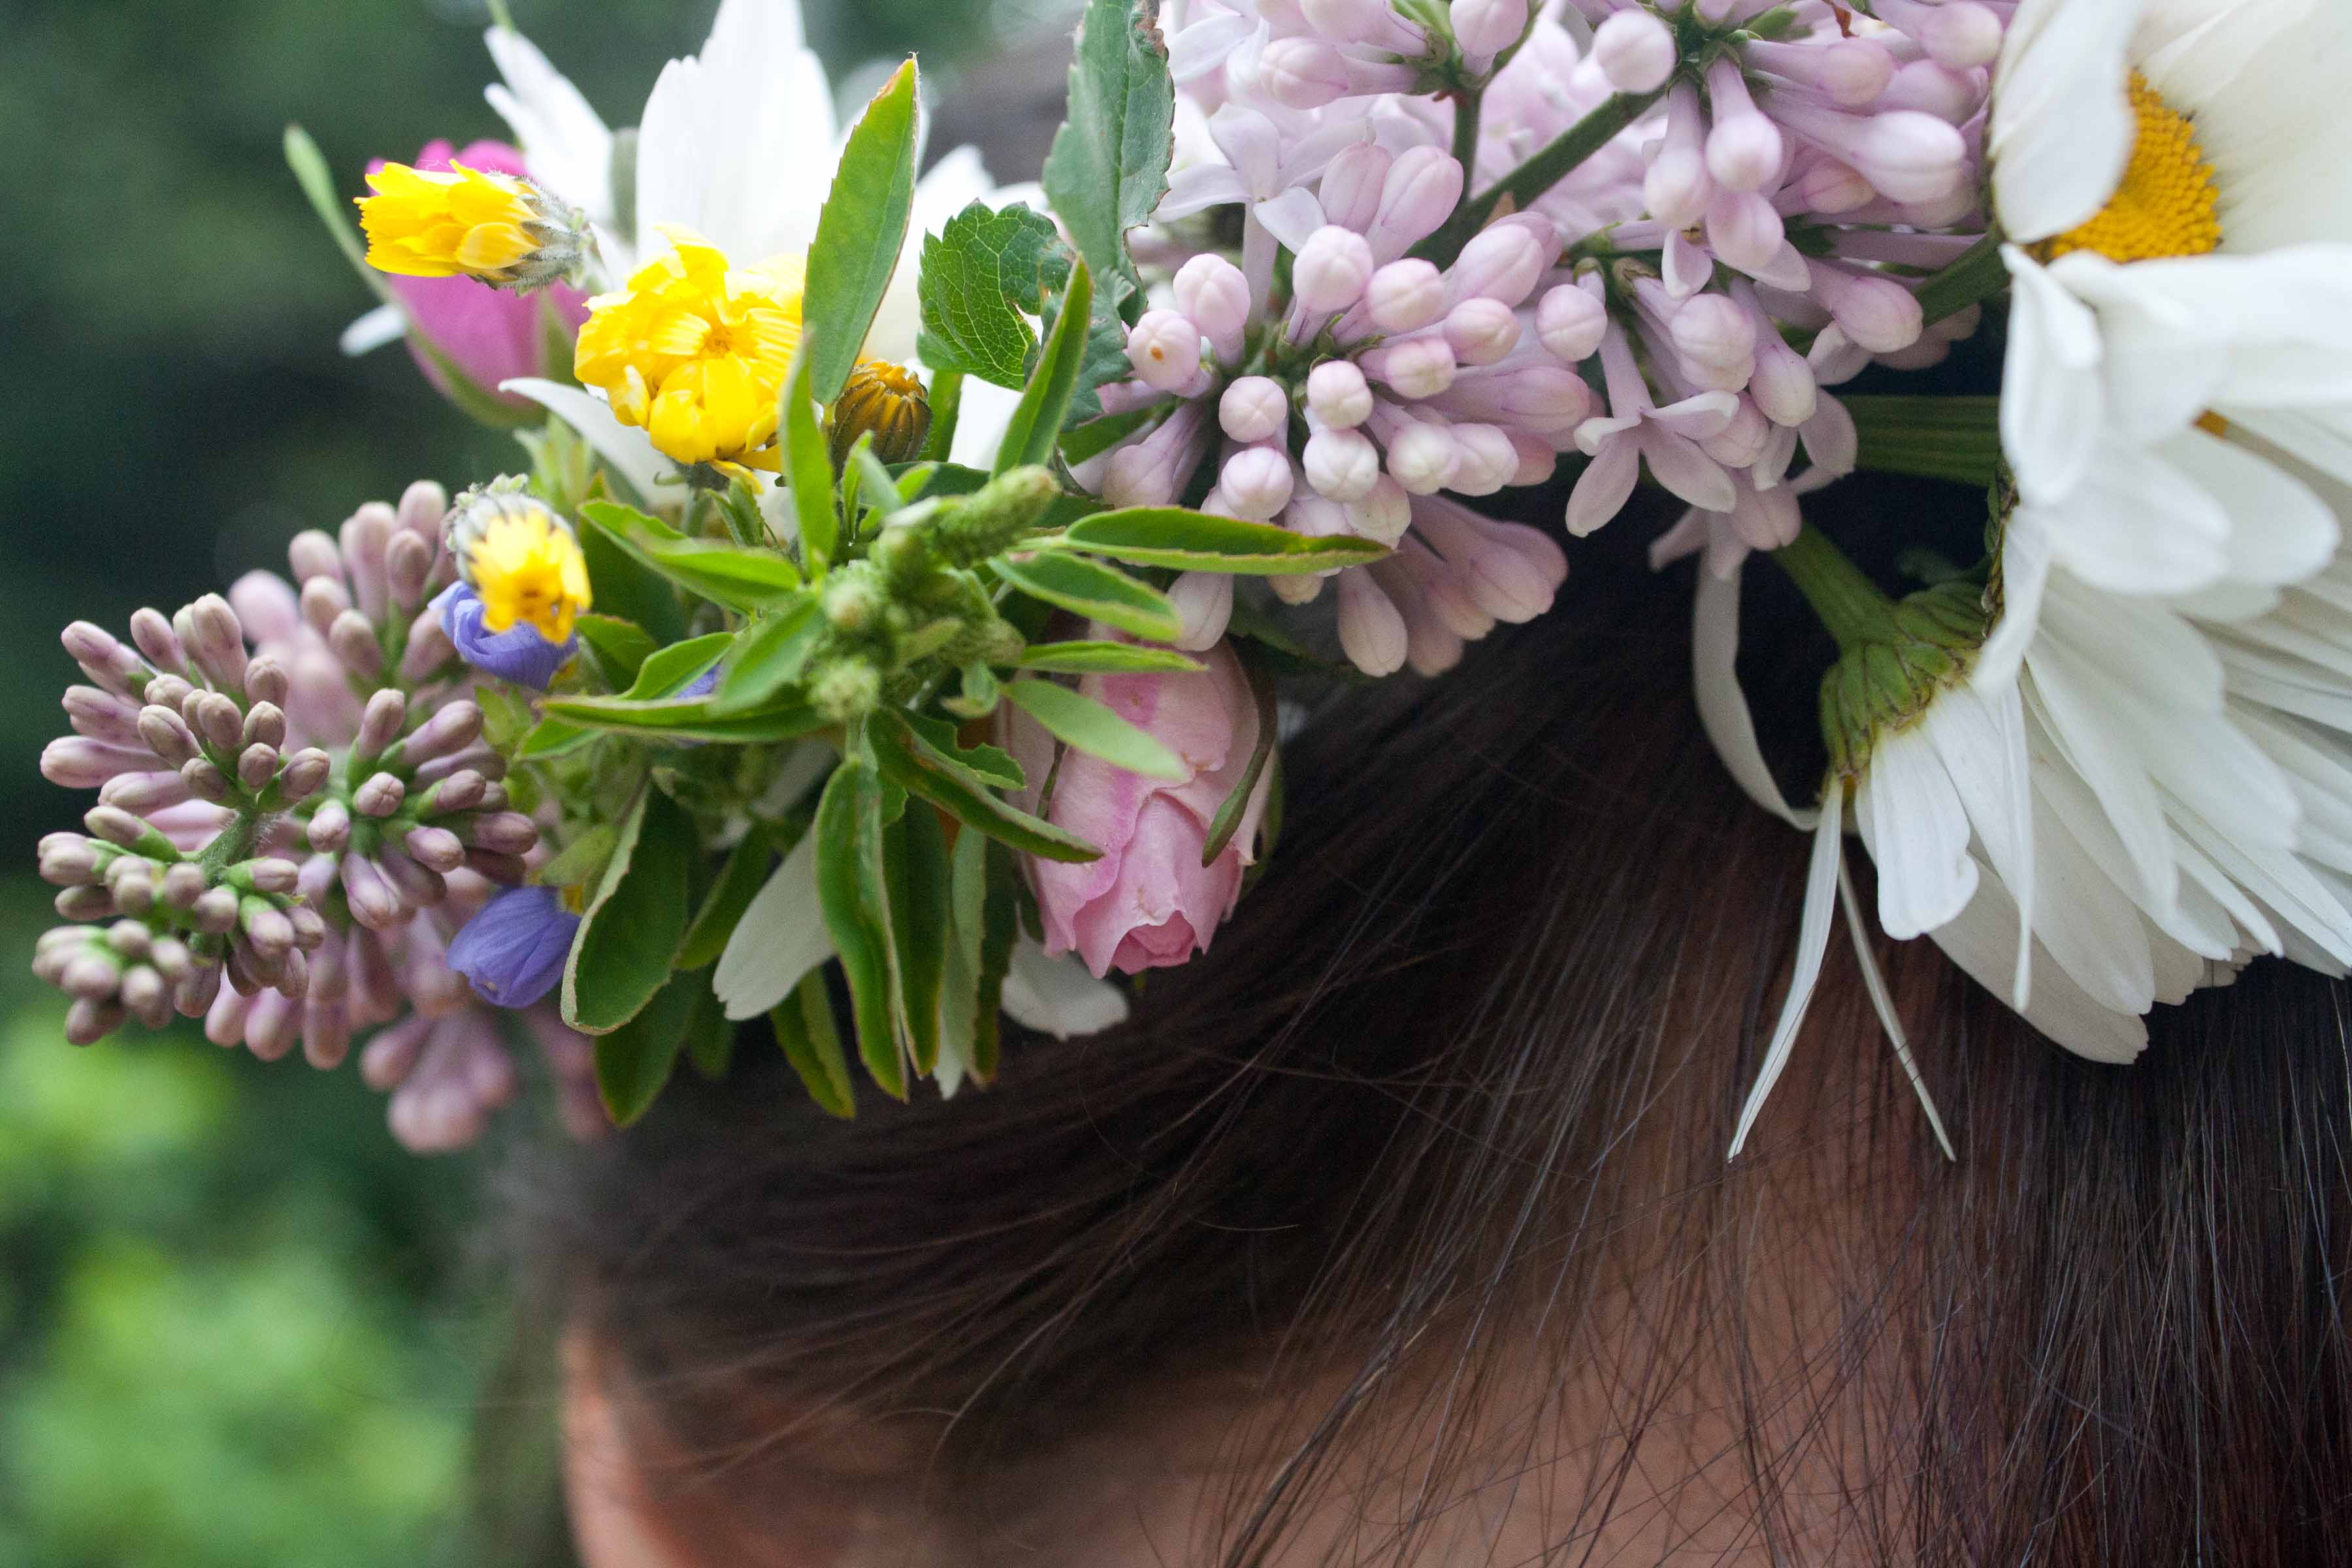
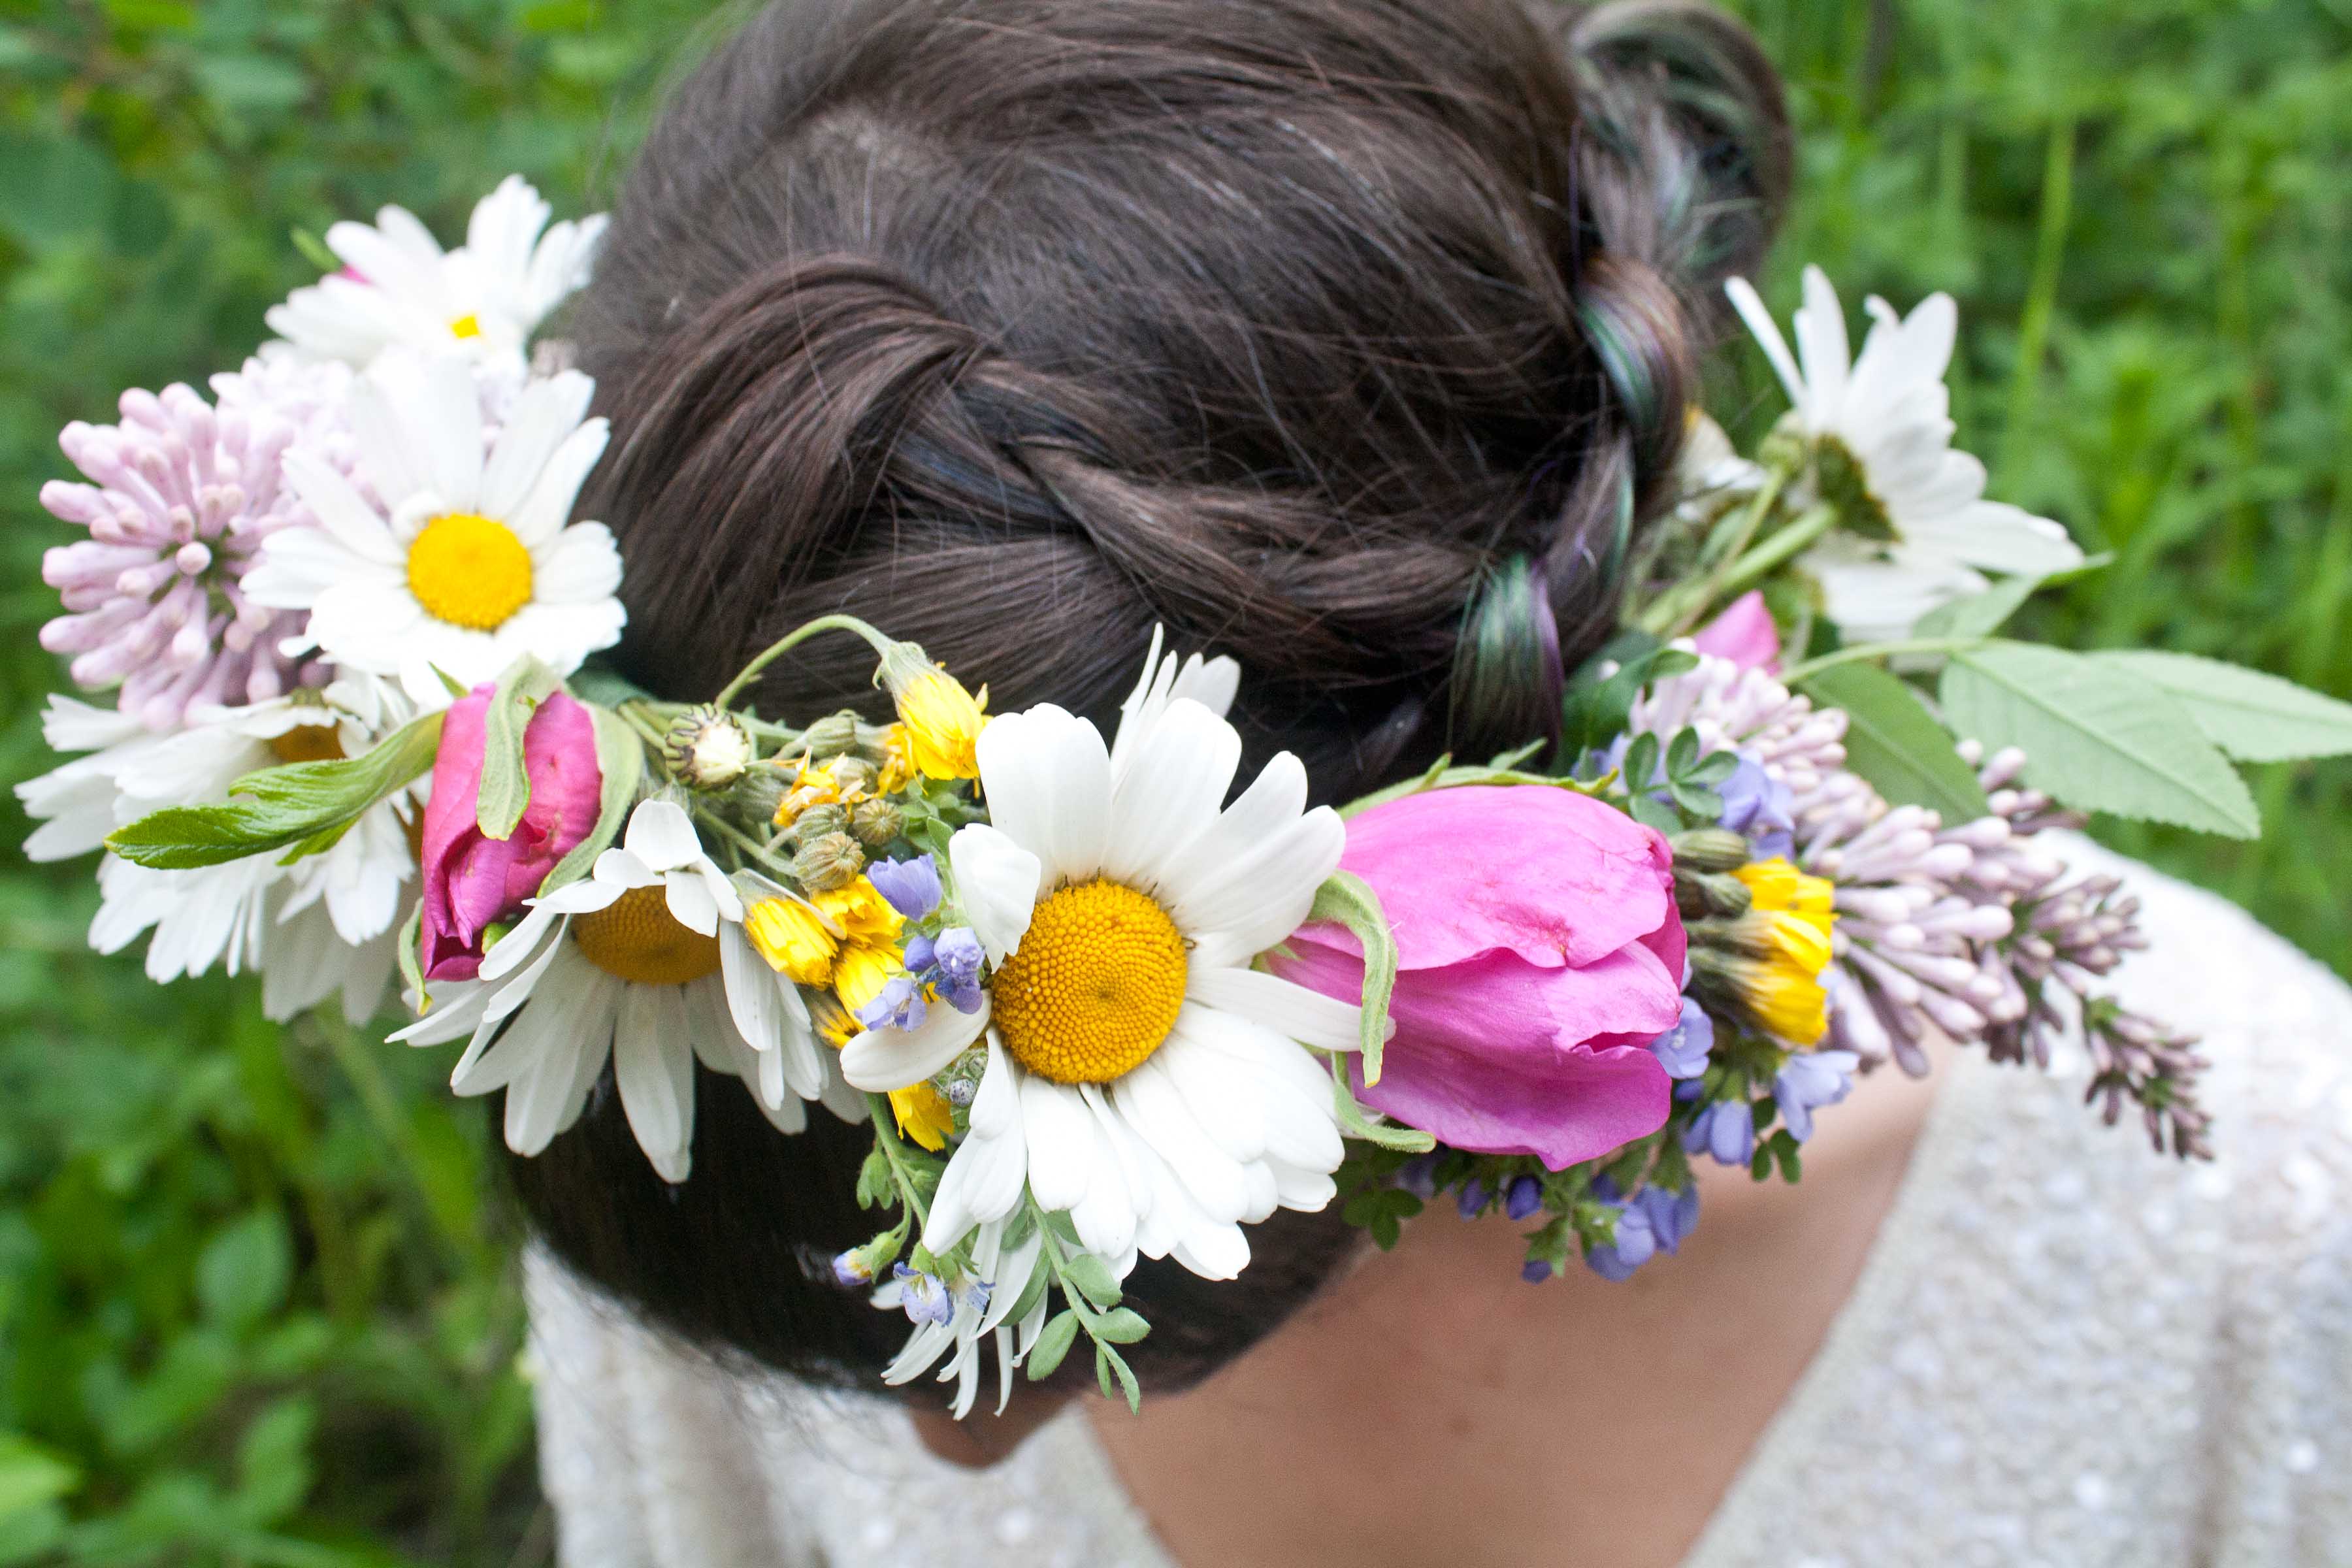
My best friend Kelly and I have a long past of frolicking through the Anchorage woods together. We frolic and collect. Sometimes it’s moss. Sometimes it’s branches, but most of the time it’s flowers.
One great thing about Alaska summers is the endless sunlight. Tonight we decided to go pick daisies on the side of the road. We set out at 9 p.m. By the time we completed a flower crown it was 10 p.m. and still plenty of light for a photo shoot.
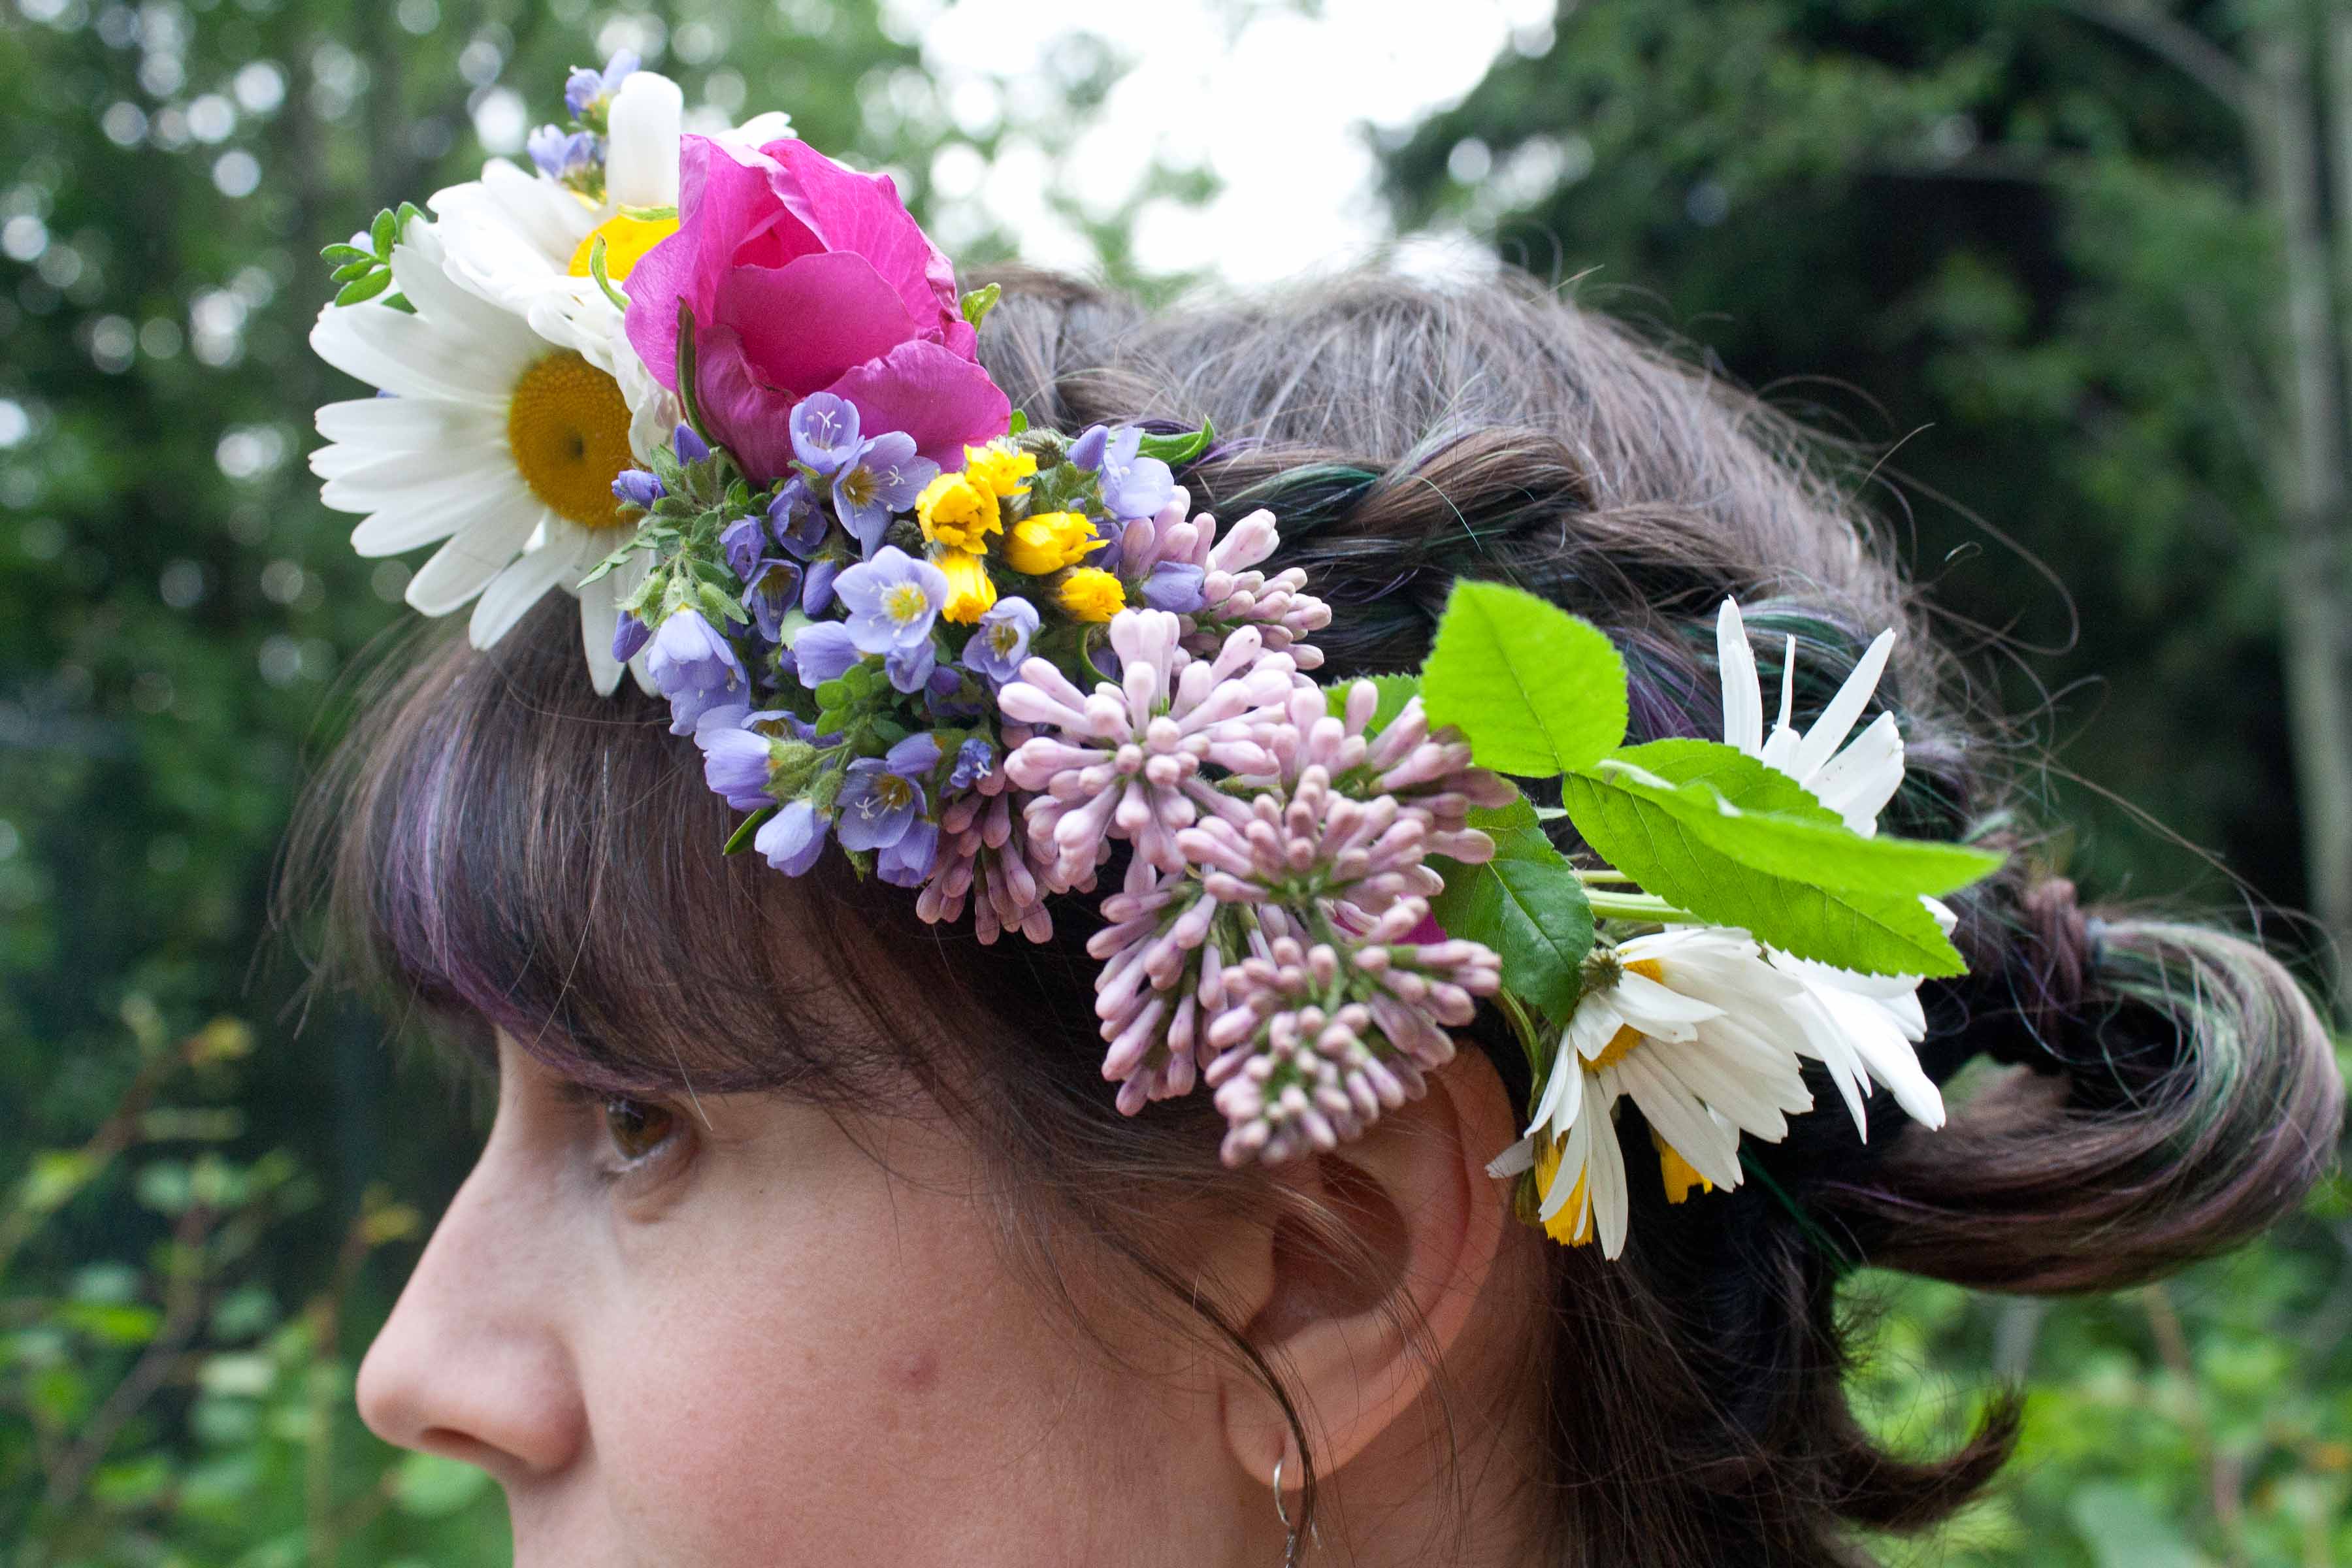
Flower crowns are surprisingly easy. All you need is some floral wire, floral tape and small clusters of wildflowers. We used lilac, daisies, beautiful Jacob’s ladder and wild roses.
No tutorial today, but I just wanted to show off my beautiful friend.
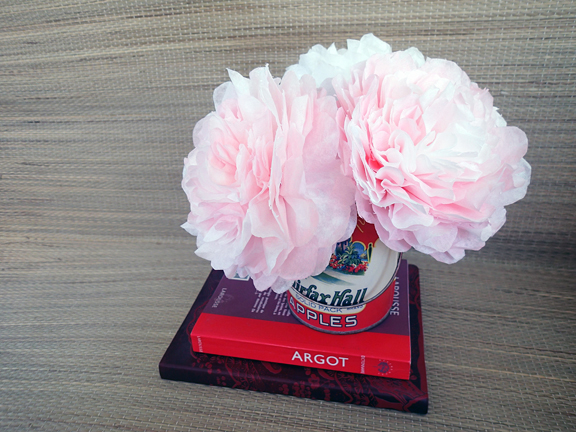
I stayed home sick today and I hate wasting my time in bed, so I decided to mildly craft out. I really love tissue paper flowers but I don’t like spending a ton of time cutting out paper. I found this neat tutorial last year for making coffee filter flowers and I thought I’d take it a step further. I dyed the coffee filters with food coloring and water, let them air dry, and then made them with pipe cleaners as the stem. By using coffee filters I didn’t have to cut the paper to shape. I just shaped the petals, which is far quicker. They really turned out splendidly, don’t you think?
Materials:
White coffee filters
Red food coloring
Liquid medicine syringe or eye dropper
Scissors
Pipe cleaners
Floral tape
Floral wire
Directions:
You’ll be using 12 filters per flower. Fill a small cup with water and about 7 drops of food coloring. Place a few filters at a time onto a plate. With the syringe or eye dropper randomly drop the water all over the filters. Flip them over and do the other side. It’s up to you how much white you want to leave. Hang dry them. Or I guess you could use a hair dryer, but I don’t own one.
When filters are dry, take six at a time and fold them in half three times and cut out a heart shape to make the petals. I cut more off of one set of six. These will be the inside petals.
Rough up the edges of the petals with your scissors. Cut a teeny tiny bit off the point of the filters to create a small hole in each filter.
Inner petals (left) and outer petals
Repeat with second set of six filters, but don’t cut off as much. These will be your outer petals.
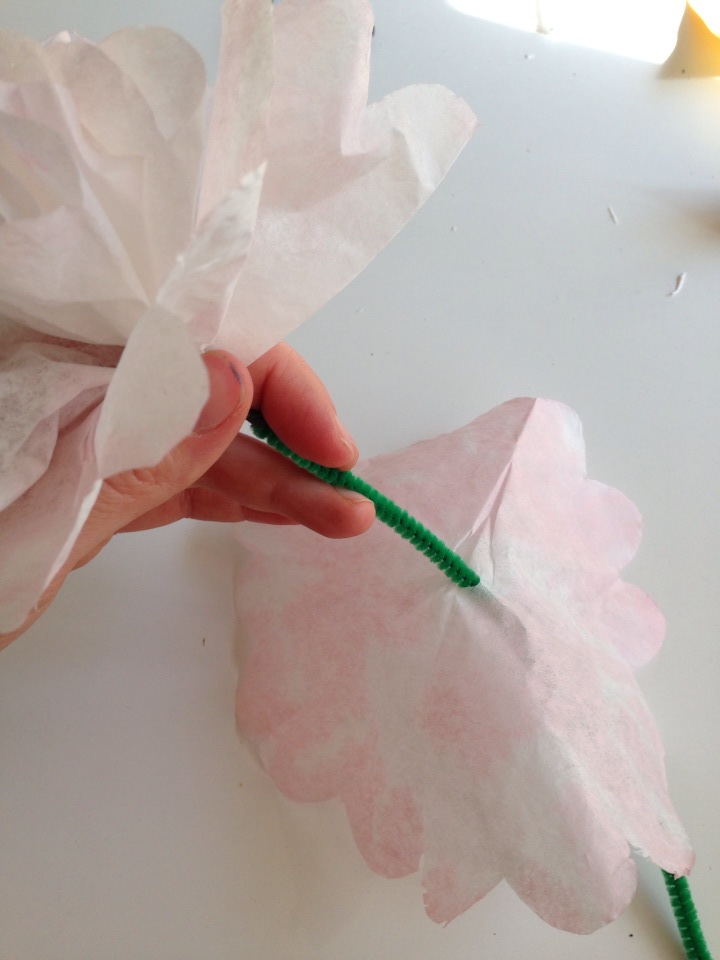
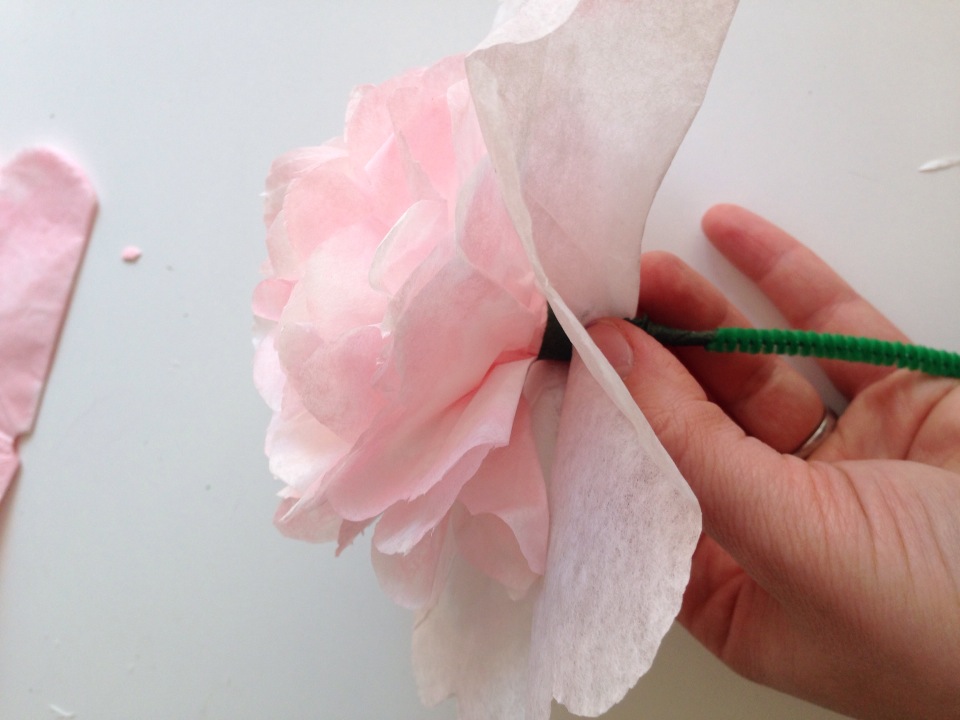
Take your pipe cleaner and create a little nub at one end. Take one sheet of your smaller filter and thread it up to the nub. Wrap the bottom of the filter all around the nub to cover it and secure with floral tape. This way you won’t be able to see the center of the flower.
Thread the next filter onto the pipe cleaner and scrunch it around the nub. Repeat with one filter at a time till you’ve put on all the small filters.
Scrunch around the base of the flower and wrap with floral tape. You’ll now have a small flower and you could call it a day, but I want a huge peony.
Take one larger filter and thread it on the pipe cleaner, but don’t shove it all the way up. Give it a little space so the outer petals are just a little longer than the inner petals. Repeat with the remaining filters. Scrunch up around the base of the flower and secure with floral tape.
Cut a 6-inch piece of floral wire and fold it in half, or just use another pipe cleaner. Stick it to the main stem and continue wrapping with floral tape. This stabilizes the stem. Keep wrapping all the way to the bottom.
Break tape and wrap the bottom of the stem. Ta-da!
These flowers look cheery on a window sill year-round. Peony season is on the way, but I just couldn’t wait. These will definitely do in the meantime.
I found the cutest little mug at the thrift store today.
I just knew the daffodils I got yesterday would look delightful with the grey and red. I love low floral arrangements. They are fun to make too. Here’s a step-by-step.
1. Choose a mug or container that suits you.
2. Make a grid on top of the mug using narrow scotch tape (I only had wide, so I cut it in half).
3. Bring your mug to the edge of your work surface and hold a flower up against the mug. Figure out how tall you want the flower to stick up over the mug and cut the stem.
4. Work around the mug, cutting and nestling the flowers in different parts of the grid. Fill mug with water.
5. A good tip is to make sure some of the flowers cover up the edge of the mug. This creates a continuous flow from flowers to vase.
My little sister’s best friend from childhood got married last Saturday in Talkeetna, Alaska. Talkeetna is considered “the country” of south central Alaska. They have a bluegrass festival each year. People have cabins and fish in the Susitna River. As my dad describes it, “It’s a funky hippy town.”
It was a last-minute wedding and the bride asked me last minute to do the flowers on the cheap. That’s my specialty, so it was my pleasure to see what I could whip up. Her colors were blue so I decided on orange and white for the floral arrangements.
But before I made it to the floral shop I decided to stick to the bride’s Alaska roots and gather the flora and fauna of our childhood neighborhood. I decided on wild yarrow for arrangement filler. Alder and birch sprigs and wild ferns were the greens. The mountain ash is setting into fall mode with clusters of bright red berries.
The biggest treat was the pink yarrow that has grown in the same spot every year across the street from my parents’ house. Nowhere else have I seen wild pink yarrow and it was perfect for the bridesmaids’ bouquets and mother corsages.
I snagged wild forget-me-nots from my parents’ back yard and little sprigs of plants I don’t know the name of from around the street we grew up on.
The biggest benefit to using wildflowers? Free! I saved the bride a lot of money by using plants in our back yard.
At the flower shop there weren’t many stunning blue flowers that were sturdy and affordable, so I decided on orange and white carnations with orange roses. Orange is complementary to blue so it’s really a great combination. An unusual combo is orange and pink, but I really love them together in the bridal arrangements.
For $90 I got 26 roses, 60 carnations, a bunch of spray roses (the mini ones), and a bag of flower petals for the flower girl. Keep in mind we live in Alaska so prices are higher.