Welcome to Alaska Knit Nat! I was born and raised in Anchorage and have always had a passion for making useful things, whether they are eaten, knit, crocheted, sewn or randomly glued and assembled. I received my bachelor’s degree in French and journalism from the University of Alaska Anchorage and work almost full time at a nonprofit and way over time as a mom.
Time to jump on the pumpkin bandwagon. I’ve had a medium baking pumpkin sitting around the house for a couple of weeks and I’ve been putting off cooking with it because I have so little pumpkin-cooking experience.
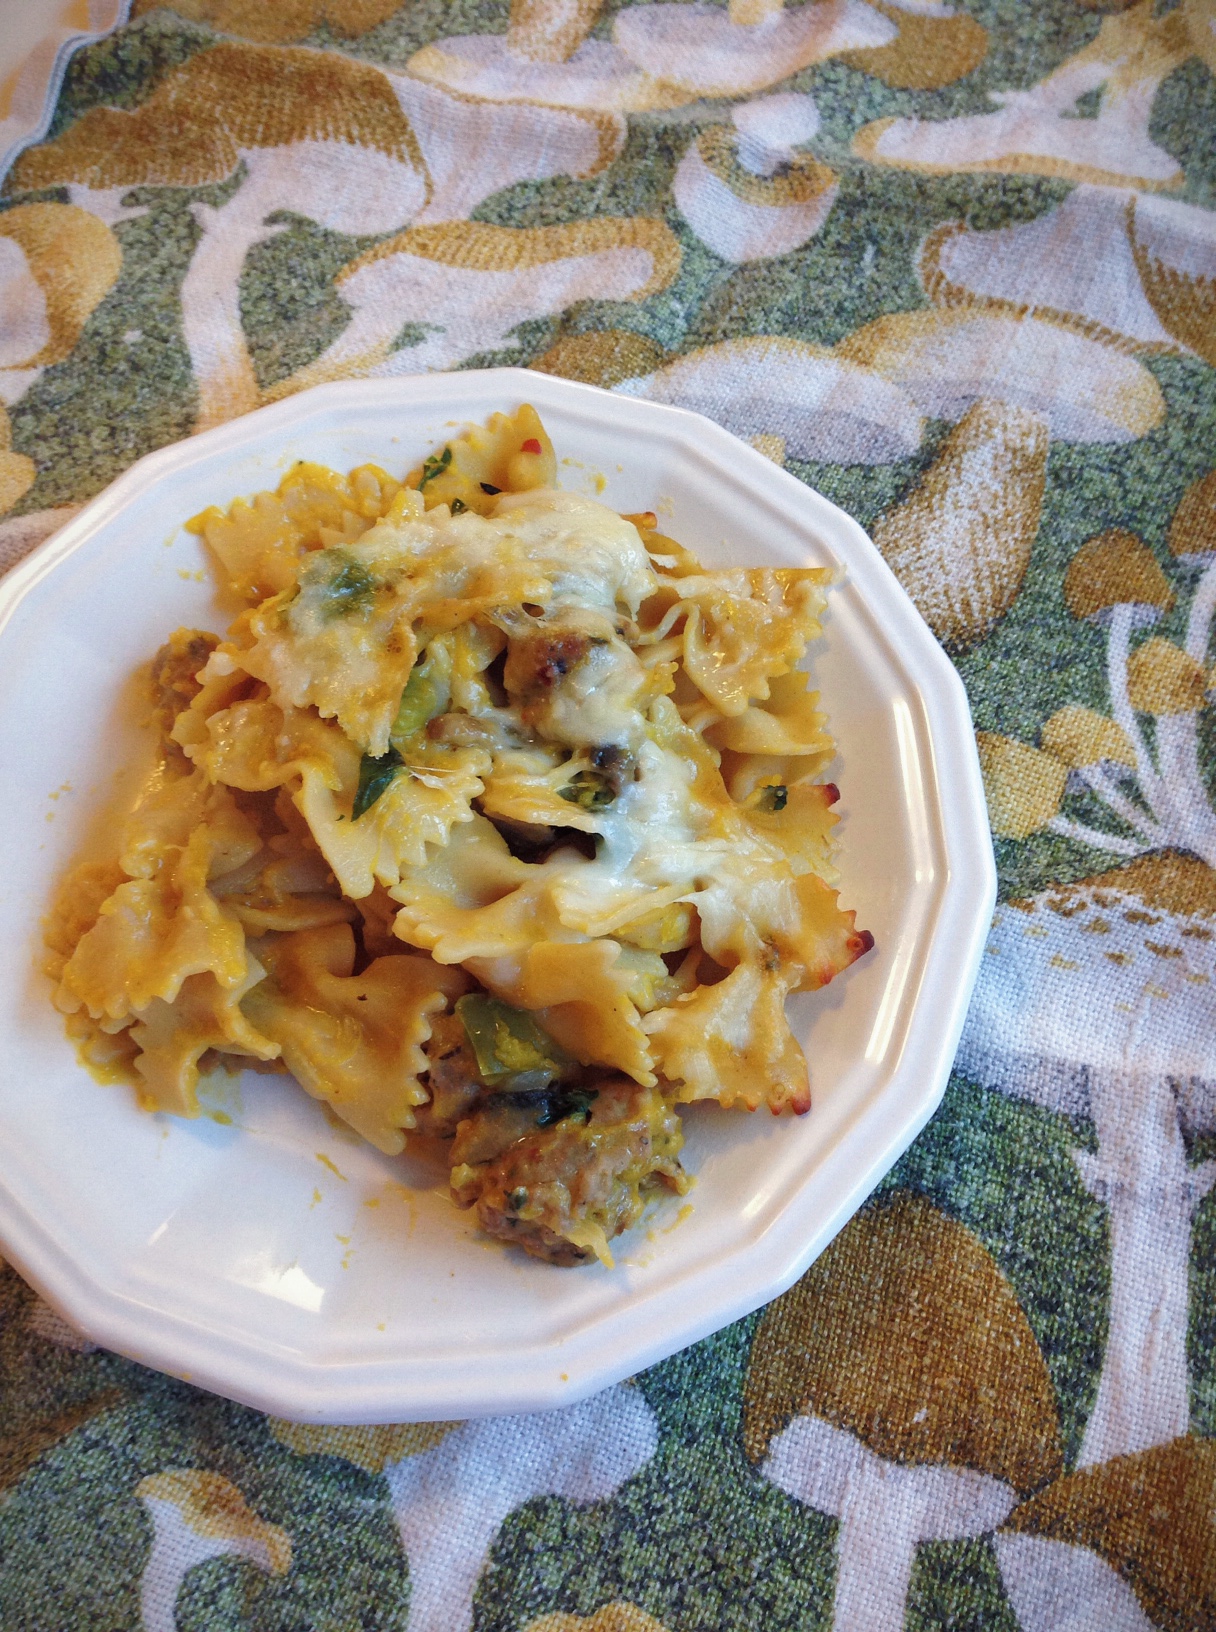
I was inspired by a recipe from Hezzi-D’s Books and Cooks, but I also had items in the fridge I needed to use up, so I winged it a little. What I came up with was a flavorful casserole that was creamy, cheesy and somewhat healthy too.
You can use canned pumpkin, but I recommend baking your own using this method, as it was super easy and fresh.
Pasta with Chard & Sausage in Pumpkin Cream Sauce
Serves 6-8
Ingredients:
4-5 hot Italian sausages, casings removed
14.5 oz.-box farfalle noodles
10 cremini mushrooms, sliced
1/2 onion, chopped
2 cups chopped Swiss chard
3 garlic cloves, minced
1/2 cup chicken stock
1/2 cup evaporated milk
1.5 cups pumpkin puree
3 Tbs. chopped Italian parsley
salt and pepper to taste
1 tsp. dried oregano
1/2 cup shredded mozzarella
1/2 cup freshly grated parmesan
Directions:
Preheat oven to 350 degrees. Boil noodles till just al dente, drain and set aside. Meanwhile, brown the sausage in a large saute pan, breaking it up as it cooks. Set sausage aside and in the same pan, add the mushrooms, onions, chard, salt and pepper and toss till coated with the sausage grease. Add a small amount of olive oil if needed. Cover and let steam for five minutes. Uncover, stir in the garlic and saute another minute.
Stir in the pumpkin, chicken stock and oregano. Bring to a simmer for a few minutes. Add the evaporated milk, sausage and parsley and bring back to a simmer. If it’s too thick, add more chicken stock.
Place pasta in a large casserole dish and pour sauce over noodles. Sprinkle in half the cheese and mix thoroughly. Top with remaining cheese (and more cheese if you’d like) and bake for 30 minutes or until cheese is bubbling.
Remove from oven and let sit 10 minutes before serving.
This is a wholesome dish the whole family will love!
This weekend I had the opportunity to attend End of Summer Camp, which proved to be a unique bonding experience for Anchorage grown-ups. I met bloggers, event planners, printmakers, food critics, photographers, storytellers and other local professionals all while enjoying nostalgic campy activities. The campers were fed by Fork Catering, and I took every available moment to enjoy their meals and chat with chefs Rob and Dave.
Chef Rob Kinneen taught a cooking workshop, which I eagerly signed up for. Turns out he was going to demonstrate homemade pasta-making. I’m familiar with making my own pasta, such as comb pastas,basil fettuccine and Russian pelmeni, but I was interested in learning techniques from a professional chef.
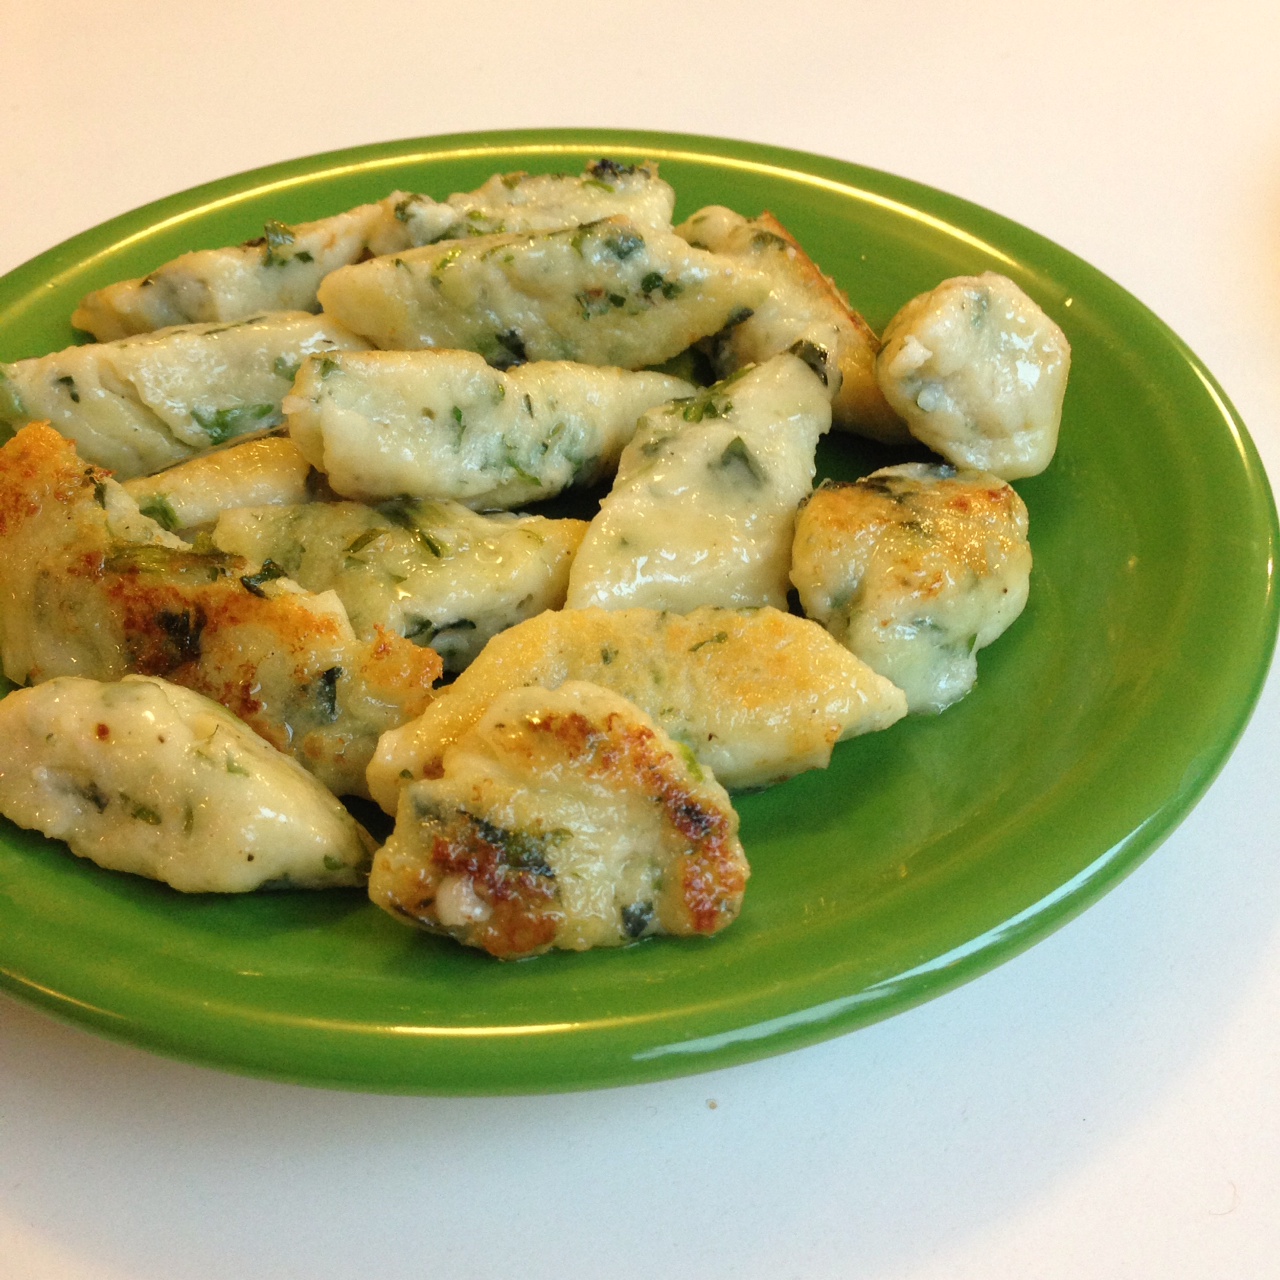
He led a hands-on lesson on tortelloni and ravioli nudi. The tortelloni, which were essentially large tortellini, were familiar to me, but the ravioli nudi were entirely new. The nudi are like ravioli without the noodle, literally naked ravioli. Instead you incorporate cheeses, flour, herbs and egg into a sticky, soft dough and create small dumplings, which are then boiled. They are sort of like gnocchi, but with cheese instead of potato.
Chef Rob Kinneen instructs campers on how to roll out ravioli nudi dough.
My only attempt at making gnocchi in the past was a complete slimy failure and Rob’s technique for making nudi could be easily translated to gnocchi. I had to try the recipe myself when I got home.
And I did.
Ravioli Nudi with Spinach, Ricotta, and Parsley
Serves 3
Ingredients:
2 eggs
2 egg yolks
1 garlic clove, minced
1/4 tsp. red chili flakes
1/4 tsp. salt
1/8 tsp. ground nutmeg
1/4 tsp. ground black pepper
8 oz. part-skim ricotta cheese
1 cup freshly grated parmesan cheese
2 Tbs. chopped Italian parsley
2 Tbs. chopped frozen spinach, thawed and well drained
1/4 cup all-purpose flour plus about 1/2 cup for coating dough
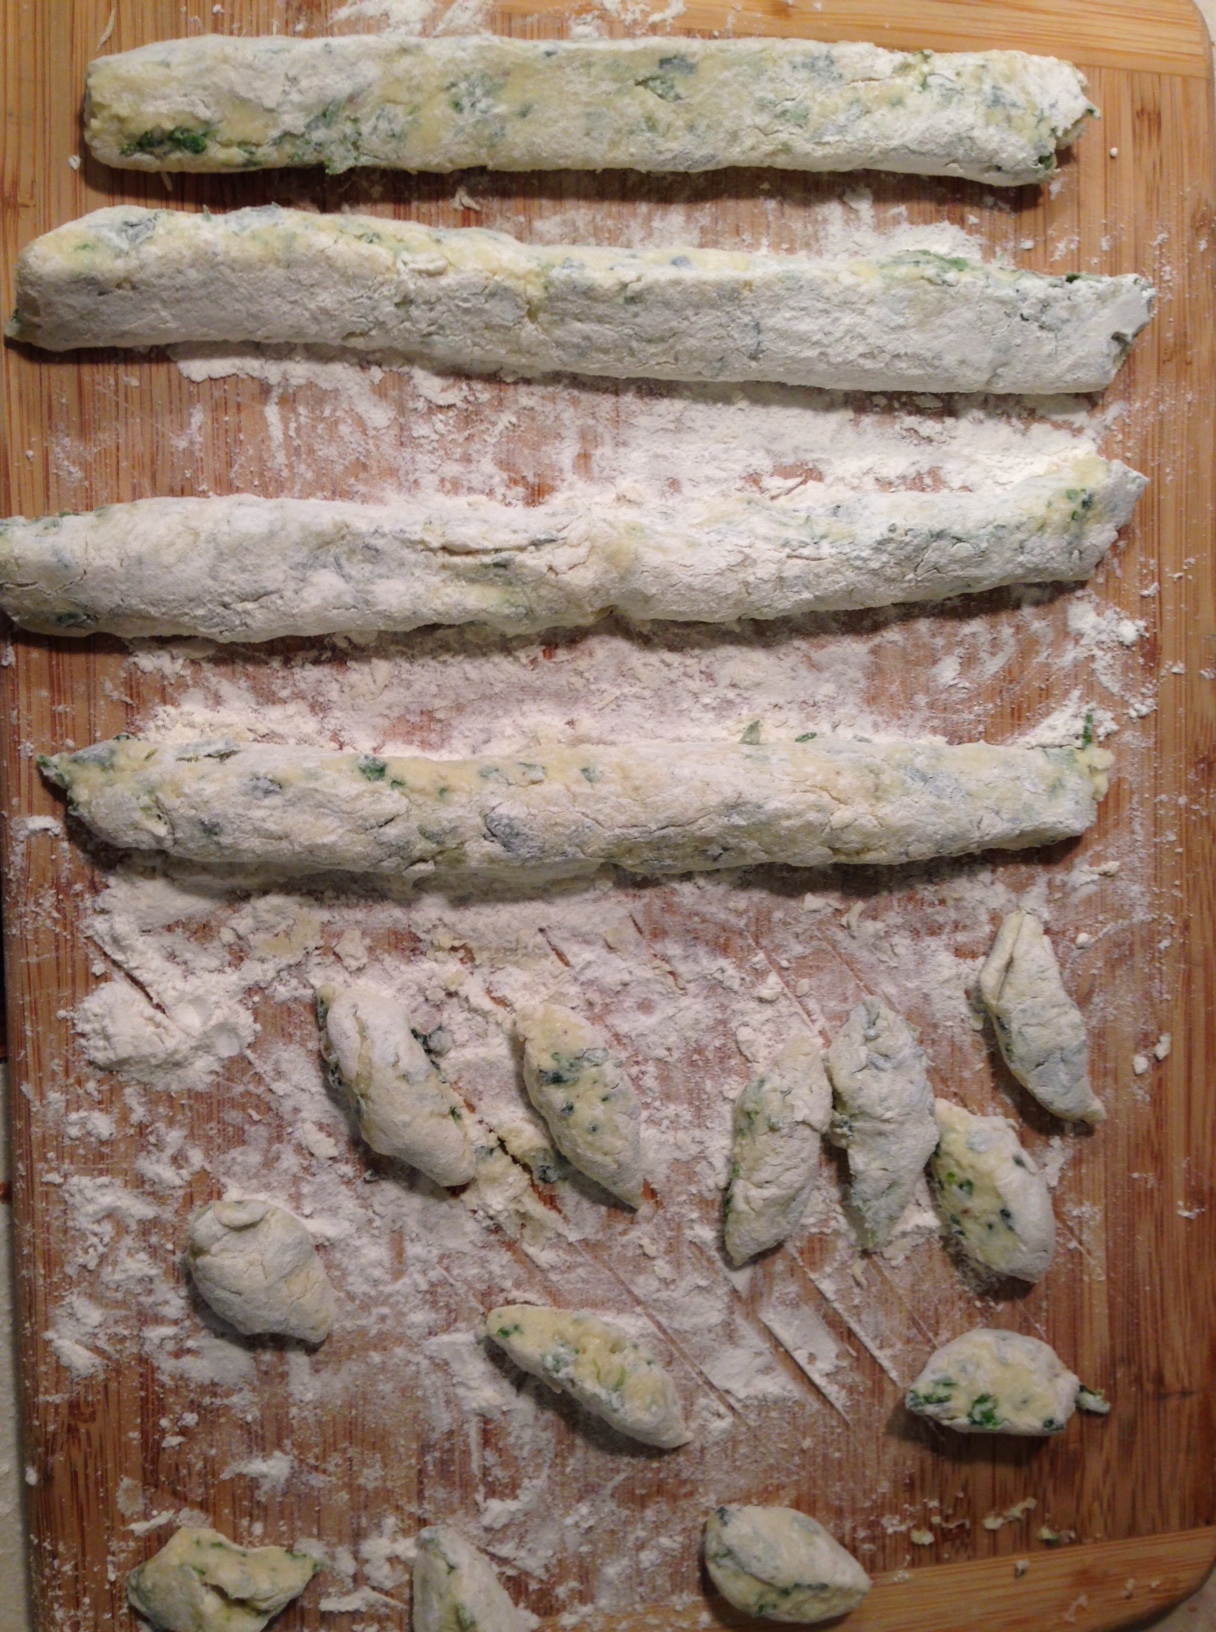
Bring a large pot of salted water to a boil. Fill a large bowl with ice and cold water and set beside the pot. Meanwhile beat together the eggs, yolks, garlic, chili flakes, nutmeg, salt and pepper in a medium bowl. Incorporate the ricotta till smooth. Add the parmesan, parsley and spinach. Slowly add the 1/4 cup flour till a super sticky dough forms. It should be the consistency of thick, lumpy pancake batter. Heavily flour a large cutting board. Gently turn the dough onto the board and work in enough extra flour for it to be very soft and sticky inside, but coated on all sides in flour. Form the dough into a 1.5-inch tall rectangle.
Cut the dough into 1.5-inch strips and gently roll each strip around, dusting with flour, till coated evenly on all sides. Cut each strip on a diagonal into 1-inch pieces so you have small, oblong dumplings. Gently roll each dumpling around in your floured hand till they are each coated and no sticky dough is exposed.
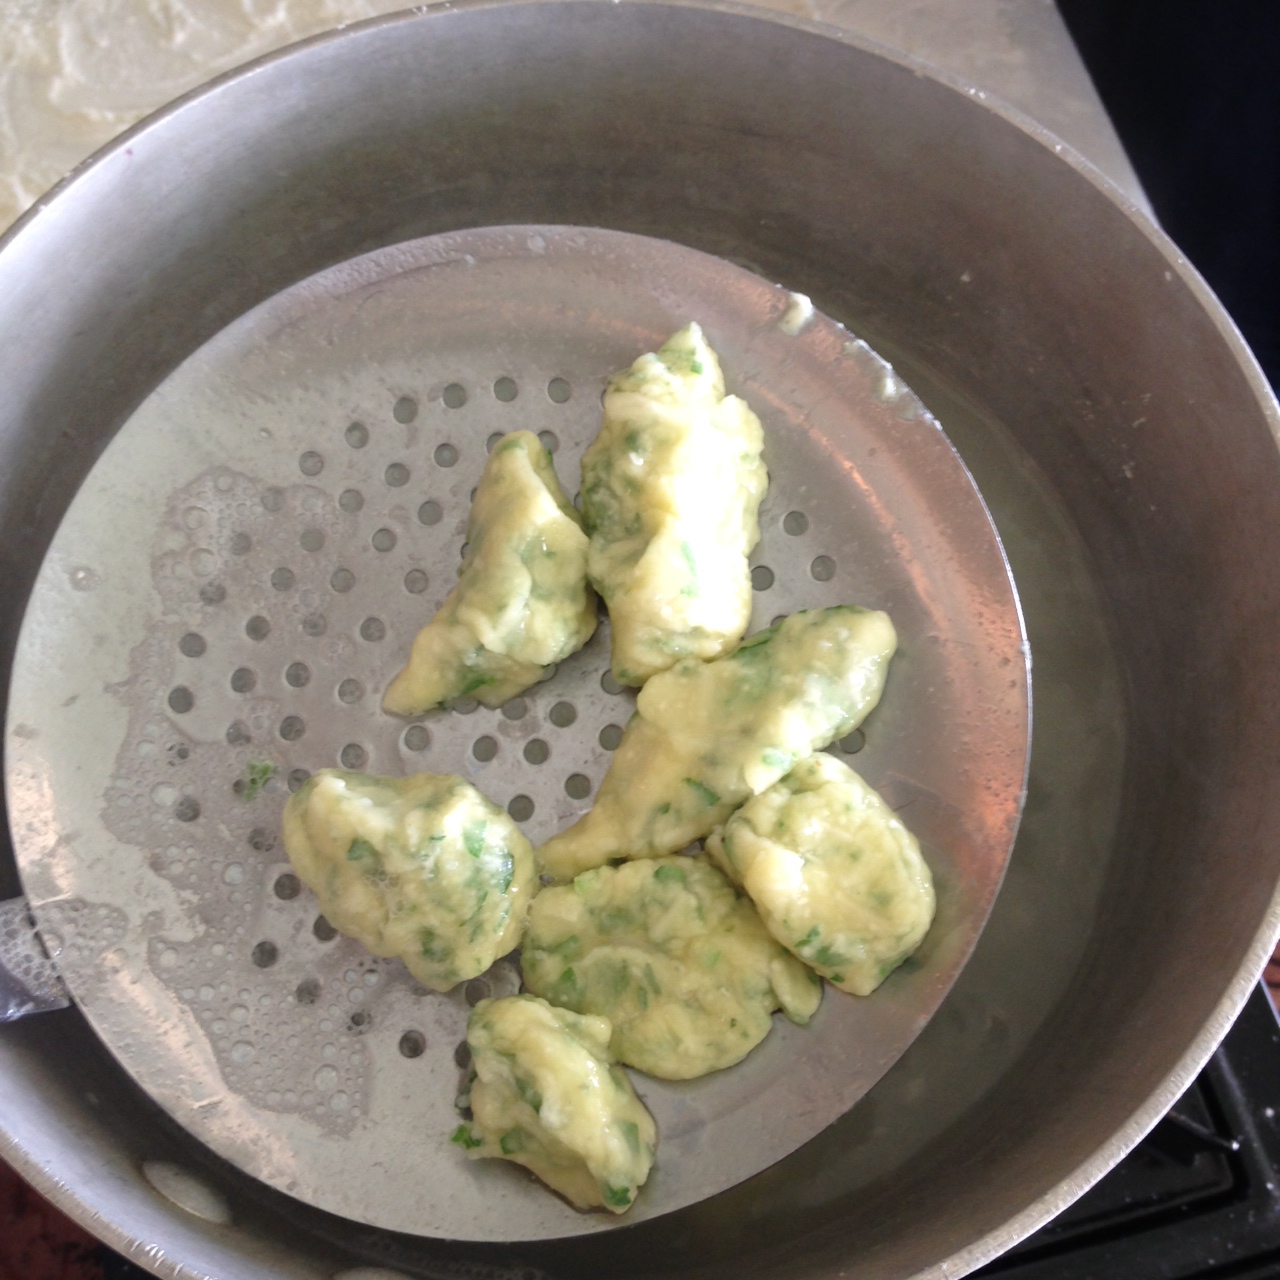
When the water is at a rolling boil, gently add the ravioli in batches so the water doesn’t cool down too much. Boil for just a few minutes, until the ravioli float to the surface. With a slotted spoon, strain out the ravioli and add to the ice water bath. Repeat with remaining ravioli.
Now that you have made your ravioli nudi, there are lots of ways to serve them. Use them in any ravioli recipe, or fry them up with butter till lightly browned and crusty.
Thanks again, Chef Rob, for your excellent instruction. I’m happy to add this technique to my repertoire.
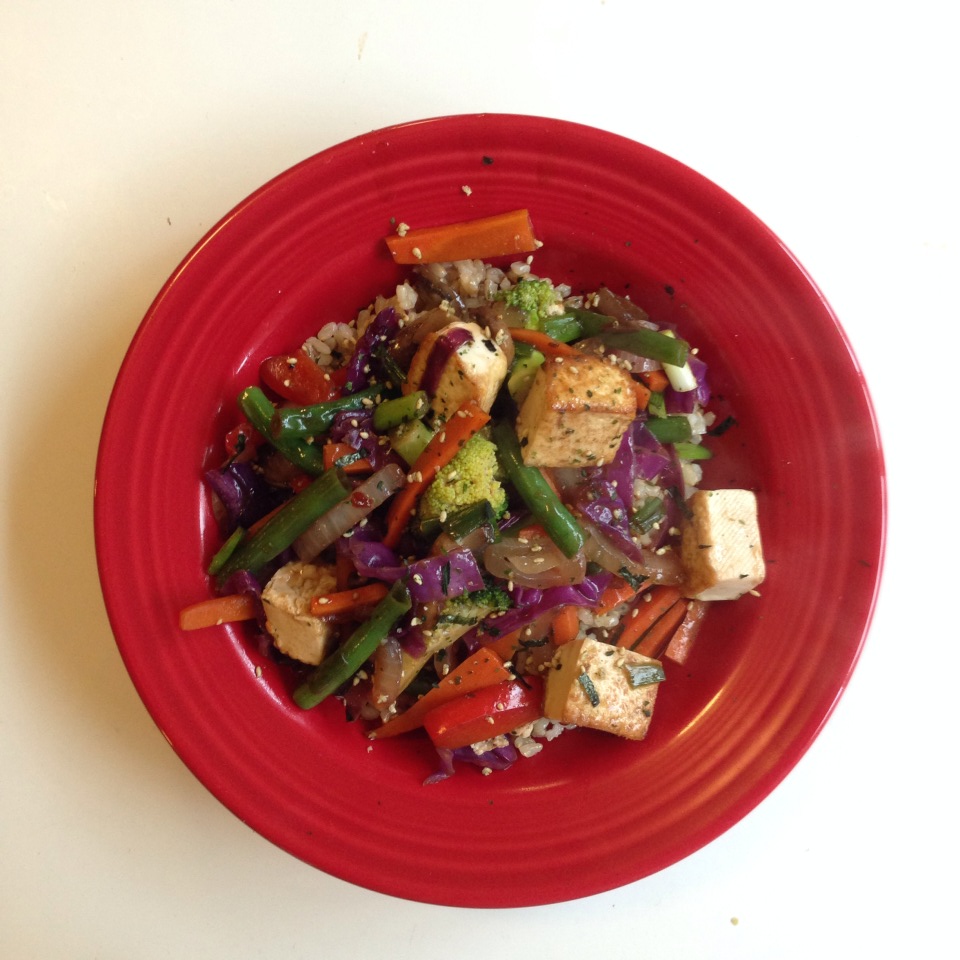
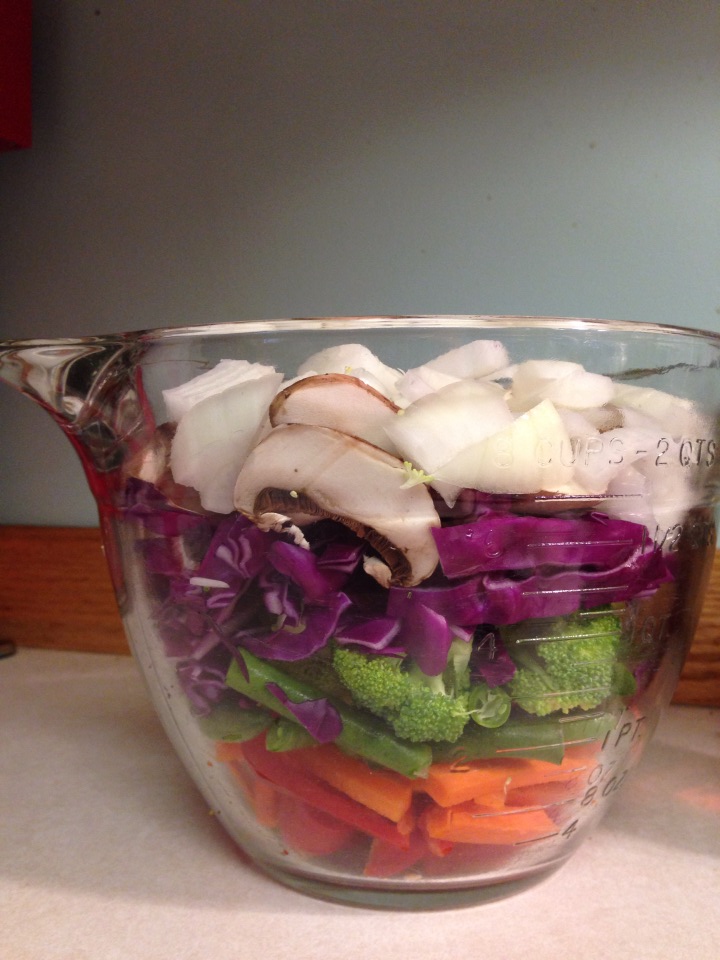
I’ve been eating an awful lot of burgers lately. Not sure why, but I felt like a healthy dinner was in order. My two-year-old son and I decided on a veggie-packed stir fry. Today at the grocery store he helped me pick out many colors of the rainbow: red bell pepper, carrots, broccoli and purple cabbage.
I never use a recipe when I make stir-fry sauce, so all of the following measurements are approximate. Feel free to substitute vegetables of your choice. This recipe seems to have a lot of ingredients, but most of them are staples in my cabinet so it wasn’t an expensive dish. You could also add beef or chicken, I just forgot to thaw out any meat for tonight.
Rainbow Stir Fry with Orange Garlic Sauce
Serves 4
Ingredients:
Coconut oil
1/2 red bell pepper, julienned
1/2 large carrot, julienned
1/2 cup fresh green beans
1 small head of broccoli, cut into small florets
1/4 of a small red cabbage, chopped
4 crimini mushrooms, sliced
1/2 onion, chopped
1 brick of firm tofu, cut into 1-inch cubes
3 green onions, chopped
For the sauce:
1/4 cup soy sauce
1/4 cup chicken stock
2 tsp. rice vinegar
1/2 tsp. agave nectar
2 Tbs. orange juice
1 Tbs. chili garlic sauce
1 tsp. powdered or freshly grated ginger
splash of fish sauce
splash of sesame oil
freshly ground pepper
1/2 tsp. corn starch
Directions:
I like to serve this over brown rice. I recommend Alton Brown’s technique, which takes an hour in the oven, so prepare your rice and then start on the stir fry when there’s about 30 minutes remaining.
Whisk together the sauce ingredients and set aside.
In a large frying pan or wok, add two tablespoons of coconut oil and crank up the heat to high. Add the tofu and don’t move it for one minute. This will create a nice brown crust. Gently turn tofu to brown the other sides and set it aside for later.
Add another tablespoon of coconut oil and reheat the pan. Add all of the veggies except the green onions and toss till well coated in the oil. Let the pan heat up again and add 1/4 cup of water or chicken stock. Cover and steam for about 7 minutes, until the broccoli and carrots are just tender.
Pour in the sauce and coat the vegetables evenly. Add the green onions and tofu and gently toss. Serve over brown rice.
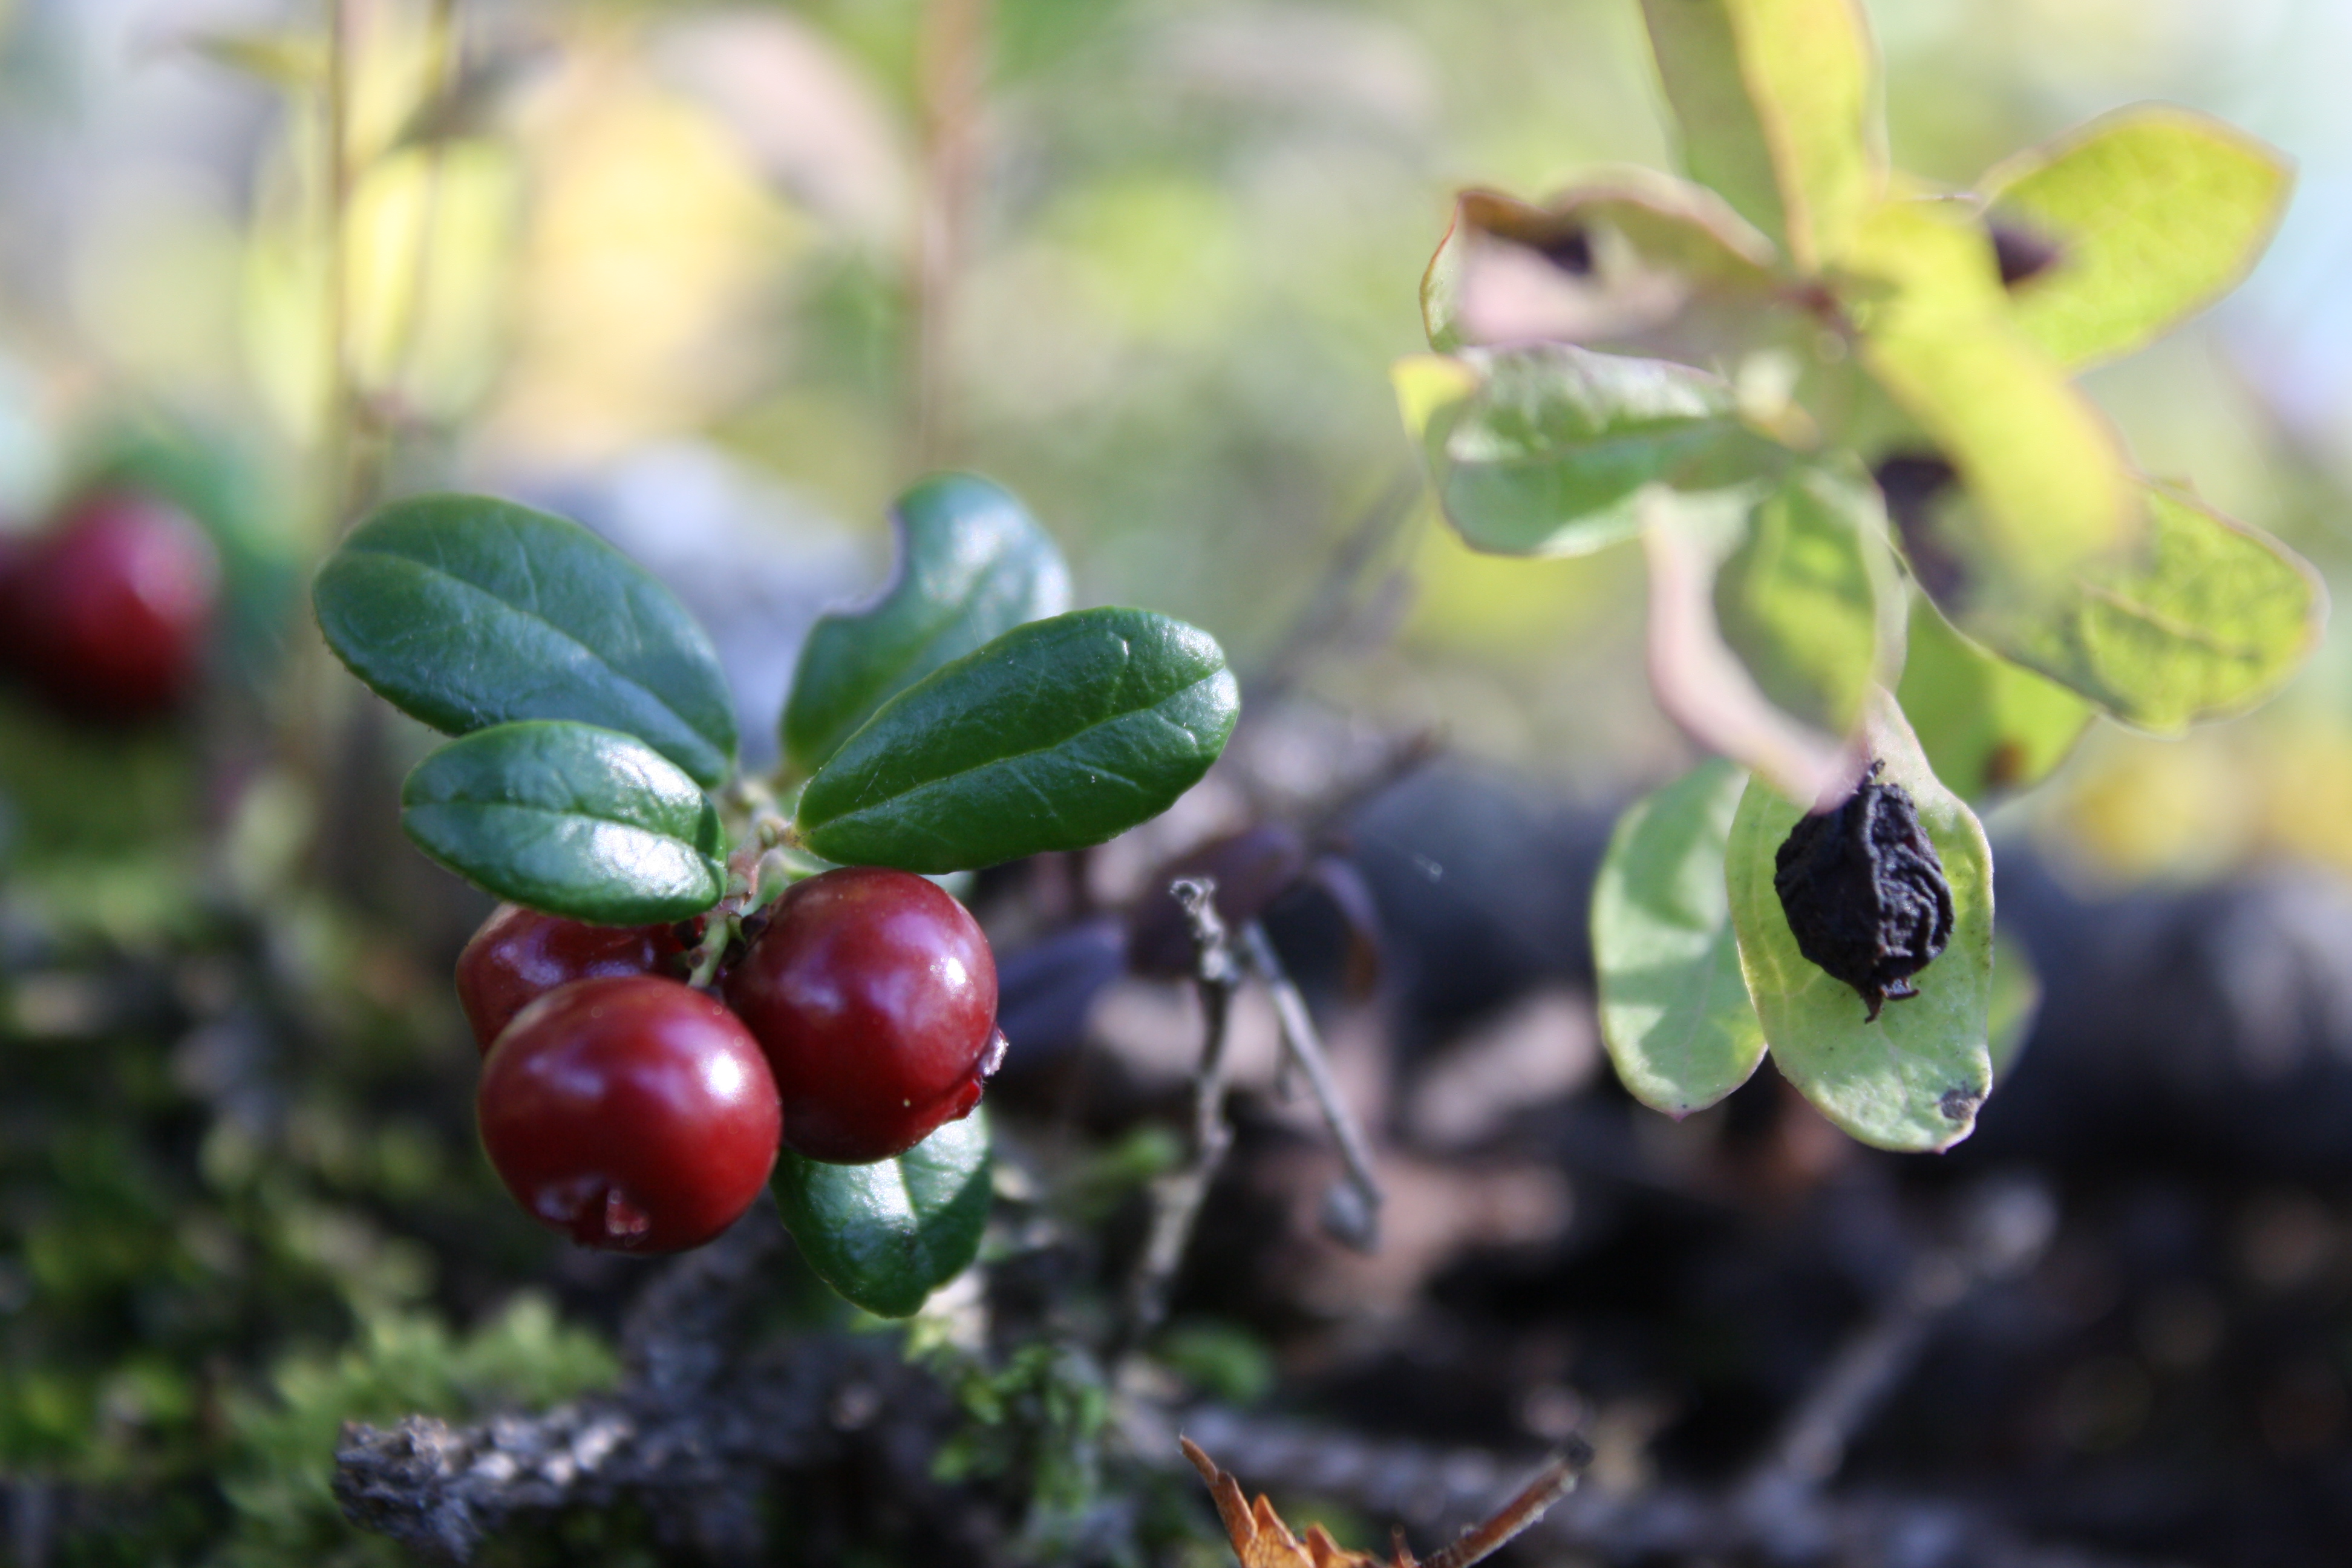
This is my favorite time of year in Anchorage. The air is crisp and smells of earth and cranberries. Cranberries are my favorite wild berry to pick because they are durable, high in nutritive value and they freeze well. They can also be substituted for any recipe that calls for commercial cranberries.
I only pick low-bush cranberries, also called lingonberries. These short plants can be found in most Anchorage forests. They have round, shiny leaves and if there’s enough sunlight during the summer they bear tart, red berries. High-bush cranberries, which are abundant in Anchorage, have a similar flavor but they have a large seed in each berry, must be strained during processing and aren’t pleasing to eat whole.
One would be inclined to harvest low-bush cranberries when they are at their brightest red color, but it’s best to wait until after the first frost when they’ve turned a deep wine red. I don’t know the science behind it, but the berries become juicier after they’ve endured a frost.
I found buried in my freezer a pint of last year’s cranberries. So to make way for this year’s harvest, I decided on a simple muffin recipe based on this one from Simple Nourished Living.
I’m not much of a bakist, so I was surprised by how thick the batter was. Have no fear, for these muffins were fluffy, tart, sweet and zesty. It’s like a party in my mouth!
Wild Cranberry & Lemon Muffins
Makes 12 muffins
Ingredients:
1 cup all-purpose flour
1 cup whole-wheat flour
1 Tbs. baking powder
1 tsp. salt
scant 1/3 cup sugar
zest of one lemon
3/4 cup milk
1 egg
1/2 cup melted coconut oil, cooled
1 cup low-bush cranberries, frozen or thawed
Directions:
Preheat oven to 400 degrees.
In a large bowl combine the dry ingredients and the lemon zest.
In another bowl combine the milk, egg and oil.
Pour the wet ingredients into the dry ingredients and mix until just combined. The batter should be lumpy and wet, but almost the consistency of dough. If it’s too dry add a little more milk. Fold in the cranberries and divide batter into a muffin tin lined with cupcake liners. Bake 20 minutes or until golden brown on top. Let cool for a few minutes before removing muffins from tin and placing on a cooling rack.
Growing up we had a lot of spaghetti dinners. It was common knowledge that my dad made a wicked marinara sauce, so much so that he was head chef at several of my school’s spaghetti dinner fundraisers.
We inevitably ended up eating a lot of leftover spaghetti, and I have to be honest, it wasn’t ever as good as the fresh stuff.
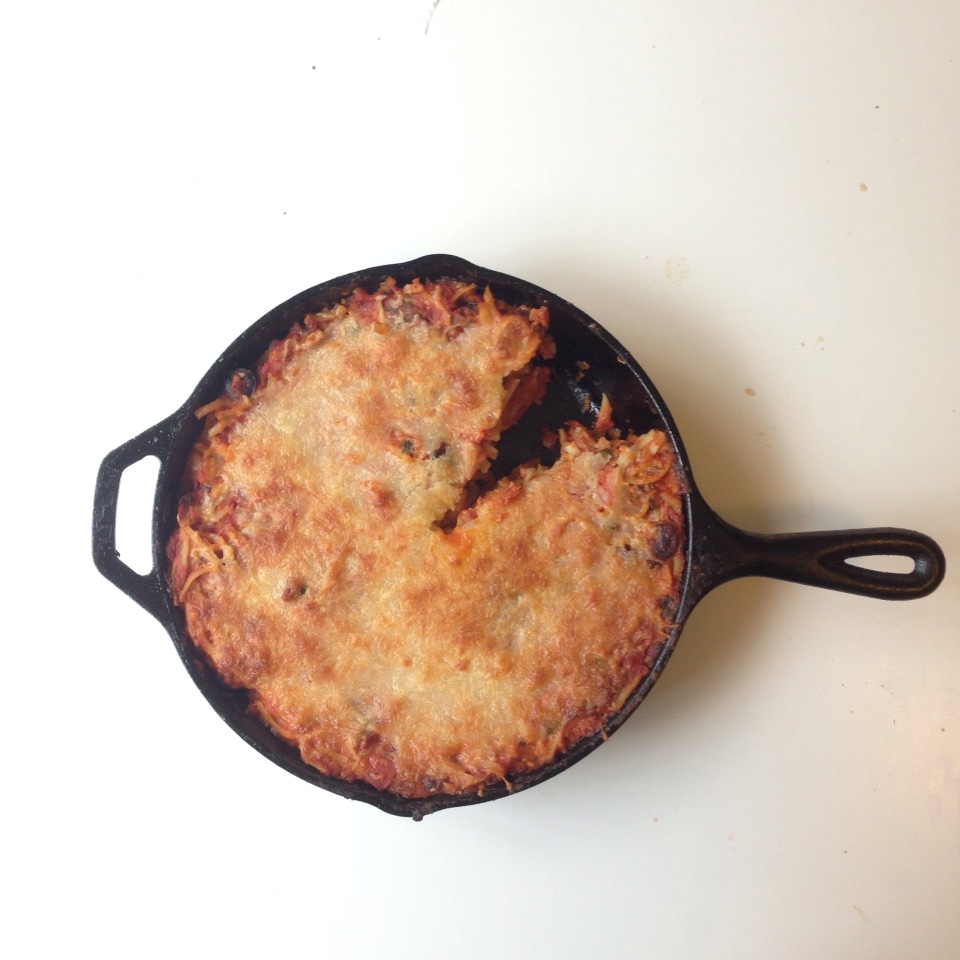
But sometimes my dad would whip together spaghetti pie. He would take the leftover pasta, stick it in a skillet with some eggs and cheese and bake it till it was crusty and delicious.
I don’t know his recipe, but I decided to try it out myself and it was an instant success — well, a 30-minute success.
This is comfort food at its best and is perfect for a quick weeknight meal. Plus, it’s easy cleanup since you only use one skillet.
Leftover Spaghetti Pie
Serves 6
Ingredients:
1/2 pound leftover pasta
3 italian sausages, cooked
One jar of marinara sauce
1 cup shredded Italian blend cheese
1/4 cup cream
Directions:
Preheat the oven to 400 degrees. Slice the cooked sausages into bite-sized pieces. Heat an oven-proof skillet over medium-high and brown the sausages on both sides. Meanwhile, roughly chop the leftover spaghetti into 2-inch pieces. Toss the pasta into the skillet with the marinara sauce. Turn heat to medium-low and heat thoroughly, stirring occasionally, about 7 minutes. Stir in 1/3 cup of the cheese and the cream. Top with a hefty layer of cheese and bake for 30 minutes, or until cheese is browned and bubbly. Let rest 10 minutes before serving.
1 cup shredded mexican blend cheese plus more for topping
1 can diced green chiles
1/4 cup cream (optional)
black pepper
oil
Directions:
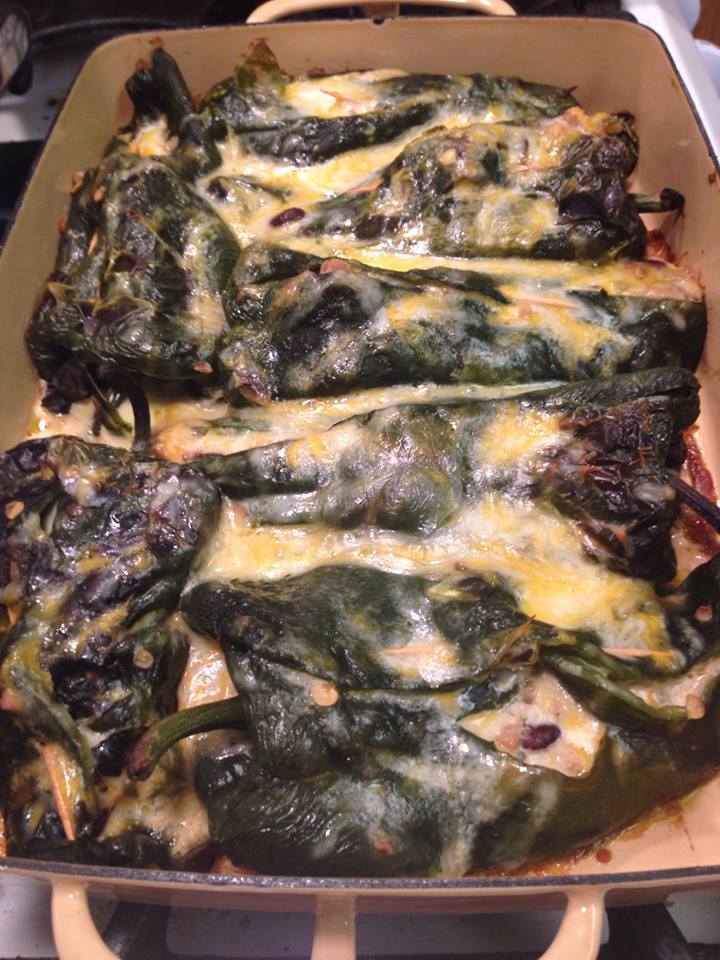
Grill the chiles over high heat till blackened on all sides. Place in a paper bag and let steam for 10 minutes. Gingerly remove the skins and slice open on one side. Let cool completely and carefully remove the pith and seeds. Set peppers aside. Meanwhile, brown the pork in a lightly oiled pan over medium high heat. Add the taco seasoning and break up the meat. Remove from heat and let cool.
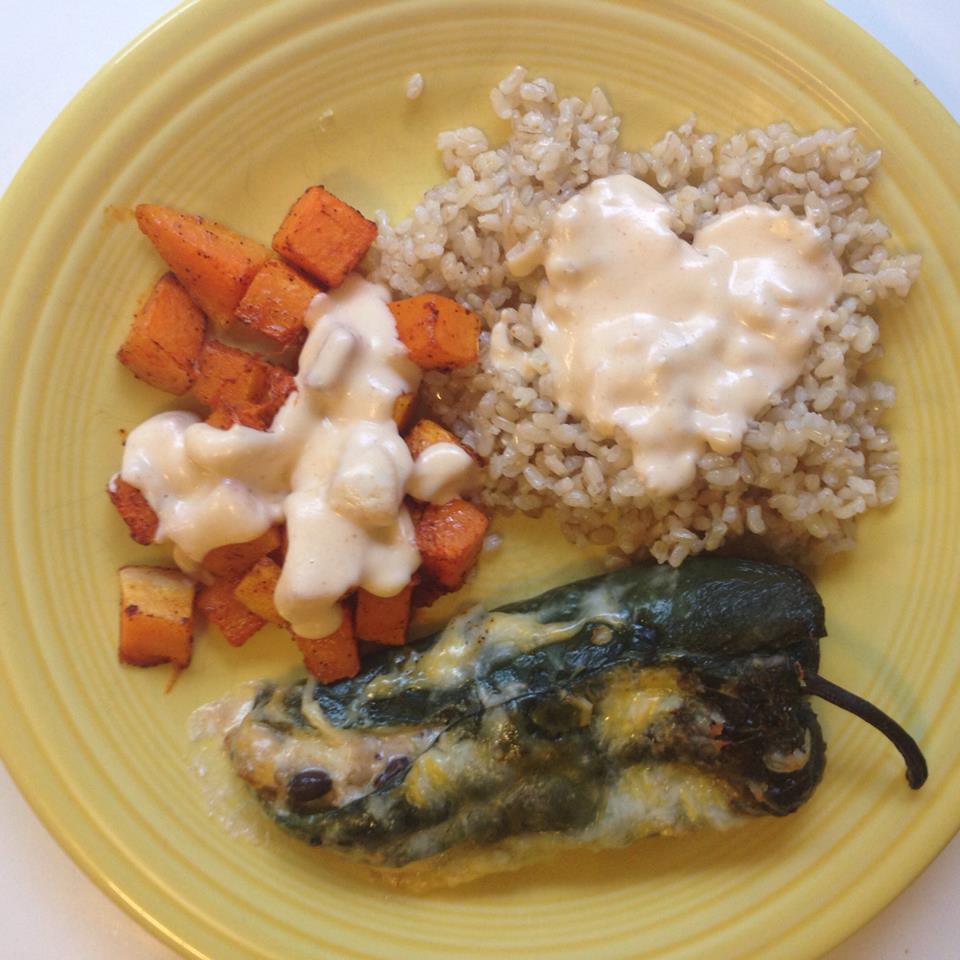
Preheat the oven to 375 degrees. Mix together the beans, pork, cream cheese, Mexican cheese and diced green chiles and season with pepper to taste. Stuff each chile and secure with a toothpick. Place stuffed peppers in a greased casserole dish and sprinkle liberally with more shredded cheese. Pour cream over the chiles and bake, uncovered, for 30 minutes till cheese is bubbling. Serve with brown rice and southwestern roasted butternut squash. Drizzle with smoky cream sauce — recipe below.
Smoky Cream Sauce
Ingredients;
1 Tbs. butter
1 Tbs. flour
2 Tbs. cream
1/2 cup milk
2 Tbs. cream cheese
1/2 cup Mexican shredded cheese
1/2 tsp. smoked paprika
1/4 tsp. garlic salt
1/4 tsp. cumin
salt and pepper to taste
Directions:
Melt the butter in a small saucepan over medium heat. Whisk in the flour and cook for one minute, stirring frequently. Add the cream and milk and whisk till thickened, about two minutes. Turn down heat till just bubbling and add the cheese and spices. Serve immediately. If it’s too thick, add more milk.
If you live in Southcentral Alaska then you’re probably keenly aware it is sockeye salmon season. My husband is getting his hipwaders and dipnets all ready for the coming week where he will camp out on the shores of the Kenai River and make the most of the everlasting daylight by fishing into the wee hours of the night.
We still have some vacuum-packed filets in the freezer from last year so to make way for this year’s bounty we are trying to find creative ways to use it up. Sure, there’s nothing better than simple grilled salmon with a drizzle of lemon, but my dad started preparing poke out of the frozen filets that tops any store bought ahi poke.
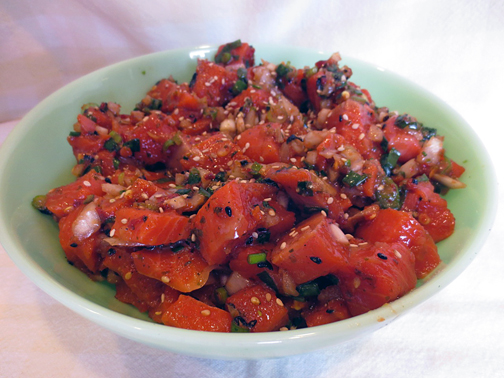
Poke is a Hawaiian salad made of cubed sashimi such as ahi tuna, soy sauce, sesame oil, onions and hot chili sauce. It’s a bit like spicy tuna sushi without the rice and seaweed.
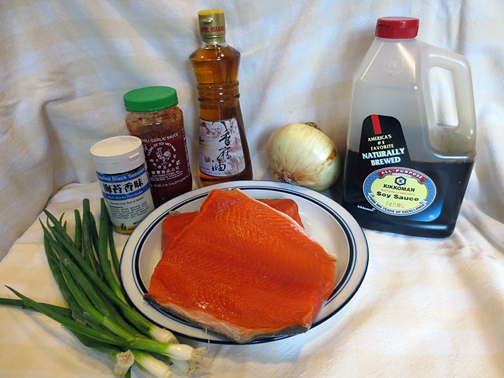
Here’s my dad’s recipe, which uses fresh-frozen sockeye, a.k.a. red, salmon. Keep in mind that the Food and Drug Administration recommends freezing fresh fish and thawing it before consuming it raw because this kills any parasites. This is how sushi-grade fish is prepared in America. The FDA also says cooking seafood is the safest way to consume it, so prepare poke at your own risk. If you are pregnant or are at risk for food-borne illness, then please be cautious about consuming fresh-frozen fish.
With that disclaimer out of the way, here’s my dad’s recipe!
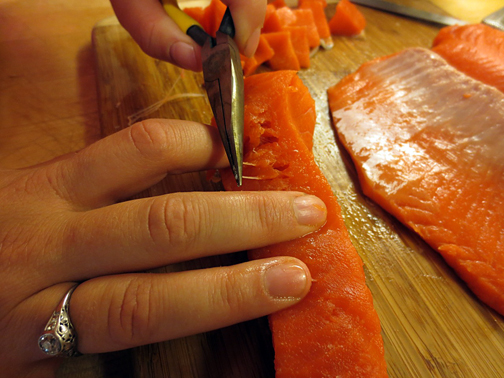
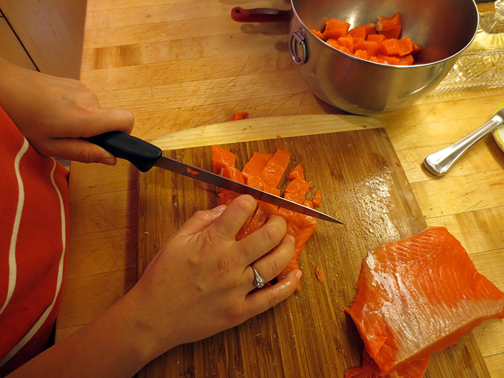
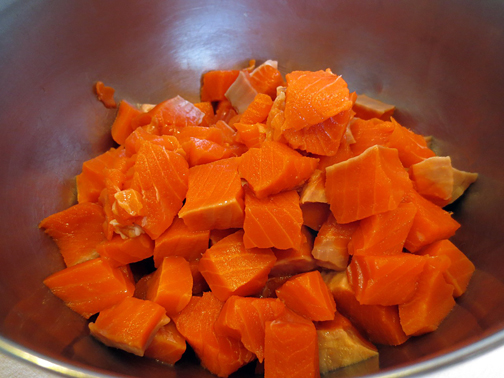
Using a sharp filet knife, remove the skin from the salmon filets. If there are any pin bones, carefully remove them with needle nose pliers. Cut the salmon into bite-sized cubes.
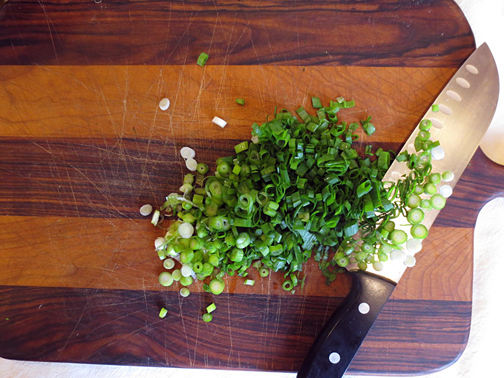
Add all the ingredients in a medium bowl and mix thoroughly. If you are not using the rice seasoning, add salt to taste. If you like a little more kick, add an extra tablespoon of the chili garlic sauce.
Serve immediately or refrigerate for later. Serve with sesame or rice crackers.
For more tasty Alaska recipes, check out my dad’s website.
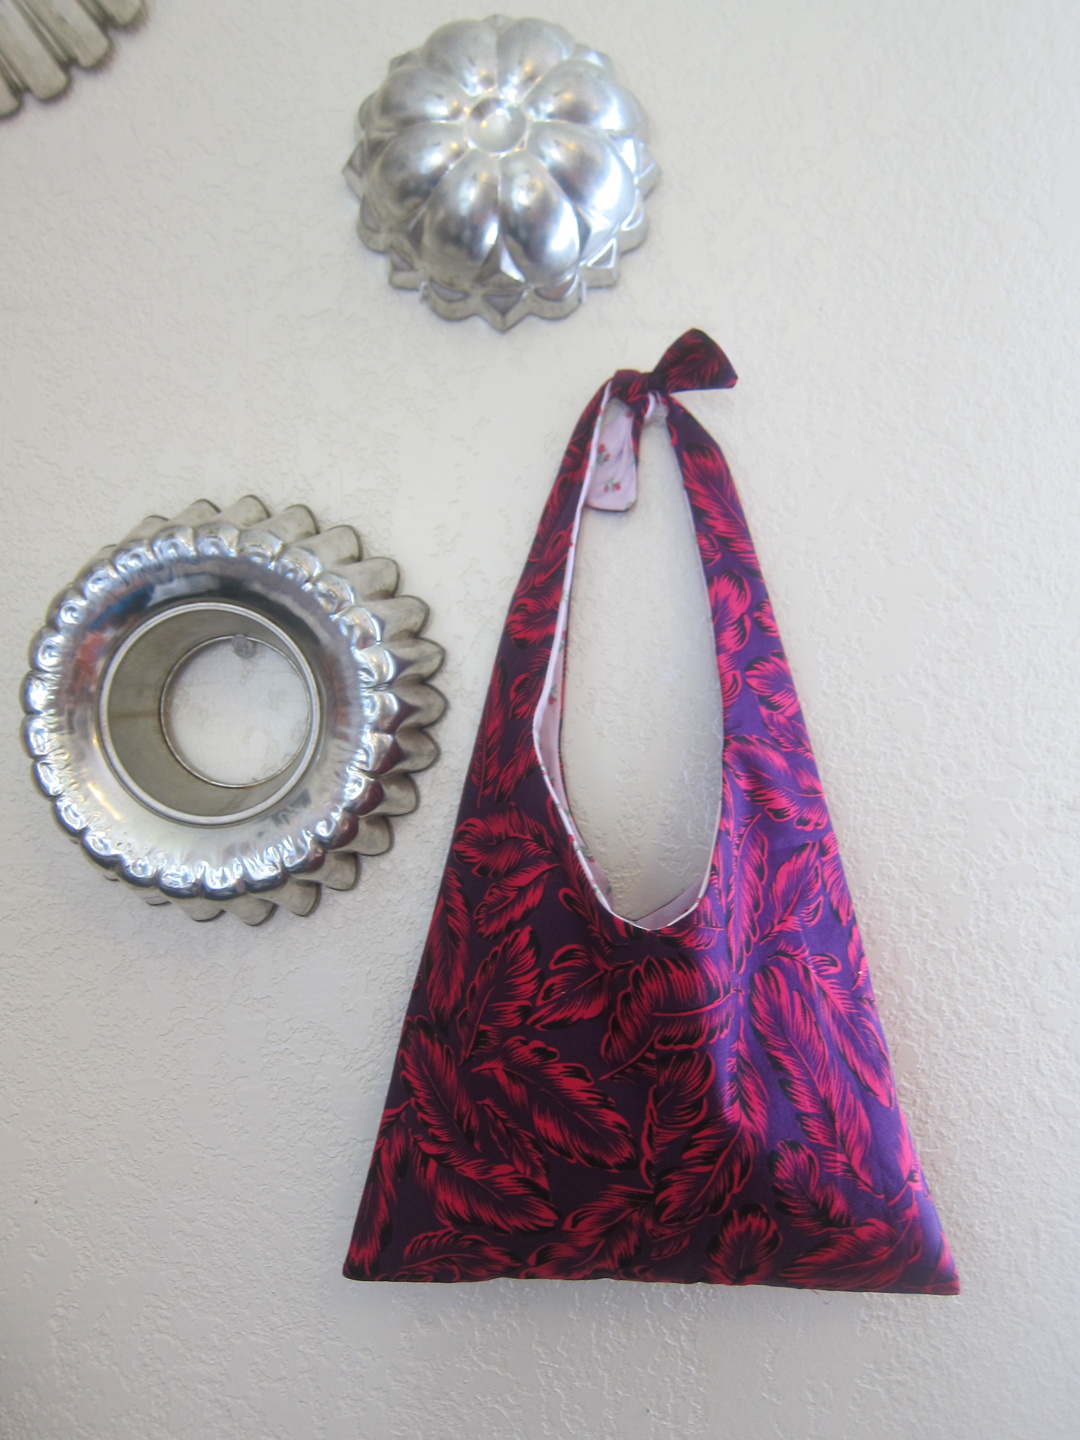
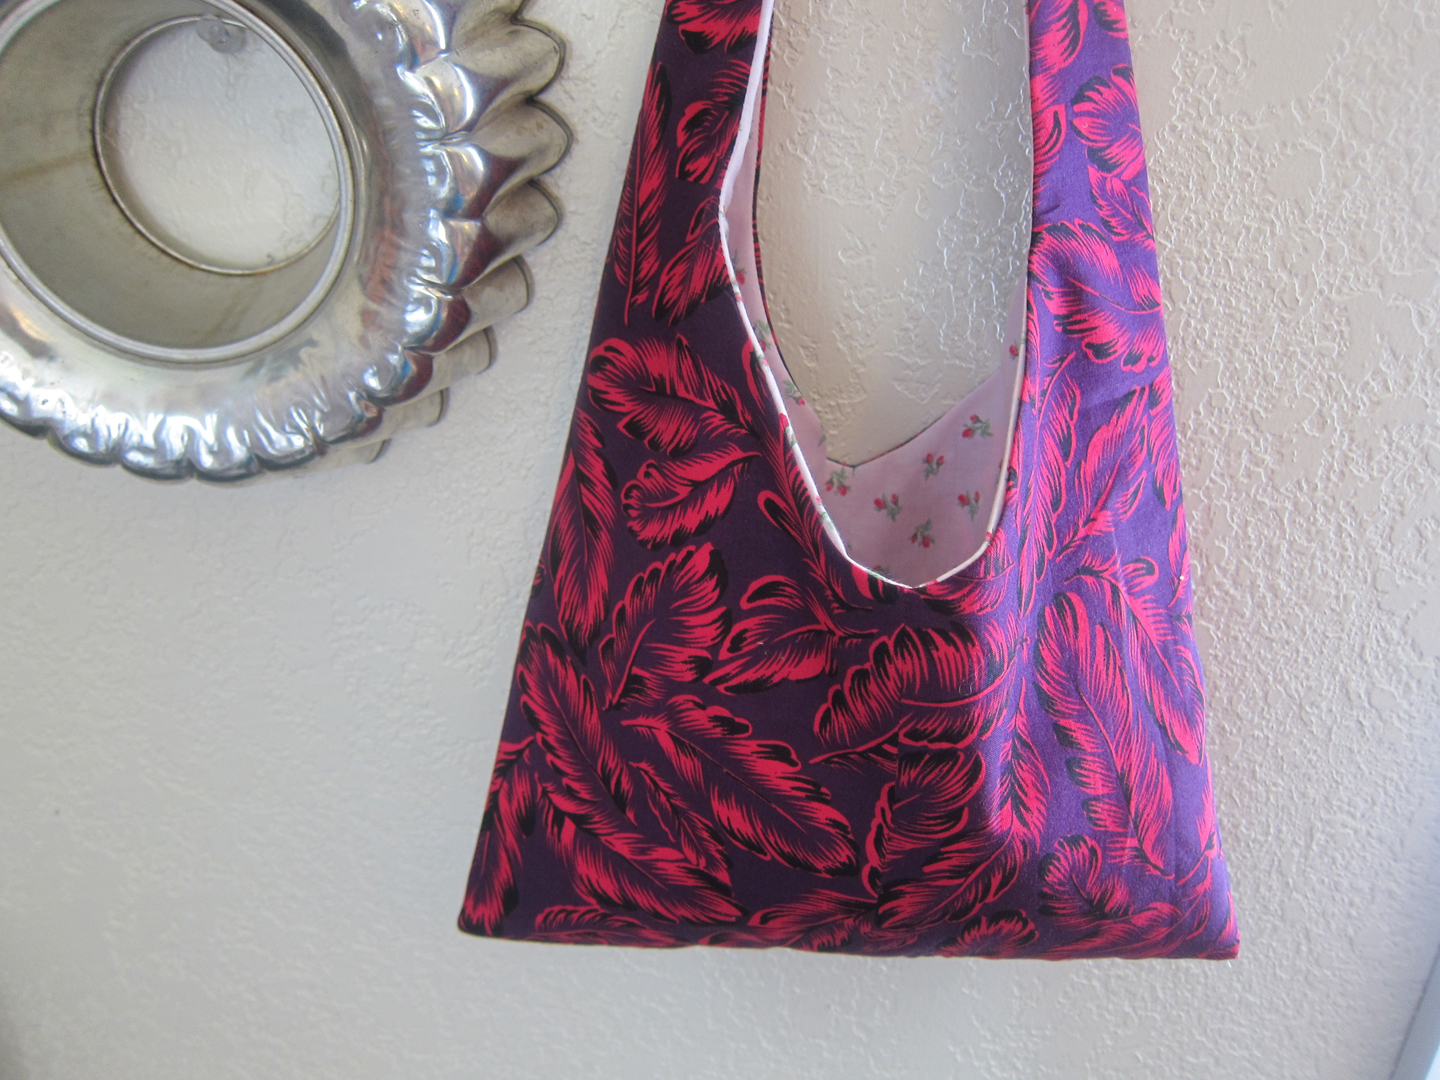
A few years ago I went sewing machine crazy and sewed a couple dozen Tokyo tie bags. I was inspired by a pattern on Darling Petunia’s blog. I never got around to posting my own pattern because I was too caught up in sewing them. My pattern, which I tweaked slightly from Darling Petunia’s, sadly sat in my craft pile for a few years until someone from Mexico emailed me last month and asked if she could buy one. I sewed it, shipped it and was reminded how easy and fun it was to make.
So here I am, three years later, ready to offer a full tutorial and pattern for the Tokyo tie bag. I hope you enjoy making them as much as I do!
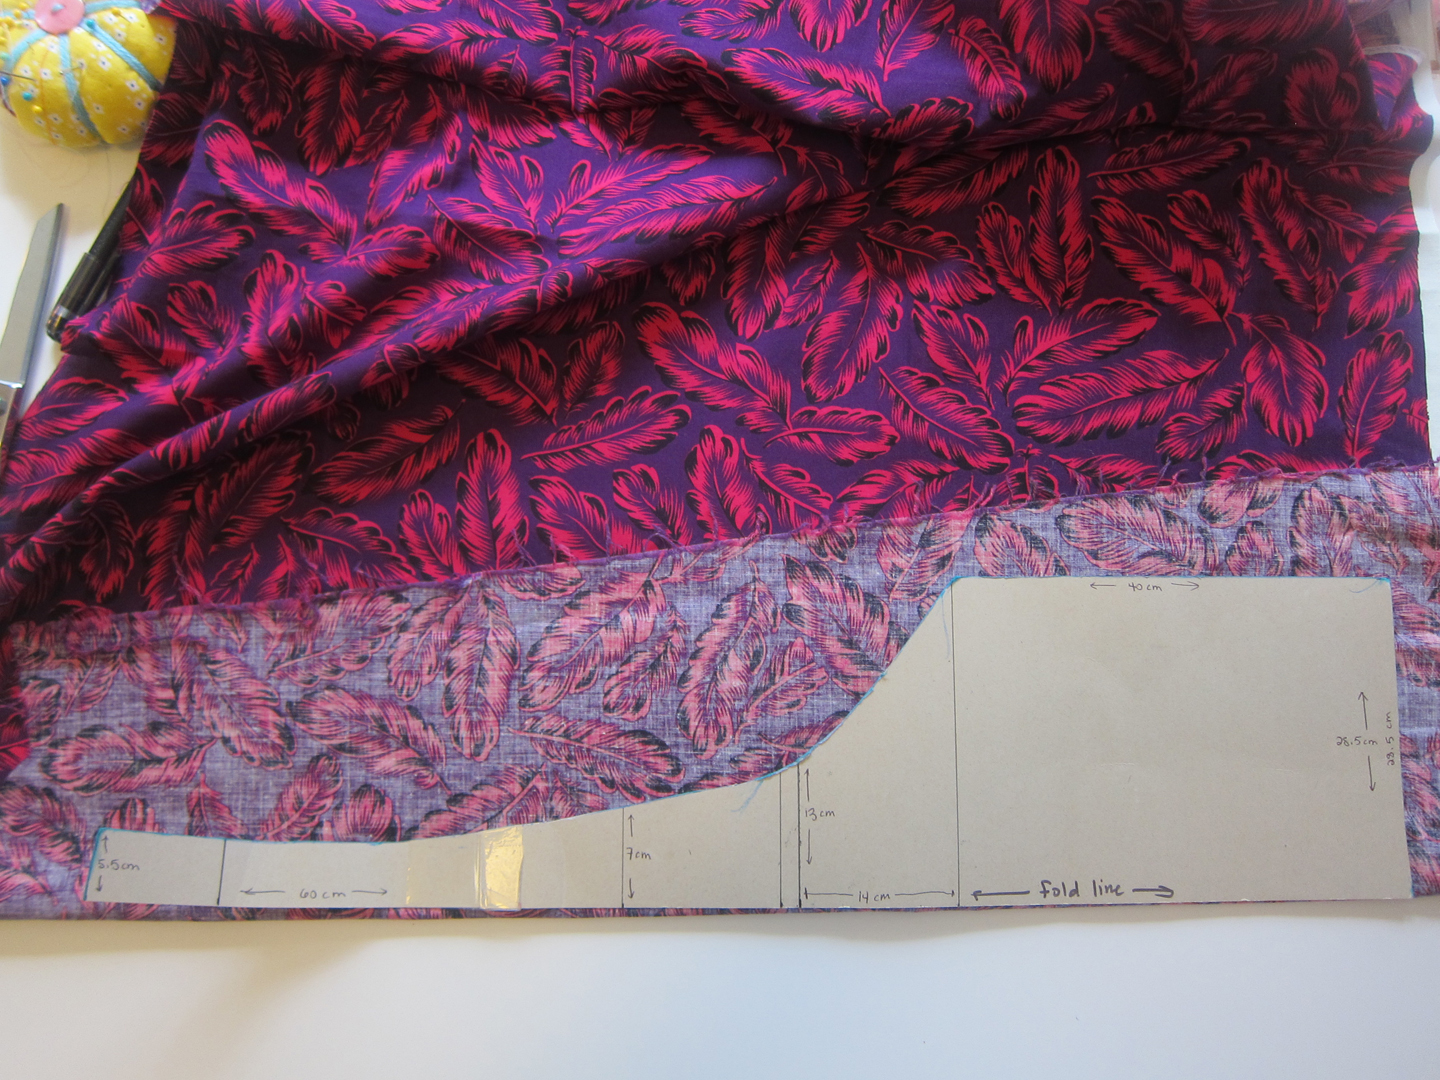
Tokyo Tie Bag
An easy sewing project that can be completed in an hour
Materials:
3/4 yard each of lining and outer fabric (100% cotton is recommended)
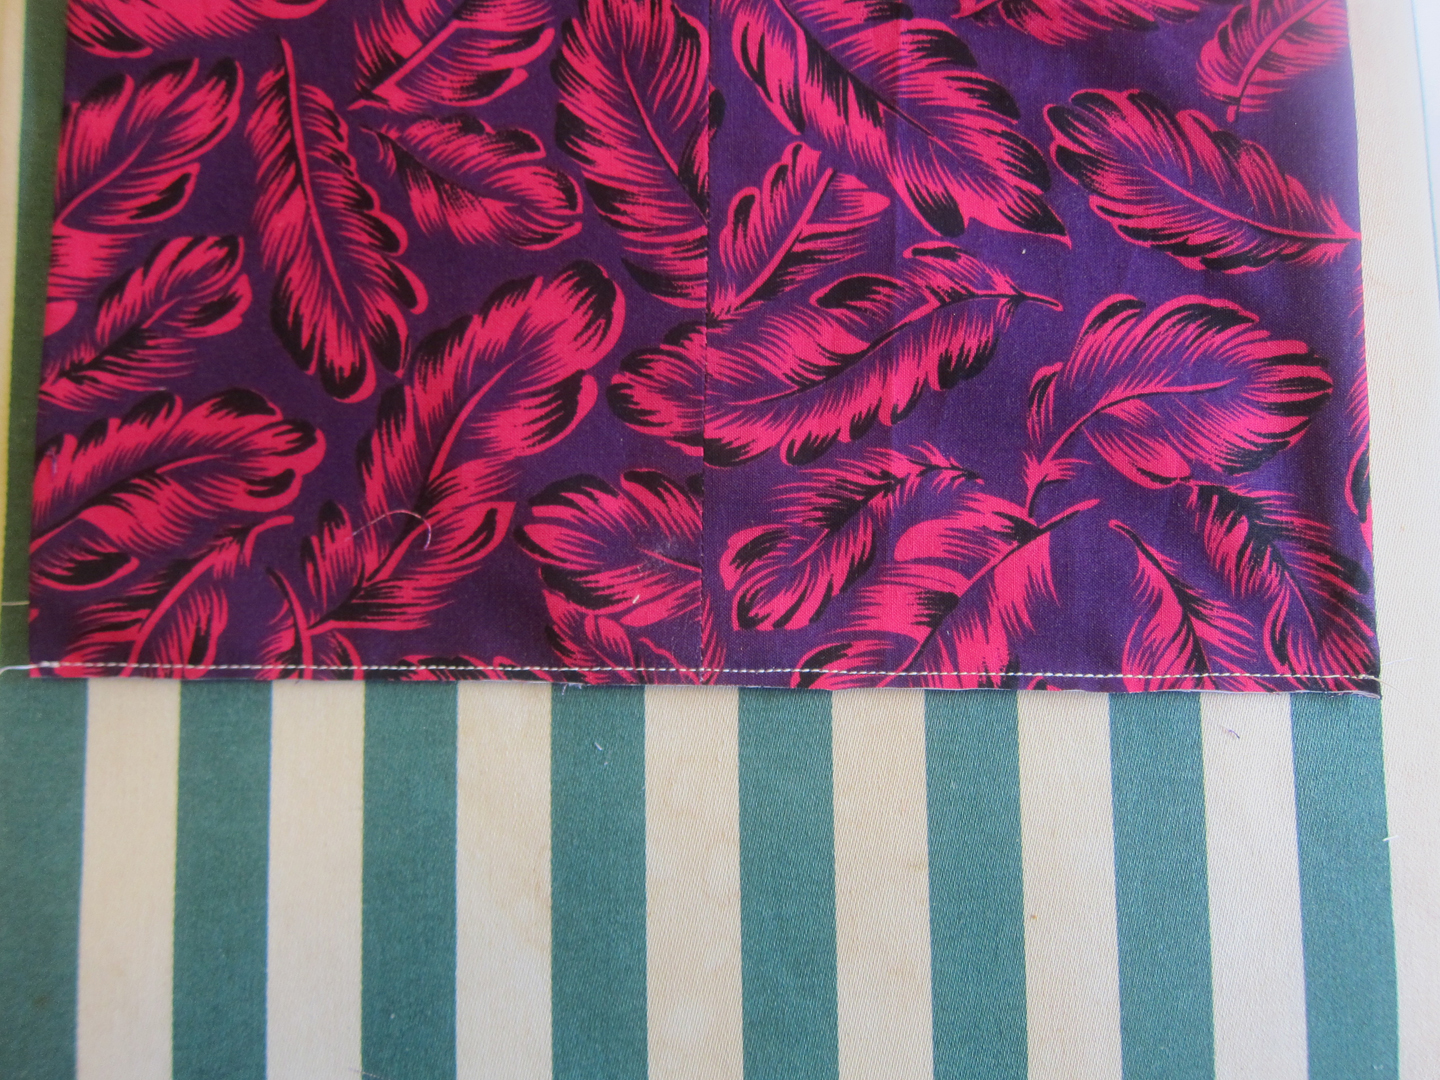
1. Iron your fabric and cut out two pieces of the pattern from the lining and outer fabrics. If your fabric is directional (meaning it looks different upside down) be sure you cut your pattern so the bottom of the pattern is on the same edge for both pieces. You should have four pieces.
2. With right sides together, sew each edge of the lining with a 3/8 inch seam allowance. Repeat for outer fabric.
3. Iron open the seams.
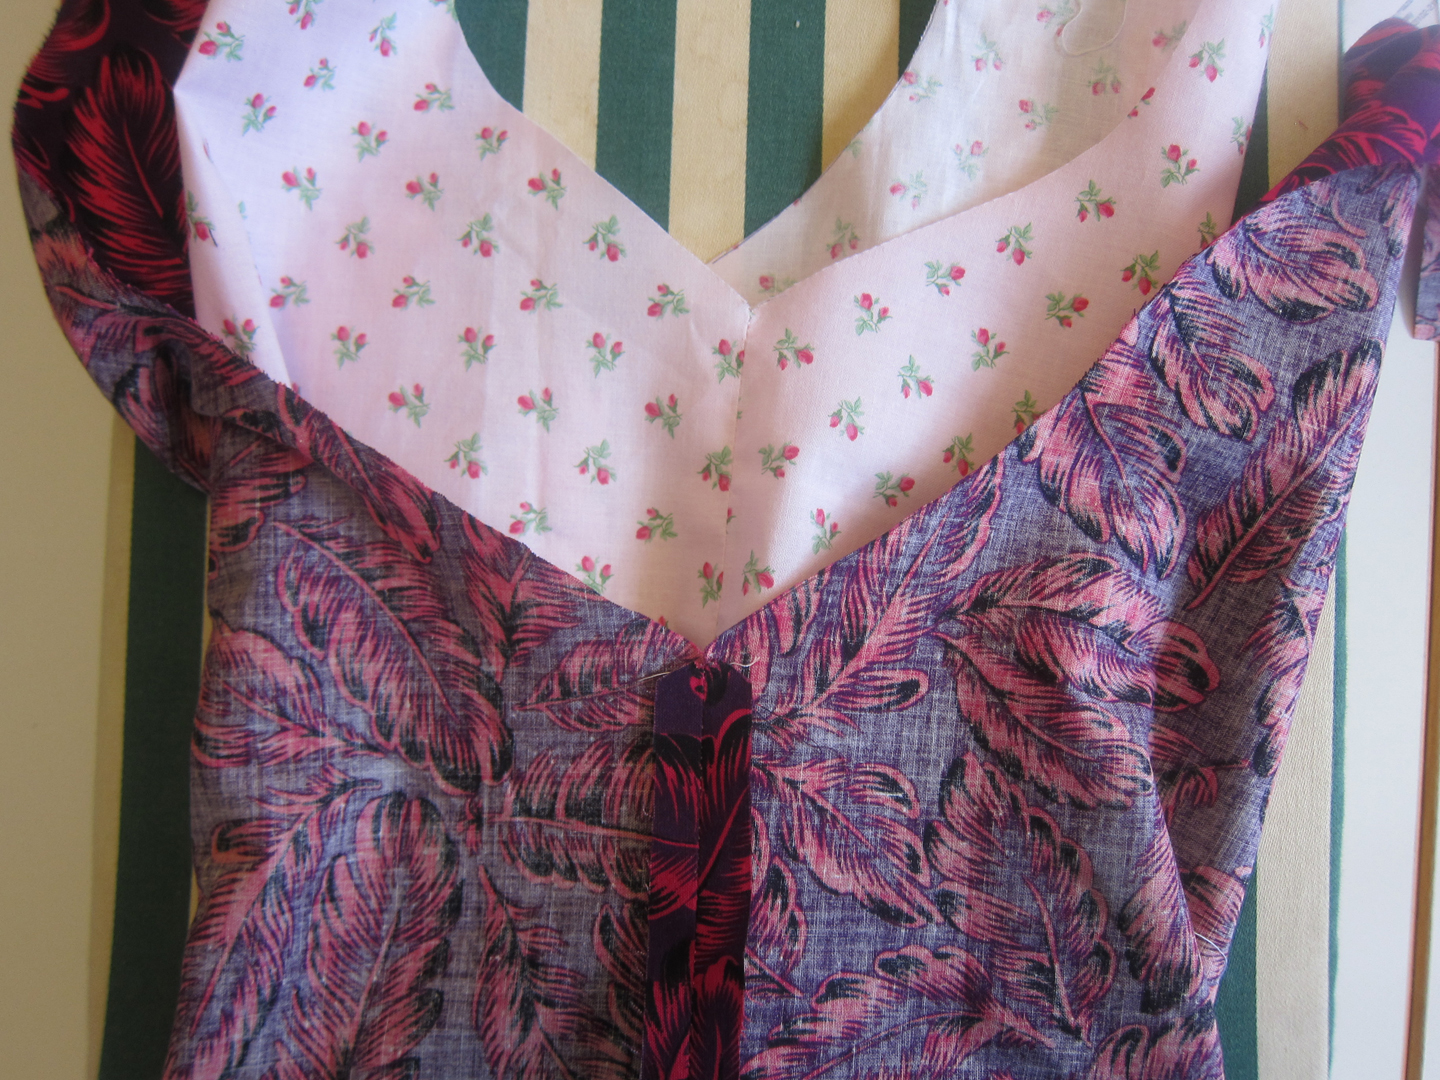
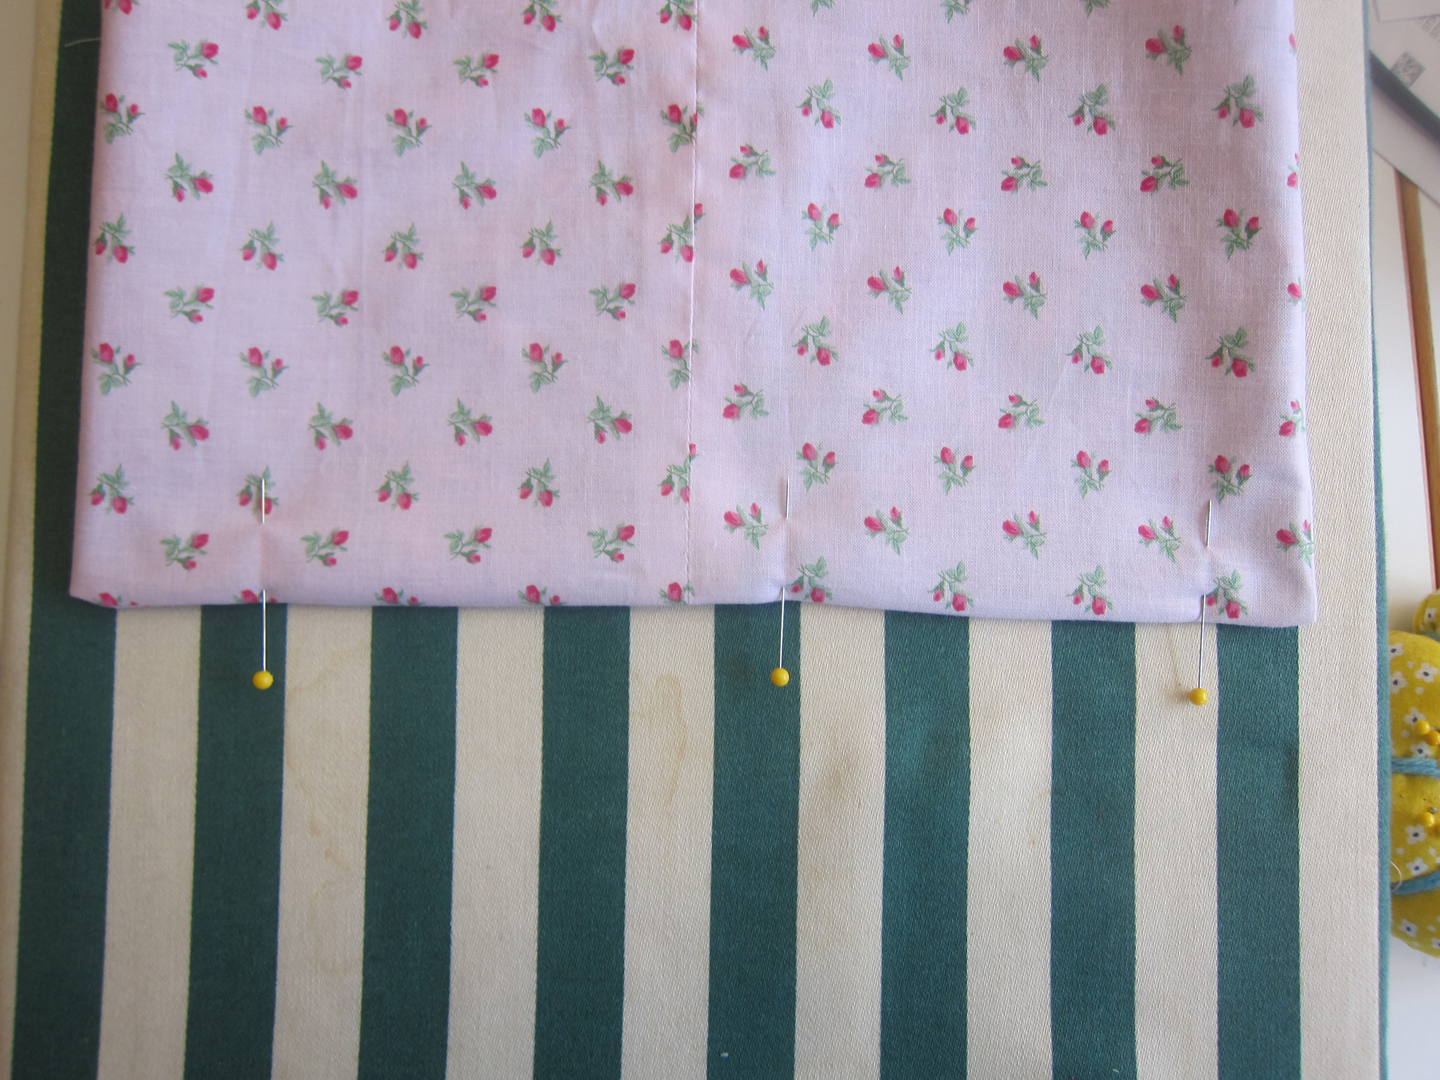
4. Turn your lining right side out and slip it inside the outer fabric.
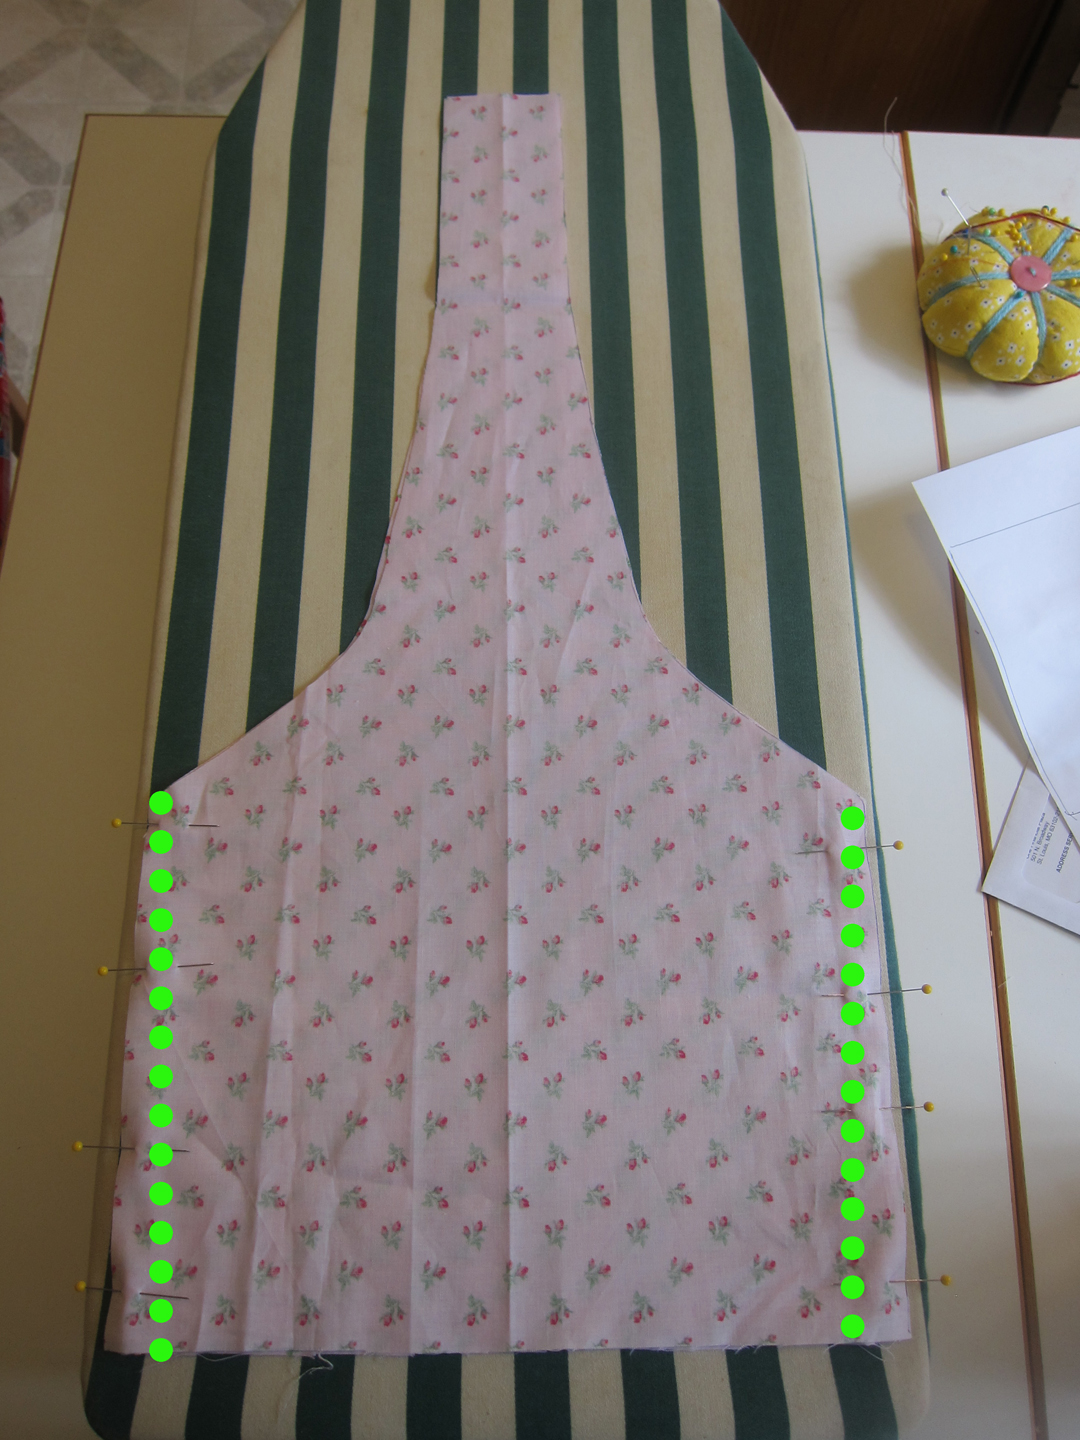
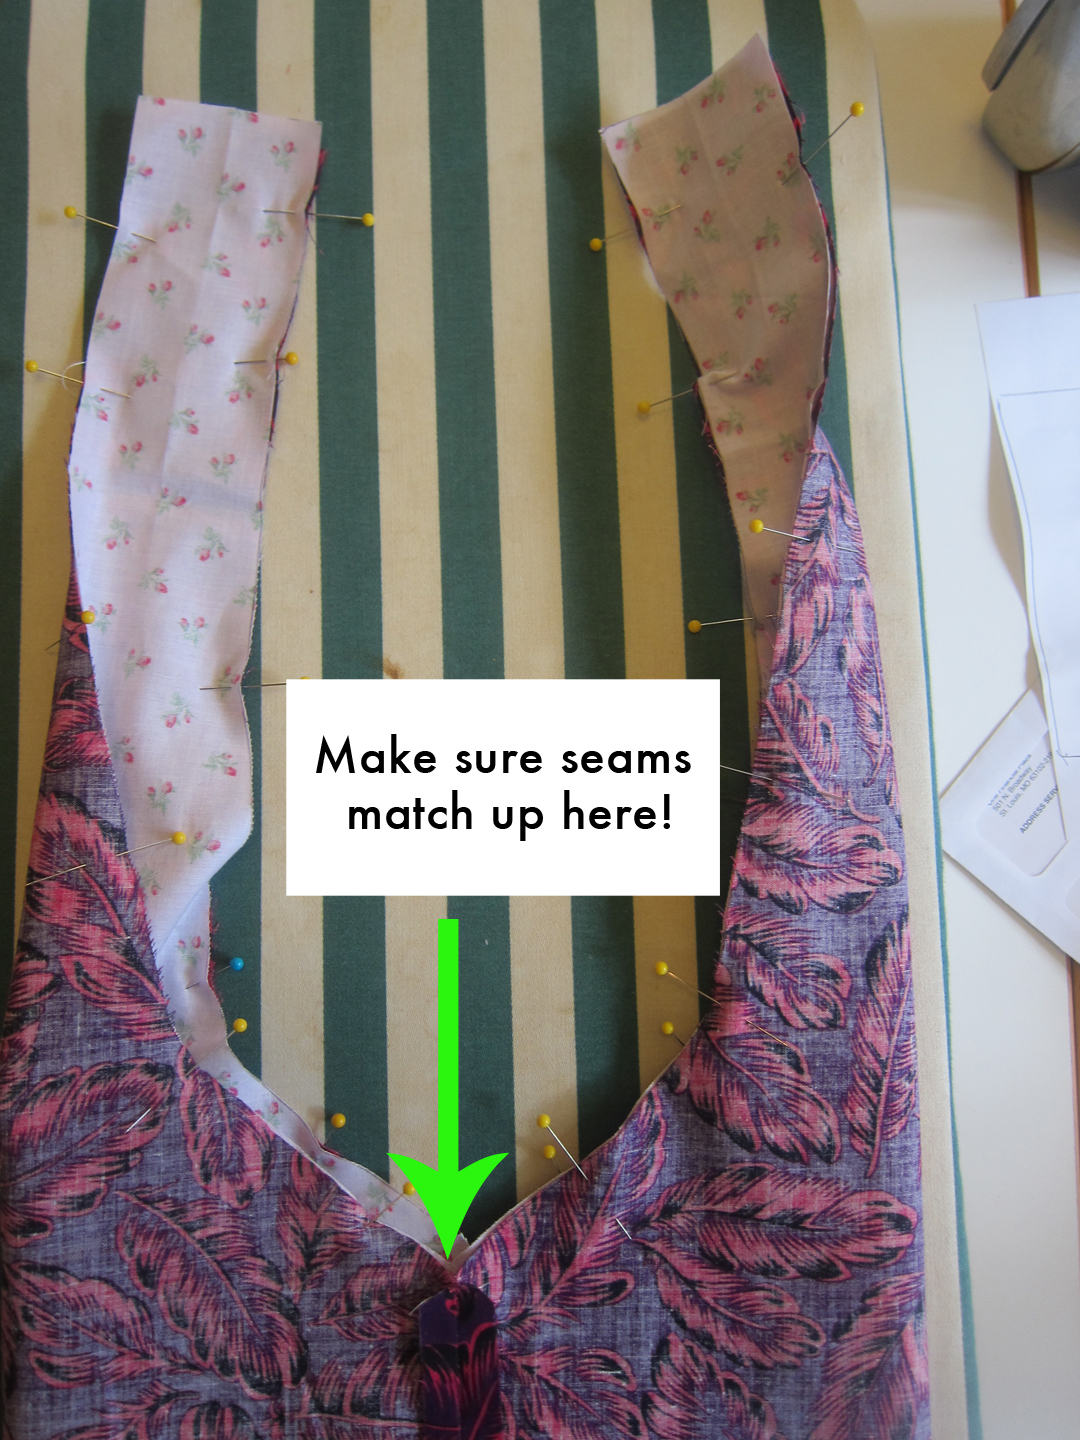
5. Make sure the seams from the outer and lining fabrics match up in the middle and pin all around the top edge and handles.
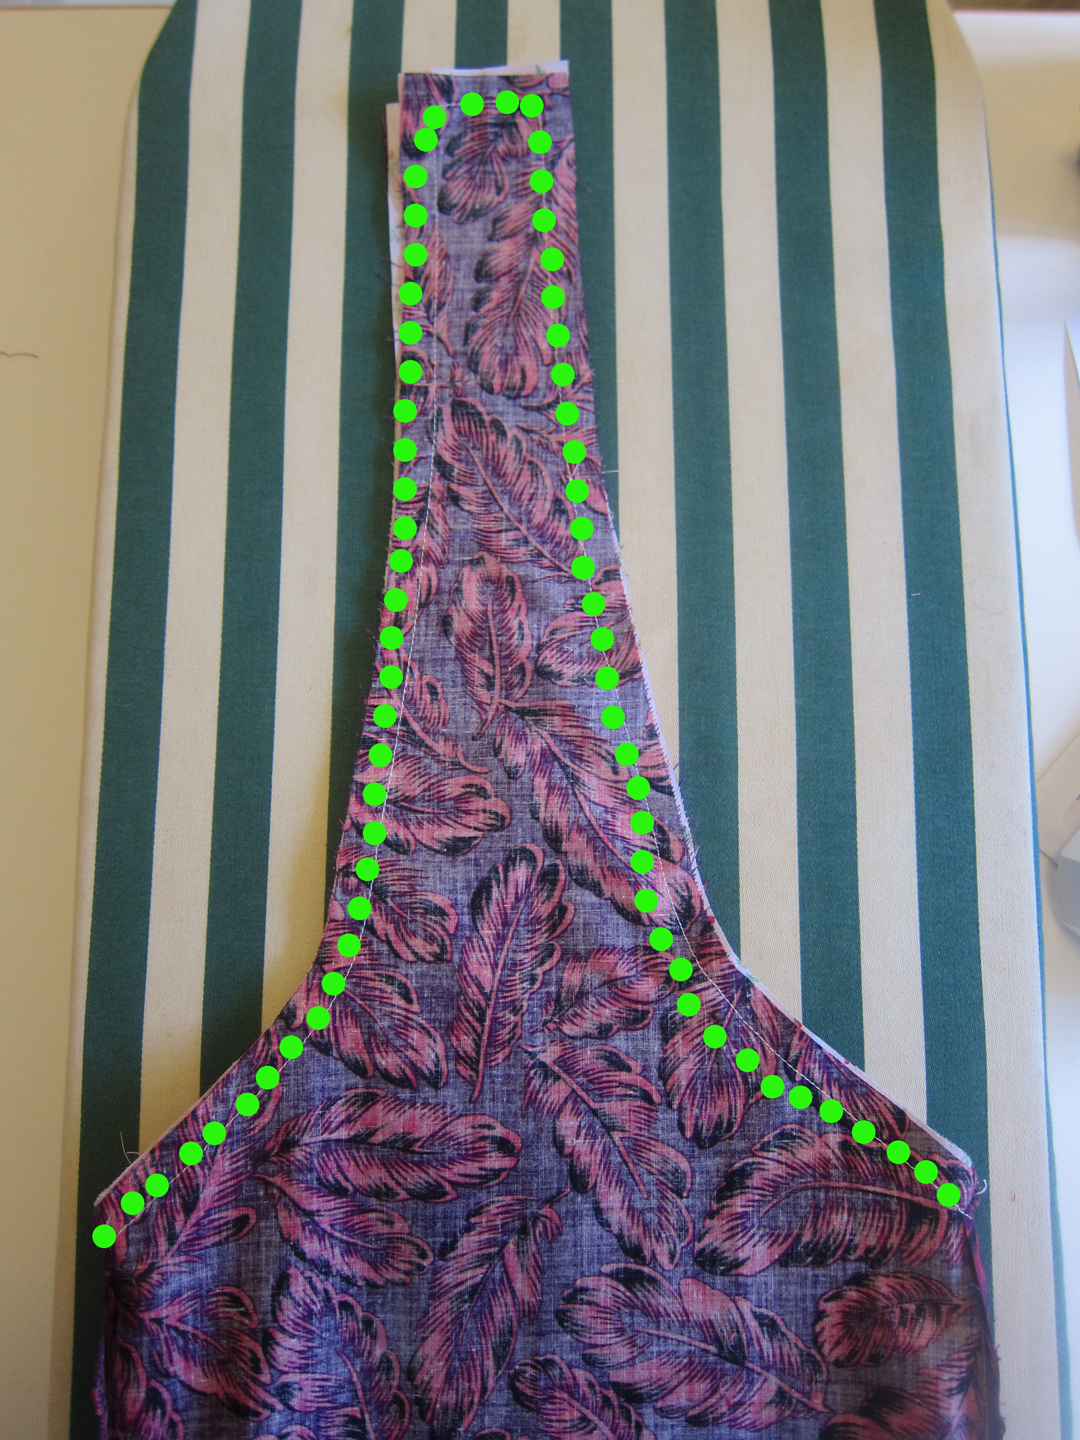
6. Sew all around the top edge, along the handles and back down again. Your seam should end at the same place you began as you’ll be sewing in a giant loop.
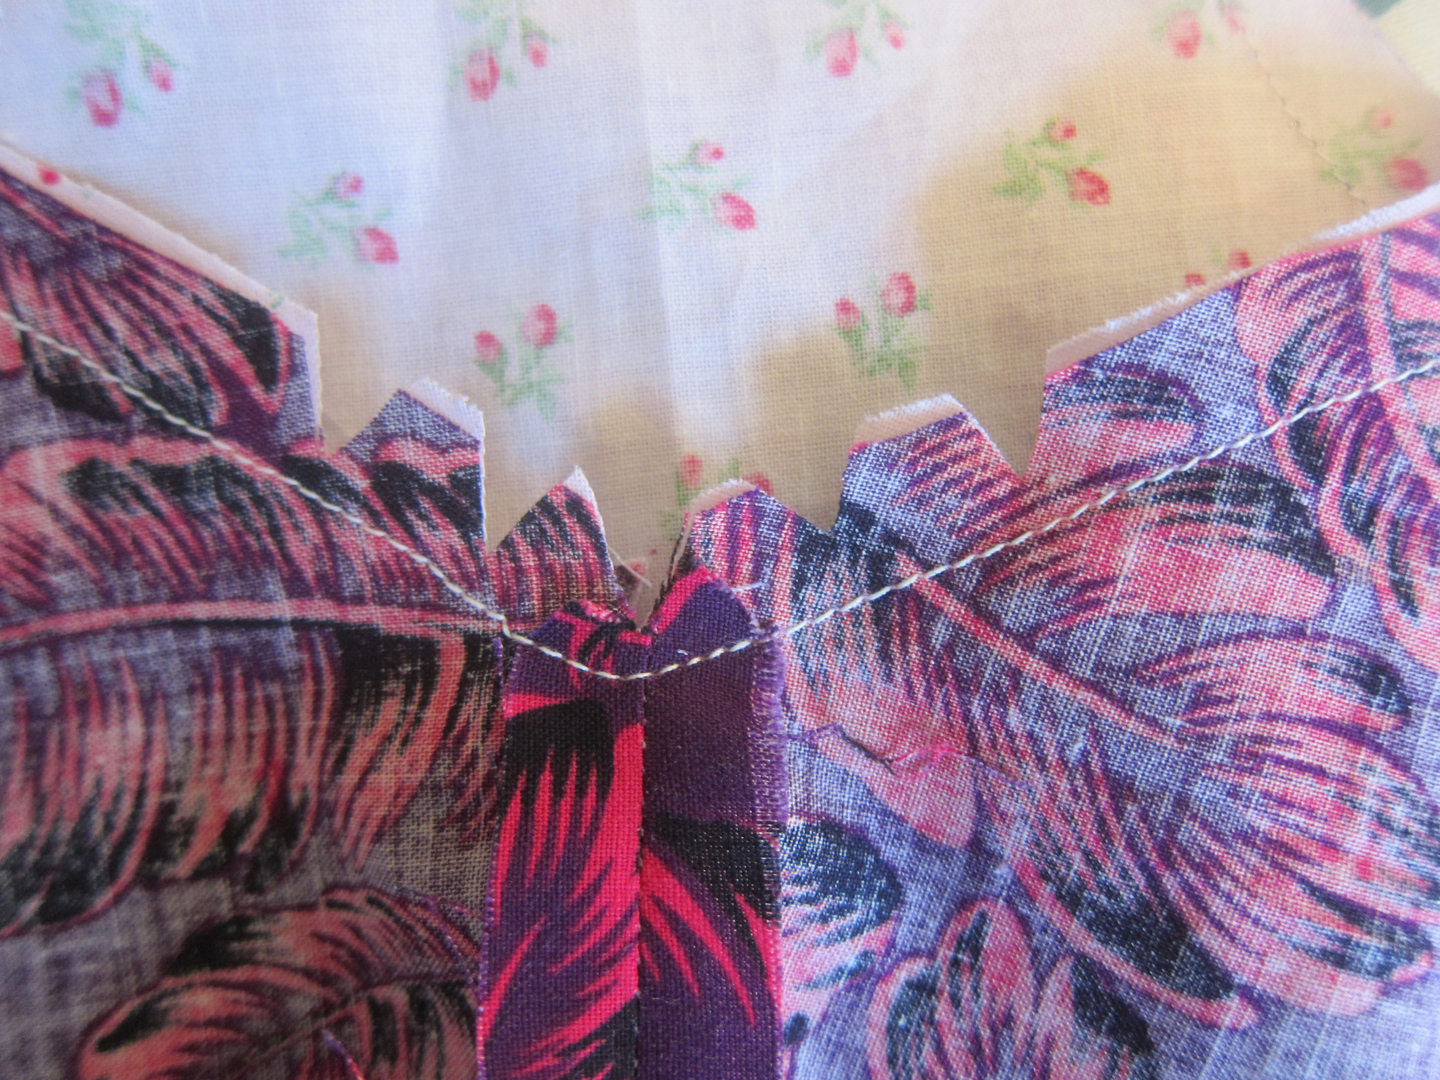
7. Trim the corners of the handles so there is less bulk.
8. Cut notches at the center curves so the seam will be more smooth when turned right-side out.
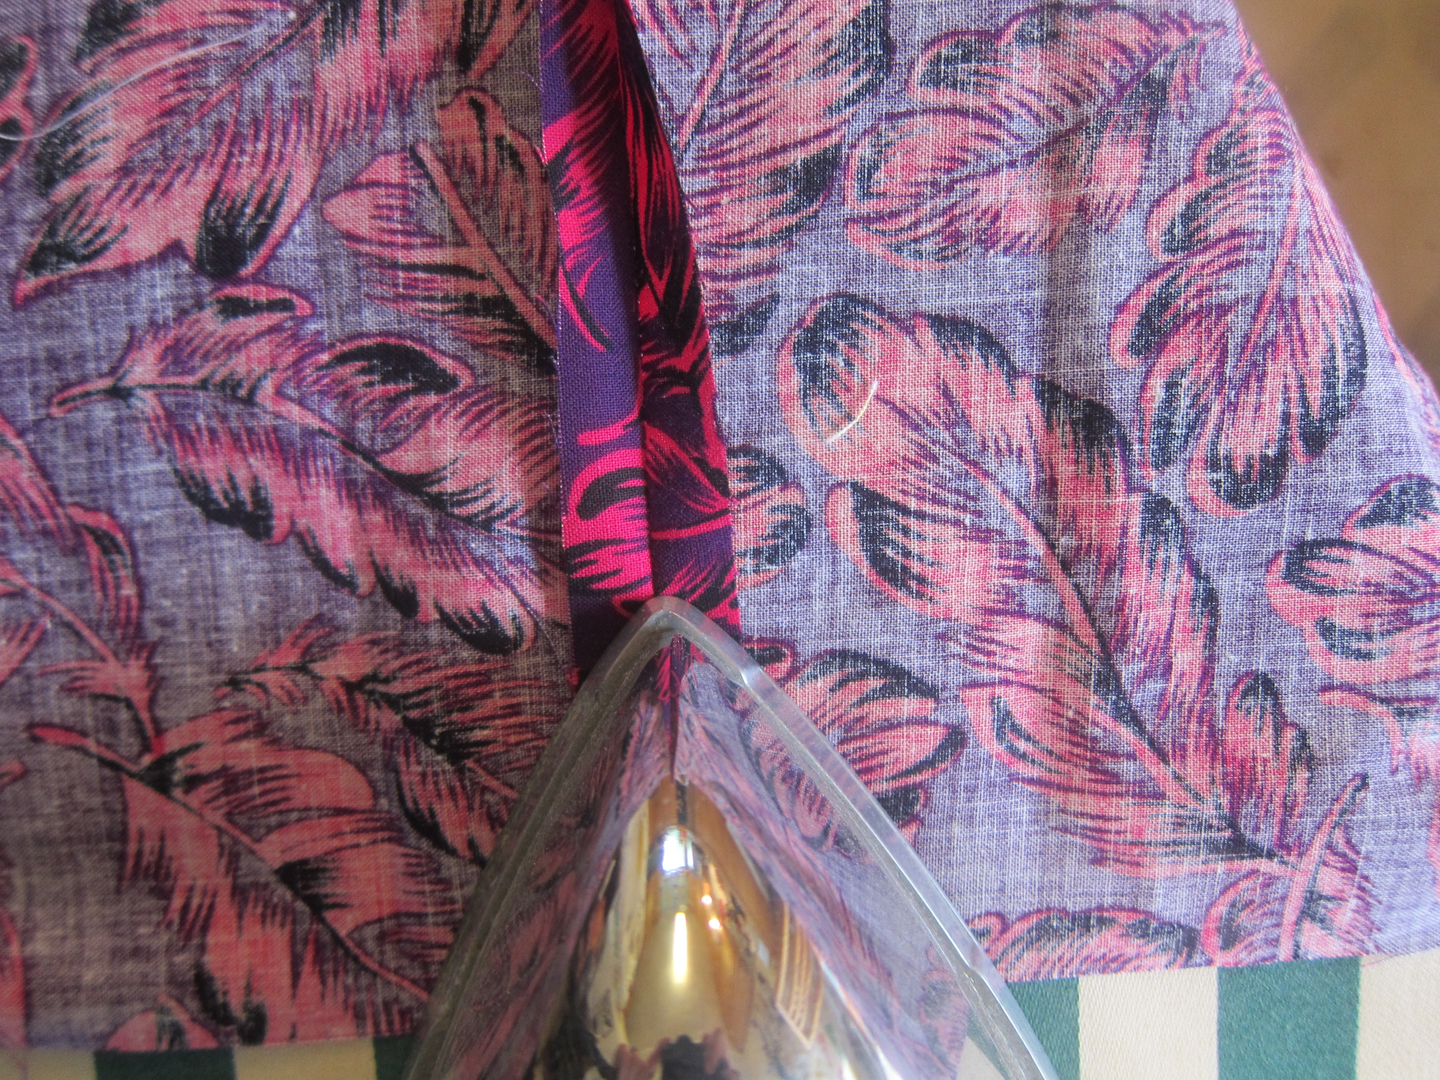
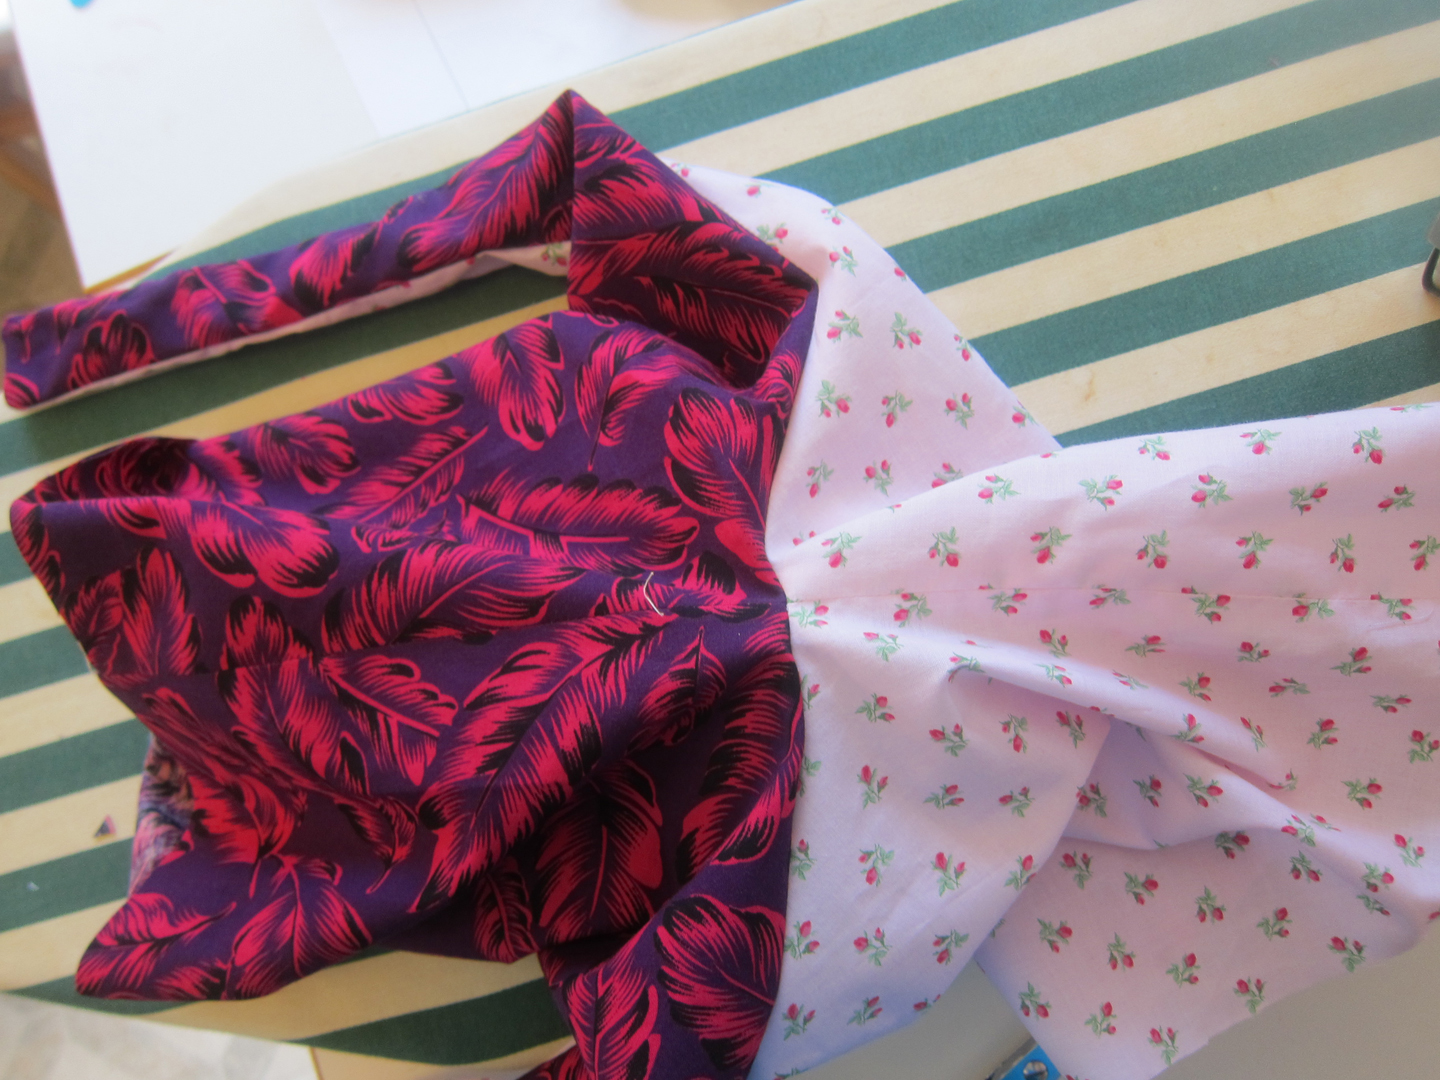
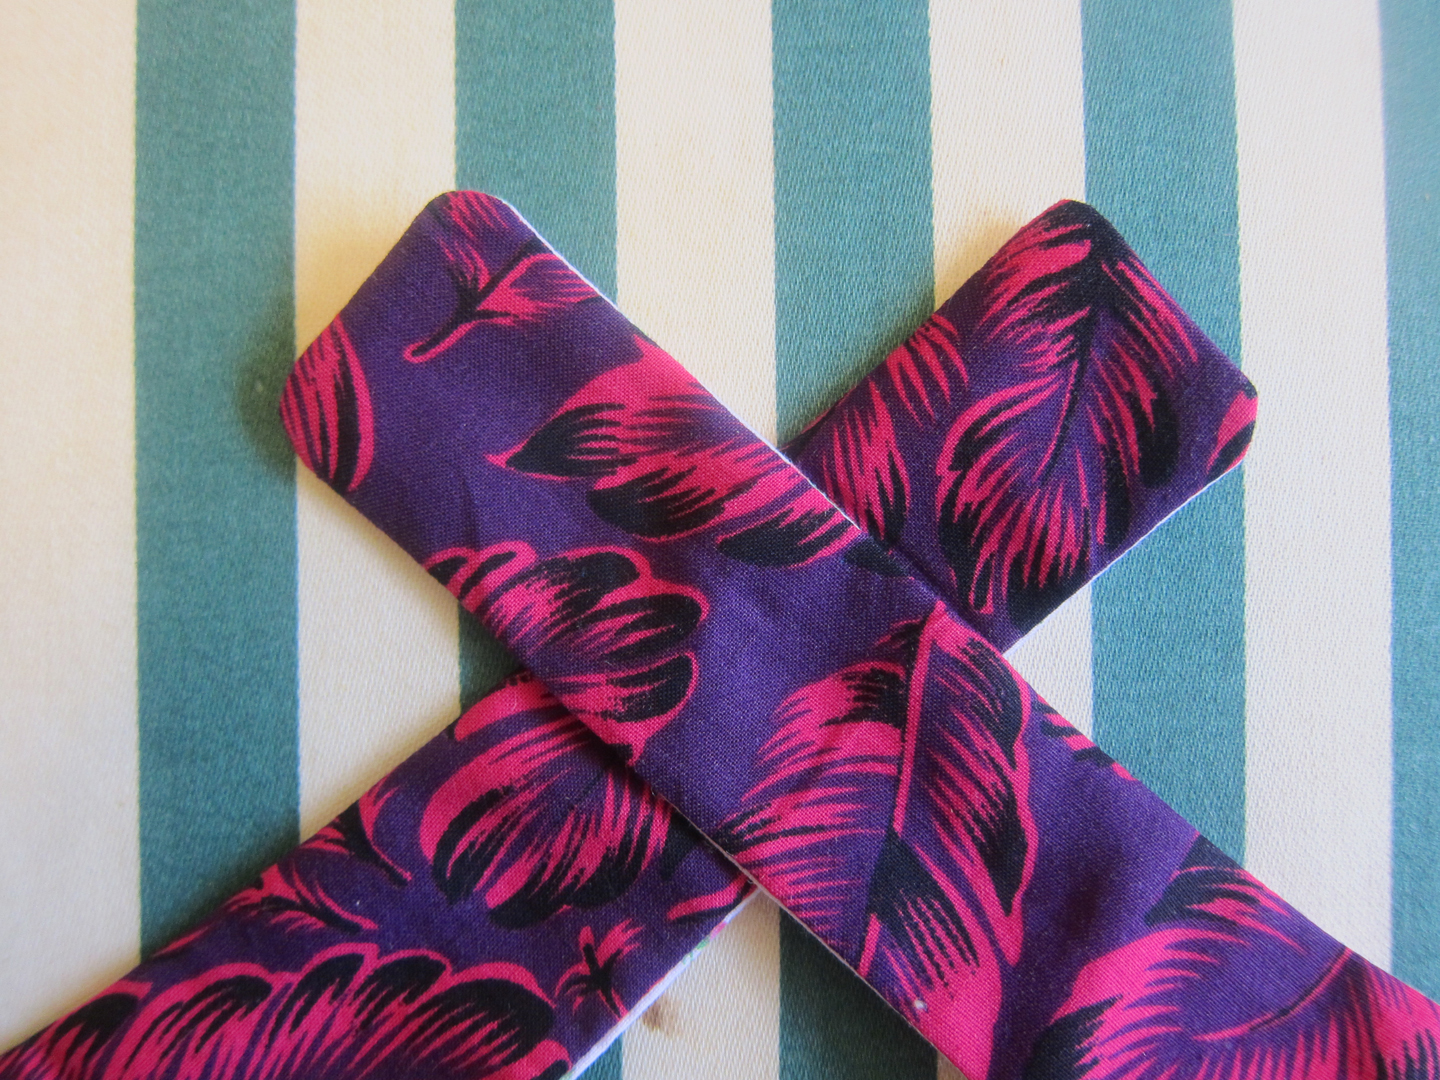
9. Turn the bag right-side out and use a chopstick to push out the handles. Stuff the lining down into the outer fabric. It should now look somewhat like a bag but with the bottom unfinished. Iron the whole bag flat.
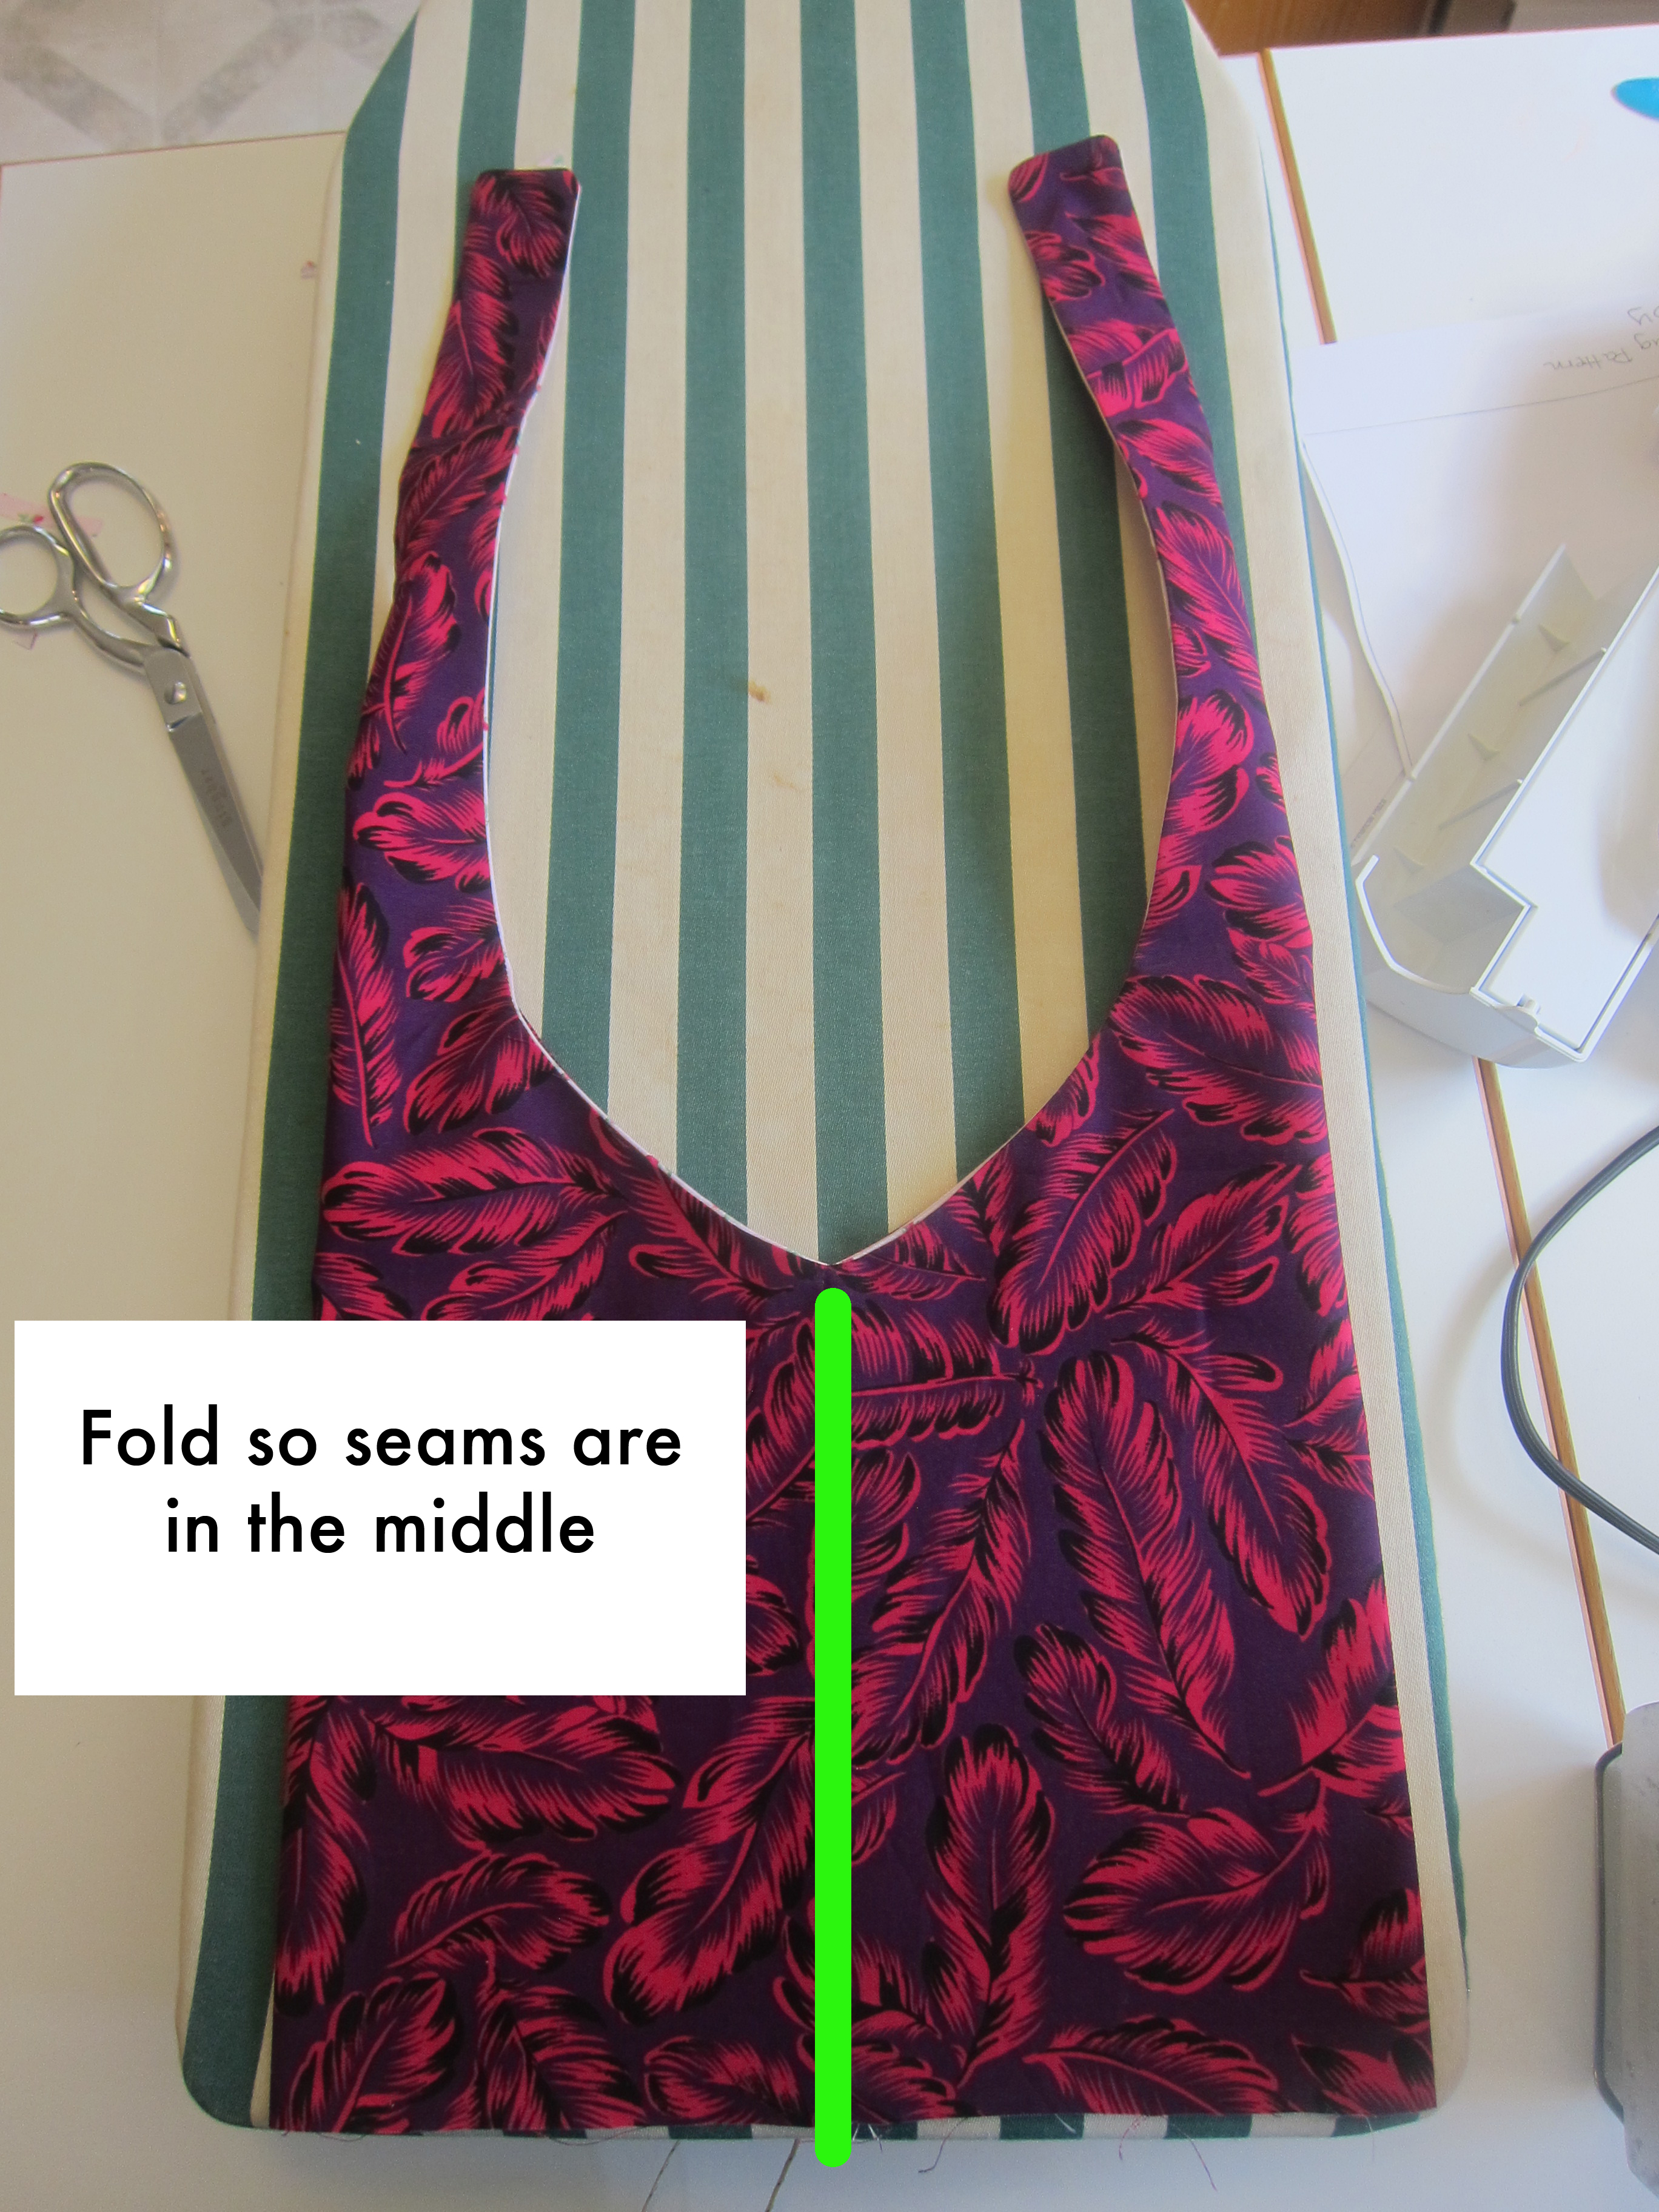
10. Lay the bag flat so the side seams are now in the middle. Make sure these seams line up on the bottom and then iron the bag flat.
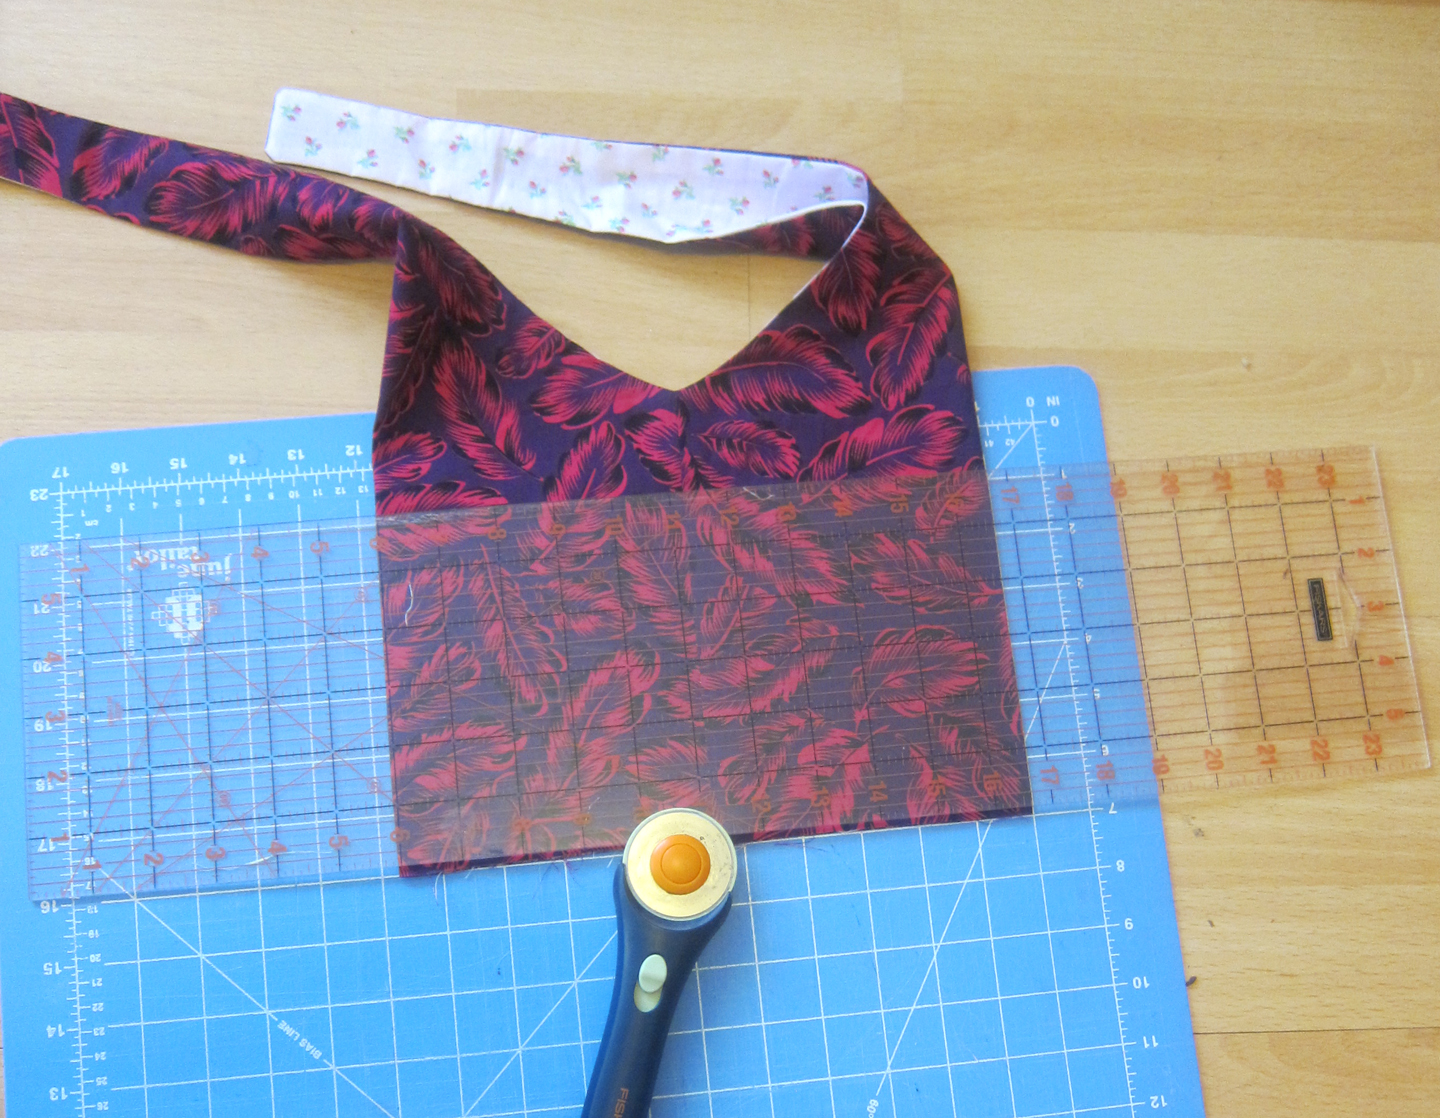
11. Using a rotary blade, cut the bottom edges of the bag so it’s all even. Sometimes things just aren’t lined up well and a good fresh cut will make it turn out better. This step is optional.
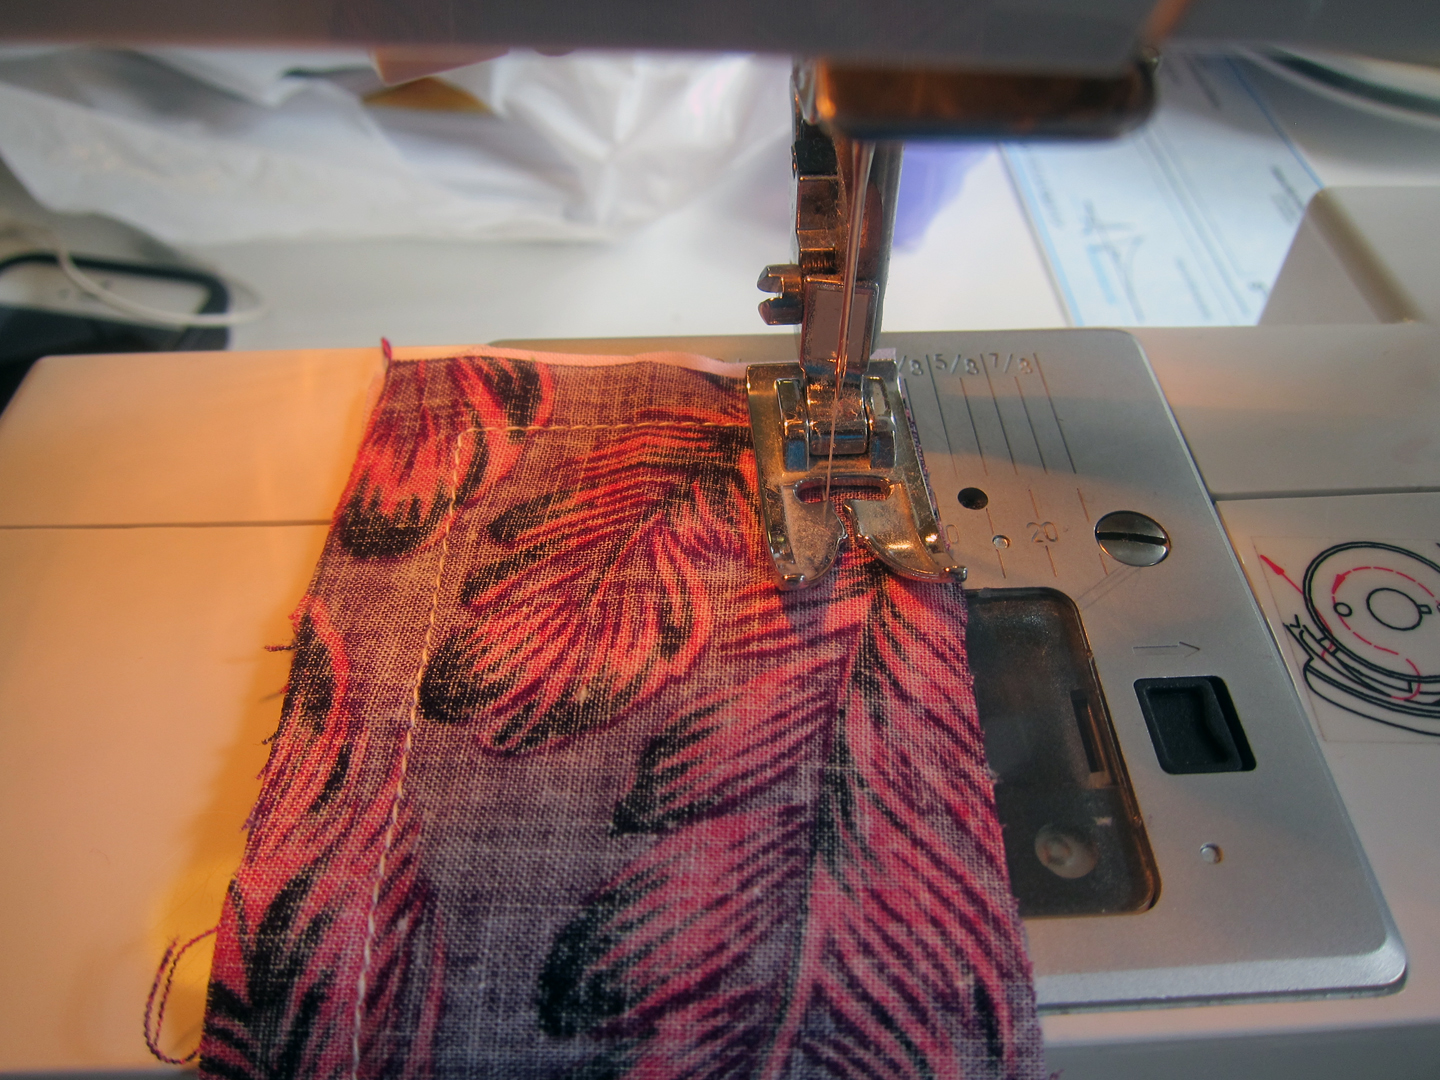
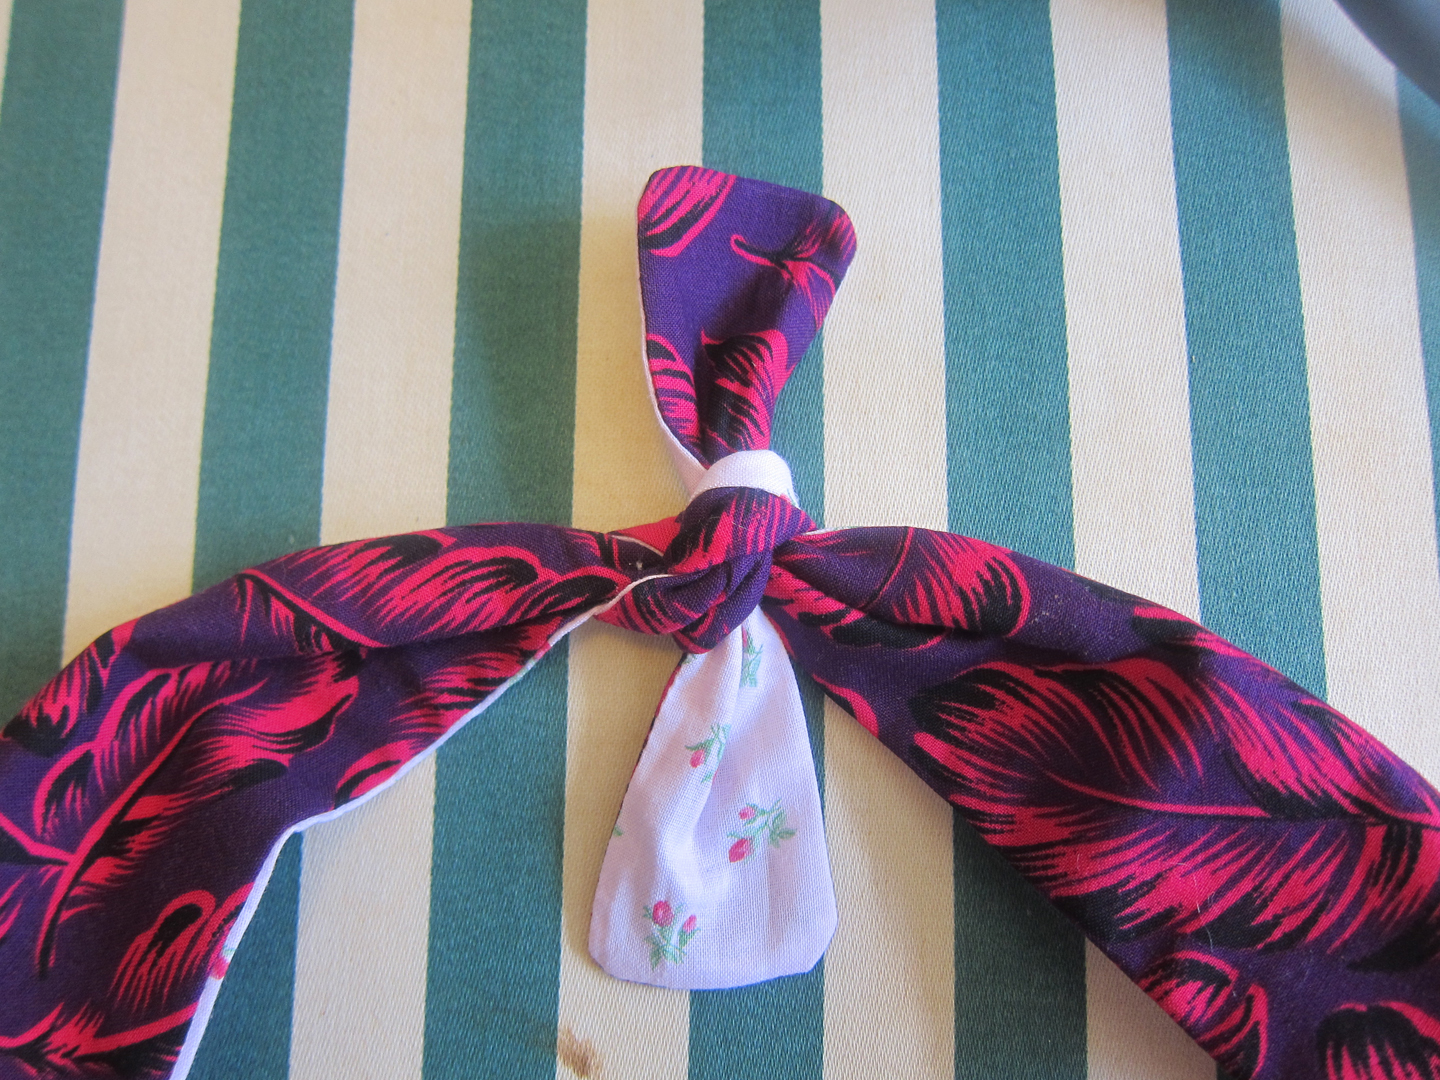
12. With the bag right-side out pin along the bottom edge, starting at the center seams so they line up on both sides. Sew along the edge with the shortest seam allowance possible.
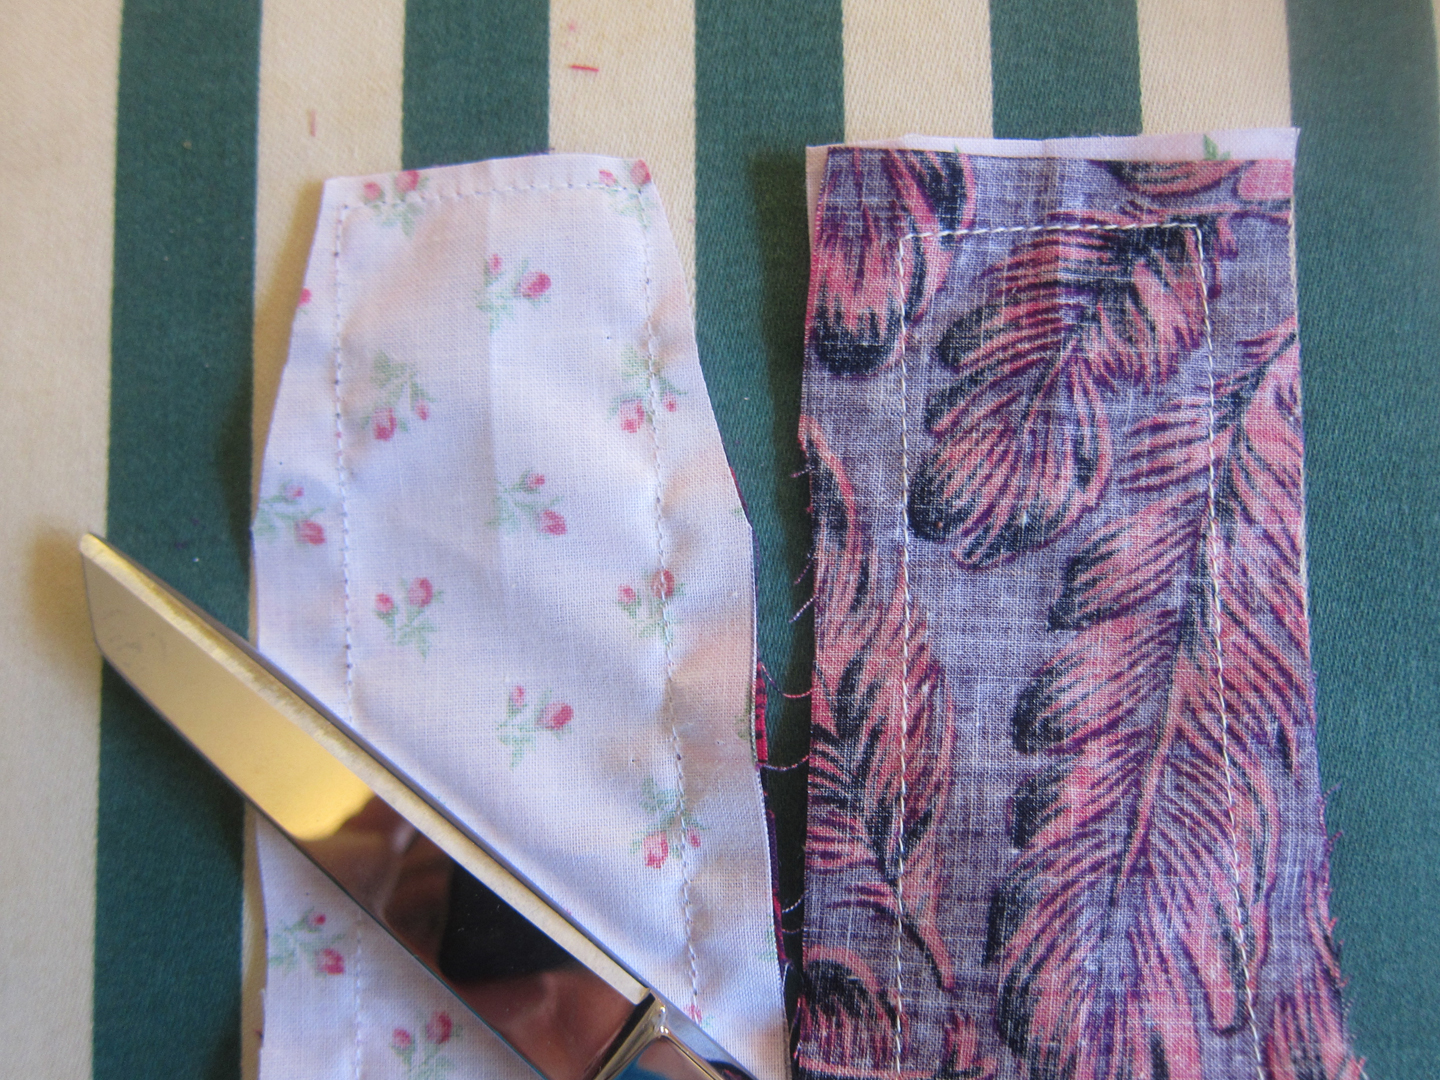
13. Trim closely along this seam and turn inside out.
14. Pin the now sewn shut bottom edge again and sew a new seam with 1/4-inch seam allowance. You have now created a French seam. Hurrah!
15. Turn your bag right-side out and iron one more time.
Last year my knitting friend Lina asked if I would design the flowers for her wedding. When she described the colors she wanted there was no way I could say no. She envisioned a wild, rainbow bouquet.
I created a slightly unkempt bouquet of peonies (from her own garden), Japanese asters, mini sunflowers, green trick dianthus, bupleurum, gerber daisies, spray roses, wild daisies, wild grass cattails and wild yarrow.
Lina had saved pussy willow branches from the spring, which I used on the boutonnières.
The groom’s boutonnière mimics the bridal bouquet with a small band of lace wrapped around the fuchsia stem.
Billy balls are the perfect accompaniment to fuchsia spray roses and iridescent fuchsia ribbon gave everything a polished look with great pops of color.
Because the bride selected so many types of flowers I was left with an excess of product. I decided to make flower crowns for her daughter and niece who were flower girls. My mother models it here.
Marigolds and pale pink rosebuds from my garden were a necessary addition to the garlands.
I had yet even more product, including a full peony (no way I was wasting that!) so I created a draping arrangement in an antique orange vase, which I left on the dining table in the wedding party’s bed and breakfast.
Pink, fuchsia, orange, green, purple and yellow — a magical array of color for a perfect summer day.
Congratulations, Lina and Bill!
I was lucky to find pale pink yarrow growing wild in field by my local grocery store.
Yesterday I had the pleasure of guest posting on GretchenLovesAnchorage about thrift store fashion shopping in Anchorage. It was refreshing to post something a little different from what I normally write and it brought back memories of working as the features editor for The Northern Light.
In case you missed it, here’s my thrift store advice. And for those non-Anchorage residents, you still might learn a thing or two about how to dress to the nines without spending the tens — of thousands…ok, I am done trying to be clever. Enjoy! And if you have a chance, take a look around Gretchen’s blog. It’s happy, insightful and hopefully will make you want to come visit our fabulous city.
I have been thrift store shopping in Anchorage since I was 12 when I bought my very first Kurt Cobain-style flannel shirt at Value Village on Boniface (the Dimond location was Fabricland and Nerland’s furniture store). Since then I’ve furnished my dorm room, first apartment and current home in second-hand décor. I have also created a fun, colorful wardrobe that I can say I’m pretty proud of.
So let me delve into the Anchorage thrift store scene and give you some tips and tricks of the thrifty trade.
Recently my friend, Karen, asked me to be her “thrifty style adviser.” She wanted a little more pizzazz in her wardrobe without spending a lot of cash. I accepted the challenge, but gave her a few ground rules.
First, you have to be persistent and diligent. You can’t expect to waltz into a secondhand shop and immediately flick to the perfect, most amazing item you’ve ever seen in your life. You have to trudge through a whole lot of, well, crap. People often literally donate trash to thrift stores. I’ve spoken with former Salvation Army employees who have told me they toss a majority of donated items because they aren’t suitable to sell. Be prepared to visit thrift stores more than once and to dig, dig, dig to find the good stuff.
My other tip is to take fashion risks. Try on things you wouldn’t normally wear. You never know — that Las Vegas cat shirt might be the perfect level of ironic for you to pull it off.
Do some research. Analyze your closet inventory and figure out what articles of clothing you want or need. I always keep a mental list of items I’ve either worn out or really want. For instance, I NEEDED salmon-colored jeans and — ta-da! — I found some the other day for just $2. Also on my recent list was a pair of plain black heels. Mission accomplished when I found a brand-new pair of Sofft brand black patent leather pumps for $25 — a little pricey by my thrifty standards, but since they were originally $110 I felt it was worth it.
A great resource is Pinterest. I’ll often type in an article of clothing I already own and see what Polyvore experts have put together. From “black blazer” to “chevron maxi dress,” you can create a mental file of what to keep an eye out for.
My goal as a thrift store clothing shopper is to find good quality clothes that will complement my current wardrobe. Sometimes I go out on a limb and buy something wacky and wild just because I love the item. I don’t feel remorse when it doesn’t work out because I really didn’t spend much on it.
Now let’s get started. Anchorage thrift shops are not all alike. Some are great for furniture, others are better for clothing and some have really great dishes. Today I’ll discuss the good clothing stores in town.
Salvation Army — Northern Lights Blvd.
Anchorage has three Salvation Army thrift stores – on Dimond, Mountain View and the oldest location on Northern Lights Boulevard next to Crossbar. My mom used to take me to this store when I was just four years old (thrifting runs in the family).
This Salvation Army is great for most clothes. Target donates unsold items to the city’s Salvation Armies, so if you like Merona, Converse and Mossimo brands you can often find them here for $4-6 with the tags still attached. They are usually stored on their own racks.
Salvation Army has an endless supply of shirts.
Karen was looking for colorful tops and cute mini skirts so we split up and started flipping through the racks. The shick, shick, shick of hangers quickly passing by can be exhausting, but I made a game of it by holding up the most horrifying of frocks and joking that “this Victoria’s Secret top is so old it’s actually fashionable again.”
I found Karen a few pretty shirts, a lovely blue dress with pockets, and she came up with a floral skirt and some indigo straight-legged jeans. It’s off to the fitting room. Keep in mind that not all thrift stores offer such a luxury. Employees have told me it has to do with homeless people using them as public toilets. The Mountain View Salvation Army only has a full-length mirror, so be sure to wear a camisole and leggings if you want to see how things look on you.
I stood outside the fitting room as Karen broke a mild sweat.
“Nobody said you didn’t have to work for it,” she said as she tried on several unexpectedly frumpy shirts. True that, Karen; true that.
She came away with the blue dress, a striped mini skirt, a comfy Gap sweatshirt and jeans. I found a couple of pairs of perfect-fitting pants and red patent leather flats.
Karen models her Salvation Army finds; total cost, about $5:
Quick tip: check the rack of recently tried-on clothes. Often times people do the hard work of digging for you and don’t end up buying what they find. That’s where I discovered some awesome Vigoss pedal-pushers.
It was our lucky day because *almost* everything was 50 percent off, so we walked out with an armload for under $20.
S.P.C.A. Thrift Shop — Arctic and International
This gem is nestled in a strip mall on International Airport Rd. with Guido’s and Partycraft. Enjoy a saketini at The Dish and get your thrift on because the S.P.C.A. won’t disappoint. Psst! Here’s a secret: a beloved local consignment store often donates their unsold items to this place. I’ve found designer brands here for mere pennies. Plus, your purchases go toward helping animals so what isn’t there to like?
Most of the clothing follows a flat pricing list, save for a small rack up front with “fancy” clothes. The items on this rack range from $10-20. A few weeks ago I spotted a cashmere argyle sweater vest from J. Crew for $10. Pretty good deal!
Karen didn’t find much on our visit — just a Merona denim-colored skirt. But I found two Columbia brand skirts — with pockets — and an unusual sequined belt.
Full-body selfies are the worst!
Don’t forget to remind the cashier to give you a punch card if you spend more than $10. I don’t remember what happens when you fill it up, but it’s a perk nonetheless.
Value Village — Dimond or Boniface
The “Buy more, spend less” mantra isn’t always accurate and I hesitate to say that Value Village is a good thrift store. Often its knickknacks are grossly overpriced and they have a pathetic furniture selection. But they do stock an unbelievable number of jeans and tops at reasonable prices, which is why I’m including it on today’s list. Skip the dresses at VV because most of them are priced at $30, and that’s just crazy! Pricers here understand the value of a designer label and won’t hesitate to mark a Calvin Klein top with holes in it at $20. But most of the tops and jeans are about $7-10, which I can handle.
I went solo on this Value Village trip and came out with black cropped dress pants from Banana Republic for just $7.
Karen and I had a medium-good thrifting day. I had to remind her not to give up. Thrifting can be rewarding, especially when you find just what you’re looking for at a good price. She definitely bulked out her wardrobe with a dress, skirt, pants and shirts without spending more than $25. I call that a thrifting success!
What thrift stores do you visit to find great duds? How do you fill your clothing cravings without overspending?


