Category Archives: asian

Marinated Ramen Eggs

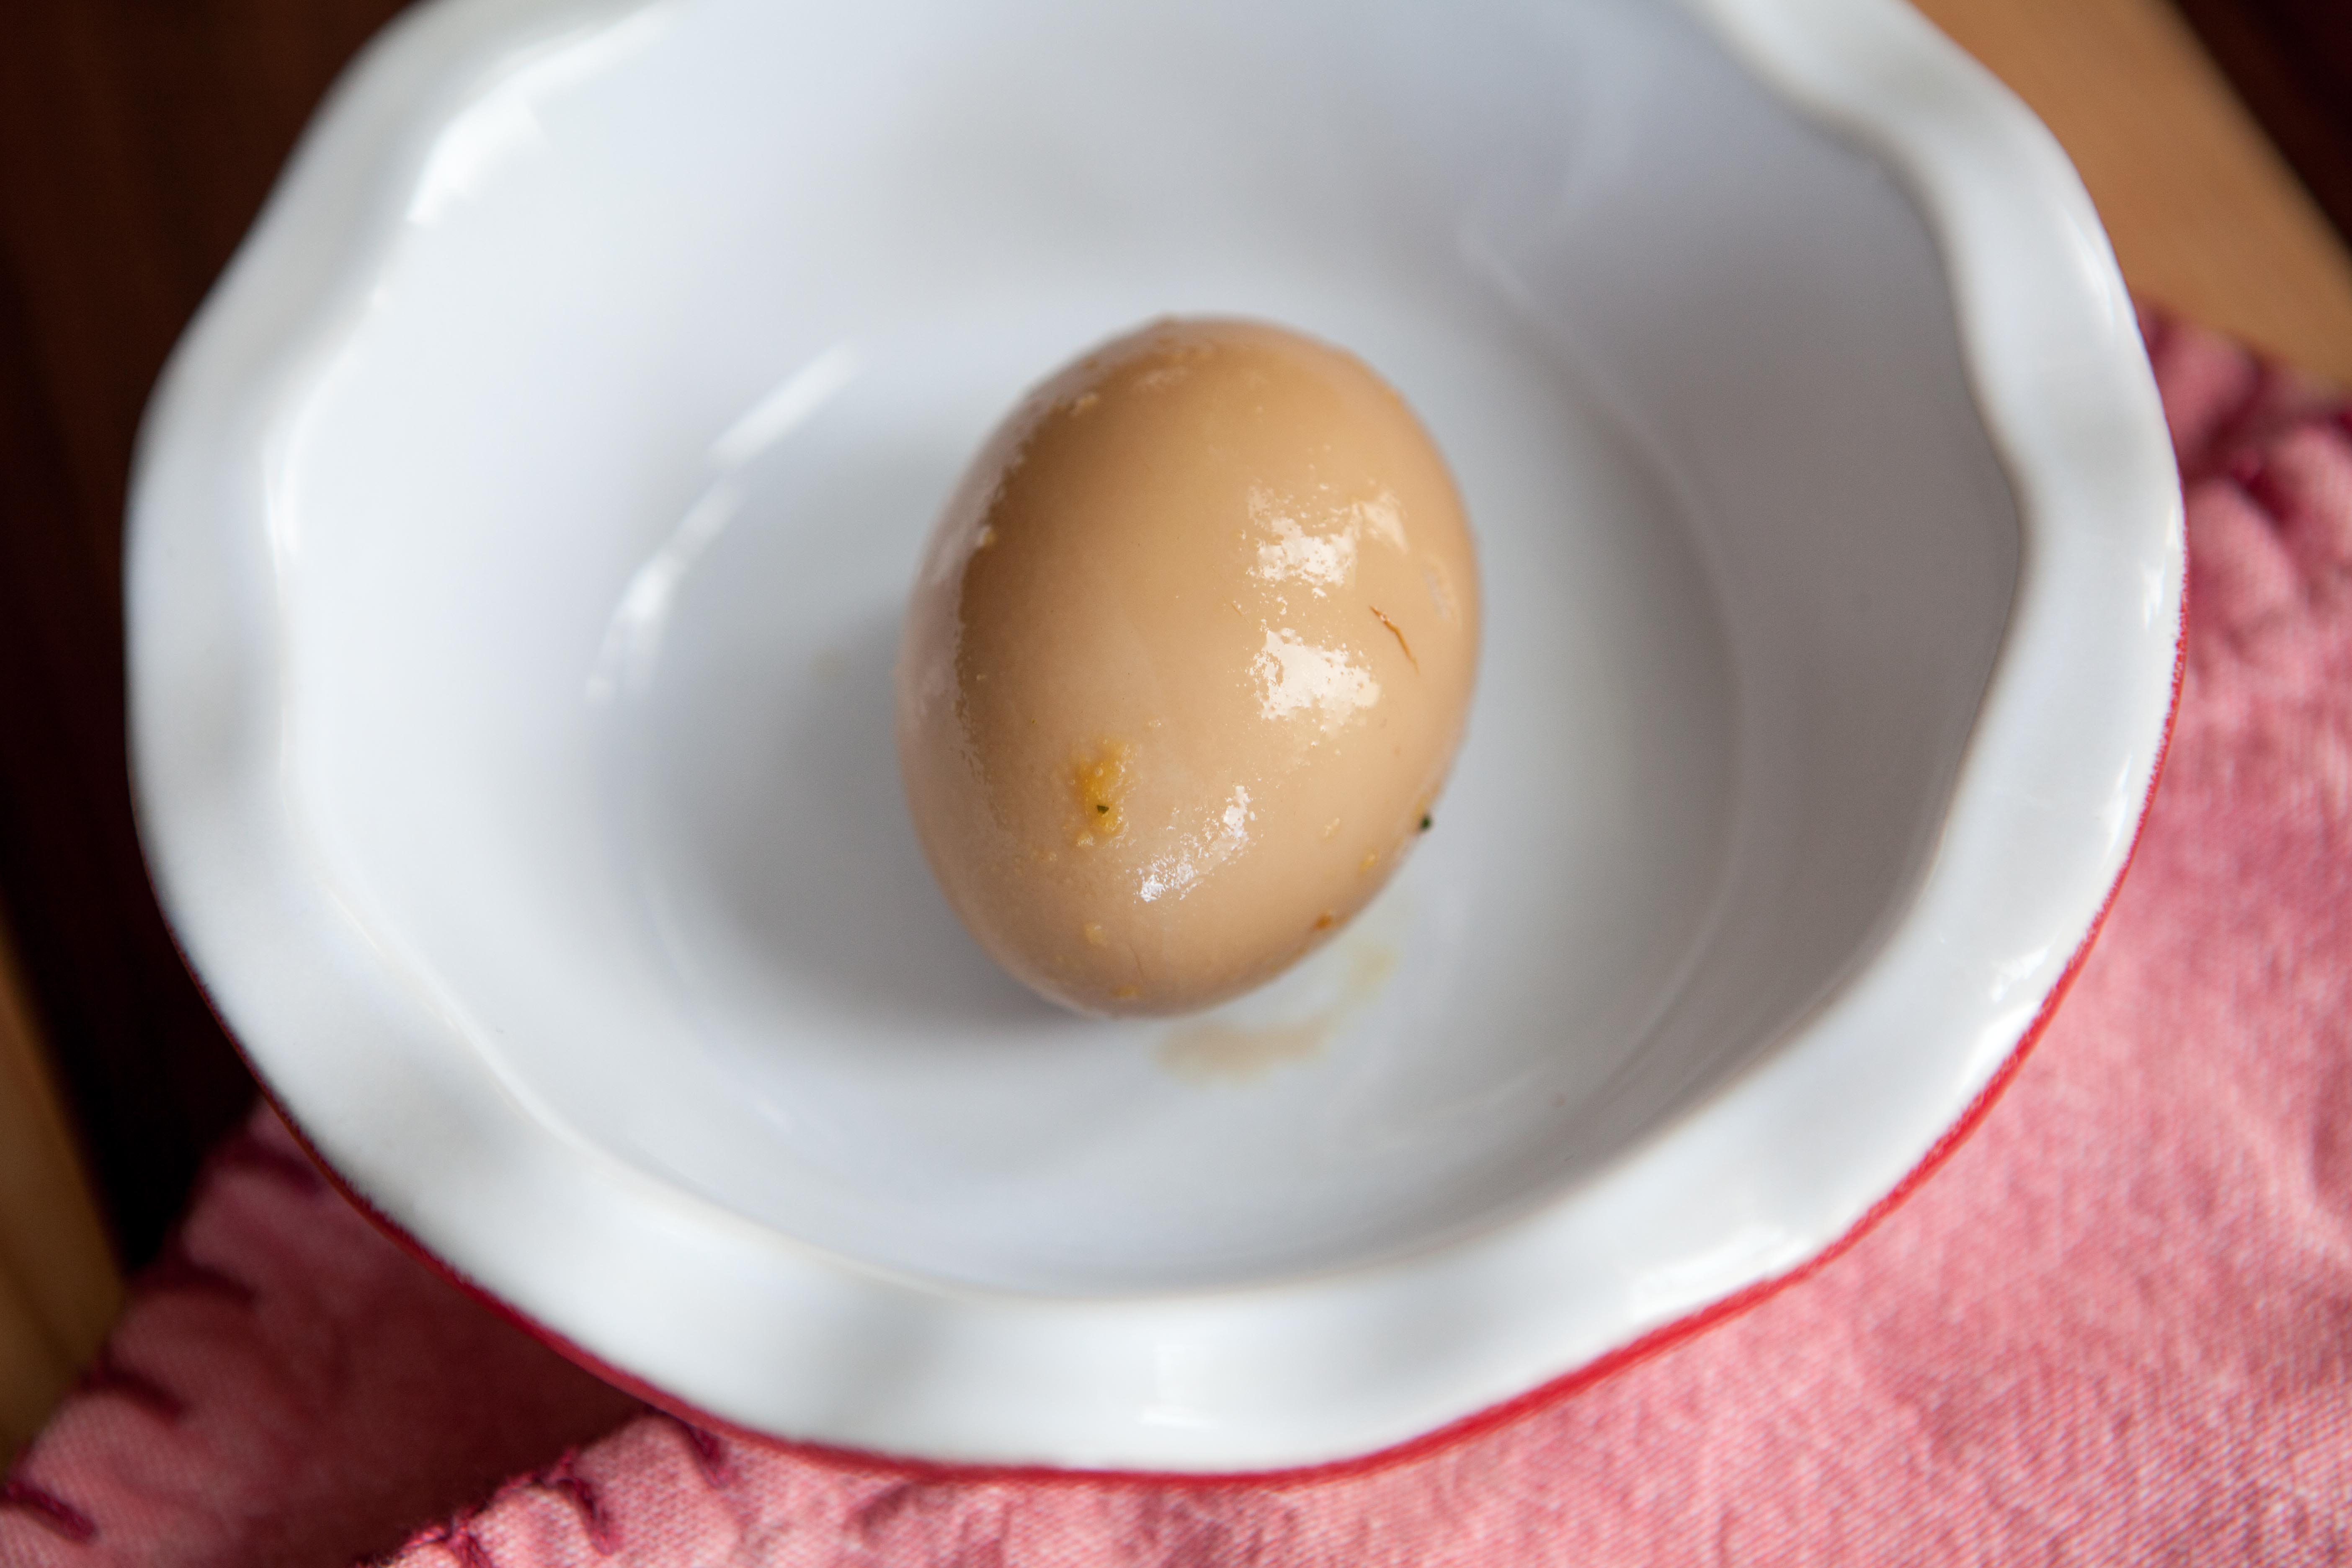
I am high-key obsessed with the jammy eggs that come in ramen. So much so, that I started making them on the regular and not even putting them in ramen. I’m just snacking on them. The simple marinade penetrates the white of the egg and infuses the whole egg with umami flavor.

Thanks to Uncle Roger for the tip on how to keep the floating egg parts submerged! You know when your eggs are properly marinated when they are brown all over and when you cut them open you can see the marinade has gotten inside the eggs.

Marinated Jammy Eggs for ramen or for snacking

Makes 4 eggs

Ingredients:

  • 4 eggs
  • 1/4 cup soy sauce
  • 1 tablespoon oyster sauce
  • 1 tablespoon rice vinegar
  • 1 tablespoon sake
  • 1 tablespoon mirin
  • 1 teaspoon Knorr chicken bouillon (optional, but this is the MSG part of the recipe)
  • 1 teaspoon sesame oil
  • 2 teaspoons miso paste

Directions:

Bring a medium pot of water to a boil. Gently lower in the eggs so they don’t crack and turn down the heat slightly so it’s not an aggressive boil. Boil for 6 minutes 45 seconds. This is my magic number to achieve not too runny and not too cooked eggs. If you like yours cooked more, boil them longer.

Drain and place eggs in an ice bath till cool. In the meantime, combine all the marinade ingredients in a mason jar and whisk well so the miso paste breaks up.

Peel the eggs and gently place them in the jar. Take a paper towel and place it on top of the eggs so it becomes saturated with the marinade. This will ensure that any parts of the egg that are floating will get marinated.

Place in the fridge overnight. Enjoy your eggs the next day or the day after. I don’t usually let them sit longer than two days (but they also don’t last that long).

Air Fried Salmon Sushi Cups

This fun appetizer has been popular among social media channels, and it’s no wonder. A Japanese-style barbecue glaze is drizzled over air fried salmon and rice cups and topped with spicy mayo – it’s creative and a real crowd pleaser!

Cook time: 40 minutes
Serves: 4 (two cups per person)

Marinade/glaze:

  • 1/4 cup mirin
  • 1/4 cup sake
  • 1/4 cup agave
  • 1/4 cup soy sauce
  • 2 teaspoons fish sauce

Spicy mayo:

  • 2 tablespoons mayonnaise
  • 1 teaspoon sriracha
  • 1 teaspoon rice vinegar
  • 1/4 teaspoon sugar

For the salmon cups:

  • 1 cup short grain sushi rice
  • 2 tablespoons unseasoned rice vinegar
  • 2 teaspoons sugar
  • 1/2 teaspoon salt
  • 1 pound wild Alaska salmon, skin removed, cut into small pieces
  • 2 nori sheets, cut into quarters
  • 2 teaspoons tempura flakes
  • 2 scallions, green parts only, chopped
  • Furikake, to serve

Tools:

  • Air fryer
  • 8 silicone muffin cups
  • Rice cooker

Directions:

Mix together the marinade/glaze ingredients. Reserve half of this mixture in a small saucepan. The other half pour into a sealable container along with the salmon. Place salmon in fridge and marinate for 15-30 minutes.

Combine the spicy mayo ingredients in a small bowl, cover, and place in fridge till ready to serve.

While salmon is marinating, cook the sushi rice according to package directions. When rice is cooked, mix in the rice vinegar, sugar and salt. 

Meanwhile, heat the remaining glaze over medium-high and simmer for 10 minutes until it’s the consistency of thin syrup. Set aside until ready to serve.

Drain the marinade from the salmon and preheat air fryer to 400F while you assemble the salmon cups. Place a piece of nori in your palm and add 1 tablespoon of rice to the center. Place the nori into a silicone muffin cup. Add one more tablespoon of rice and press down with the back of a wet spoon so there’s a small indent in the rice. Place 2 tablespoons of salmon pieces into the rice. Sprinkle some tempura flakes on top. Repeat with three more muffin cups and place all four into the air fryer. Cook for 5 minutes or until salmon begins to brown on top. Remove from air fryer and repeat with remaining 4 muffin cups.

Remove from muffin cups and place on a serving tray. Drizzle with 1 teaspoon of glaze, and top with a small dollop of spicy mayo, a sprinkle of chopped scallions, and a shake of furikake.

Miso Ramen

As autumn descends into what I call “waiting for winter” I crave cozy, warming meals. I’ve been trying out making my own ramen and I think I finally have it down.

As with most of my recipes, this is a flexible dish where you can interchange a lot of ingredients. Baby bok choy or baby spinach, ramen noodles or udon noodles, raw chicken or leftover rotisserie – do what you like, but what’s key is a good broth or stock. I recommend homemade bone stock, but if that’s out of your wheelhouse, Costco carries a “sipping bone broth” that’s remarkably rich and delicious.

Miso Ramen – a simple recipe

Serves 4

Ingredients:

  • 7 cups chicken stock
  • 3 scallions, 1 reserved for serving
  • 2-inch piece of ginger, unpeeled and sliced
  • 1 1/2 pounds boneless, skinless chicken thighs (or leftover rotisserie chicken)
  • 3 garlic cloves, smashed
  • 3 dried shiitake mushrooms
  • 1, 5-inch piece of kombu
  • 1 tablespoon black soy sauce
  • 1 tablespoon sake (optional)
  • 4 ounces sliced crimini mushrooms
  • Pinch of white pepper
  • Black pepper, to taste
  • 1/2 cup sweet white or yellow miso
  • 1 1/2 cups fresh or frozen corn (optional)
  • 4 eggs
  • 4 ounces chopped baby spinach
  • 1 1/2 pounds ramen or udon noodles
  • 1 brick firm tofu, drained and cubed
  • chili oil, for serving
  • furikake, for serving

IMG_2403

Directions:

In a medium pot, combine the stock, 2 whole scallions, ginger, chicken, garlic, shiitake, kombu, black soy sauce, sake, crimini mushrooms, white pepper and black pepper. Cover, bring to a boil, turn down heat and simmer for 20 minutes.

Remove the scallions, ginger, chicken, shiitake and kombu. Slice the shiitake mushrooms and reserve for serving. Shred the chicken and place it back in the pot. Discard the ginger, scallions and kombu. Add the miso and corn to the pot and continue to simmer while you prepare the eggs.

Bring a medium pot of water to boil and gently place four eggs into the water. Let boil for 6 minutes and 30 seconds. Using a slotted spoon, remove the eggs and run under cold water. Peel and set aside. Chop the remaining scallion and set aside. Add the spinach to the broth and continue simmering while the noodles cook.

Bring the water back to a boil and add the noodles. Boil them according to the package directions. Drain the noodles and rinse with cold water to keep them from overcooking.

Divide the cubed tofu and noodles into four ramen bowls. Fill each bowl with broth, being sure to get some good chicken and crimini bits into each bowl. Carefully cut each egg in half and place two halves in each bowl. Divide the sliced shiitake mushrooms into each bowl. Sprinkle each bowl with the chopped scallion and furikake. Top with chili oil to taste. Serve immediately.

IMG_2402


Delicious Homemade Pad Thai

I am trying to work through my pantry. This evening I called out ingredients to my family and when I got to “rice stick noodle” my husband suggested Pad Thai. In my experience, Pad Thai at home is this sticky, icky mess that doesn’t remotely resemble the Thai restaurant staple.

I decided to give it another go. I started researching recipes on Pinterest. One claimed to taste just like the real thing but contained ketchup. Another suggested peanut butter, and I finally decided on the most un-Pinteresty looking recipe from SouvenirFinder.com. Heck yes I want my pad Thai to taste like Bankok street food!

The first go around I didn’t have tamarind concentrate. So I improvised and used peanut butter instead. I was delightfully surprised. I didn’t end up with a sticky ball of noodles that was overly sweet. It was a balanced dish with lots of flavor. Second time around my father gifted me a jar of tamarind concentrate and the recipe was even better – I even had time to snap some photos before inhaling it.

Delicious and easy homemade Pad Thai | a recipe from Alaskaknitnat.com

Simple homemade pad Thai

Serves 3-4

For the sauce:

  • 2 oz. brown sugar
  • 1/4 cup chicken stock
  • 1/4 cup fish sauce
  • 2 tablespoons tamarind concentrate (sub peanut butter)
  • squeeze of lime
  • 1-2 tablespoons Sriracha sauce (or more to taste)

For the stir fry:

  • 8 ounces Thai rice stick noodles
  • 1/2 pound chicken breasts, sliced thin (you could add tofu and shrimp as well, just don’t marinate them)
  • 2 tablespoons cooking oil
  • 1/2 onion, sliced very thin
  • 3 baby bell peppers, sliced very thin
  • 1 clove garlic, minced
  • 1/3 cup chicken stock
  • 3 green onions
  • 1 cup fresh bean sprouts
  • 2 eggs, lightly beaten
  • 1/4 cup chopped roasted peanuts
  • cilantro, for serving
  • lime wedges, for serving

Directions:

Fill a large bowl with very hot water and soak the noodles for 20 minutes. Drain in a colander and set aside. They should be pliable but not soft – way less than al dente. Don’t worry, they soften up when you put them in the pan later.

Meanwhile, mix together the ingredients for the sauce in a medium bowl. Add the chicken and marinate until noodles are done.

Remove chicken, squeezing out sauce, and pat dry with paper towels. You’ll be using the remaining marinade as the sauce so if you’re worried about salmonella, just heat the sauce in a small pan until boiling and set aside.

Heat a wok or large frying pan with 1 tablespoon oil until smoking. Add half the chicken and leave undisturbed for a couple of minutes until nice and browned. Flip chicken pieces and brown on the other side. Set aside. Repeat with remaining chicken.

Add another tablespoon of oil. When pan is hot again, add the onions and baby bell peppers. Cook until softened, about three minutes, scraping up any browned bits as you stir. Add the garlic and cook until fragrant, about 30 seconds.

Add the noodles and chicken stock and stir frequently until noodles are softened, about three minutes.

Push noodles to the side of the pan and add the egg. Let it set and stir until firm and browned. Add the green onions, sauce, chicken and sprouts and mix thoroughly. There might be some sticking to the bottom of the pan, but that’s ok, it’ll still be super yummy.

Serve in bowls and top with a good squeeze of lime, some chopped peanuts and fresh cilantro.

Delicious and easy homemade Pad Thai | a recipe from Alaskaknitnat.com

Cold Sesame Ginger Noodle Salad

Last Saturday my husband and I decided to spend date night shopping around Costco, which was surprisingly mellow at 6 p.m. I came across a package of millet and brown rice ramen noodles that looked like it might fulfill my never-ending craving for pasta while not being totally unhealthy.

I came up with this cold noodle salad that is perfect for a weekday lunch.

Cold Asian Noodle Salad | A simple weekday lunch from Alaskaknitnat.com

Cold Asian Noodle Salad

Ingredients:

  • 2 bricks of millet and brown rice ramen (or regular cheap ramen would do fine, just toss out the spice packet)
  • 6 mini bell peppers, julienned
  • 3 green onions, chopped fine
  • 3 tablespoons chopped cilantro
  • 1/2 cup diced English cucumber

For the dressing:

  • 1/3 cup rice wine vinegar
  • 1/4 cup soy sauce
  • 1 tablespoon toasted sesame oil
  • 1 teaspoon grated ginger
  • 1 garlic clove, minced
  • freshly ground pepper to taste

Directions:

Boil the noodles according the package directions. In the meantime, whisk together the dressing ingredients in a small bowl or jar.

Drain the noodles and rinse with cold water to stop them from cooking. Toss noodles, bell peppers, green onion, cilantro and cucumber in a mixing bowl. Pour dressing over the noodles and toss well. Serve right away or refrigerate until lunch time.

Cold Asian Noodle Salad | A simple weekday lunch from Alaskaknitnat.com

Thai hot pot soup with shrimp & pork dumplings

It was blustery out yesterday and after picking rose petals in the afternoon to make rose syrup, we went up to my folks’ place for dinner. My dad had prepared what he calls “hot pot soup” the day before and had it sitting in the fridge overnight. The broth was so rich, it looked like murky Jell-o. That’s how you know it’s good.

My dad was lamenting that he’d put the pork in too early and although the broth was extremely flavorful, the meat itself was rather tasteless. I suggested I make some Chinese-style wontons filled with shrimp and pork. The two dishes combined splendidly and we were left patting our bellies and snacking on mushrooms from the near-empty pot.

Thai hot pot soup with shrimp & pork wontons | a delicious fusion recipe from Alaskaknitnat.com

Fusion Thai Hot Pot/Chinese Pork Dim Sum Soup

Serves 4

Continue reading Thai hot pot soup with shrimp & pork dumplings

30-Minute Fried Rice

I recently got a full-time job. This means I come home at 5:15 and if my husband and I want some non-kid, sane time I have 45 minutes to get dinner on the table before we start our son’s bedtime routine.

This is not a lot of prep time, I’ve discovered. It takes all my strength to make something nutritious and non-mac & cheesy.

I am realizing that I need to strategize. I can’t expect to chop veggies, thaw chicken, marinate steak, or do all the other simple, yet time-consuming preparatory steps required to make tasty food.

Here’s the first of hopefully many recipes where you can come home from work, make the food, and then spend some quality time with your family, such as watching “Bob’s Burgers” (that’s what we are currently doing).

30-minute fried rice | this simple, flavorful dish can be made in no time with a little prep work the night before. Recipe from Alaskaknitnat.com
Photo Credit: Cal ! via Compfight cc

30-minute fried rice

Serves 4-6

To make delicious fried rice you really need to start with cold, cooked rice. That’s hard to do when you want to cook a meal in 30 minutes. But if you make the rice the night before while you’re binge-watching “The Voice,” and stick it in the fridge, you’re good to go the next day.

Ingredients:

  • 2 cups uncooked rice, prepared and refrigerated overnight
  • 2 boneless, skinless chicken breasts, removed from freezer the night before and placed in the fridge (I forgot to do this so we went without today)
  • vegetable oil
  • 3 eggs, lightly beaten
  • 2 cups frozen vegetable medley (whatever medley you prefer)
  • 4 tablespoons softened butter
  • 2 cloves garlic, minced
  • 1/2 an onion, diced
  • 2 tablespoons chicken stock or water
  • 1 tablespoon toasted sesame oil
  • 3 green onions, chopped finely
  • 3 tablespoons soy sauce
  • pepper to taste

Directions:

Slice the chicken into bite-sized pieces. Season with salt and pepper and set aside. Combine the butter and garlic in a bowl. Set aside. Heat a large skillet over high heat. Lightly coat the pan with vegetable oil.

Pour the eggs in the pan and let set for a minute before stirring vigorously. Set eggs aside. Wipe pan clean and add a little more oil. Toss in the chicken and sauté till cooked through. Set aside.

Add the chicken stock, veggies and onion to the pan. Sauté until veggies are cooked through. Add the sesame oil and 1 tablespoon of the garlic butter. Start crumbling the rice into the pan with your hands, about a cup at a time. Add a little more butter between handfuls. Add the green onions.

When butter and rice are incorporated in the pan, stir in the eggs and chicken. Add the soy sauce and cook until rice gets a little crispy if you like. Add pepper to taste.

Store the leftovers for lunch or cook up some ham or Spam and have breakfast fried rice.

30-minute fried rice | this simple, flavorful dish can be made in no time with a little prep work the night before. Recipe from Alaskaknitnat.com
Photo Credit: shainelee via Compfight cc

Perfect Beef Stir Fry — A Free Recipe

For years I’ve struggled with stir fry. It seems easy enough: chop meat and veggies, fry them up in a hot pan, toss with sauce and serve over rice or noodles. I could do the veggie part right, but the meat always turned out pale and chewy. I wanted that crispy beef you get at a restaurant that’s tender and flavorful.

I finally figured it out. It isn’t even hard. First, my kitchen stove isn’t hot enough. It can’t heat a wok like an industrial restaurant flame can. So right away I was set up to fail. My first step was to ditch the wok. My stove just can’t heat the bottom of a wok to a high enough heat. Instead I place a cast iron skillet in the oven and heat it to 500 degrees before putting it over a hot flame. This produces the hottest pan and will help with that caramelized sear I’m looking for on the meat.

Second, tenderize the meat. In the past I just sliced my beef thinly and tossed it into a pan. I find poking it all over with a fork or a meat stabber creates a more tender final product.

Third, don’t overcrowd the pan. Adding a large quantity of cold meat to a hot pan will lower the pan’s heat and it’ll take longer to reheat it. Cook your beef in two batches and the pan will stay hotter. Lastly, don’t move that meat! To achieve that perfect sear, toss in the beef and don’t stir it, shake it or flip it for a minute.

Here’s a recipe I came up with tonight, inspired by this recipe, and using what I had available in my kitchen. I hope you don’t feel intimidated by the number of ingredients. Most of them are staples in my kitchen. Use whatever veggies you like. That’s the great thing about stir fry. It’s customizable. Serve over noodles or rice, whichever you prefer. I happened to have udon noodles so that’s what I went with tonight.

The Best Beef Stir Fry | A Free Recipe from Alaska Knit Nat
suziedepingu via Compfight cc

Perfect Beef Stir Fry — A Free Recipe from Alaska Knit Nat

Ingredients (all of these measurements are estimated):

  • 1 pound of beef, I think we used New York strip steak
  • 1/2 pound udon noodles
  • 1 Tbs. corn starch
  • 2 Tbs. soy sauce
  • 2 tsp. vinegar
  • 3 tsp. sesame oil
  • 4 cloves garlic, smashed
  • salt and pepper
  • 1 Tbs. cooking sherry
  • 2 Tbs. oyster sauce
  • 1/4 cup chicken stock
  • 1/2 tsp. powdered ginger (I didn’t have any fresh)
  • 3 dried red chilis
  • 1/2 onion, thinly sliced
  • 2 bok choy heads, chopped into bite-sized pieces
  • 6 kale leaves, stems removed and torn
  • 1/2 tsp. sugar
  • cooking oil
  • 3 green onions, chopped

The Best Beef Stir Fry | A Free Recipe from Alaska Knit Nat
lauradeponte via Compfight cc

Directions:

Tenderize the beef with a meat stabber or a fork. Slice thinly across the grain. In a bowl combine soy sauce, vinegar, 2 cloves of garlic, 1 tsp. sesame oil, corn starch, salt and pepper. Add the sliced beef, coat in the mixture and set aside.

Place a cast iron skillet in a cold oven and set the temperature to 500 degrees. Set a large pot of water to boil. Cook noodles for nine minutes, rinse with cold water and set aside.

In the meantime, chop the onions and bok choy. Massage the kale for a minute. This helps it be more tender when cooked. In a medium bowl, combine the sherry, oyster sauce, chicken stock and ginger; set aside.

When oven reaches 500 degrees, remove the cast iron pan and place it over a high flame. Add some cooking oil, enough to coat the pan, and let it heat for a minute. Add half of the beef and spread it evenly on the pan. Now don’t move it! Let it sit and sear for one minute. Flip each piece, toss in the dried peppers and garlic and let it sit another minute. Place into the bowl with the sherry and oyster sauce. Add a little more oil to the skillet and let it reheat for a minute. Add the second batch of beef and cook the same way.

In the now empty pan, add a little more oil if needed and toss in the onions. Stir and let cook for a few minutes till onions begin to soften and brown slightly. Add the bok choy, kale and sugar; toss to coat in the oil. Add a splash of chicken stock and let the greens cook down for a few minutes, until tender. Add the beef mixture and green onions and toss well. Serve over the noodles.

The Best Beef Stir Fry | A Free Recipe from Alaska Knit Nat
Chung Chu via Compfight cc

Rainbow Stir Fry with Orange Garlic Sauce

I’ve been eating an awful lot of burgers lately. Not sure why, but I felt like a healthy dinner was in order. My two-year-old son and I decided on a veggie-packed stir fry. Today at the grocery store he helped me pick out many colors of the rainbow: red bell pepper, carrots, broccoli and purple cabbage. 

I never use a recipe when I make stir-fry sauce, so all of the following measurements are approximate. Feel free to substitute vegetables of your choice. This recipe seems to have a lot of ingredients, but most of them are staples in my cabinet so it wasn’t an expensive dish. You could also add beef or chicken, I just forgot to thaw out any meat for tonight.

Rainbow Vegetable Stir Fry | A quick, healthy dish from Alaska Knit Nat

Rainbow Stir Fry with Orange Garlic Sauce

Serves 4

Ingredients:

Coconut oil

1/2 red bell pepper, julienned

1/2 large carrot, julienned

1/2 cup fresh green beans

1 small head of broccoli, cut into small florets

1/4 of a small red cabbage, chopped

4 crimini mushrooms, sliced

1/2 onion, chopped

1 brick of firm tofu, cut into 1-inch cubes

3 green onions, chopped


For the sauce:

1/4 cup soy sauce

1/4 cup chicken stock

2 tsp. rice vinegar

1/2 tsp. agave nectar

2 Tbs. orange juice

1 Tbs. chili garlic sauce

1 tsp. powdered or freshly grated ginger

splash of fish sauce

splash of sesame oil

freshly ground pepper

1/2 tsp. corn starch

Rainbow Vegetable Stir Fry | A quick, healthy dish from Alaska Knit Nat

Directions:

I like to serve this over brown rice. I recommend Alton Brown’s technique, which takes an hour in the oven, so prepare your rice and then start on the stir fry when there’s about 30 minutes remaining.

Whisk together the sauce ingredients and set aside.

In a large frying pan or wok, add two tablespoons of coconut oil and crank up the heat to high. Add the tofu and don’t move it for one minute. This will create a nice brown crust. Gently turn tofu to brown the other sides and set it aside for later.

Add another tablespoon of coconut oil and reheat the pan. Add all of the veggies except the green onions and toss till well coated in the oil. Let the pan heat up again and add 1/4 cup of water or chicken stock. Cover and steam for about 7 minutes, until the broccoli and carrots are just tender. 

Pour in the sauce and coat the vegetables evenly. Add the green onions and tofu and gently toss. Serve over brown rice.

Wild Alaska Salmon Poke

If you live in Southcentral Alaska then you’re probably keenly aware it is sockeye salmon season. My husband is getting his hipwaders and dipnets all ready for the coming week where he will camp out on the shores of the Kenai River and make the most of the everlasting daylight by fishing into the wee hours of the night.

We still have some vacuum-packed filets in the freezer from last year so to make way for this year’s bounty we are trying to find creative ways to use it up. Sure, there’s nothing better than simple grilled salmon with a drizzle of lemon, but my dad started preparing poke out of the frozen filets that tops any store bought ahi poke.

Poke is a Hawaiian salad made of cubed sashimi such as ahi tuna, soy sauce, sesame oil, onions and hot chili sauce. It’s a bit like spicy tuna sushi without the rice and seaweed.

Wild Alaska Salmon Poke | Alaska Knit Nat

Here’s my dad’s recipe, which uses fresh-frozen sockeye, a.k.a. red, salmon. Keep in mind that the Food and Drug Administration recommends freezing fresh fish and thawing it before consuming it raw because this kills any parasites. This is how sushi-grade fish is prepared in America. The FDA also says cooking seafood is the safest way to consume it, so prepare poke at your own risk. If you are pregnant or are at risk for food-borne illness, then please be cautious about consuming fresh-frozen fish.

With that disclaimer out of the way, here’s my dad’s recipe!

Wild Alaska Salmon Poke

As featured on Anchorage Food Mosaic

makes about 4 cups

Wild Alaska Salmon Poke | Alaska Knit Nat

Ingredients:

2 pounds red salmon, previously frozen and thawed in the fridge overnight

1 bunch of green onions, finely chopped

1/2 cup finely chopped white onion

2 Tbs. Nori Komi Furikake rice seasoning (optional)

2 Tbs. soy sauce

3 Tbs. sesame oil

2 Tbs. chili garlic sauce

2 tsp. sugar

1 Tbs. sesame seeds

Wild Alaska Salmon Poke | Alaska Knit Nat

Wild Alaska Salmon Poke | Alaska Knit Nat

Wild Alaska Salmon Poke | Alaska Knit Nat

Directions:

Using a sharp filet knife, remove the skin from the salmon filets. If there are any pin bones, carefully remove them with needle nose pliers. Cut the salmon into bite-sized cubes.

Wild Alaska Salmon Poke | Alaska Knit Nat

Add all the ingredients in a medium bowl and mix thoroughly. If you are not using the rice seasoning, add salt to taste. If you like a little more kick, add an extra tablespoon of the chili garlic sauce.

Wild Alaska Salmon Poke | Alaska Knit Nat

Serve immediately or refrigerate for later. Serve with sesame or rice crackers.

For more tasty Alaska recipes, check out my dad’s website.