Cheery Winter Set Patterns

If you’re wanting to knit this pattern with a different needle size and different weight yarn, I am unable to adjust the pattern for you. This pattern is written for a specific needle size and yarn weight.
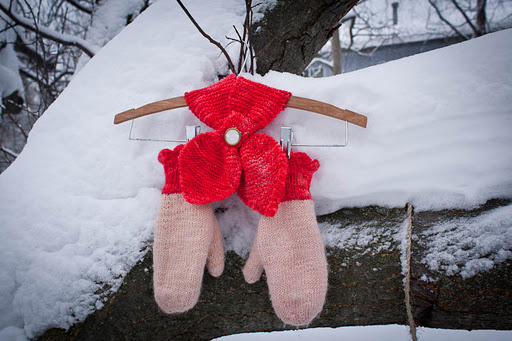
These items were made with heavy worsted hand-dyed single-ply yarn.
The hat is a simple pattern. Seventy-two stitches on size 9 circular needles. K1, P1 rib for six or so rows and knit in st st for 7 inches. Decrease as follows:
Place marker. *K2tog, K 6*, repeat to end of round
Knit one round
*K2tog, K5*, repeat to end of round
Knit one round
*K2tog, K4*, knit to end of round
Knit one round
*K2tog, K3*, repeat to end of round
Knit one round
*K2tog, K2*, knit to end of round
Knit one round
*K2tog, K1*, knit to end of round
*K2tog*, repeat to end of round
Draw loops together and weave in ends. Add awesome pom-pom.
Click here for the ascot pattern

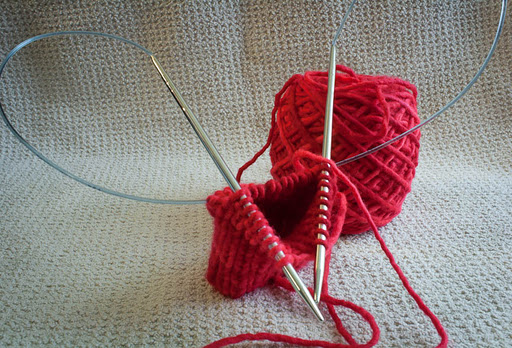
For the mittens I used the Magic Loop method of knitting. It really made the project go by fast. If you don’t have any really long size 7 circular needles, then just use double points. For the cuff, use size 5, but don’t forget to switch out. I had to undo half a mitten when I realized it was coming out smaller having forgotten to change to size 7.

CO 36 stitches on smaller needles. K1, P1 rib for 28 rows or until preferred length. M1 stitch four times evenly over the next row (40 st).
Change to bigger needles and other color if making bi-colored mitts. Knit 6 rounds even.
Thumb gusset:
Round 1: M1, K1, M1, knit to end of round
Round 2 and all even rounds: Knit
Round 3: M1, K3, M1, knit to end of round
Round 5: M1, K5, M1, knit to end of round
Round 7: M1, K7, M1, knit to end of round
Round 9: M1, K9, M1, knit to end of round
Round 11: M1, K11, M1, knit to end of round
Round 13: M1, K13, M1, knit to end of round
Knit 5 rounds
Thumb hole: Place the first 15 stitches onto a stitch holder or scrap piece of chunky yarn. CO one stitch and knit to end of round (40 st).
Knit in st st till the piece is 1/2 inch shorter than the top of your middle finger.
First decrease round: *K2, K2tog* repeat to end of round
K 2 rounds
Second decrease round: *K2tog, K1* repeat to end of round
K 1 round
Third decrease round: *K2tog*, repeat to end of round
Repeat the last round or you should have about 12 stitches.
Use the Kitchener stitch or just draw up the stitches and weave in ends.
For the thumb:
Place the 15 stitches onto two double points or on your long circular if doing magic loop.
Pick up and knit four stitches, knit to end of round.
On next round, decrease two stitches evenly.
Knit 4 rounds
Next round: K2tog, knit to end of round. You should have 16 stitches, but it’s ok if you don’t.
Knit in st st till it’s as long as your thumb.
Decrease round: *K2tog* till end of round. Draw up yarn and weave in all ends.

Now make one more so you have two mittens to warm both hands!

To make a lining:

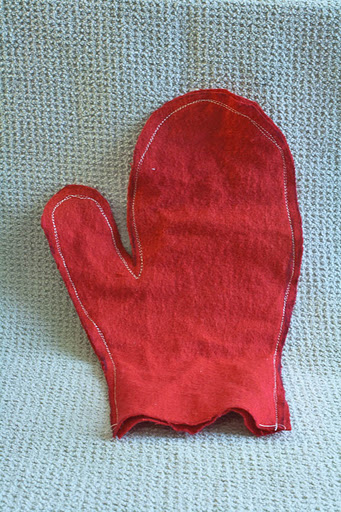
Trace the outline of the mitten to a pice of flannel doubled over. Add two inches to the tracing and cut out. Sew double seams all around the flannel mitten. You must make sure you can easily put on the flannel mitten, especially in the wrist area. I had to try a couple of times to get a good fit. Make two and hand sew into the mitten inside-out because that way the raw seams will not be on the inside of the lining.
New Mittens

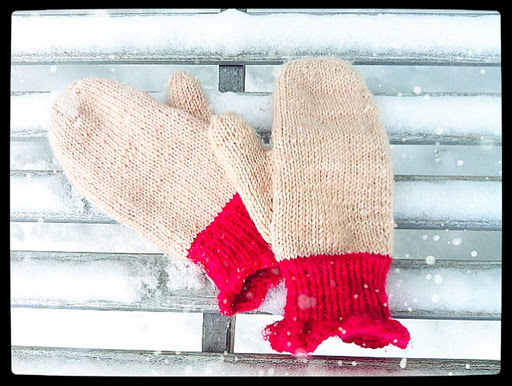
Last May I went to New York City and finally got to use the gift certificate my little sister got me for Christmas at Purl Soho, the cheeriest yarn shop ever. Since then I’ve been dying to use some of the yarn I bought there, so I finally decided to make some new mittens. These are made out of Manos de Uruguay yarn. I don’t know what brand the red is anymore, but the pink is actually called “cheek.”
I used my basic mitten pattern, but instead of drawing up the top of the mitten like I do a hat, I used the Kitchener stitch to make it seamless.
Then I added a crocheted ruffle trim, which was a first for me. Another first was I lined these mittens with red flannel. I’m glad it was fabric I acquired from a thrift store, because it took me several tries to make a lining that fit properly.
So now I have some delightful mittens to match my hat and ascot, which I will post photos of later.
Happy Thanksgiving and I’ll write from Mexico!
-Nat

Make Your Own Veggie Steamer

Steaming vegetables is one of the best preparation methods. It locks in nutrients and makes veggies as tasty as can be.

Every time I think of steaming my veggies I remember that I don’t have one of those steaming baskets. So I took matters into my own hands — tin foil to the rescue!

This takes just a couple of minutes to make and you can steam your veggies just as if you had a fancy steamer.

First, fill a saucepan with an inch of water.

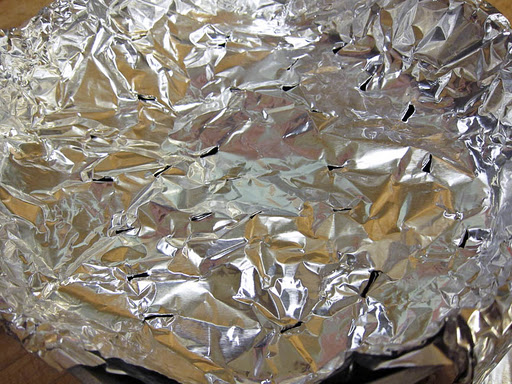
Take a long piece of tin foil and fold it in half. Fit it over the pot and push some of the foil into the pot so it creates a bit of a well. Crimp the foil all around the edge of the pot.

With a paring knife, cut several holes in the foil.

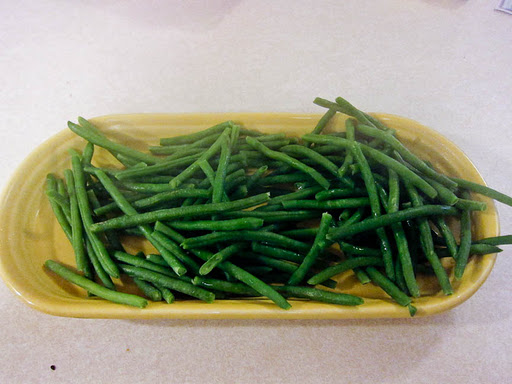
Add your vegetables (I used frozen green beans) and cover the pot.

Place over high heat and let the veggies steam for several minutes until they are tender.

Voila!

Greek Dolmades

One of my coworkers got married Friday and the food at the reception was superb. In addition to the several authentic Filipino dishes, there was a pita platter with those little Greek snacks wrapped in grape leaves. I’d never really been a fan in the past, but maybe it’s the pregnancy, I ate about ten of them at the reception.

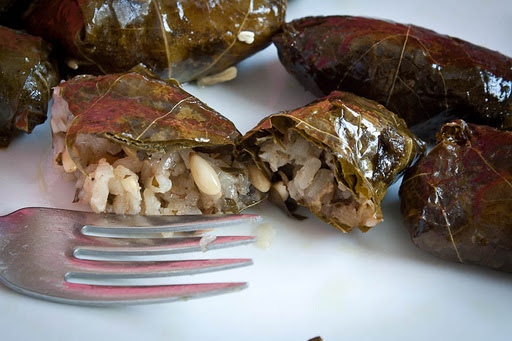
I woke up early for a Sunday and all I could think about was making my very own yummy Greek snacks wrapped in grape leaves. After about 10 seconds of research, I discovered they are called dolmas, or dolmades. I found several recipes that sounded good. I settled on a combination of two recipes. I used the methods of this recipe, and the ingredients from this recipe, slightly altered.

It took me three grocery stores to find all the ingredients. The grape leaves were in the section with the jars of roasted red peppers. I was going to use dried mint because fresh mint is really pricey up here in Alaska, but one grocery store didn’t have it and another one wanted to charge more than $7.00 for a spice jar. Forget about that! I went with fresh.

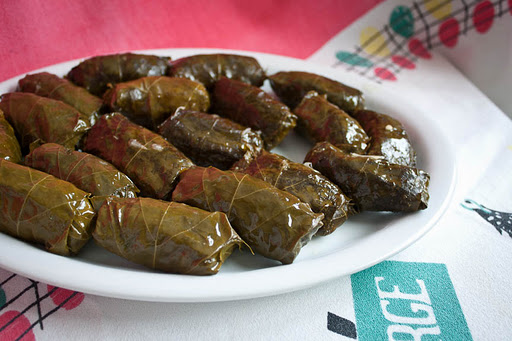
Here’s a step-by-step guide to making this delicious snack that could be a meal if you’re pregnant and starving.

Ingredients:

1 onion, grated
1 tsp. lemon zest
1 cup of raw white rice
1/2 cup olive oil, divided
2+ cups water, divided
1/2 cup golden raisins, chopped
1/2 pine nuts
1/2 finely chopped fresh parsley
1/4 cup finely chopped fresh mint
1 tsp. salt
pepper to taste
several dashes of allspice, to taste
1/2 tsp. cinnamon, or to taste
1/2 tsp. freshly grated nutmeg
2 lemons, juiced and sliced (slice them after juicing)
1, 8-oz. jar grape leaves, drained and rinsed

To prep grape leaves:
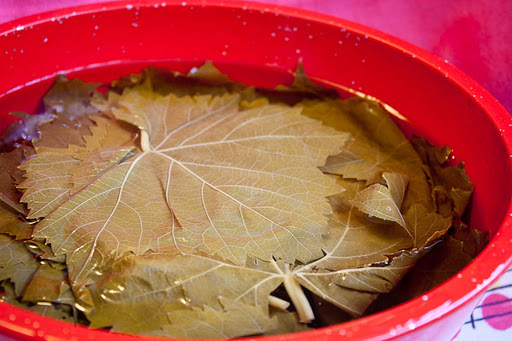
Bring a large pot of water to a boil. Lay the grape leaves flat and set into the pot. Cover and return to a boil, then turn off the heat and let the pot sit for ten minutes. Drain and set the leaves in a bowl of cold water until you’re ready to fill them.

Directions for filling:
Heat a large saute pan with 1/4 cup of oil over medium-high heat. Add the onions and zest and cook, stirring once in a while, for 10 minutes. Add the rice, pine nuts and raisins and stir so that the rice is thoroughly coated in oil. Cook for 2 minutes then add 1 cup of water. Stir rice frequently and cook for 10 minutes so rice absorbs the water. If the water evaporates before this time is up, just add a bit more water.

Transfer mixture to a bowl and combine with the parsley, mint, salt, pepper, allspice, cinnamon and nutmeg. Taste mixture and make sure you like the flavor. Let it cool.

Take a dutch oven and place a plate inside of it. Cover the plate with grape leaves (use ones that are torn).

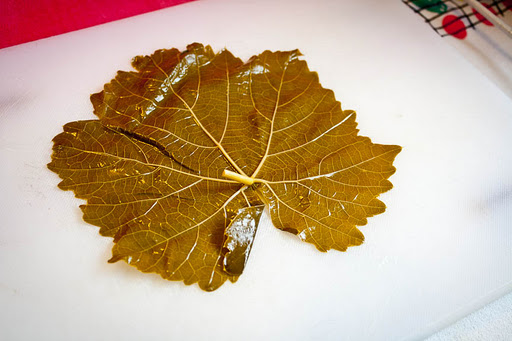
Now prepare the dolmades. Click on photos to enlarge.

Place leaf veiny side up

With a paring knife, cut away the stem

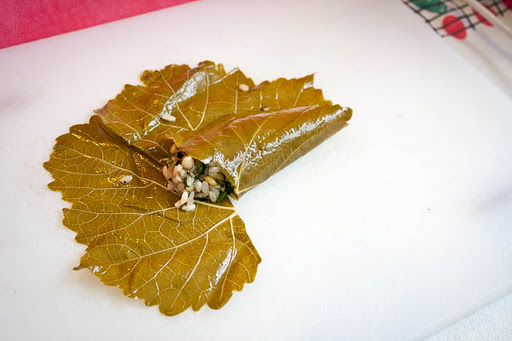
Add about 1 Tbs. filling and form it into a little sausage shape
Fold up the right corner of the leaf

Fold up the left corner

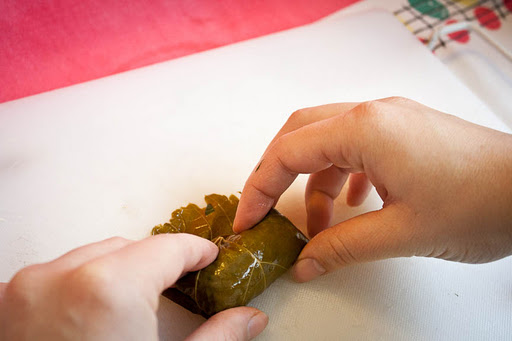
Fold in the sides

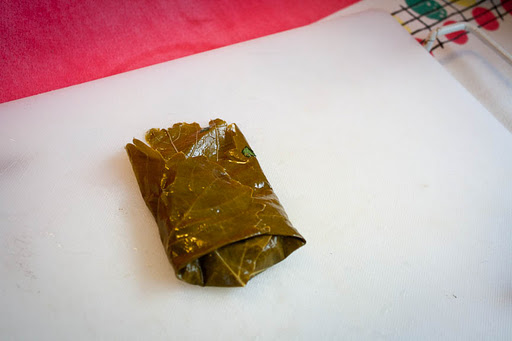
Now roll it up!

Place each finished dolma seam side down in the dutch oven so they are tightly packed in one layer. When you’ve filled the bottom of the pot cover the dolmades with a layer of grape leaves and start placing more finished dolmades on top. When you’ve used up all your filling or grape leaves or you don’t have any more room in your pot, pour 1/4 cup olive oil, 1 cup of water and the lemon juice over the dolmades. Fill the pot with more water until the water line goes halfway up the top layer of dolmades. Now fit the lemon slices all around, in between and on top of the dolmades.

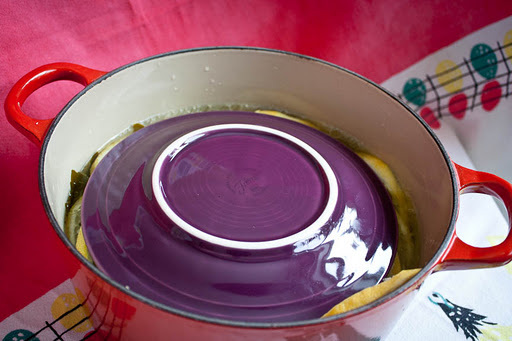
Place an upside-down plate on top of it all. If there’s room, place another plate right side up. You need to add weight so the dolmades don’t come undone while they are boiling.

Place the lid on your pot and bring it to a simmer. Turn heat to low and simmer for 40 minutes. Test one of your dolmades. If the rice isn’t cooked enough, simmer for another 10 minutes.

A Year and a Day

I’m not too much of a sentimental person when it comes to anniversaries. In fact, if I hadn’t been looking at my blog stats just now and seen that someone had looked at “Posting No. 1” I’d have no idea that I started this blog Nov. 6, 2010.

So…happy birthday Knit Nat!

So many good memories….

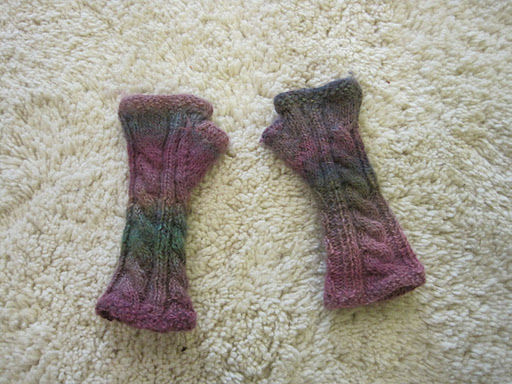
http://knitnatak.blogspot.com/2010/11/cabled-gauntlets.html

http://knitnatak.blogspot.com/2011/02/pink-champagne-cake.html

http://knitnatak.blogspot.com/2011/05/hubby-cook-breakfast-egg-cups.html

http://knitnatak.blogspot.com/2011/06/italian-cheeseburgers-with-homemade.html

http://knitnatak.blogspot.com/2011/04/baby-beckham-set.html

http://knitnatak.blogspot.com/2011/05/tea-wallet-photo-tutorial.html 

http://knitnatak.blogspot.com/2011/03/springtime-headband-with-tutorial.html

http://knitnatak.blogspot.com/2011/07/30-minute-craft-cute-pincushion.html 

http://knitnatak.blogspot.com/2011/03/homemade-granola.html

http://knitnatak.blogspot.com/2011/04/tokyo-tie-bag.html

http://knitnatak.blogspot.com/2011/04/snow-angel-scarf.html

Magic Loop

Dear Fellow Knitters,
If ever you find yourself knitting mittens, socks or booties, I highly recommend using the Magic Loop Method.

It eliminates unwieldy double pointed needles, knitting becomes quicker and you don’t have any pesky “ladders” as a result of improper tension between needles.

It takes some finesse to figure it out at first, but once you understand how to Magic Loop knit, it goes by quickly.

Here is a great video tutorial:

Now I’ve got to finish my second mitten. I already finished the first one I started this morning. Can’t wait to show y’all!

-Nat

Beautifying the Medicine Cabinet

I stayed up too late last night and I can never sleep past 9:30 a.m. This gives me lots of time to myself before my husband — who could sleep standing up if he had to — stumbles out of bed at around noon. So today I made up my mind to organize my medicine cabinet.

Yes, I’m aware of the lameness of this decision. But it wasn’t so lame, trust me!

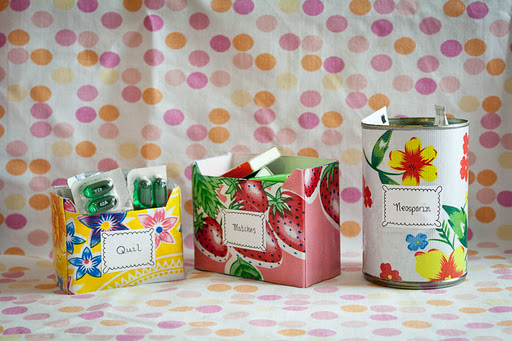
I took out all the little cartons of Alka-Seltzer and Day Quil and transformed them into bright, flowery containers fit for a magazine medicine cabinet.

Using Mexican oilcloth, scissors, scotch tape, paper, pen and glue I spent my afternoon turning something that people rarely see (unless they are poking around) into what is nearly unattainable — an organized space.

Useless garbage? I think not!
Ta-da!

Halloween Garland

My friend Rosey and I crafted out today. It was a beautiful not-quite-winter day. The afternoon sun dappled the kitchen table as we cut and pasted.

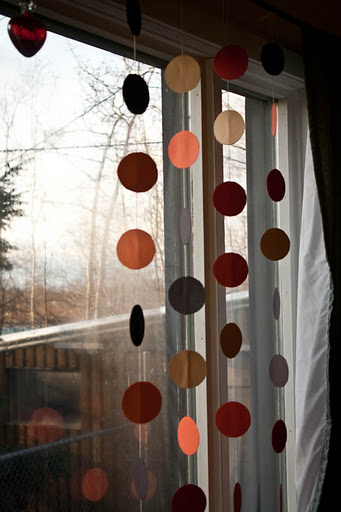
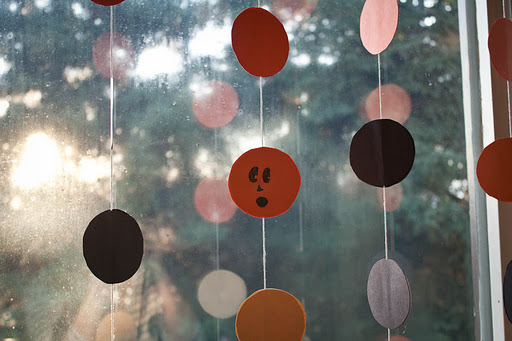
Rosey made a simple vertical garland with orange, black and tan construction paper. She traced around a tin can and cut out about 64 circles. She cut lengths of string and glued the string in between two circles and spaced them about two inches apart from one another.

Pretty spooky!

Crocheted Ugly Bunny

I love Ugly Dolls. They crack me up. Also, they are cuddly.

In my quest for easy crochet patterns I came across this brilliant pin cushion pattern on Craftster.org:

http://www.craftster.org/forum/index.php?topic=334739.0

This nutty bunny resembles Ugly Dolls and it looked relatively simple to create, so I got going. It only took a few hours to make and since I used a larger hook — J size — it turned out sort of stuffed animal sized. I opted for button eyes cause I thought he looked crazier that way.

Crocheted Baby Booties

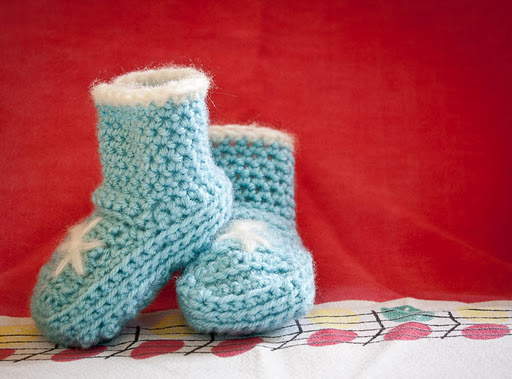
In the past I’ve not admired crocheted objects. They looked icky to me. But during the past couple of years crochet has grown on me. It’s easier and more gratifying than knitting when you’re making blankets. And recently I’ve discovered baby booties go by more quickly on a hook than with needles.

 
I have Lion Brand Yarn to thank for this bootie pattern. Reading crochet patterns isn’t easy when you’re a beginner, but I took it one step at a time and after two pairs of funny looking booties I finally made a pair that resembled something. 


I would not call it a baby bootie in the size I was successful at, but more of a small child’s slipper.
 
Either way, I thought they were cute and a little kitchy. They don’t have the elegance of a knitted bootie, but functionality outweighs elegance when it comes to clothing a baby.
 
This is really a great way to make a bootie. You create the sole first, then crochet around to make the vertical volume, then work across to make the front and you end with the cuff.
 
I’m unable to link the pattern — it just takes you to the main Lion Brand page, so I’ll paste the pattern below. Initially it required a lot of counting and I couldn’t figure out how to get the number of cuff stitches that pattern suggests you should have, but after a couple of tries I worked it out.
 
Also, I still haven’t really figured out hook size so I used a J hook and it turned out just fine.


BOOTIE (make 2)
Sole

Ch 5 (7, 9, 9).
Foundation Row: Sc in 2nd ch from hook and each ch across – 4 (6, 8, 8) sc.
Next 5 (6, 7, 9) Rows: Ch 1, turn, sc in each sc across.
Next Row: Ch 1, turn, 2 sc in first sc, sc in each sc to last sc, 2 sc in last sc – 6 (8, 10, 10) sc.
Next 4 (7, 10, 12) Rows: Ch 1, turn, sc in each sc across.
Place marker in last st worked. Move marker up as work progresses.
Sides
Rnd 1:
 Do not turn, work 10 (14, 18, 22) sc evenly spaced down side of sole; work 4 (6, 8, 8) sc along opposite side of foundation ch (this is the heel); work 10 (14, 18, 22) sc evenly spaced along other side of sole; work 6 (8, 10, 10) sc across to marker – 30 (42, 54, 62) sc.
Next 2 (3, 4, 5) Rnds: Working in front loops only, sc in each sc around.
Top of Foot
Note:
 When working top of foot, do not ch 1 at the beginning of rows.
Row 1: Sc in next 1 (1, 2, 2) sc, sl st in next sc, turn, sk sl st, working in front loops only, sc in next 6 (8, 10, 10) sc; working in both loops, sl st in next 2 sc; leave remaining sts unworked.
Next 4 (8, 12, 14) Rows: Turn, sk first 2 sl sts, working in front loops only, sc in next 6 (8, 10, 10) sc across top of foot; working in both loops, sl st in next 2 sc along side of Bootie.
Next Row: Turn, sk first 2 sl sts, working in front loops only, sc in next 6 (8, 10, 10) sc across top of foot; working in both loops, sl st in next sc along side of Bootie.
Cuff
Rnd 1:
 Turn, sk first sl st, working through both loops, sc in each sc around entire Bootie opening; do not join – 18 (22, 26, 30) sc.
Note: If you would like cuff to be a little tighter, when working Rnd 2, work 3 decreases evenly spaced around as follows: draw up a loop in each of next 2 sts, yarnover and draw through all 3 loops on hook.
Rnd 2: Sc in each sc around.
Rep last rnd until cuff measures 1 1/2 (2, 3, 4) in. (4 (5, 7.5, 10) cm). Fasten off.
FINISHING
Weave in ends.
 

Free knitting patterns, DIY crafts, easy recipes and more!