Every summer I look forward to the week of our wedding anniversary; and not because I’m a hopeless romantic — because it’s sockeye salmon season on the Kenai River.
My husband is never here to celebrate our anniversary during the second week of July because he’s dipnetting three hours away.
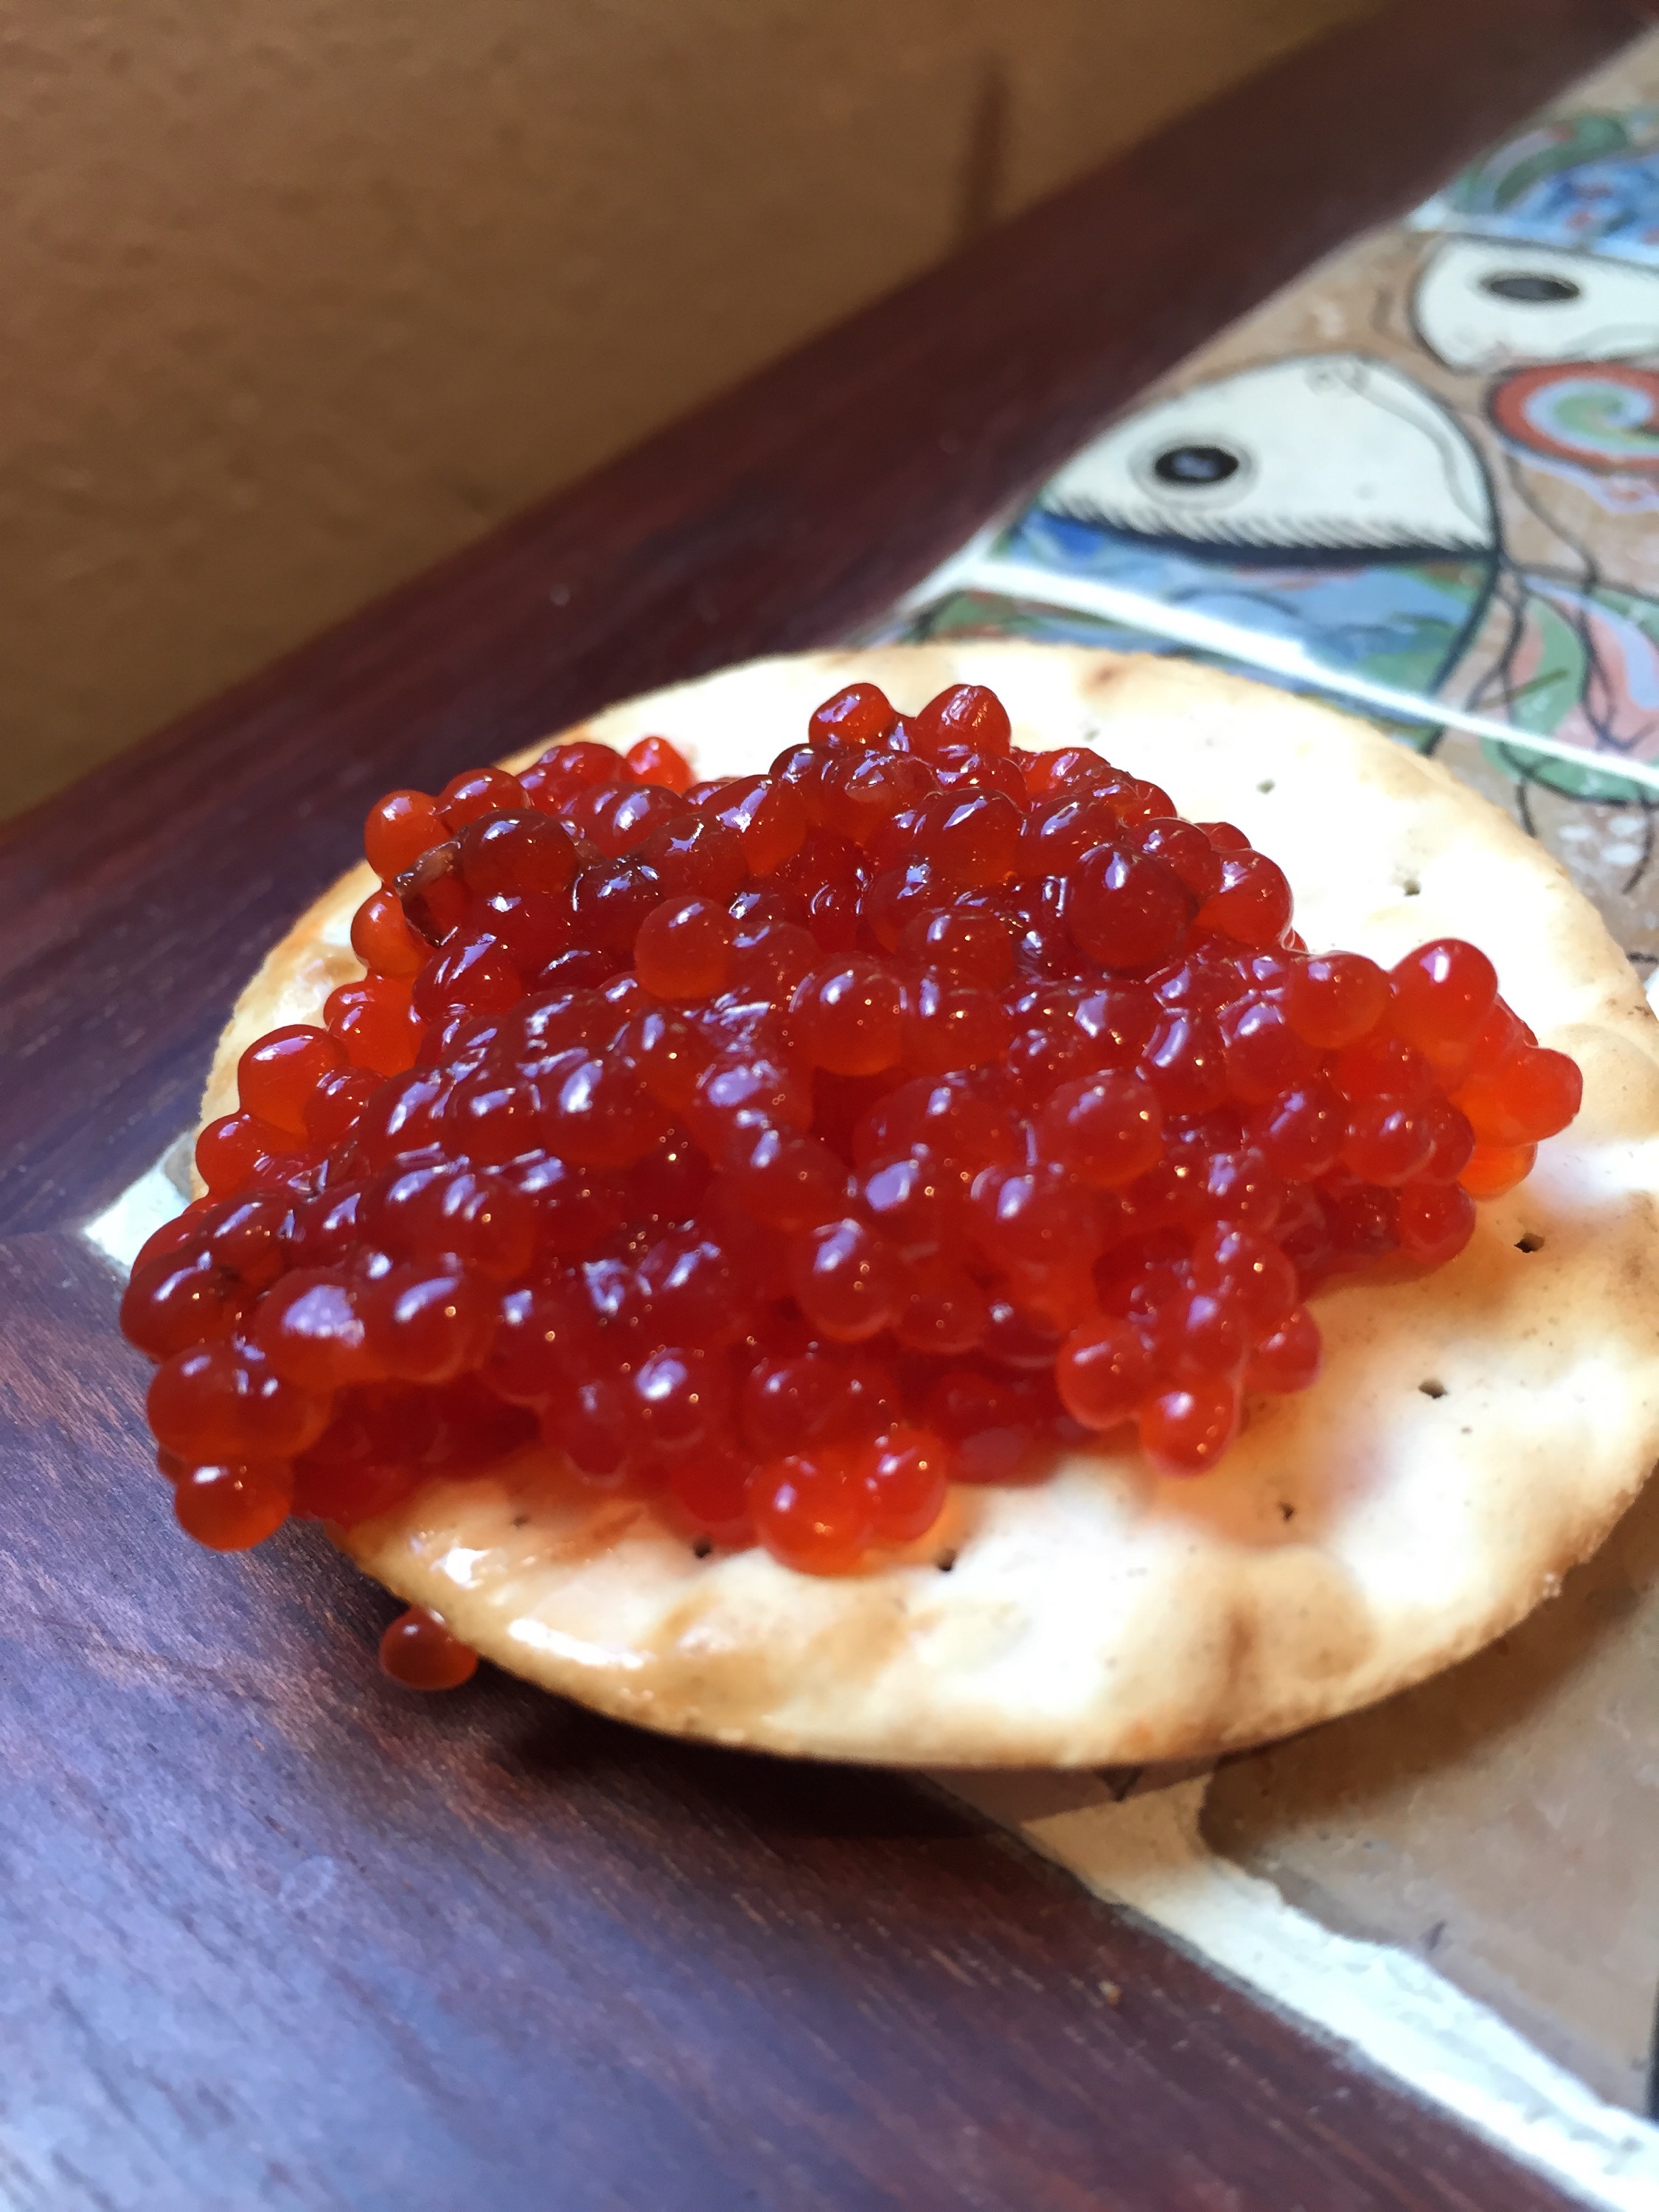
And although I love a good fresh grilled salmon steak (last night we grilled them over alder branches), it’s the roe that I crave. We usually brine the roe in a simple salt and water solution and serve them with crackers and white wine. You can read my post from last year about wild salmon caviar.
Today, though, a friend dutifully gave me his roe from the silver salmon he caught in Seward over the weekend. When I went to process them I realized they were too small and delicate. Pushing them through a metal grate was ruining them. I didn’t want to waste them so I thought outside the box. Or inside the box, rather, as my dad had just removed some red salmon lox from his smoker.
I found this incredibly simple recipe for smoked salmon roe and decided to give it a try. It turned out splendidly! A friend told me it tasted a bit like smoked oysters. I will definitely try it again, but I might rinse the eggs of their salt brine before smoking them as they are a bit on the salty side.
This recipe assumes that you know how to use a smoker. I only say this because my dad is the smoke master in my family and I haven’t learned to operate one. All I can say is we cold smoked the eggs since heat would ruin the texture altogether.
Make sure the roe is fresh, fresh, fresh. That means it’s either been in a freshly caught fish or if the fish was processed on the beach that the eggs were kept on ice the entire time for no more than two days.
Smoked Salmon Roe
Directions:
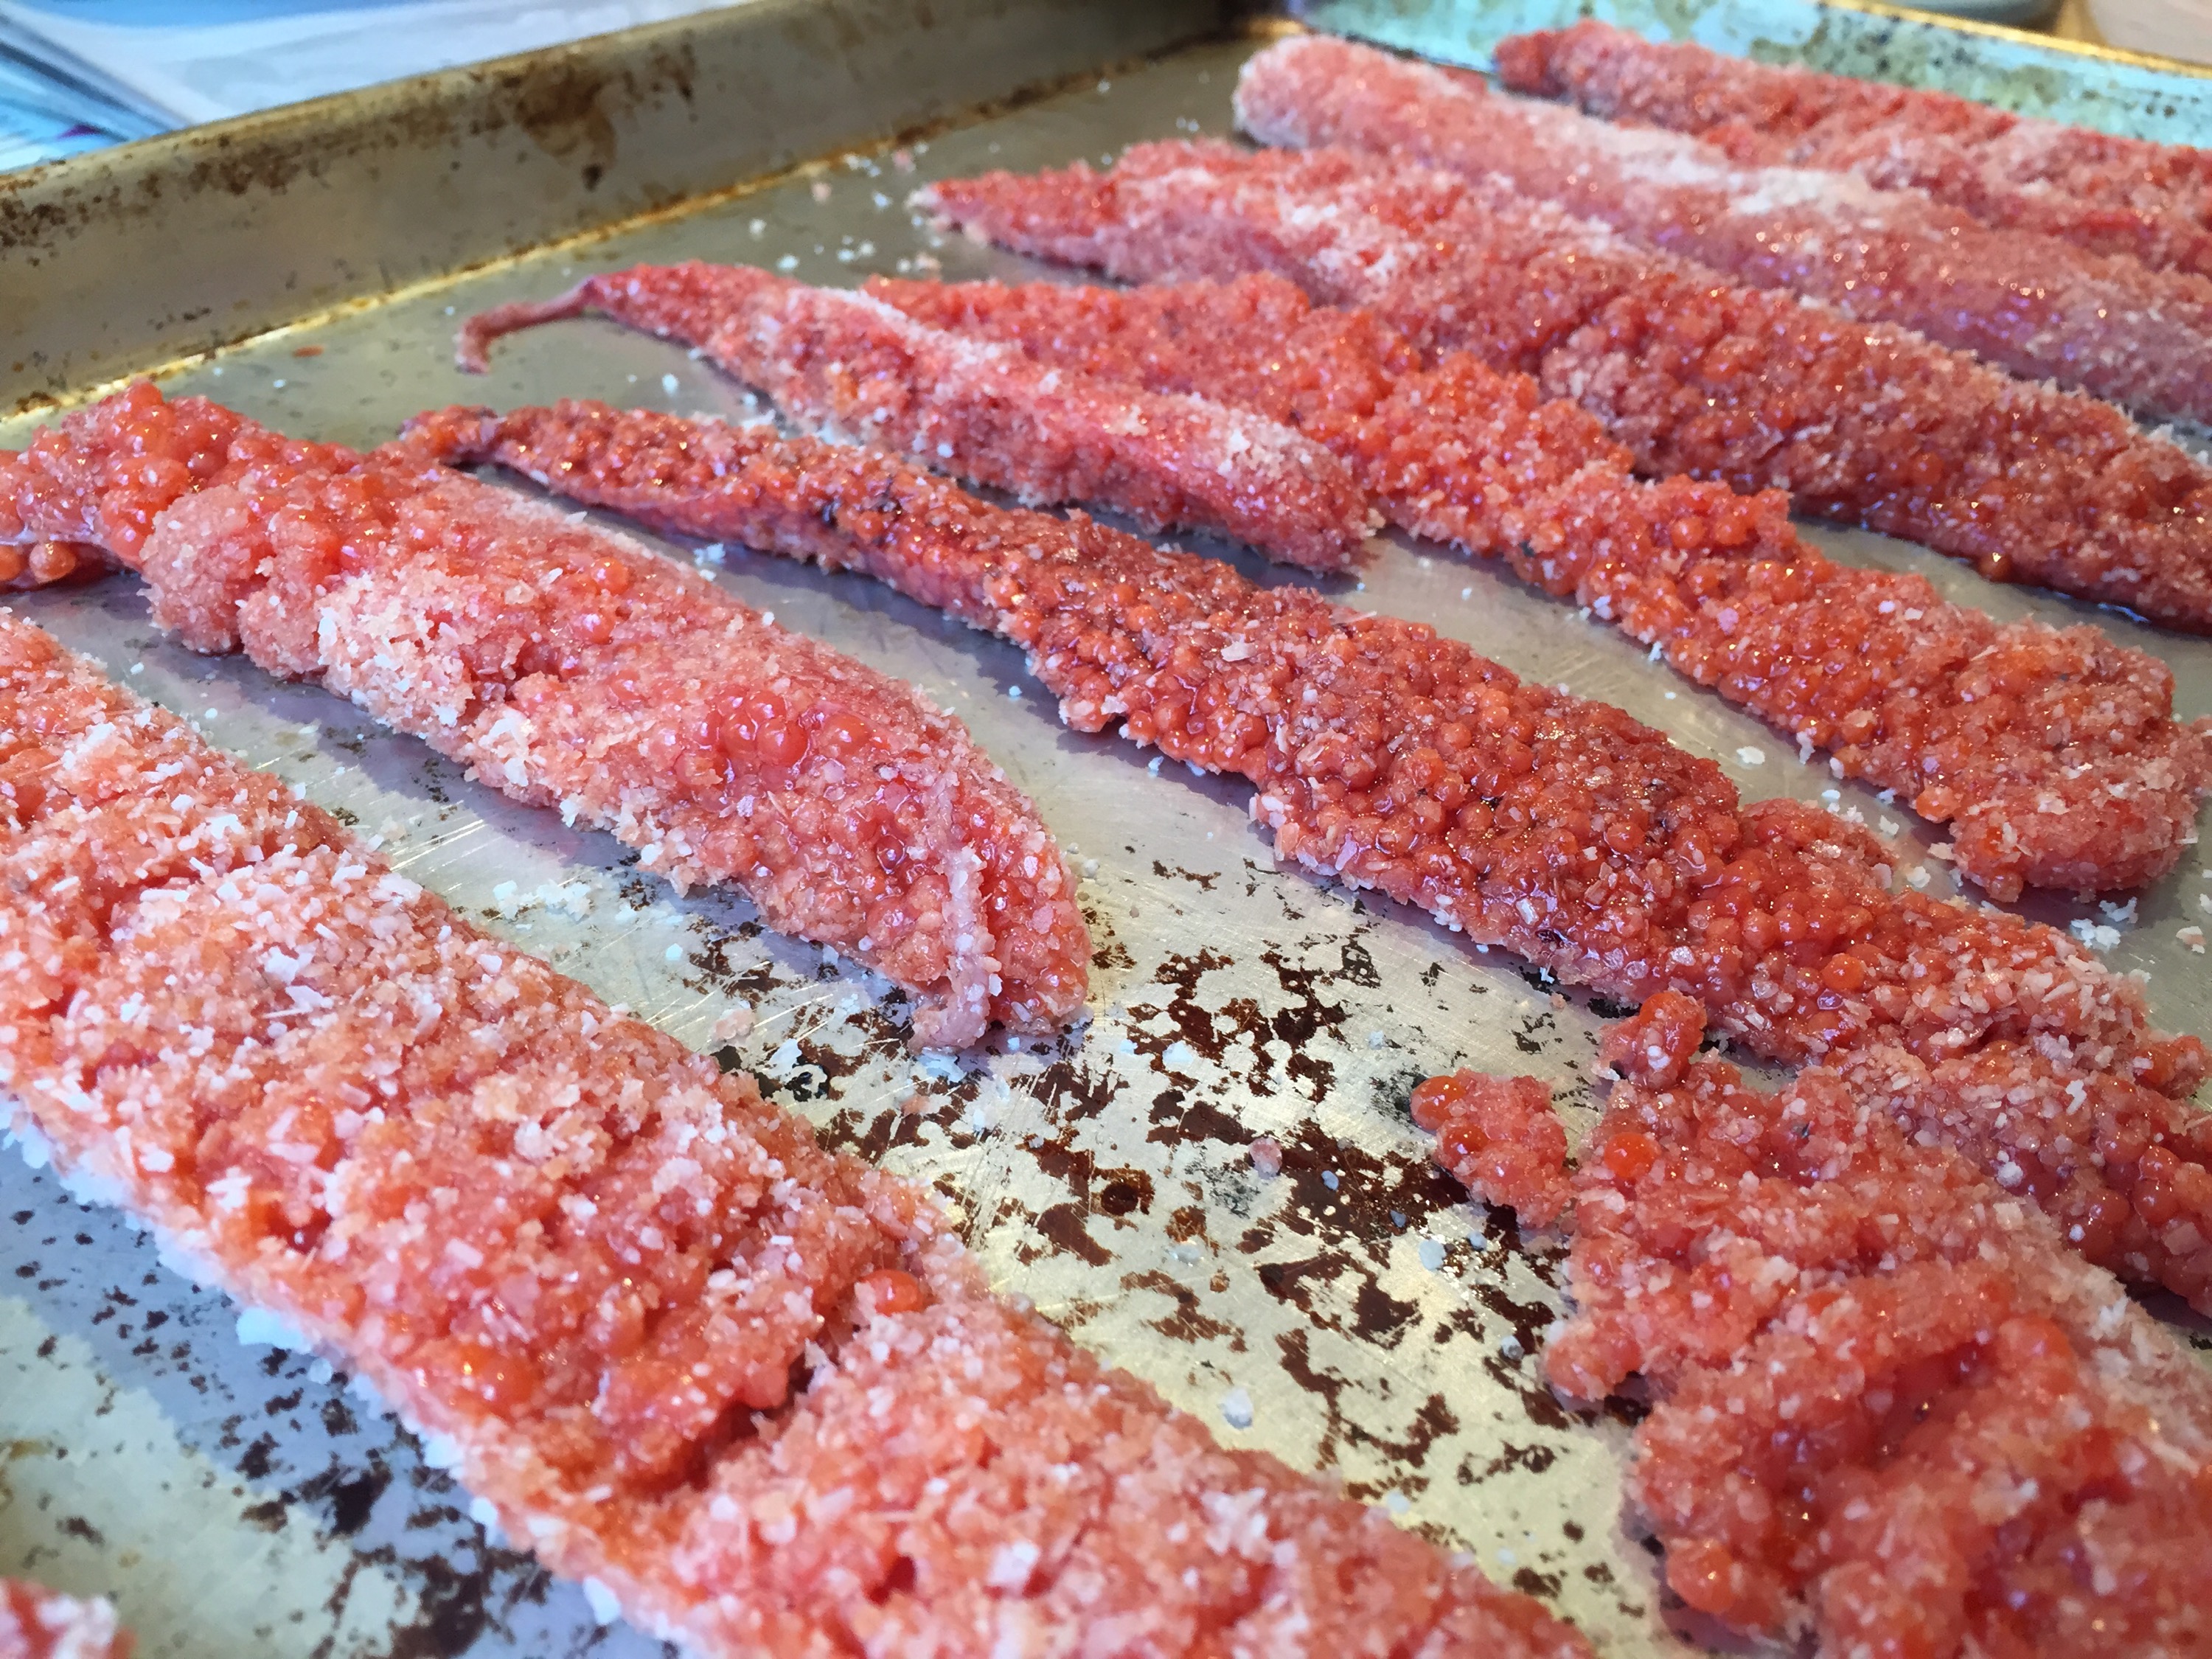
Rinse the salmon roe skeins in fresh cold water to remove any grit. Pat them dry with paper towels and dredge them in kosher salt.
Place them on a rimmed baking sheet in the fridge for 20 minutes. In the meantime, turn on your smoker.
Remove the skeins from the fridge and rinse them again under cold water. Pat dry. Rinse off the baking sheet and wipe dry. Place the skeins back on the tray.
Place your baking sheet on the top shelf and leave the smoker door slightly ajar. Smoke for 30-45 minutes.
Place roe in fridge until cold. Use a butter knife to scrape the eggs away from the skein membrane. Store in a jar for up to 5 days (but they shouldn’t last that long, really). Enjoy on crackers or in any way you deem fit. Today I made sushi with the smoked roe. It was fabulous.
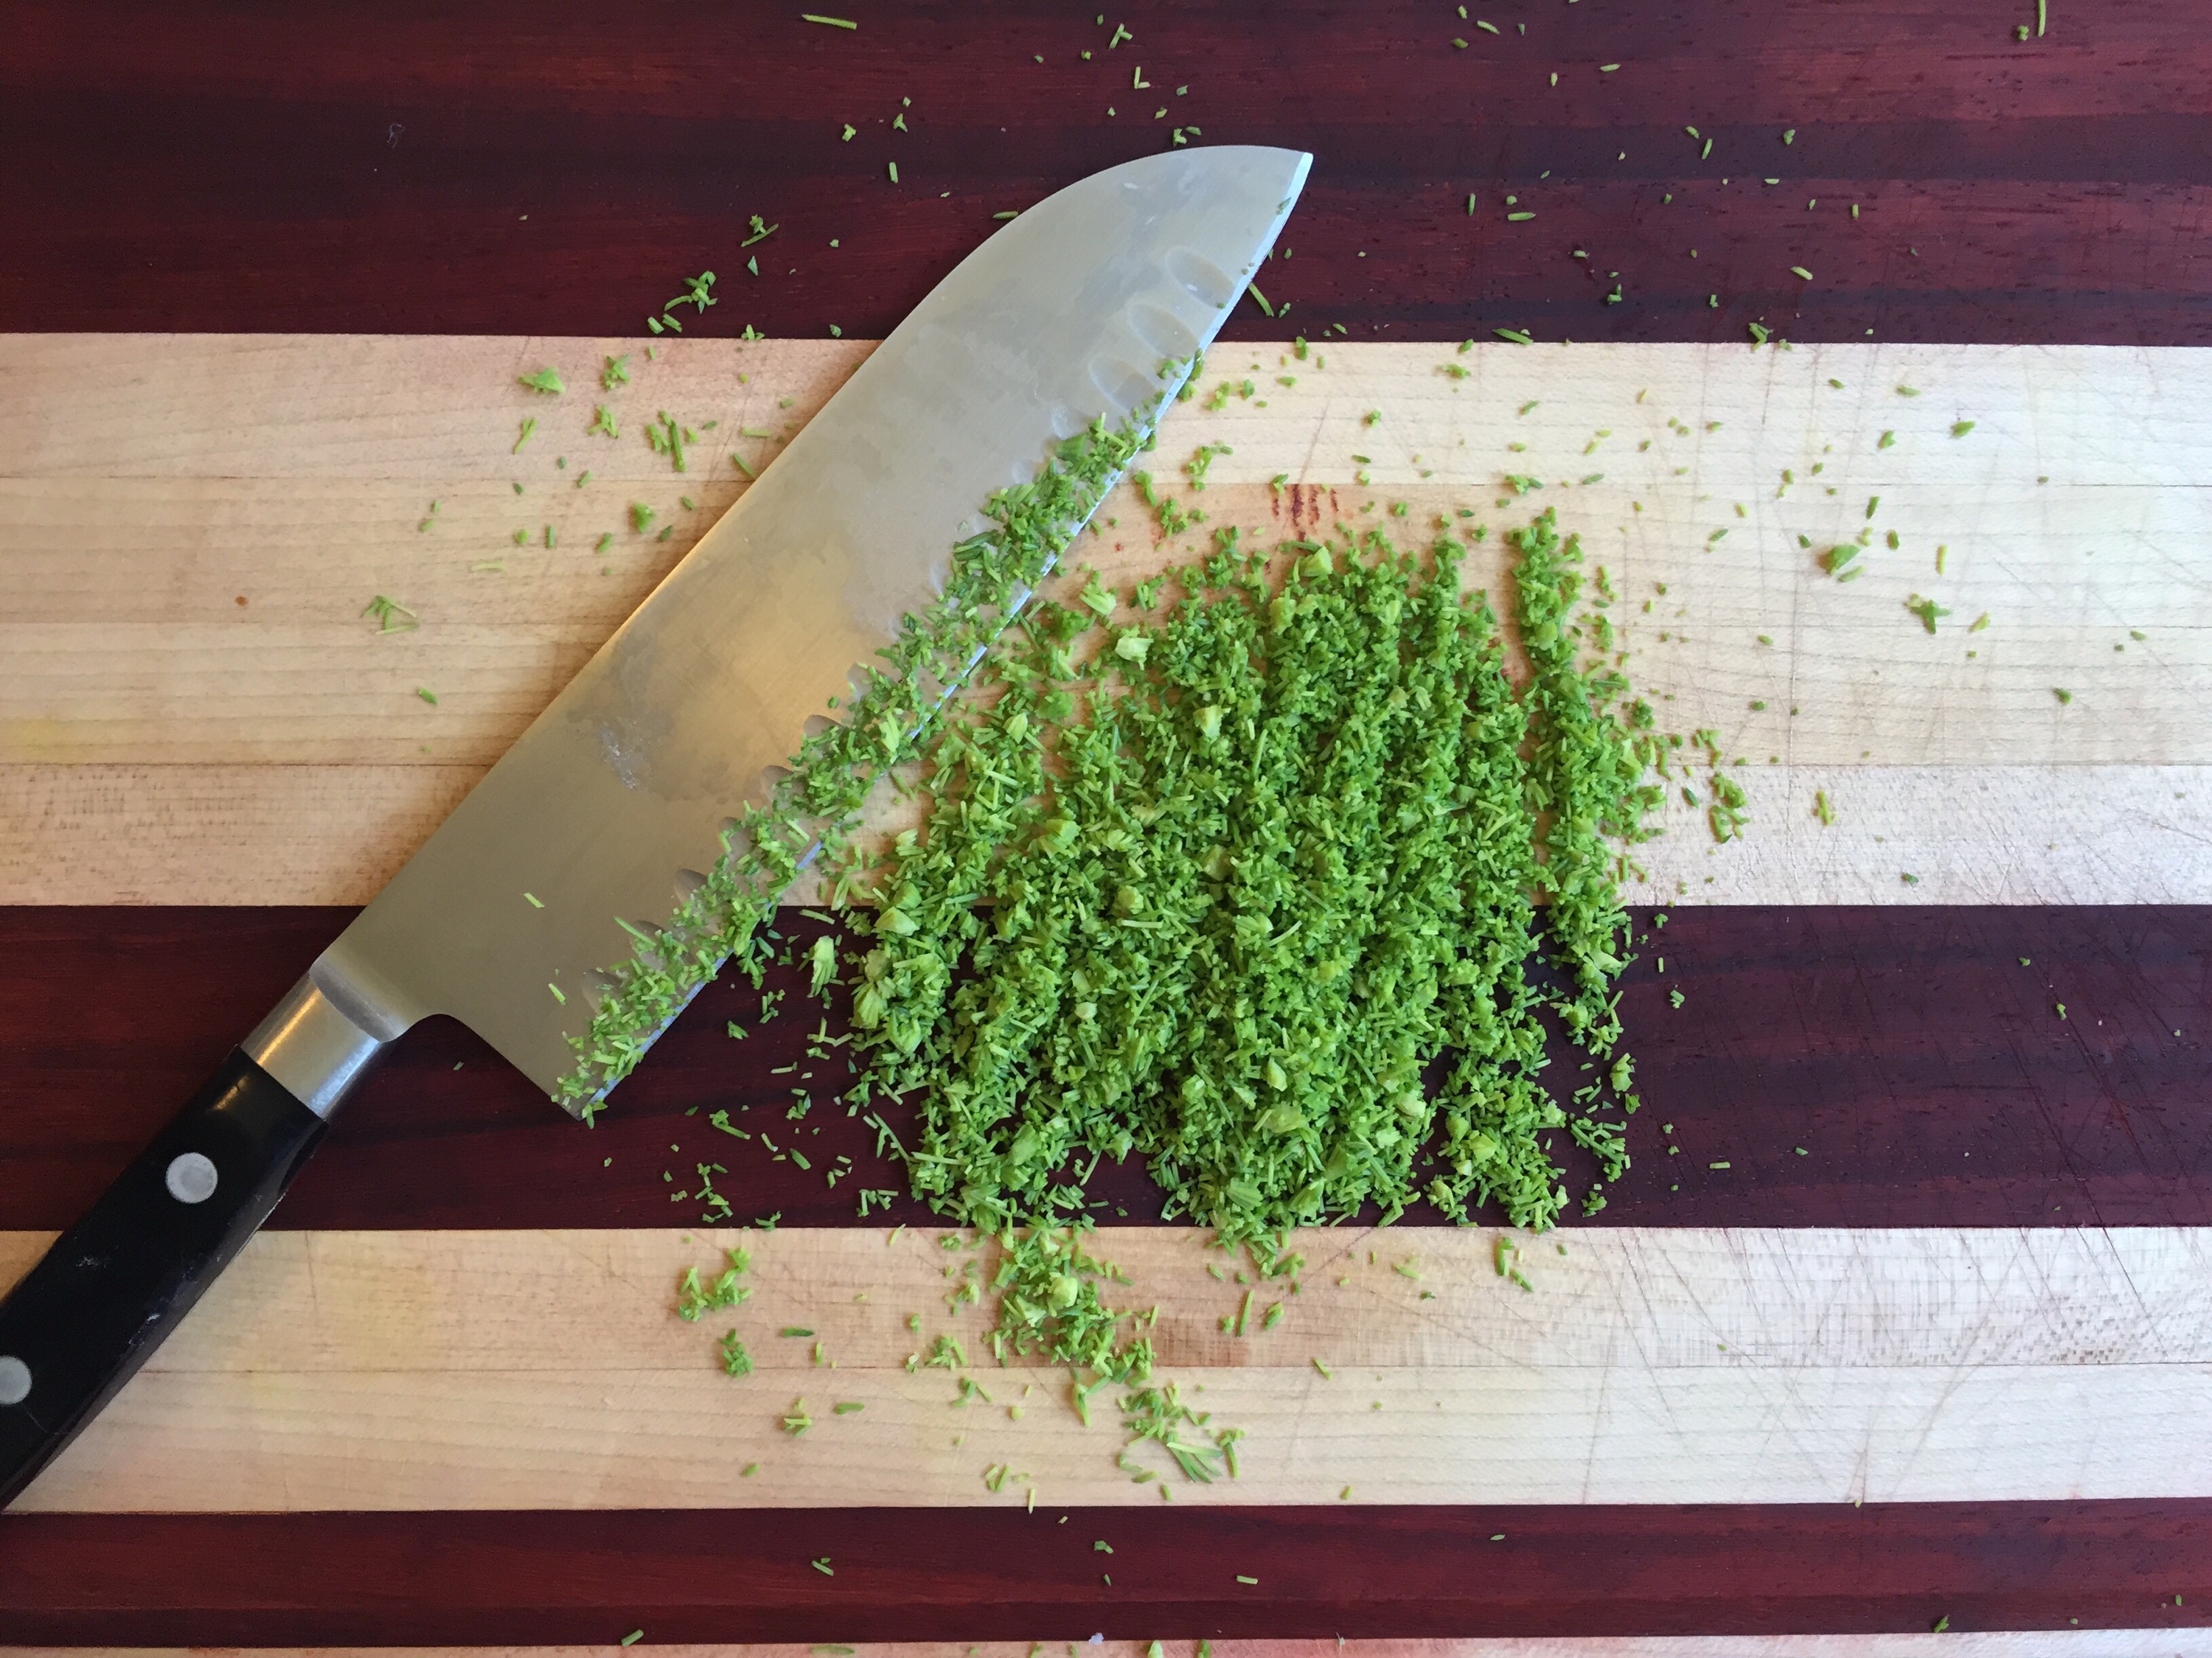
After my less-than-stellar morel hunt last weekend I needed to forage something more gratifying. It’s the perfect time for spruce tips. Pretty much all the spruce trees in town are boasting bright green tips with brown papery casings. I ventured as far as my yard to collect a pound of them. They required very little processing; just remove the papery casings and you’re good to go.
I’ve never been quite sure what to make with these edibles. I’m not much for tea or jelly. I wanted something savory.
I first referenced the Goddess of Alaska Forests, Laurie Constantino, and made a delectable dip with mayo, Greek yogurt, lemon juice and minced spruce tips. It was perfect for the garlic bread crusts I had leftover on my dinner plate last night.
Recently a friend of mine told me about a Juneau-based blog that’s all about foraging Alaska edibles. There was an intriguing recipe for spruce tip gnocchi. I had to try it.
I love junk food. LOVE IT. But there are lots of reasons why I shouldn’t eat it on the regular.
I’m not a big fan of diet recipes that try to emulate the real deal. Usually they lack in flavor or texture. But I’m willing to try them once in a while.
Here’s a recipe that satisfies my fast food desire: homemade chicken nuggets. Not only are they kid friendly (my son gobbled them up), but they are great for those on low-carb or gluten-free diets.
This is a great weeknight dish since they only take about 40 minutes from start to finish. Serve them with cheesy broccoli quinoa and you’ve got yourself a tasty junk-like meal.
Low Carb Chicken Nuggets
Serves 2-3
Ingredients:
1 pound of chicken tenders (chicken breast would be fine)
1 tsp. baking soda (optional)
3/4 cup almond flour
1/2 tsp. onion powder
1/2 tsp. garlic powder
1/2 tsp. smoked paprika
salt and pepper to taste
2 eggs
Directions:
Preheat oven to 400 degrees F. Line a baking sheet with foil and spray with cooking spray.
Cut your chicken into two-inch pieces. Place them in a bowl with two tablespoons of cold water and the baking soda. Let sit for 15 minutes. Drain and pat dry with paper towels. (This step is optional, but I find it makes a more tender nugget as per America’s Test Kitchen’s advice).
Whisk together the eggs in a pie pan. Combine the dry ingredients in another pie pan.
Toss the chicken pieces in the egg then gently dredge them in the almond flour mixture. Place on the baking sheet. Bake for 12 minutes, flip them and bake another 10 minutes. Remove from oven and let cool a couple of minutes before serving.
With a new year comes New Year’s resolutions, and I’ve decided to join the countless others who resolve to eat more healthily. As a contributor to Anchorage Food Mosaic Project, I was recently asked what my Food Year’s Resolution was. Fewer cheeseburgers was the first thing that came to mind, but also to cut down on carbs and to eat more healthily in general.
My husband and I are trying out the South Beach Diet, which is a low sugar and carb regimen. The first phase is pretty strict, but that doesn’t limit my ability to cook delicious food.
Today’s lunch was quick to prepare and pretty dang delicious. I love me some smoked salmon, but that stuff is expensive. I wanted to make a dish that had the flavor of smoked salmon, but was a little easier on the pocketbook.
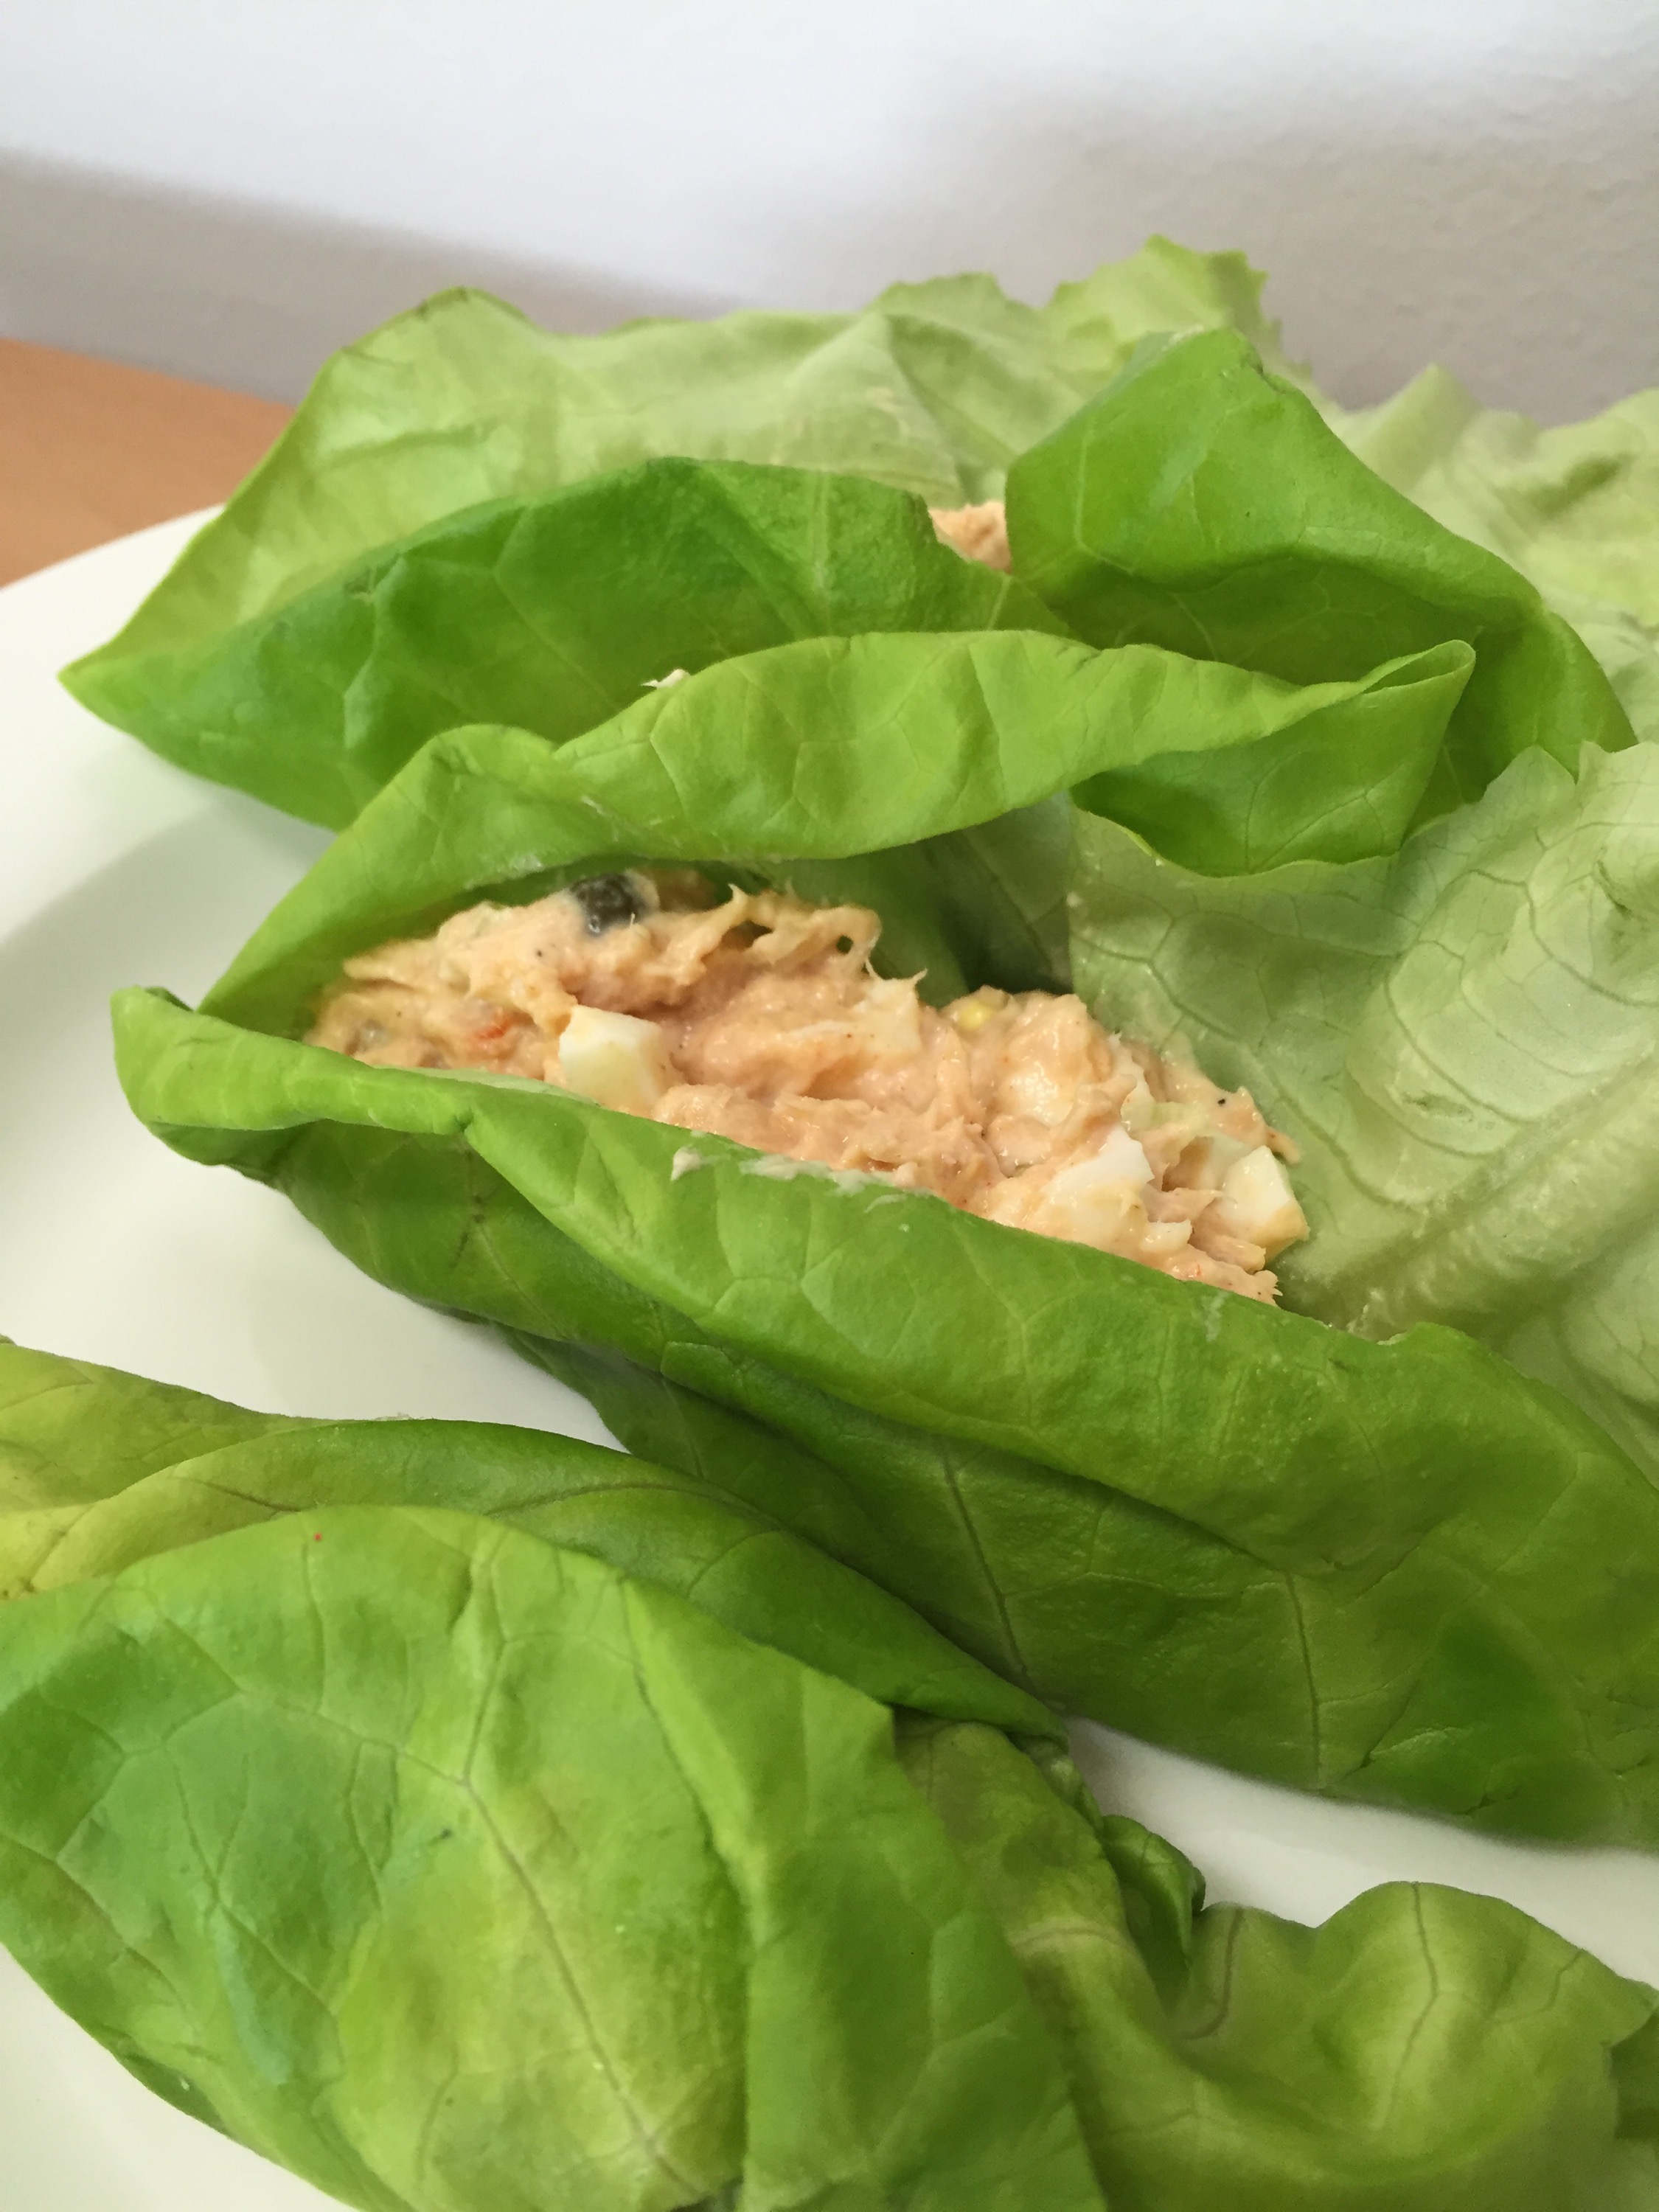
This salad recipe is chock full of nutrients and with the use of smoked paprika, it fulfilled my craving for smoked salmon. I purchased my canned salmon at Costco, but if you’re lucky to have an Alaska fisherman friend, you could certainly make this with fresh-cooked salmon!
Smokey salmon lettuce wraps — A South Beach Diet phase 1 recipe
If you live in Southcentral Alaska then you’re probably keenly aware it is sockeye salmon season. My husband is getting his hipwaders and dipnets all ready for the coming week where he will camp out on the shores of the Kenai River and make the most of the everlasting daylight by fishing into the wee hours of the night.
We still have some vacuum-packed filets in the freezer from last year so to make way for this year’s bounty we are trying to find creative ways to use it up. Sure, there’s nothing better than simple grilled salmon with a drizzle of lemon, but my dad started preparing poke out of the frozen filets that tops any store bought ahi poke.
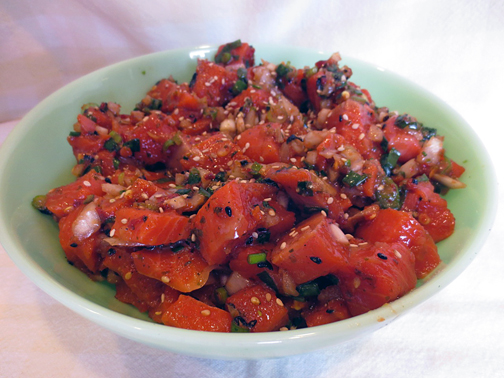
Poke is a Hawaiian salad made of cubed sashimi such as ahi tuna, soy sauce, sesame oil, onions and hot chili sauce. It’s a bit like spicy tuna sushi without the rice and seaweed.
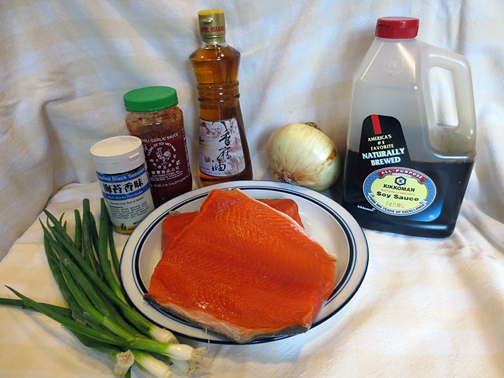
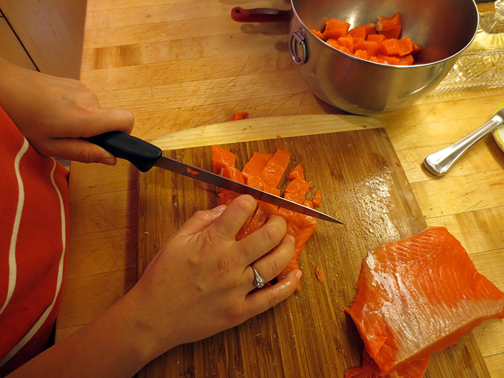
Here’s my dad’s recipe, which uses fresh-frozen sockeye, a.k.a. red, salmon. Keep in mind that the Food and Drug Administration recommends freezing fresh fish and thawing it before consuming it raw because this kills any parasites. This is how sushi-grade fish is prepared in America. The FDA also says cooking seafood is the safest way to consume it, so prepare poke at your own risk. If you are pregnant or are at risk for food-borne illness, then please be cautious about consuming fresh-frozen fish.
With that disclaimer out of the way, here’s my dad’s recipe!
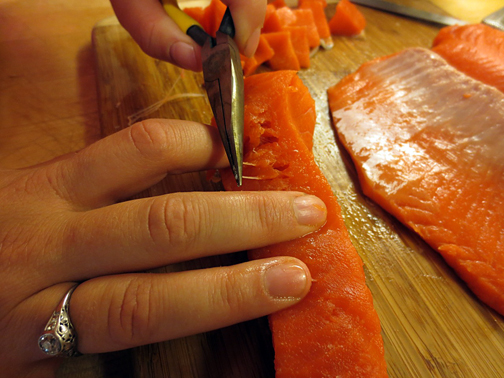
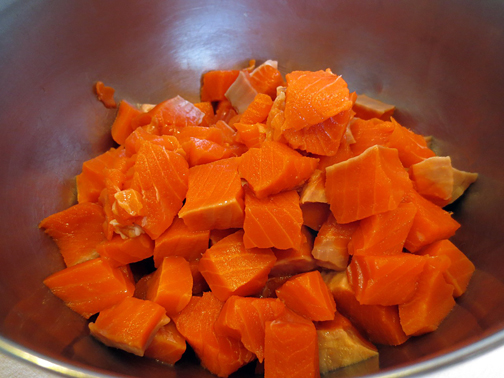
Using a sharp filet knife, remove the skin from the salmon filets. If there are any pin bones, carefully remove them with needle nose pliers. Cut the salmon into bite-sized cubes.
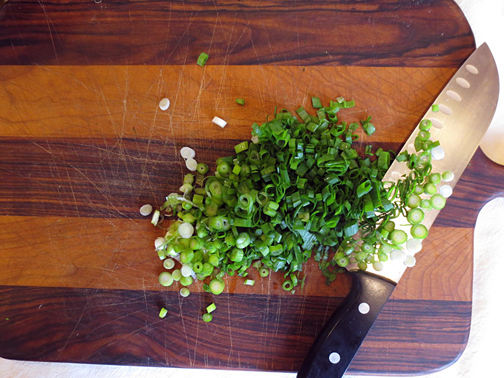
Add all the ingredients in a medium bowl and mix thoroughly. If you are not using the rice seasoning, add salt to taste. If you like a little more kick, add an extra tablespoon of the chili garlic sauce.
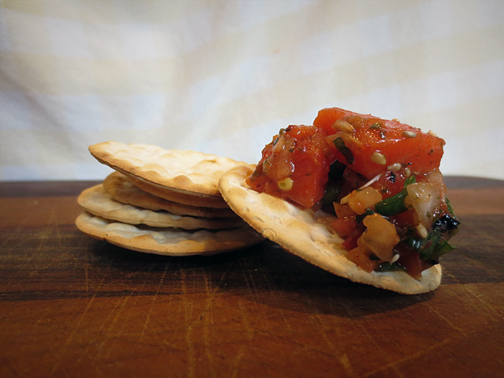
Serve immediately or refrigerate for later. Serve with sesame or rice crackers.
For more tasty Alaska recipes, check out my dad’s website.
It’s salmon season and for most that means filets, steaks and smoked salmon. We love all that in our family, but as soon as we hear of a friend going salmon fishing we think “roe!” We request that all our fishing friends keep the salmon eggs when they clean their fish and store them diligently on ice until they reach our clutches.
I grew up knowing all about brined salmon caviar: they were stinky, fishy, gooey and gross. But then I grew up and so did my palate. Now they are glimmering orange jewels that pop and melt in your mouth in salty bliss.
My father is the king of salmon roe preparation, so I have decided to reblog his Caviar Mania post from his site sausagemania.com (it’s for real, people). Visit his site for full photo tutorials on preparing sausage, lox, kippered salmon, and pesto.
How to Make Delicious Salmon Caviar at Home. Easy Recipes From SausageMania.com!
The designation “caviar” is traditionally applied to the salted, unfertilized roe of wild Caspian Sea sturgeon, a rapidly diminishing resource as neither Russia nor Iran are able (or willing) to end poaching. While Russian and Iranian caviar is an expensive luxury, going for as much as $500 an ounce, lesser caviars, made from the salted roe of salmon, lump fish, whitefish, steelhead, trout and other species of sturgeon, are more affordable substitutes.
CaviarMania is here to teach you how to make Salmon Caviar, specifically, caviar from Wild Alaskan Salmon.
Salmon Caviar is ridiculously simple to make. The most difficult part is getting hold of fresh salmon eggs. Fortunately, here in Alaska, salmon eggs are often discarded, or rolled in Borax, frozen, and used as bait – to catch more salmon, of course. So during the salmon runs in June through August, fresh eggs can be had in abundance if you have the right connections.
If you do not, then you need salmon – fresh, whole, uncleaned, iced salmon, and then you hope most of them are hens, that is, full of eggs. You can do without the fish, if you can tap into a good supply of fresh eggs, which, in Alaska, the home of SausageMania, LoxMania, KipperMania and now, CaviarMania, can often be done if you have fishing friends who are wiling to save the roe for you. A word of caution, however: you must know and trust your roe purveyor to care for the roe. If the fish have been left in the sun for a few hours before being cleaned, or the roe is not immediately iced, you may find youself spending time, energy and salt to produce an inferior product!
Two beautiful skeins of roe!
The roe is removed from the salmon.
The only tools needed are a few bowls and a screen of 1/4″ or 5/16″ galvanized mesh to fit over one of the bowls, a large strainer and a 1-gallon ZipLoc bag. The only ingredients are the salmon eggs, salt and cold water. The most time-consuming part is pushing the eggs through the mesh. The brining time necessary to prepare the caviar varies from 10 to 30 minutes, depending on the size of the eggs and your tolerance for saltiness.
A few words of caution about salmon roe: handle the skeins with care. Keep them cold at all times. Never, never, never freeze salmon roe unless you’re planning to make fish bait. The same goes for the finished product: freezing wrecks the eggs, and is especially harsh on the sensual “pop-ness” of the individual eggs as you eat them. Fresh caviar has a unique texture: you can feel each separate egg on the tongue, and each egg pops with a flavorful explosion. Frozen caviar is “dead.” It’s slushy, slimy and inert.
OK, so now you have several skeins of fresh, cold salmon eggs from a reputable source. From which species of salmon? Eggs from sockeye (red) and pink (humpy) salmon are small, and require less brining time. Eggs from Coho (silver) salmon are larger and require more brining. Eggs from king (Chinook) salmon, and from chum (dog or keta) salmon are the largest, and need the longest time. (Keta eggs are prized by Russians, who feel they make the best salmon caviar.)
Whatever kind of roe you have, you will need a galvanized screen to separate the eggs from their membranous attachment. A galvanized mesh screen with 1/4 – 5/16” holes is the best; cut it to fit tightly over a large bowl. Then get hold of some non-iodized salt. Coarse is better than fine.
Spread each skein, membrane side up, on the screen and work the eggs through the screen and through the mesh with your fingers. Membranes will get caught in the screen, so every now and again, remove the stuck membranes and discard. From time to time, remove the screen, and gently scrape off the eggs hanging from the bottom with a rubber or plastic spatula.
ust one ingredient: non-iodized salt. Just one tool: a piece of galvanized mesh.
A skein being positioned on the mesh. The skein will be rotated to put the egg membrane on top.Push the eggs through the mesh.
Next, fill a large bowl with the coldest water you can get and dissolve enough salt in it until you have a saturated saline solution, meaning that there will be undissolved excess salt in the bottom. Pour the separated eggs into the cold brine and gently stir. Set a timer for 10 minutes.
After ten minutes, take a spoonful of eggs and place in a small strainer, then rinse them in running cold water to rinse off the exterior salt. Taste them. If not salty enough, wait another five minutes and taste again. When the eggs are salty enough for your taste, pour them into a large strainer and rinse them with running cold water, gently turning them over and over with your hands to wash off all the outside salt.
Now put the eggs in a cold saturated saline solution for 10-30 minutes, depending on size of eggs and your taste for saltiness.
Once you’ve sampled the eggs, and gotten them to your level of saltiness, rinse in cold running water to remove surface salt.
At this stage, the eggs still have active osmotic cell walls, so, if you over-salted them, just soak them in cold water for several minutes, and the salt will travel back out of the eggs and into the water. Once you are completely satisfied with the saltiness of the product, place the egg-laden strainer in a large bowl and fill a gallon ZipLoc bag with cold water. Place the bag on top of the eggs and put the bowl with strainer, eggs and ZipLoc in the refrigerator overnight. The weight of the ZipLoc bag packs and compresses the eggs, which helps make them spreadable onto crackers or whatever you wish to spread them on. Now you have caviar! It will last 7-10 days in the fridge, after which it won’t spoil, but will acquire an unpleasant fishy taste. If you have a vacuum packer, you can vacuum-pack the jars, which will allow the product to remain decent from 2-3 weeks, if refrigerated, before becoming “fishy.”
Weight down the eggs with a ZipLoc bag.
Store the weighted eggs overnight in the fridge.The next day, the caviar is compacted.
Unless you have a vacuum packer that will evacuate Mason jars, you’ll need to punch a hole in the tops of the jars to let the air out, and vacuum-pack them in bags. They will then keep in the fridge for up to three weeks.
Placing a jar of caviar in the packer.
The final product safe in the refrigerator.
Now that you’ve finished, what are you going to do with all that caviar? Well, it’ll go faster than you think. You can spread it on crackers, make Blini or Caviar Omelets (but don’t make them “hard” or you’ll ruin the caviar). If you make Blini, serve with iced vodka.
Preparing a plate of Salmon Caviar Blini. Blini are Russian pancakes, really the same thing as crepes.
For the quantity of Caviar we just made, we’ll need a lot of Vodka!Serve the Blini with a dollop of sour cream and some iced vodka. You’ll be surprised how quickly a quart of caviar goes!
Not yet brave enough for salmon eggs? Try my recipe for grilled cedar-plank salmon.
I love me some junk food and nachos are near the top of the list. They are quick, cheap and can pile on the calories if you’re not careful. I like to justify mowing down on nachos by using healthier ingredients.
Here’s my no-brainer secret to making perfect nachos in the oven — bake them, don’t broil them. Broiling sometimes burns the chips before the cheese has melted. So, preheat an oven or toaster oven to 375 degrees. Arrange the chips on a foil-lined baking sheet. Top with green onions and cheddar. Dot the Neufchâtel all around the chips. Bake for about 7 minutes, or until the cheddar is gooey.
Remove from oven and top with sour cream, avocado, salsa and cilantro.
This is just a guideline, of course. You can add whatever toppings you like. Jalapeños, black beans, chicken, tofu — the world is your nacho!
If you’re in the mood for a fiesta, try some of my other recipes, such as:
Chicken Taquitos with Spinach & Wild RiceGuacamole à la Moña
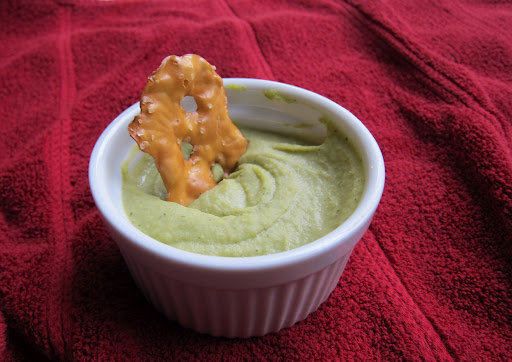
My husband is back on the South Beach Diet, which means I have to get creative in the kitchen. This evening he was planning on herbed chicken bits with asparagus. He was just going to pile some canned black beans on top of his chicken, so I decided to get a little more creative.
I had a can of cannellini beans in the cupboard and some leftover homemade pesto so I decided to bust out the blender. What I came up with was a smooth and flavorful dip perfect for topping his chicken bits with. I cleaned up the rest of the dip with pretzel chips. Divine!
Ingredients:
One can of white beans
1 clove of garlic
juice of 1/4 lemon
3 or so tablespoons olive oil
2 tablespoons pesto
Directions:
Drain the beans and toss them into a blender. Add a couple of tablespoons of olive oil, the lemon juice, garlic and pesto. Turn on the blender. If your mixture is struggling to mix, add a little more oil while the machine is running. Once it loosens up, let it run for a few more seconds.
Serve with pita chips or spread on a chicken sandwich. Be creative!
I’ve been sort of obsessing over Fage Greek yogurt lately. It’s so affordable at Costco. It’s been heavenly with blueberries, honey and granola in the mornings, but the tart, creamy yogurt is also a great ingredient for salads and dips.
My sister and I catered my baby shower Sunday and we purchased the ubiquitous veggie platter with a bland cream dip in the middle. I chucked the plastic container for something homemade and it was a big hit.
The secret ingredient is a Bulgarian puree of roasted red peppers and garlic. I found it in the exotic grocery section of Wal-mart, believe it or not, and I use this stuff for pasta dishes, salads and pretty much anything I want to add a little zing to. Most grocery stores I’ve been to have some sort of version of this stuff.
Otherwise, this recipe is pretty simple. Fresh herbs are best, but I’m sure you could toss in some dried basil or oregano and it would still be outstanding.
Roasted Red Pepper Veggie Dip
Ingredients (all measurements are approximations. I eyeball it): 1.5 cups Fage fat-free Greek yogurt 1/2 cup light mayo 2 Tbs. fresh lemon juice 2 Tbs. chopped fresh parsley 2 Tbs. chopped fresh oregano 3 Tbs. Zergut red pepper/garlic puree salt and pepper to taste
Directions: Mix together all of the ingredients. Taste your dip and add more red pepper puree if you’d like. Refrigerate for at least an hour for flavors to meld.
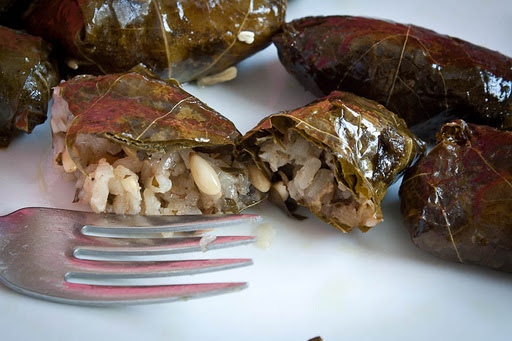
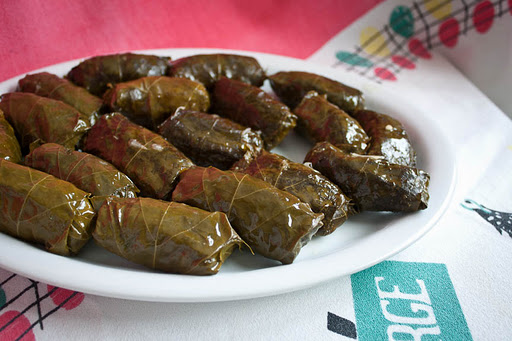
One of my coworkers got married Friday and the food at the reception was superb. In addition to the several authentic Filipino dishes, there was a pita platter with those little Greek snacks wrapped in grape leaves. I’d never really been a fan in the past, but maybe it’s the pregnancy, I ate about ten of them at the reception.
I woke up early for a Sunday and all I could think about was making my very own yummy Greek snacks wrapped in grape leaves. After about 10 seconds of research, I discovered they are called dolmas, or dolmades. I found several recipes that sounded good. I settled on a combination of two recipes. I used the methods of this recipe, and the ingredients from this recipe, slightly altered.
It took me three grocery stores to find all the ingredients. The grape leaves were in the section with the jars of roasted red peppers. I was going to use dried mint because fresh mint is really pricey up here in Alaska, but one grocery store didn’t have it and another one wanted to charge more than $7.00 for a spice jar. Forget about that! I went with fresh.
Here’s a step-by-step guide to making this delicious snack that could be a meal if you’re pregnant and starving.
Ingredients:
1 onion, grated 1 tsp. lemon zest 1 cup of raw white rice 1/2 cup olive oil, divided 2+ cups water, divided 1/2 cup golden raisins, chopped 1/2 pine nuts 1/2 finely chopped fresh parsley 1/4 cup finely chopped fresh mint 1 tsp. salt pepper to taste several dashes of allspice, to taste 1/2 tsp. cinnamon, or to taste 1/2 tsp. freshly grated nutmeg 2 lemons, juiced and sliced (slice them after juicing) 1, 8-oz. jar grape leaves, drained and rinsed
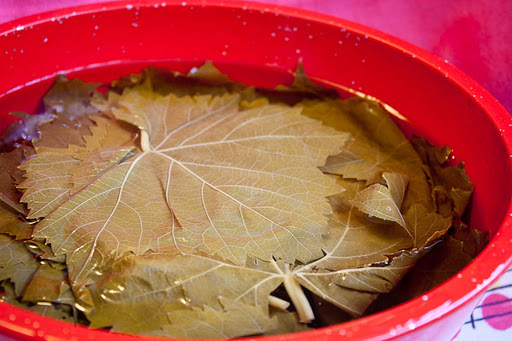
To prep grape leaves: Bring a large pot of water to a boil. Lay the grape leaves flat and set into the pot. Cover and return to a boil, then turn off the heat and let the pot sit for ten minutes. Drain and set the leaves in a bowl of cold water until you’re ready to fill them.
Directions for filling: Heat a large saute pan with 1/4 cup of oil over medium-high heat. Add the onions and zest and cook, stirring once in a while, for 10 minutes. Add the rice, pine nuts and raisins and stir so that the rice is thoroughly coated in oil. Cook for 2 minutes then add 1 cup of water. Stir rice frequently and cook for 10 minutes so rice absorbs the water. If the water evaporates before this time is up, just add a bit more water.
Transfer mixture to a bowl and combine with the parsley, mint, salt, pepper, allspice, cinnamon and nutmeg. Taste mixture and make sure you like the flavor. Let it cool.
Take a dutch oven and place a plate inside of it. Cover the plate with grape leaves (use ones that are torn).
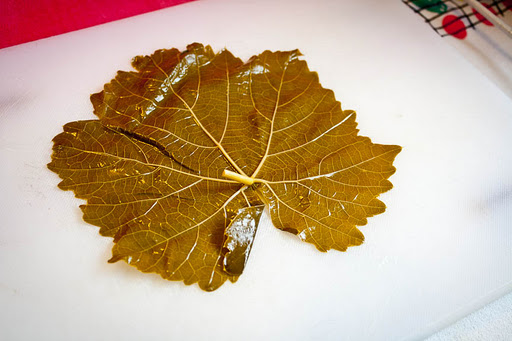
Now prepare the dolmades. Click on photos to enlarge.
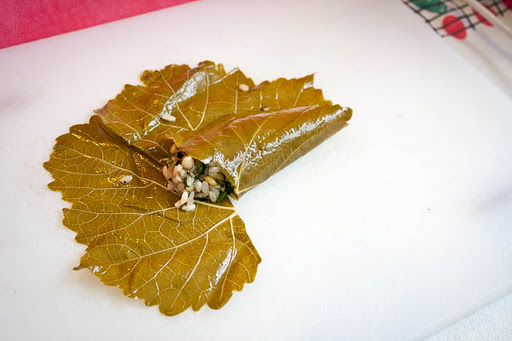
Place leaf veiny side up
With a paring knife, cut away the stem
Add about 1 Tbs. filling and form it into a little sausage shape
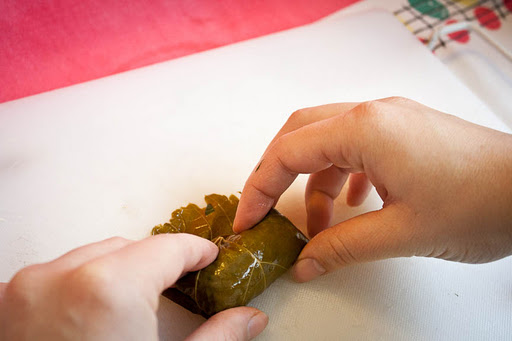
Fold up the right corner of the leaf
Fold up the left corner
Fold in the sides
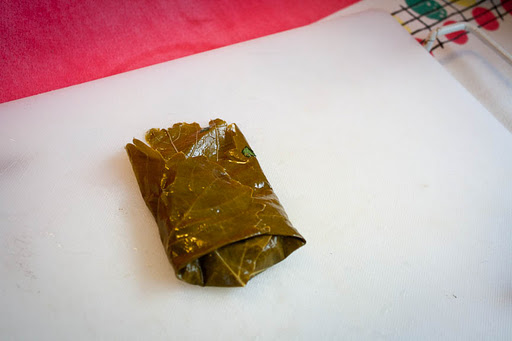
Now roll it up!
Place each finished dolma seam side down in the dutch oven so they are tightly packed in one layer. When you’ve filled the bottom of the pot cover the dolmades with a layer of grape leaves and start placing more finished dolmades on top. When you’ve used up all your filling or grape leaves or you don’t have any more room in your pot, pour 1/4 cup olive oil, 1 cup of water and the lemon juice over the dolmades. Fill the pot with more water until the water line goes halfway up the top layer of dolmades. Now fit the lemon slices all around, in between and on top of the dolmades.
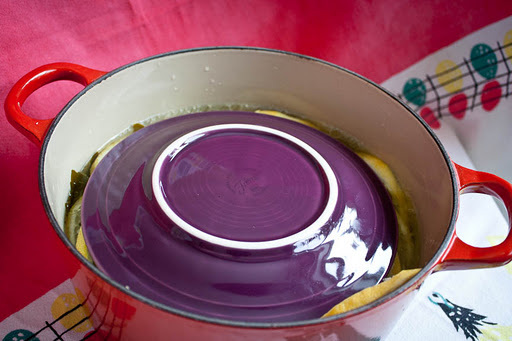
Place an upside-down plate on top of it all. If there’s room, place another plate right side up. You need to add weight so the dolmades don’t come undone while they are boiling.
Place the lid on your pot and bring it to a simmer. Turn heat to low and simmer for 40 minutes. Test one of your dolmades. If the rice isn’t cooked enough, simmer for another 10 minutes.


 Directions: