Crochet a Flower Headband

At long last I have finally caved into mainstream fashion and I’ve gone and made a flowered headband. You know the ones — tapered with a big flower on the side? They are cute, don’t get me wrong, but I was never into knitting them and then I realized the other day — I was never into KNITTING them. But what about crochet?

I actually admire Knitty.com’s Calorimetry Headband. I’ve made it before, although slightly altered because I feel as though it’s too wide for my head.

But honestly, I hate purling. All you do is knit 2, purl 2 for the whole pattern and it’s enough for me to stay away.

Last weekend I set out looking on Ravelry for a simple crochet headband pattern. I ended up finding a crocheted version of the Calorimetry Headband. As a knitter by nature, I needed a crochet pattern I could understand. This one was simple and best of all, much quicker than knitting.

I decided to take this basic pattern and embellish it with a border and a flower. Pizzazz!

Tapered flower headband | A Free Crochet Pattern from Alaska Knit Nat
© Laura Stennett Photography


But I didn’t stop there. In case you don’t know me very well, when I get on a new kick I don’t stop. So I made five more. Then I decided to double the yarn and WOWEE it made it really pop. So I made four more.

Tapered flower headband | A Free Crochet Pattern from Alaska Knit Nat
© Laura Stennett Photography
Tapered flower headband | A Free Crochet Pattern from Alaska Knit Nat
© Laura Stennett Photography


And choosing the button in the back is half the fun!

© Laura Stennett Photography

So how are these pretty headbands made? LET ME TELL YOU!

First, I followed the instructions here but I used a J hook instead. I also think doubling up the yarn is much nicer, but that’s up to you. If you only have one ball just make another ball from it or use the end from the inside at the same time as the outside, if that makes sense.

Once you’ve completed the basic headband, with your contrast color start making single chains all around the outside of the headband. I didn’t put the hook into individual stitches, but instead I stuck the hook in the ch2 gaps at each end. When you’ve gone all the way around, slip stitch into the first SC and weave in all the ends.

View my previous blog post on how to crochet a flower. Then stitch the flower with a darning needle to wherever you’d like the flower to be. Pretty simple!

Tapered flower headband | A Free Crochet Pattern from Alaska Knit Nat
© Laura Stennett Photography
Tapered flower headband | A Free Crochet Pattern from Alaska Knit Nat
© Laura Stennett Photography


What to Pack in a Diaper Bag

Ok, now that my son is three months old, I feel a bit like a pro when it comes to running errands and not losing my head. There were a few panicky times in the beginning where we found ourselves without a diaper or with a poorly-stocked diaper bag.

I’ve learned from my mistakes and I’d like to share with you how I pack the diaper bag. I always make sure to restock the bag whenever I think of it so I’m not left in the lurch. Also, I try to keep diapers in the center console of the car just in case I forget to bring the bag, God forbid!

I’ll explain the contents just in case the photo isn’t clear. Click on the photo to enlarge.

1. Nursing Cover — This takes up very little space and I like to have it in case I nurse in public where people might be uncomfortable seeing a little boob flesh.

2. Book — I keep a book in the bag for when I drop Jack off with a babysitter. I’ll change the book from time to time. It’s always good to give babysitters a little something to do with your baby besides watch TV.

3. Changing Pad with Wipes — This is my all-time favorite item in the diaper bag. I made this “clutch” from a pattern on the Internet. It unfolds and reveals a pouch that can keep two diapers and a wet wipes case. Click here for the tutorial.

4. Toy — Again, another good thing to have when you drop off your baby with a babysitter. Also, it doesn’t hurt to have if your baby is getting cranky on the go.

5. Diapers — Ah yes, the item for which this bag is named. I try and keep my bag stocked with about eight diapers. That’s enough for several outings throughout the week. Not pictured are two cloth diapers and a small wet bag since they aren’t a necessity.

6. Blanket — You never know when a beautiful sunny day might get cold and blustery, as I learned earlier this summer. A receiving blanket doesn’t take up much space and it’s a must for all seasons.

7. Burp cloth — This is a no-brainer item. Whether it’s spit-up or drool, I always keep one on hand for quick clean ups.

8. Nursing Pads — This is the one non-baby item. I sometimes have my own accidents so I always keep a couple of disposable nursing pads in the bag to prevent unsightly leaks.

9. Baby Powder — Just a typical diaper bag item, but instead of hauling a huge container around I put some in an old poultry seasoning jar. Make sure to place it in a plastic baggie as powder tends to get everywhere.

10. Rash Cream — Another must-have.

11. Baby Shampoo — I keep a travel-size bottle of shampoo in my bag in case we have to give Jack an emergency not-at-home bath. You never know when you might have a blowout!

12. Change of Clothes — I always keep a Onesie, set of jammies, pants, outer layer and socks in a gallon Ziploc bag. Babies will tend to go through more than one outfit a day, what with the drooling, puking, peeing and pooping they do. Be sure to restock whenever you think of it. Don’t want to be stuck with a dirty, wet, stinky baby while running errands or while he’s with the babysitter.

13. Bottle — A must-have if you bottle-feed or if you leave your baby with a sitter. Make sure to clean it when you get home.

14. Grocery bags — These are free and are great for messy clothes, burp cloths, diapers or whatever you want to keep apart from clean stuff or politely toss in someone else’s trash.

15. Gallon Ziploc Bags — I like to be a polite mama-on-the-go. Would you want someone to leave a stinky diaper in your trash? Seal it up in a Ziploc so you don’t have to share the smell with others. Also makes a good wet bag for dirty clothes and cloth diapers.

So, that’s our diaper bag! Is there anything you put in your bag that I left out? Leave me a comment!

Thanks,
Nat

Pasta Alfredo with Peas and Salmon on a Bed of Arugula

In case you don’t live in Southcentral Alaska, it’s sockeye salmon season. If you do live in Southcentral Alaska then you, your brother, your coworker and your landlord’s cousin have a freezer full of salmon. My husband came home with 36 gorgeous fish and after 4 hours of processing we now have to come up with ways of eating this healthy, delicious animal.

Last night we grilled up simple salmon steaks with just butter and lemon pepper, but tonight I wanted something fancy. No, I just wanted pasta.

This turned out amazingly. Here’s how to make it. Please keep in mind that I eyeball everything so these measurements are approximate.

Serves 2-3

Ingredients:
1 small salmon fillet
butter
1 clove of garlic, minced
2 oz. cream cheese
1/4 cup cream
1/4 cup milk
1/4 teaspoon freshly grated nutmeg
1/2 cup freshly grated parmesan or pecorino romano
1/2 cup frozen peas
1/2 lb. pasta of your choice
fresh baby arugula
salt and pepper

Preheat your oven to 400 degrees. Place salmon fillet, skin side down, in a baking dish. Spread butter all over your fillet. Salt and pepper to taste.

In the meantime, bring a large pot of salted water to a boil.

Bake your salmon for about 20 minutes. Keep an eye on it. When you see white “sweat” coming out of the edges of the filet, it’s done. Remove from oven and set aside.

Cook your pasta al dente.

Meanwhile, heat a tablespoon of butter in a medium saute pan over medium heat. Add the garlic and cook till fragrant, about one minute. Add the cream, cream cheese, and milk. Stir until cream cheese is melted. Add the nutmeg and cheese and pepper to taste. Turn down heat as soon as sauce thickens.

When pasta is almost done, add the peas to the sauce. Drain the pasta and add it to the saute pan. Mix till pasta is thoroughly coated in the sauce.

With a fork, flake the salmon into bite-sized pieces.

Line each serving plate with baby arugula leaves. Add the pasta and top with a serving of salmon.

Deeeeeelish!

Hooded Baby Towel and Mitt Set — A Tutorial

Our son is a tall little fellow and store bought hooded towels are too short for him. I want him to be bundled up and cozy after a bath so I decided to make my own hooded towel out of a plush bath towel.

He’s not too sure about this bath thing…

Here’s how you can make one too.

Materials:
1 large towel
Sewing machine
Heavy duty needle (optional, but makes the job easier)
Fabric scissors or rotary cutter

Directions:

1. Fold your towel lengthwise or “hot dog” style. Cut a 12 to 14-inch piece from one end.

2. Turn under the raw edge of the big piece and pin in place. With a straight stitch sew across. Go back along this seam with a zig zag to prevent the towel from unravelling. Since my towel had stripes I didn’t pin. I just made sure the stripes lined up.

3. Take the big piece and line up one corner on top of the 12-inch piece with the finished edge of the small piece on the bottom. The finished edge is going to be the edge of the hood. You’re going to cut a triangle form the little piece so you want to make sure it’s the right shape of triangle. I eyeballed how big to make the triangle. I just imagined it as the hood and how big my baby’s head is.

4. Cut out the two edges of the triangle and pin it to the corner of the big piece. Save the scraps.

5. Sew along the two edges with a straight stitch.

6. Turn the triangle inside out and there’s your hooded towel!

For the mitt:

1. Place your hand on the scrap of towel to figure out how tall you want your mitt. Fold your scrap in half and cut out a rectangle with one side being on the fold.

2. Unfold your rectangle and turn under one of the long edges and sew down.

3. Fold the rectangle in half with the turned under edge on the outside (right sides together) and sew the raw edges.

4. Turn right side out and there’s your mitt!

Knit Nat’s 17 Most Essential Infant Items

I’ve been a mama for nine weeks now and I wanted to write about the items and products I find myself using on a daily basis. There is so much advice out there in the Interwebland, but it doesn’t hurt to throw in my two cents.

In case you don’t know me well, I’m a thrifty girl at heart; therefore, my baby is a thrifty baby whether he likes it or not. Most of the things on this list I got second hand, I made or they were gifts, but they are all totally useful and I’ll explain why. Just a note: these are in no particular order, so the top of the list is not most important. It’s just what came to my mind first.

1. Bottle drying rack
When I was a non-mom perusing the kitchenware aisles at thrift stores, I would always see these bottle drying racks on the shelves. And when it came time to actually needing one, I had no trouble at all finding one for two bucks. No, you don’t actually NEED a bottle drying rack, but if you find yourself washing bottles on a daily basis this is a great tool to ensure you don’t have bottles rolling all over your counters (which is what was happening to me before I bought a drying rack). It’s a handy piece of plastic that usually folds flat, although I never store mine since I’m always using it.
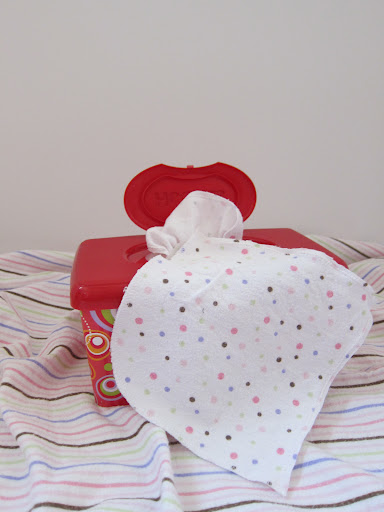
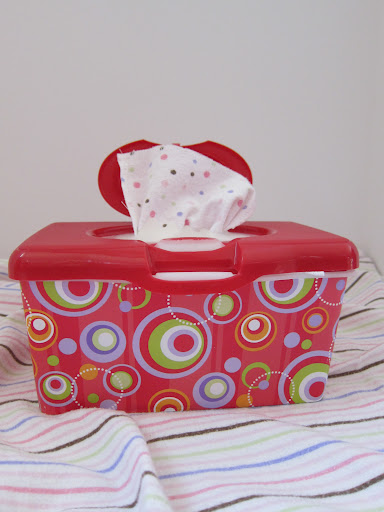
2. Cloth wipes
When my granola-type friends told me they use only cloth baby wipes to clean their babies’ bums, I thought, “Yuck, no way do I want to wash and reuse soiled pieces of cloth!” Well, call me a granola, but I totally love cloth wipes. Just wet them with warm water (or cold if your baby doesn’t care) and they really do the job better than any disposable wipe I’ve used. You spare your baby from the soap and chemicals in the disposable wipes and you are doing your tiny part to save the environment, if you’re into that kind of thing.

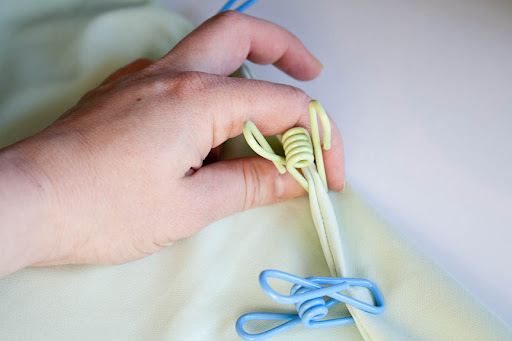
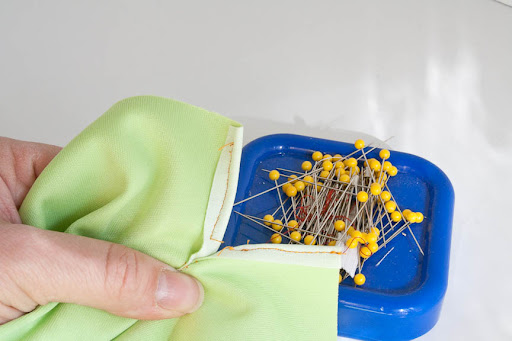
The cheapest way to go is to make them from flannel receiving blankets you find at garage sales. Just cut them up into 7-inch squares and if you want them to last longer, sew a zig-zag stitch around the edges. I found that I only need about 24 wipes. I stuff them into a disposable wipes dispenser and toss the dirty ones in the wash every couple of days. This is like a 50-cent investment that is totally worth more than 50 cents. Check out my blog post about it.

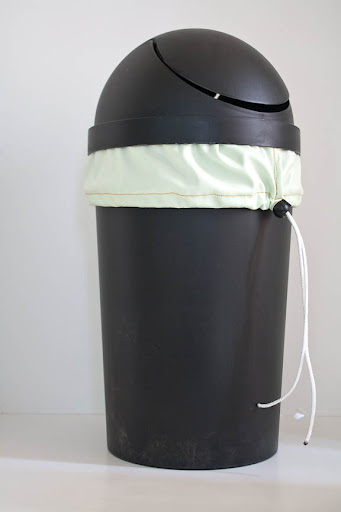
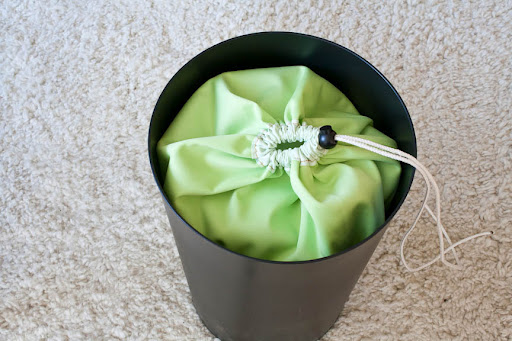
3. Homemade detergent
I cloth diaper my son part time and every few days I’ll do a diapers-only wash in my front-loading HE machine. Instead of buying pre-made detergent, which can be sort of pricey, I researched the vast Interbabynets and found a recipe for homemade detergent that costs just pennies per load.

Mix together equal parts Oxy-clean, Borax and Arm & Hammer Washing Soda (not baking soda — it’s right near the Oxy-clean at the store).

When it’s time to wash the diapers or wipes or anything else that’s been pooped on, I first do a wash on cold with 1 tablespoon of detergent. Then I do a hot wash with an extra rinse cycle with another tablespoon of detergent. If I lived in a dry, sunny place I’d line dry them, but instead I make sure to dry them for more than an hour in the dryer.

Keep in mind this is a process for my infant who is only two months old. I think it’ll be a whole different ball game when he starts eating solids.

4. Automotive shop cloths
This is where I credit my husband for being a thrifty genius. When our son was a week old, my husband came home from Target with a pack of jersey-knit shop cloths from the automotive section. These cloths look like white t-shirt rectangles. They are the perfect size for pretty much everything: baby spit-up, a tiny changing pad, when I leak everywhere, when I can’t seem to find a napkin while eating breakfast, etc. These were less expensive than burp cloths and they are really soft because people treat their fancy cars like babies. Brilliant!

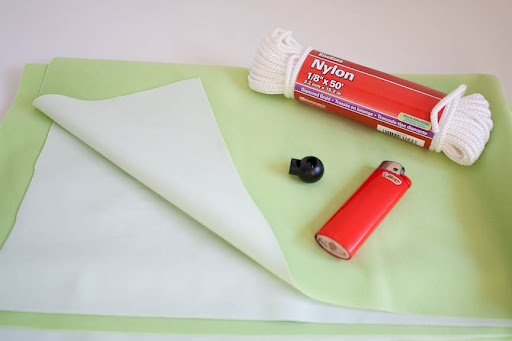
5. Travel changing pad
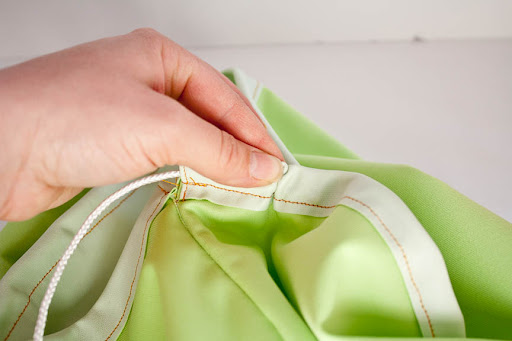
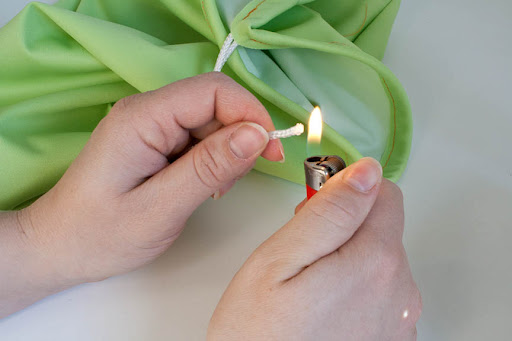
Yes, it’s important to have a huge diaper bag in your car for any foreseeable crisis or explosion, but the best thing I’ve made for my baby so far is a changing pad that folds up and looks like a clutch purse. I found this simple pattern here and it’s just the perfect size for a travel wipes container and one or two diapers. I’ll keep the diaper bag in the car and just bring the changing pad when I’m running errands or visiting a friend. It makes me feel like a mom in disguise….sort of…except that I’m carting around a baby.

This is the one I made, unfolded in the back of our car

6. Muslin swaddling blankets
When the nurses at the hospital swaddled my son, they used a thick flannel blanket and my little guy was sweating from day one. I’m so happy I had brought with me an Aden and Anais blanket. They are a tad pricey at Target, about $30 for four, but I managed to find a couple at the thrift store and I love them. They are stretchy so you can get a good swaddle on, but they are also breathable. I also use them to cover my baby’s stroller while going on walks on sunny days because he can still feel the breeze but is protected.


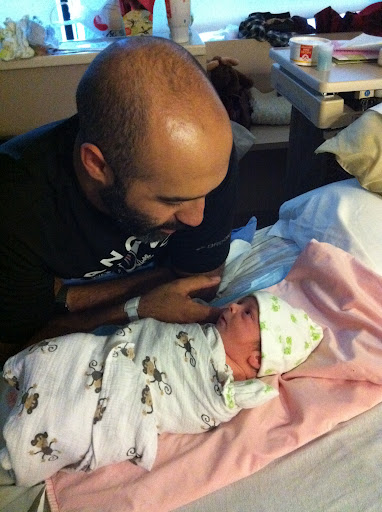
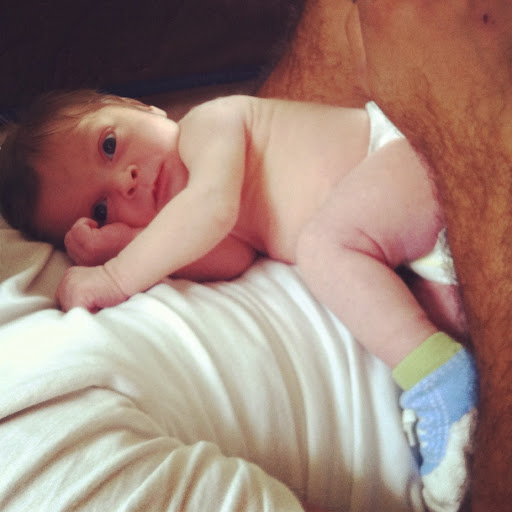
Swaddled and loving it on day one

7. The Miracle Blanket
Ok, this is my one commercial endorsement on this list. I added the Miracle Blanket to our baby registry thinking it might be useful, but we ended up loving it that we got an extra one in case the first is in the wash. This blanket swaddles your baby like no other without velcro or other fasteners. If our boy is fussy or is having trouble falling asleep, we wrap him up in this blanket and he is instantly soothed. No joke. He seems to love it. Too bad he’s getting too tall for it. It’ll be a sad day when we retire these blankets.

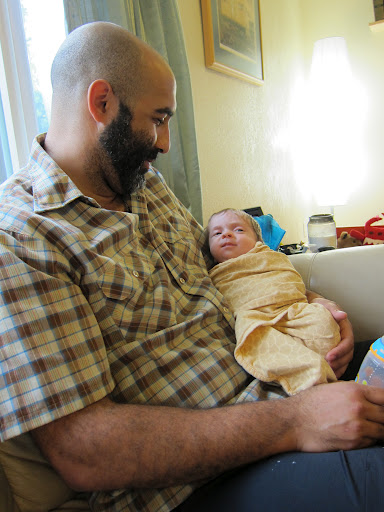
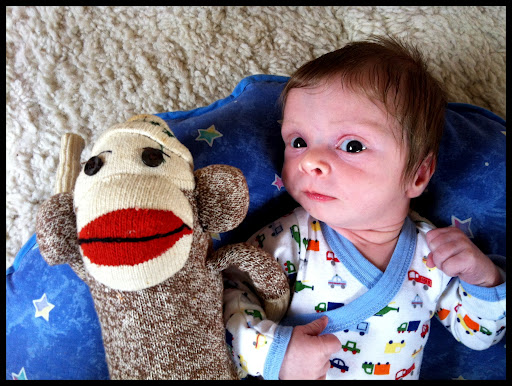
Look how passive he is!

8. Bouncy chair or automatic swing
One thing I didn’t really think about all the months I was pregnant was where do I keep my baby during the day when I need to make breakfast, clean the house, take a shower or use the toilet? The answer can be found on Craigslist. Never, ever buy a baby bouncer or swing brand new. It’s a total rip off and these things are floating around Craigslist like moths to a lamplight. When their babies grow out of them, people want these contraptions out of their house and are willing to sell them for super cheap. I bought two for $7 total just to see what our son would prefer. It just took a few C batteries and Jack is lulled to sleep by soothing vibrations. Now that he’s old enough to interact with things we re-hooked up the bubbly music electronic toy bar to his bouncer and he actually loves it. I guess Fisher Price knows what’s up.

9. Digital camera/iPhone Instagram App
I’m not going to delve into this, but photos of your baby are priceless and I use a camera every day. I do feel a little bad for my Facebook friends, but I’m really trying hard not to flood Facebook with photos of my baby. It’s pretty hard since he’s obviously the most attractive baby on the planet (I might be a tad biased).

Can you deny the cuteness?

Cool thing about Instagram is you can order teeny-tiny albums and stickers from their Web site. How cool is that?

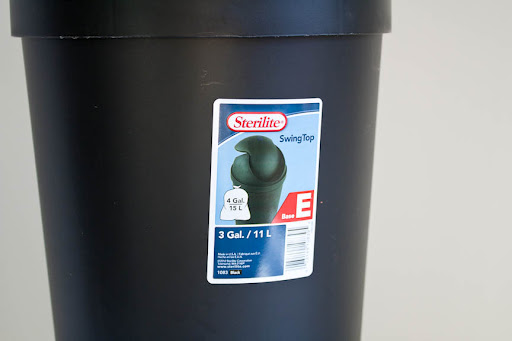
10. Gallon Ziploc bags
These are useful for so many reasons. I skip the fancy dry bags when I’m on the go and just stuff soiled items in Ziploc bags. If I’m in a bind I’ll just toss dirty diapers in grocery bags because people tend to have those lying around. Ziplocs are also useful when you’re packing for trips. Keep baby’s small clothing items and necessities contained.

11. Giant old-school water bottle with accordion straw
As a non-mom I never drank enough water, but as soon as I started nursing I became the thirstiest woman alive. Luckily the hospital provided me with a gigantic water bottle (although my bill wasn’t itemized, I’m sure I paid for it severely). Before going to bed each night, I fill up my giant water bottle with ice cubes and water and drink it down like there’s no tomorrow. Who knew having a baby would force me to stay hydrated?

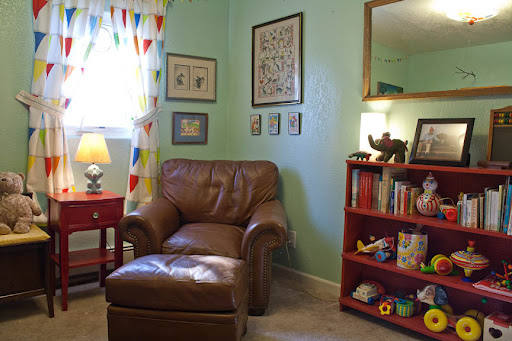
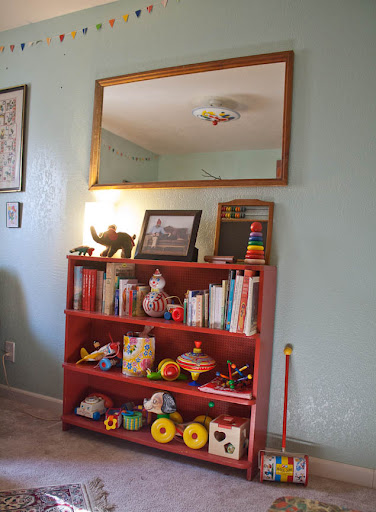
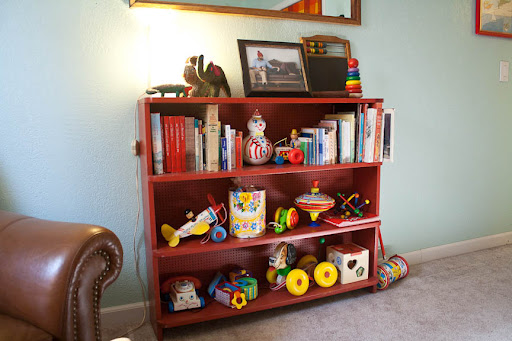
12. Thrift store books
No nursery is complete without books. I have to have the classics, such as Where the Wild Things Are and Goodnight Moon, but I really love those thick cardboard books because my baby will inevitably want to eat and destroy everything in his path. Books can add up if you buy them new, but I’ve found great books at the thrift store for next to nothing and there’s such a great variety. You can find books that are out of print, ones from your childhood, and it’s fun to find ones already inscribed. I just make sure to wipe down each cardboard page with a weak bleach water solution and let them air dry. I can’t trust thrift store dirt.
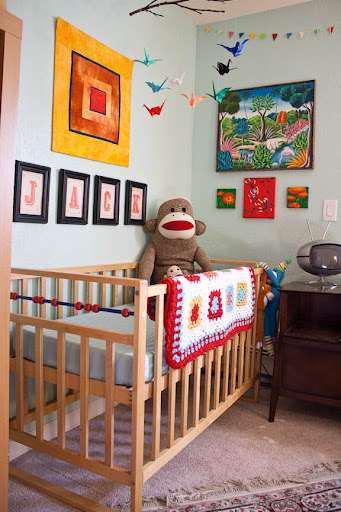
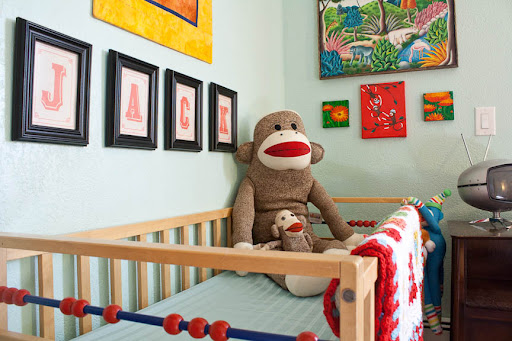
13. Womb Lamb
This isn’t a necessity, but it was a gift and I end up using it every day. My mother-in-law gave us a stuffed lamb that makes sounds such as rain, whales, ocean and heartbeat. It Velcros to the crib and for 20 or 45 minutes it will sooth your baby to sleep. I’ve read the womb is as loud as a vacuum cleaner to a baby in utero, so the outside world can be sort of quiet. This little lamb is pretty helpful, although I think the whales freak Jack out a bit.

14. Bottle warmer
Again, a total non-essential, but we actually use this thing regularly. After four weeks I started pumping so that dad could be a part of the feeding frenzy at night. It’s kind of a process for him. He has to take the milk out of the fridge and warm it up, then pour it in a bottle, all while Jack is screaming his face off. I found a bottle warmer at a garage sale and it became a lot easier for him. This device has a little cooler in the back that stores bottles for up to eight hours. When you’re ready to warm it, just pour the required amount of water in the front, place the bottle inside and press the button. In a few minutes the milk is ready for baby and dad can get a little taste of what mom’s been doing for four weeks.

15. Homemade hooded towel
Hooded baby towels are super cute. Sometimes there are animal faces on the hoods, which cuten your baby even more. But my baby is too tall for these towels and I feel like our grown-up towels are far plushier and softer than any baby towel. I’d rather be wrapped in the luxury of a Kohl’s Apt. 9 bath towel so I figured so would my baby. Luckily, I found just this towel at the thrift store for $1. I cut about a foot off the end of the towel, cut a triangle from the cut piece and sewed the triangle to one corner of the towel. I also turned under any raw edges. Presto! My boy can be all snuggled up as soon as bath time is over.

16. Garage sale clothing
Summer is the time for garage sales and never before have I actually been excited when I walk up to a garage and it’s full of baby clothes. I have yet to buy any new article of clothing for my boy. He is currently sporting jammies with mice and acorns that I bought for about 50 cents. In the winter I was shopping at thrift stores, but as soon as I went garage sailing (yes I know that’s not the right spelling) I realized I was being ripped off at the thrift store. Ok, so $1 for a Onesie isn’t so bad, but usually people sell clothes for a quarter at garage sales. We were able to dress up Jack for a wedding last week in a nice three-piece baby suit we purchased for $3.

17. Pacifier
I didn’t foresee us being a binky family, but a pacifier comes in handy at some point every day. Sometimes Jack just wants to suck on something and I don’t have time to leave my breast out all day. Buying the right pacifier was a bit like a baby wine tasting event. We bought several different types and let Jack figure out what he preferred. Turns out he likes the latex kind over the silicone kind. Who knew there was so much to learn about pacifiers? Jack’s full-bodied Nuk pacifier has a smooth, velvety texture with a hint of blackberry tannins.

So yes, those are 17 things that I use almost every day. Of course not everything on this list will be useful to each and every reader, but I hope my recommendations help you be a frugal, happy parent. What is something you can’t live without while caring for your infant? Feel free to leave a comment!

-Natasha

White Bean Pesto Hummus

My husband is back on the South Beach Diet, which means I have to get creative in the kitchen. This evening he was planning on herbed chicken bits with asparagus. He was just going to pile some canned black beans on top of his chicken, so I decided to get a little more creative.

I had a can of cannellini beans in the cupboard and some leftover homemade pesto so I decided to bust out the blender. What I came up with was a smooth and flavorful dip perfect for topping his chicken bits with. I cleaned up the rest of the dip with pretzel chips. Divine!
Ingredients:
One can of white beans
1 clove of garlic
juice of 1/4 lemon
3 or so tablespoons olive oil
2 tablespoons pesto
Directions:
Drain the beans and toss them into a blender. Add a couple of tablespoons of olive oil, the lemon juice, garlic and pesto. Turn on the blender. If your mixture is struggling to mix, add a little more oil while the machine is running. Once it loosens up, let it run for a few more seconds.
Serve with pita chips or spread on a chicken sandwich. Be creative!

Homemade Cloth Baby Wipes

All right, apparently it’s been a full month since my last post, and boy, did that month fly by! Here’s the reason I’ve been so absent:

His name is Jack Oliver and he is a month old. It’s been an exciting month and I’m finally settling into a new normal, so let’s get back to craftin’!

We have already purchased a Costco-sized box of wet wipes and I’m realizing how we’re fast becoming a wasteful family. We are doing a combo of cloth diapers and disposables, so I thought I’d give cloth wipes a try.

Today was the first big garage sale day and for once I’m actually stoked when all a garage sale has is baby stuff. I found some nice clothes for Jack but I snagged several flannel receiving blankets to craft out with.

Homemade wipes are super easy. Since I’m washing cloth diapers anyway, I figured a few scraps of flannel added to the wash wouldn’t make a big difference.

Here’s what you need to make 32 or so wipes:

2-3 flannel receiving blankets, or a yard of flannel fabric
An empty wet wipes box (sometimes thrift stores have these)
Sewing machine with zig zag stitch

Photo by Amber Telling

Cut your blankets into 7-inch squares. No need to be precise. You’ll end up with about 16 squares per blanket.

Using a wide zig-zag (or a serger machine is even better!) sew a border around any unfinished edges. I just incorporated the finished edges into each square.

Fill up your empty wet wipes box. If you have time (and I doubt I’ll find myself doing this often) overlap each wipe so that when you pull out a wipe, then next one will come out.

I plan on wetting each wipe as I use it with a spray bottle of water with a small amount of baby oil and baby soap in it. I suppose you could prewet the wipes by pouring some water into the wet wipes box after it’s filled. I’m not sure how that works, but I’m sure it’s fine.

Once a wipe is used, place it in your designated dirty cloth diapers receptacle. When it’s time to wash the wipes and diapers, here’s what I do (this is after hours of online research on washing cloth diapers using homemade detergent). I use a combination of equal parts Borax, Arm & Hammer Soda Wash (found next to Borax in grocery store) and Oxy Clean. I have a front loading HE machine and I run it through two cycles. The first cycle I run on cold and add one tablespoon of detergent. The next load I select an extra rinse cycle, add another tablespoon of detergent and run the load on hot.

Either line dry or dry on hot for more than an hour.

Turquoise Vintage Circus Jungle Nursery

When I was about four months pregnant, my close friend Kasandra asked me, “So, what is your theme going to be for the nursery?” Theme? Uh….under the sea? Wild west? I just don’t think in themes. So I thought about the colors I love — red, turquoise, purple, teal, orange, yellow — oh wait — I love all the colors.

When we first moved into our place Stephen and I painted two of the rooms Martha Stewart Vintage Map, which, obviously, is a light blue color (I can’t get over product color names).  So, conveniently enough when we found out we were having a boy we didn’t have to repaint the walls.

Honestly, though, I have a problem with classic nurseries. The baby is only a baby for a couple of years so I see no point in decking out a room with paint and decals and décor that will only be applicable for a short amount of time. Also, I wanted our baby room to be a space that I’d want to hang out in.

I love vintage toys and they all seem to have vintage colors like rusty orange and faded blue. I also love the look of Hipstamatic photos. The colors are saturated but a little off. They kind of remind me of old circus photos.

A few months ago I found someone on Craigslist who was selling several Fisher Price toys from the ’60s. I instantly scooped them up and after some light contemplation I had an answer for Kasandra: the theme will be vintage circus. What I ended up with I can’t exactly explain in terms of a theme, hence the bizarre blog title of Turquoise Vintage Circus Jungle Nursery.

I love how the room turned out. It look very little effort to transform what used to be the booze and guns room into a comfortable space to play and care for our son. Due to space constraints, my husband is sharing this room with baby. Stephen lays claim to the closet and the upper part of the cube shelf is his retro music station. But I think it blends well with the rest of the room.

I pride myself in finding good used items, so this room was a relative bargain. All the furniture is from thrift stores, garage sales, or was given to us. Most of the decorations were handcrafted by me, friends and family or were printed off the Internet and put into cheap frames.

We have many meaningful things in this room: a slate that my godmother used when she was a child, my older sister’s teddy bear, friends’ artwork, embroidery that was in my nursery, “A Child’s Garden of Verses” that belonged to my husband’s grandfather, a crib that all four of the kids in my family used, a bookshelf my grandfather made in the ’50s, a homemade sock monkey that belonged to my older brother and photos taken by close friends.

The love from our family and friends spans wall to wall. I hope you enjoy these photos as much as I do. Click on a photo to enlarge.

Curtains from Ikea, blanket made by me, crane mobile and paint chip bunting also made by moi, our old garage sale chair and ottoman, my Oriental rug from college

Bookshelf made my my grandfather in the ’50s, thrift store bedside table and lamp

Craigslist vintage toys, slate belonging to my godmother, thrift store toys, new German wooden toys from grandma

Homemade fitted sheet, giant sock monkey and red monkey painting from our friend Ashley, crib made in Sweden and purchased in England for my brother in 1971, wall quilt made by my mom, jungle painting scrounged from a moving van, space-age TV scrounged from a dumpster
From left to right: My childhood bear Bosh, older sister’s bear Beary, new Pooh sitting on vintage telephone bench converted to a toy chest

Artwork and haiku by my old friend Joe

Craigslist cube shelf, painting by original Jack, thrift store toys, photos by our friend Amber
Bins from Jo-Ann’s

How to Sew Your Own Cloth Diaper Wet Bag

Ok, I’m gearing up for baby time. I’ve decided to embrace the cloth diaper concept and I have nearly everything I need. Upon doing research on how to clean cloth diapers, I discovered that I’ll need some sort of receptacle to store the soiled nappies between washes. My mom suggested just using plastic bags, but that seems wasteful. When I looked online I found lots of different brands of cloth diaper wet bags, but they were about $20-40 for the size I was looking for. I took to Esty and found some really cute ones, but again the price was too much for me to justify. I mean, really, it’s just a simple bag.  Why not make one myself?

So I did.

It’s definitely not professional, but I think it will do the trick and it only cost about $5 to make.

You can make one too. Here’s what you need to make two wet bags:

A 3-gallon trash can with a lid
3/4 yard of PUL fabric (It was in a special cloth diaper section at Jo-Ann’s)
Nylon cording (cheap, in the hardware section of the grocery store)
2 cord stops (found in the notions section at Jo-Ann’s)
a safety pin
a lighter
bag clips (so you don’t penetrate the waterproof fabric while you hold it in place)

Please note: you may need a different amount of PUL fabric depending on the size of the trash can you purchase.

1. Measure your trash can around. Mine was 28 inches so I decided to make my bag 32 inches wide. I learned the hard way after my first attempt at making a bag that deeper is better, so although my can is only 14 inches deep, I made my bag 25 inches to leave room for the casing and to be able to fold it over the side of the can to hold it in place. End measurement: 32″x25″.

2. I made French seams so that the bag would be more waterproof. Pin the 25-inch seam together RIGHT SIDE OUT and sew using a very narrow seam allowance — less than 1/4 inch. Leave two inches unsewn at the end. This will be the top of the bag because you’ll need the sides free for the casing and cord.

3. Turn the tube inside out and using the bag clips, clip the seam to hold it in place. You are essentially pinning it in place but without having to penetrate the waterproof fabric.

4. Sew along the side again, this time leaving about a 1/2-inch seam allowance, again leaving the top two inches unsewn. Pull the fabric slightly as you go. It’s a little sticky and has a hard time feeding itself through, at least with my machine.

5. Do steps 2 and 3 with the bottom edge. You should now have something that looks like a bag.

6. Now here’s the kind of ghetto part, but I don’t really care. With the bag right-side out, turn in the unsewn edges of the top and sew them down. This will ensure you don’t have any raw edges for the cord to fray up.

7. Turn down the top edge and pin in place, making a 1-inch casing. Sew all the way around the top of the bag. The wider the casing, the easier it is for the cord to move around. If you wanted this to look more professional you could turn down the top edge just a little bit and then turn it down again to make the 1-inch casing so you don’t have any raw edges at all. I just really don’t care that much!

8. Attach a safety pin to one end of the nylon cord and feed it through the casing. Leave about 6 inches of cord on either end. Use a lighter to melt the ends of the nylon cord to prevent fraying.

9. Thread the two ends through the cord stop.

10. Place your new bag in the trash can and wrap the edge of the bag around the can. Use the cord stop to hold the drawstring in place around the can.

11. If your pail starts to get stinky just drawstring the bag so odors won’t escape as easily. When it’s time do to a wash, just turn the bag inside out as you dump the diapers in the washer and toss the bag in with the wash. The PUL fabric can be washed and dried just like the diapers.

So we’ll see how well this holds up. At least I saved a bunch of money by making it myself and that makes me feel goooooooooood!

Lemon Almond Quick Bread

I don’t bake much. That seems to require a little more precision than normal cooking, where you mix flavors together. With baking everything has to be just right or things come out too dense or too dry and crumbly.

But after my second successful attempt at making almond milk I was left with a quantity of byproduct — almond meal, which I dried in the oven and stored in a plastic container.

So I decided to venture into the baking world. I looked up various recipes using almond meal and came across one with so few ingredients I didn’t think I could screw it up.  It was for a quick bread. I like the word quick. It makes me think “less effort.”

I actually wanted a little more zing in my bread, so I added some lemon zest. Also, I didn’t have enough almond meal so I subbed white flour for the remaining I needed. When I mixed everything together it was really thick and pasty, so I decided to add some of my own almond milk to make it more dough-like. For the yogurt I used my very own concoction of honey yogurt I made earlier in the week. I also wanted some sweetness, so I put in some honey.

Success! This dessert bread came out moist and flavorful. I think I’ll make it every time I make almond milk.

To make the almond meal yourself, just follow this recipe for almond milk and save the almond grounds. Spread the grounds on a cookie sheet and bake in a 275-degree oven for 45 minutes, or until the grounds are dried out.

Almond meal after straining out the almond milk

Place the dried meal in a food processor and process till it’s as fine as you can get it, sort of like corn meal.

Otherwise, just buy almond meal or flour!

Lemon Almond Quick Bread

Ingredients:
2 cups almond meal or flour
1.5 cups white flour
1/4 tsp. salt
1 tsp. baking soda
3 eggs
1 cup greek yogurt
1/4 cup melted butter
zest of one lemon
2/3 cups almond milk
1-2 Tbs. honey

Directions:
Preheat oven to 350 degrees. Grease a bread loaf pan. Combine the dry ingredients in a large mixing bowl. Combine the wet ingredients in a medium bowl then add to the dry ingredients. Pour batter into the bread pan and bake for 40-50 minutes or until a knife comes out clean. Let cool on a drying rack then slice up and serve with butter and jam.

Free knitting patterns, DIY crafts, easy recipes and more!