Crab Bisque

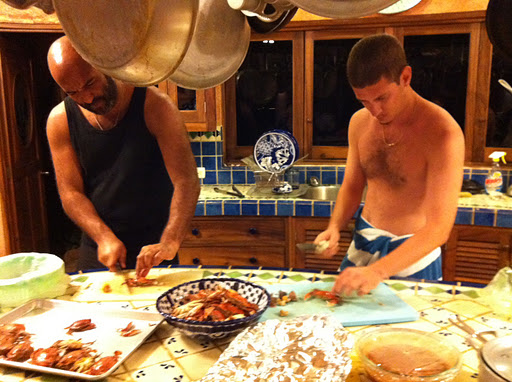
While basking on the beach yesterday in Punta el Custodio, Mexico, the boys decided to behave like, well, boys and torture a few of the small blue crabs in the tide pools.

After a half hour of chasing them with long sticks they decided to actually catch some.

I was impressed they caught 33 of the poor creatures. I was even more impressed when they cleaned and boiled them. Bisque was on their minds. My dad gave us his recipe he made up last month when it was crab breeding season in the estuary and he captured 240.

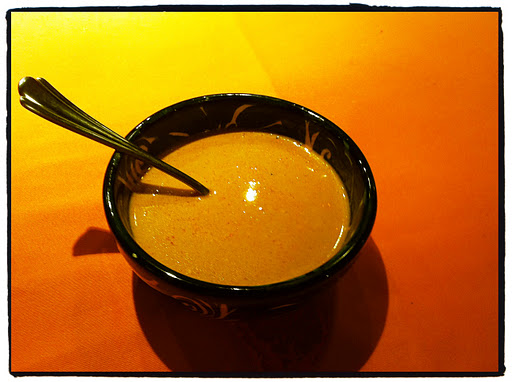
It is a time consuming process, but the bisque turned out rich and bursting with flavor.

Ingredients:
3-5 pounds fresh whole crab
Chicken bouillon
6 cloves garlic
One onion
2 carrots
3 Tbs. butter
8 ripe tomatoes or one large can chopped tomatoes
Pepper
2 tsp. smoked paprika
1.5 cups cream

Directions:
Rinse crabs thoroughly in fresh water, getting out any grit. Use protective work gloves if using live crabs.

Bring a large pot of water to a boil. Put crabs in batches into water and cook about 5 minutes.

Rinse crabs again and cut off and discard females' tails if they contain eggs.

With a cleaver, chop an "x" in the backs of each crab and crush the claws with the blade of the knife.

Bring another large pit of water to a boil and toss in all the crabs. Simmer without the lid for 3-5 hours. You should have a concentrated broth that smells über crabby and kind of gross. Strain broth into a smaller pot and discard all the crab parts. Stir in bouillon based on how much broth you have. I added two teaspoons.

Let the broth cool and then refrigerate if you don't have time to finish bisque on the same day.

Toss the butter into a tall-sided frying pan and turn to medium heat. Chop up the garlic and add to pan. Sauté for a few minutes, but don't let it burn. Roughly chop the onion and grate up the carrots. Add to pan and sauté for about 5 minutes. Add more butter if it gets too dry.

Chop up the tomatoes if using fresh. Add tomatoes to the pan and cook till everything is soft and cooked through — about 10 minutes.

Let cool and place in a food processor. Process till smooth, about two minutes.

Add this mixture to the crab stock and bring to a simmer. Simmer for three hours with the lid off so the bisque reduces a bit. Add paprika, salt and pepper to taste. Turn off the heat and leave the bisque till it's room temperature. Stir in the cream.

Serve room temp or pop a bowl in the microwave for 40 seconds before eating.

Virgin Mojito

Ok, so it's been challenging being on vacation in Mexico and not being able to drink. I've been playing blind bartender for my friends, serving up tequila sunrises, margaritas, and mojitos.

So tonight I tried to make a pregnant lady mojito and it turned out great.

Mexico has a store bought simple syrup called Jarabe, which is just the tastiest, but you can make your own of you think of it ahead of time. Just boil a cup of water and add a cup of sugar. Stir till fully dissolved and then cool.

Ingredients:
One shot glass of freshly squeezed lime juice
1.5 shot glasses if simple syrup
6 fresh mint leaves
Club soda
Ice

Directions:
In a tall glass, add the lime juice and mint. Muddle with a fork or wooden spoon handle. Add the syrup and the ice. Stir well and top off with club soda. Garnish with a sprig of mint of you like.

Bananas à la Lechera

My parents' banana tree produced about two dozen red bananas and they've been hanging in the hall for a week ripening. They are finally ready to be eaten so we have to get to work!

I thought I'd make a simple fried banana dessert and it was scrumptious.

You could use any type of banana as long as it isn't over ripe.

La Lechera is just Mexican brand sweetened condensed milk. It can be found in the Mexican food section of the grocery store.

Serves four

Ingredients:
three bananas
2 tablespoons butter
1/4 cup warmed Lechera
Cinnamon

Directions:
Cut the bananas in half lengthwise. Heat butter in a frying pan over medium high heat. Set the bananas in the pan cut side down and fry till brown. Flip and fry on the other side. Transfer to a plate and drizzle Lechera over bananas. Dust with cinnamon.

Grilled Jalapeño Poppers

These beat deep-fried poppers hands down. Also, they are wrapped in bacon so that's automatically the best thing ever.

Ingredients:
Fresh jalapeños
Cream cheese
Bacon

Directions:
Cut off the tops of the jalapeños. Cut the peppers lengthwise and scoop out the seeds.

Fill each pepper half with about two teaspoons of cream cheese.

Cut each slice of bacon in half and wrap the half slices around each jalapeño.

Place the poppers on metal or wooden skewers. I suggest soaking the wood ones for about ten minutes first.

Place on a medium high grill and turn a few times till bacon is cooked. Enjoy!

Crock Pot Stuffing

Eating is one of my favorite activities. That’s why Thanksgiving is so fun for me. There are about a dozen different dishes on the table and I can pick and choose from them all. Turkey isn’t the main event on my plate, but stuffing definitely would be a contender.

Last year I finally took Alton Brown’s advice and in addition to brining my turkey, I didn’t stuff it because he said it cools it down and hence makes the bird cook longer and less evenly.
This is actually the first year in a decade that I wasn’t in charge of the turkey. Instead I decided just to do the stuffing, or in this case I guess you would have to call it dressing.
Since some friends were hosting the feast I knew I would have to make the dressing easy to transport and also easy to keep warm. I also wanted to be courteous to the hosts and try not to take up their valuable post-turkey oven space.
I was perusing a slow cooker cookbook from the library the other day, and between the Velveeta, onion soup mix and cream of mushroom soup ingredients I found a humble recipe called Slow Cooker Stuffing. I promptly disregarded the recipe, but it was the method I was interested in.
A Crock Pot makes a lot of sense for stuffing. It’s almost like a giant turkey — it keeps moisture in and cooks slowly. It would solve my transportation, heating and oven problems. I had to try it.
So I used my tried and true Daddy O’s Stuffing recipe and Crock Potted it instead of casseroling it. What I ended up with was moist, flavorful stuffing that tasted as though it was scooped right out of the bird.
*2025 UPDATE*
I’ve been making this recipe for years, but haven’t really measured anything. I STILL don’t measure anything, but I’m going to update the recipe with better eyeballed measurements.
Ingredients:
  • 1 onion, chopped
  • 3 celery stalks, chopped
  • 2 cups sliced crimini or button mushrooms
  • 1.5 packets of breakfast sausage links
  • 1 cup cup golden raisins
  • 1 can of medium black olives, drained and chopped
  • 14 oz. bag seasoned bread cubes (or two boxes of Mrs. Cubbison’s since there are fewer cubes in the boxes)
  • 1/2 cup finely chopped parsley
  • 3/4 stick of butter
  • About 1 cup chicken stock
  • salt and pepper, to taste
  • A large crock pot
Directions: Start making this when you’re ready to eat breakfast. This way you can eat a couple of sausage links with some eggs while the other ones are cooling. Brown all the sausage links in a big sauté pan. Once they are cooled, chop them into little rounds.
Secret ingredient: meat
Slice the mushrooms using a hard-boiled egg cutter. I love this trick I invented that I’m sure other people have also come up with! My sister broke my egg slicer last year doing this, so now I just use it for olives and eggs.
Add 2 tablespoons butter in the sauté pan and heat on medium-high. Add the celery, onion and mushrooms and cook till everything is softened, about 7 minutes.
Spray the inside of the crock pot with Pam and dump in the bread cubes. Add the breakfast sausage, mushrooms, onion and celery.
Use the hard boiled egg slicer again for the olives. It’s a cinch!
Brilliant!
Add the raisins, olives, parsley, salt and pepper and mix thoroughly.
Cut the remaining butter into little cubes and mix into the stuffing. Periodically pour in the chicken stock between mixing so everything is well incorporated. You don’t want to overdo it with the stock as it can make everything soggy, so splash some in here and there until the cubes are coated but not saturated.
Put the lid on the crock pot and turn it to low. Let it cook for 4-5 hours. Don’t remove the lid until you’re good and ready cause it takes a long time to reheat the crock pot. You could also prepare this in a large dutch oven and bake at 275F for 2-3 hours, stirring occasionally.
Thank you thrift store!
Fluff up just before serving.

Orange Sherbet Scarf

Last winter I got a tad obsessed with Pickles’ pattern for a Simple Luxury Scarf. I made about three of them and then started on another but didn’t get around to finishing it till this winter.  It was the first one where I used totally different colors in the main yarn and the mohair. I used Cascade Yarn Cherub Aran and Cascade mohair.

Blue Starlight Sideways Scarf

I’ve been admiring a scarf we sell at work, the Zumi scarf by Prana.

I like how it’s make the long way instead of the short way, how most scarves are made.

I figured it would be easy enough to make and it surely was. It was a great winter Sunday project.

Materials:
One ball of soft worsted weight single-ply yarn. I used Universal Yarn Classic Shades in the blue.
One ball of mohair in a similar color. I used some donated yarn that had silver glitter thread in it.
A really long size 13 circular needle
A size J crochet hook

Directions:
Loosely CO 150 stitches. Knit in garter stitch till work is 4-6.5 inches long, whichever you prefer. Loosely bind off.
For the tassels: Using the crochet hook, single chain four pieces of cord 12 inches long. Tie knots at the ends of each cord. Loop two to each end of the scarf.

Cheery Winter Set Patterns

If you’re wanting to knit this pattern with a different needle size and different weight yarn, I am unable to adjust the pattern for you. This pattern is written for a specific needle size and yarn weight.
These items were made with heavy worsted hand-dyed single-ply yarn.
The hat is a simple pattern. Seventy-two stitches on size 9 circular needles. K1, P1 rib for six or so rows and knit in st st for 7 inches. Decrease as follows:
Place marker. *K2tog, K 6*, repeat to end of round
Knit one round
*K2tog, K5*, repeat to end of round
Knit one round
*K2tog, K4*, knit to end of round
Knit one round
*K2tog, K3*, repeat to end of round
Knit one round
*K2tog, K2*, knit to end of round
Knit one round
*K2tog, K1*, knit to end of round
*K2tog*, repeat to end of round
Draw loops together and weave in ends. Add awesome pom-pom.
Click here for the ascot pattern

For the mittens I used the Magic Loop method of knitting. It really made the project go by fast. If you don’t have any really long size 7 circular needles, then just use double points. For the cuff, use size 5, but don’t forget to switch out. I had to undo half a mitten when I realized it was coming out smaller having forgotten to change to size 7.

CO 36 stitches on smaller needles. K1, P1 rib for 28 rows or until preferred length. M1 stitch four times evenly over the next row (40 st).
Change to bigger needles and other color if making bi-colored mitts. Knit 6 rounds even.
Thumb gusset:
Round 1: M1, K1, M1, knit to end of round
Round 2 and all even rounds: Knit
Round 3: M1, K3, M1, knit to end of round
Round 5: M1, K5, M1, knit to end of round
Round 7: M1, K7, M1, knit to end of round
Round 9: M1, K9, M1, knit to end of round
Round 11: M1, K11, M1, knit to end of round
Round 13: M1, K13, M1, knit to end of round
Knit 5 rounds
Thumb hole: Place the first 15 stitches onto a stitch holder or scrap piece of chunky yarn. CO one stitch and knit to end of round (40 st).
Knit in st st till the piece is 1/2 inch shorter than the top of your middle finger.
First decrease round: *K2, K2tog* repeat to end of round
K 2 rounds
Second decrease round: *K2tog, K1* repeat to end of round
K 1 round
Third decrease round: *K2tog*, repeat to end of round
Repeat the last round or you should have about 12 stitches.
Use the Kitchener stitch or just draw up the stitches and weave in ends.
For the thumb:
Place the 15 stitches onto two double points or on your long circular if doing magic loop.
Pick up and knit four stitches, knit to end of round.
On next round, decrease two stitches evenly.
Knit 4 rounds
Next round: K2tog, knit to end of round. You should have 16 stitches, but it’s ok if you don’t.
Knit in st st till it’s as long as your thumb.
Decrease round: *K2tog* till end of round. Draw up yarn and weave in all ends.

Now make one more so you have two mittens to warm both hands!

To make a lining:

Trace the outline of the mitten to a pice of flannel doubled over. Add two inches to the tracing and cut out. Sew double seams all around the flannel mitten. You must make sure you can easily put on the flannel mitten, especially in the wrist area. I had to try a couple of times to get a good fit. Make two and hand sew into the mitten inside-out because that way the raw seams will not be on the inside of the lining.

New Mittens

Last May I went to New York City and finally got to use the gift certificate my little sister got me for Christmas at Purl Soho, the cheeriest yarn shop ever. Since then I’ve been dying to use some of the yarn I bought there, so I finally decided to make some new mittens. These are made out of Manos de Uruguay yarn. I don’t know what brand the red is anymore, but the pink is actually called “cheek.”
I used my basic mitten pattern, but instead of drawing up the top of the mitten like I do a hat, I used the Kitchener stitch to make it seamless.
Then I added a crocheted ruffle trim, which was a first for me. Another first was I lined these mittens with red flannel. I’m glad it was fabric I acquired from a thrift store, because it took me several tries to make a lining that fit properly.
So now I have some delightful mittens to match my hat and ascot, which I will post photos of later.
Happy Thanksgiving and I’ll write from Mexico!
-Nat

Make Your Own Veggie Steamer

Steaming vegetables is one of the best preparation methods. It locks in nutrients and makes veggies as tasty as can be.

Every time I think of steaming my veggies I remember that I don’t have one of those steaming baskets. So I took matters into my own hands — tin foil to the rescue!

This takes just a couple of minutes to make and you can steam your veggies just as if you had a fancy steamer.

First, fill a saucepan with an inch of water.

Take a long piece of tin foil and fold it in half. Fit it over the pot and push some of the foil into the pot so it creates a bit of a well. Crimp the foil all around the edge of the pot.

With a paring knife, cut several holes in the foil.

Add your vegetables (I used frozen green beans) and cover the pot.

Place over high heat and let the veggies steam for several minutes until they are tender.

Voila!

Free knitting patterns, DIY crafts, easy recipes and more!