All posts by alaskaknitnat

Welcome to Alaska Knit Nat! I was born and raised in Anchorage and have always had a passion for making useful things, whether they are eaten, knit, crocheted, sewn or randomly glued and assembled. I received my bachelor’s degree in French and journalism from the University of Alaska Anchorage and work almost full time at a nonprofit and way over time as a mom.

How to Sew Your Own Cloth Diaper Wet Bag

Ok, I’m gearing up for baby time. I’ve decided to embrace the cloth diaper concept and I have nearly everything I need. Upon doing research on how to clean cloth diapers, I discovered that I’ll need some sort of receptacle to store the soiled nappies between washes. My mom suggested just using plastic bags, but that seems wasteful. When I looked online I found lots of different brands of cloth diaper wet bags, but they were about $20-40 for the size I was looking for. I took to Esty and found some really cute ones, but again the price was too much for me to justify. I mean, really, it’s just a simple bag.  Why not make one myself?

So I did.

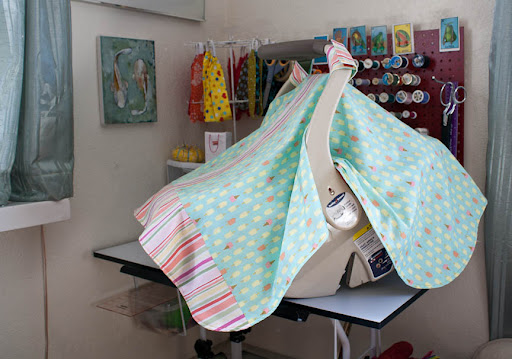
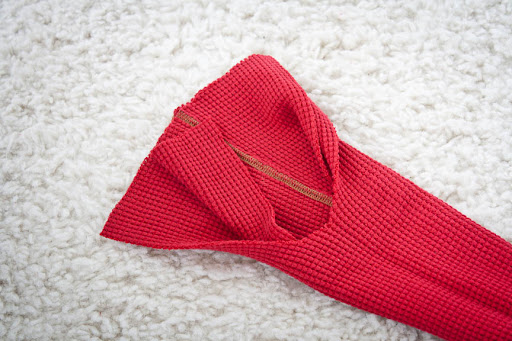
It’s definitely not professional, but I think it will do the trick and it only cost about $5 to make.

You can make one too. Here’s what you need to make two wet bags:

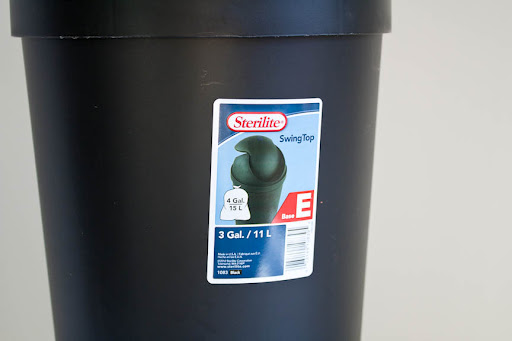
A 3-gallon trash can with a lid
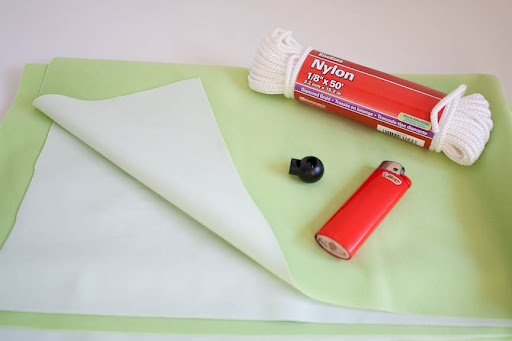
3/4 yard of PUL fabric (It was in a special cloth diaper section at Jo-Ann’s)
Nylon cording (cheap, in the hardware section of the grocery store)
2 cord stops (found in the notions section at Jo-Ann’s)
a safety pin
a lighter
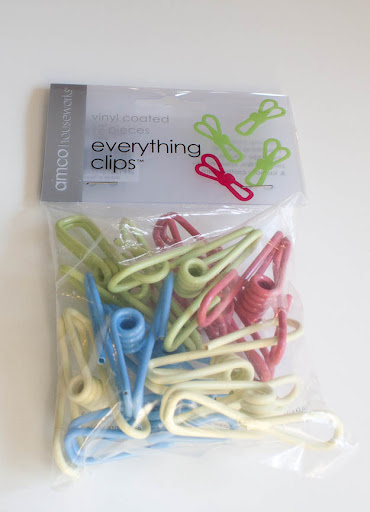
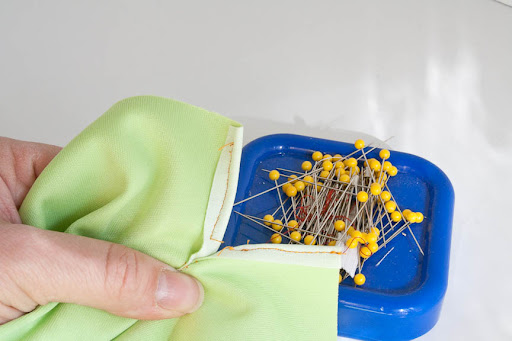
bag clips (so you don’t penetrate the waterproof fabric while you hold it in place)

Please note: you may need a different amount of PUL fabric depending on the size of the trash can you purchase.

1. Measure your trash can around. Mine was 28 inches so I decided to make my bag 32 inches wide. I learned the hard way after my first attempt at making a bag that deeper is better, so although my can is only 14 inches deep, I made my bag 25 inches to leave room for the casing and to be able to fold it over the side of the can to hold it in place. End measurement: 32″x25″.

2. I made French seams so that the bag would be more waterproof. Pin the 25-inch seam together RIGHT SIDE OUT and sew using a very narrow seam allowance — less than 1/4 inch. Leave two inches unsewn at the end. This will be the top of the bag because you’ll need the sides free for the casing and cord.

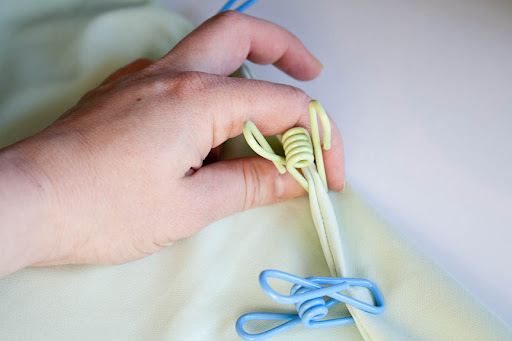
3. Turn the tube inside out and using the bag clips, clip the seam to hold it in place. You are essentially pinning it in place but without having to penetrate the waterproof fabric.

4. Sew along the side again, this time leaving about a 1/2-inch seam allowance, again leaving the top two inches unsewn. Pull the fabric slightly as you go. It’s a little sticky and has a hard time feeding itself through, at least with my machine.

5. Do steps 2 and 3 with the bottom edge. You should now have something that looks like a bag.

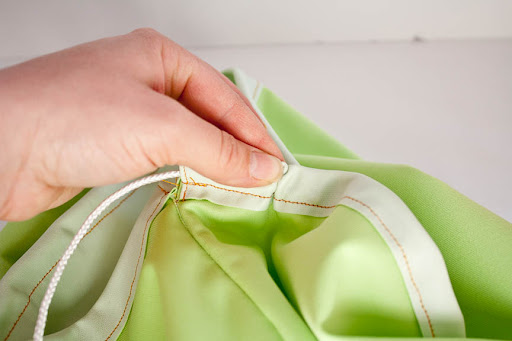
6. Now here’s the kind of ghetto part, but I don’t really care. With the bag right-side out, turn in the unsewn edges of the top and sew them down. This will ensure you don’t have any raw edges for the cord to fray up.

7. Turn down the top edge and pin in place, making a 1-inch casing. Sew all the way around the top of the bag. The wider the casing, the easier it is for the cord to move around. If you wanted this to look more professional you could turn down the top edge just a little bit and then turn it down again to make the 1-inch casing so you don’t have any raw edges at all. I just really don’t care that much!

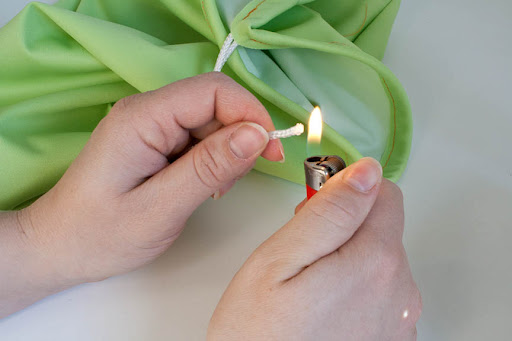
8. Attach a safety pin to one end of the nylon cord and feed it through the casing. Leave about 6 inches of cord on either end. Use a lighter to melt the ends of the nylon cord to prevent fraying.

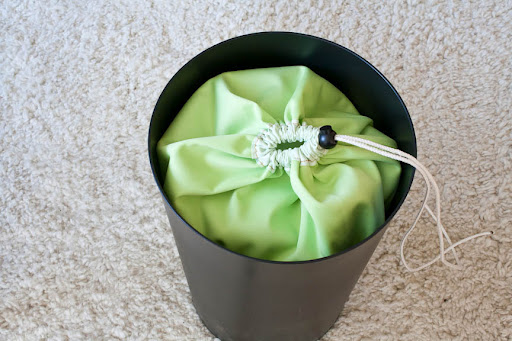
9. Thread the two ends through the cord stop.

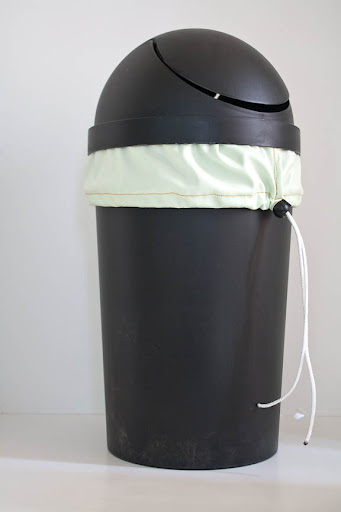
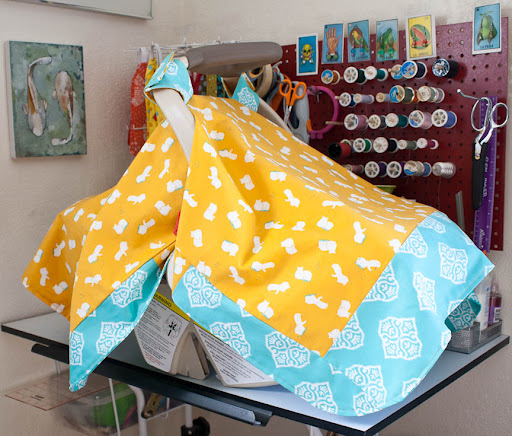
10. Place your new bag in the trash can and wrap the edge of the bag around the can. Use the cord stop to hold the drawstring in place around the can.

11. If your pail starts to get stinky just drawstring the bag so odors won’t escape as easily. When it’s time do to a wash, just turn the bag inside out as you dump the diapers in the washer and toss the bag in with the wash. The PUL fabric can be washed and dried just like the diapers.

So we’ll see how well this holds up. At least I saved a bunch of money by making it myself and that makes me feel goooooooooood!

Lemon Almond Quick Bread

I don’t bake much. That seems to require a little more precision than normal cooking, where you mix flavors together. With baking everything has to be just right or things come out too dense or too dry and crumbly.

But after my second successful attempt at making almond milk I was left with a quantity of byproduct — almond meal, which I dried in the oven and stored in a plastic container.

So I decided to venture into the baking world. I looked up various recipes using almond meal and came across one with so few ingredients I didn’t think I could screw it up.  It was for a quick bread. I like the word quick. It makes me think “less effort.”

I actually wanted a little more zing in my bread, so I added some lemon zest. Also, I didn’t have enough almond meal so I subbed white flour for the remaining I needed. When I mixed everything together it was really thick and pasty, so I decided to add some of my own almond milk to make it more dough-like. For the yogurt I used my very own concoction of honey yogurt I made earlier in the week. I also wanted some sweetness, so I put in some honey.

Success! This dessert bread came out moist and flavorful. I think I’ll make it every time I make almond milk.

To make the almond meal yourself, just follow this recipe for almond milk and save the almond grounds. Spread the grounds on a cookie sheet and bake in a 275-degree oven for 45 minutes, or until the grounds are dried out.

Almond meal after straining out the almond milk

Place the dried meal in a food processor and process till it’s as fine as you can get it, sort of like corn meal.

Otherwise, just buy almond meal or flour!

Lemon Almond Quick Bread

Ingredients:
2 cups almond meal or flour
1.5 cups white flour
1/4 tsp. salt
1 tsp. baking soda
3 eggs
1 cup greek yogurt
1/4 cup melted butter
zest of one lemon
2/3 cups almond milk
1-2 Tbs. honey

Directions:
Preheat oven to 350 degrees. Grease a bread loaf pan. Combine the dry ingredients in a large mixing bowl. Combine the wet ingredients in a medium bowl then add to the dry ingredients. Pour batter into the bread pan and bake for 40-50 minutes or until a knife comes out clean. Let cool on a drying rack then slice up and serve with butter and jam.

Homemade Carseat Canopy

Since I finally decided to stop working, I’ve had a lot of time on my hands and not a lot of motivation. It’s hard to move around when I’m more than nine months pregnant! But I powered through and made a couple of carseat covers, one for us and one for my friend who is having a girl. I love the color combos and it finally gave me a reason to buy the popsicle fabric at Jo-Ann’s — and it was half off!

The pattern was a Pinterest find and can be accessed here.

It was a really easy project, but it took me literally all day to make both because I had to take so many breaks. Also, I didn’t have enough hippo fabric for our cover and I had to do some extreme pregnant math (brain no work good) to figure out how to piece it with the blue fabric. Also due to pregnant brain I cut the popsicle fabric completely down the middle by accident, but I think the stripe looks pretty good!

The only thing I did differently from the pattern is I put the straps a couple of inches closer together. I used safety pins before sewing them down, tried it on, and realized the straps were flopping to the sides. I repositioned them till they were a good distance — about six inches apart.

Insert baby here

Love this!

finally got to put these hippos to good use!

I tried it — homemade almond milk

I’ve never been a huge fan of almond milk, or rather, you wouldn’t ever see it in my shopping cart, but that’s not to say it isn’t tasty. When I saw a super easy recipe on Pinterest for homemade almond milk, I figured I might as well give it a go.

It was pretty simple: soak 1 cup of raw almonds in water for 8 hours. Drain the water, fill a blender with four cups water, add the almonds and blend for a few minutes. Then strain the liquid through a cotton kitchen towel, being sure to save the almond meal for later.

It turned out really tasty. I added a little honey to sweeten the flavor. It made about a quart of milk.

But then I realized it was totally not cost efficient. I mean, up here in Alaska, raw almonds are $10 a pound I used about 1/2 pound. Five dollars for a quart of almond milk — I’m pretty sure it’s cheaper to buy it already made.

I guess if I wanted to make it in the future, I’d have to check out if Costco has raw almonds or if I can buy them online for cheaper. I read in one recipe that Trader Joe’s sells 4 cups of almonds for $10. Blasted Trader Joe’s — when will you come up to AK?!

*Update! I just discovered my local Safeway is a total rip off! Fred Meyer had raw almonds for $5 a pound! I’m trying this project again since $2.50 is much more affordable for a quart.

On the plus side, I kept the ground up almonds and roasted them for a while in a 250-degree oven till they were dried out. I used them in my oatmeal the next morning and in my mini meatloaves instead of breadcrumbs. Totally useful stuff.

I tried it — homemade yogurt

It’s been a busy couple of weeks. I installed a kitchen sprayer on the toilet for our future cloth diaper cleaning, made some prefolds out of old t-shirts, made some grocery bags out of t-shirts, made meatloaf cupcakes with mashed potato frosting, did a couple of more sewing and cooking projects and for this post I decided to try out making my own greek yogurt.

I found a reasonably easy recipe on the interwebs here and decided it was totally worth doing, especially since my husband bought two gallons of 1% milk at Costco for no reason other than he was craving cereal and thought we could consume all of it between the two of us in a week.

I love that I made this in my crock pot. Everything was super easy, including clean up! Since all crock pots aren’t alike, I had to heat the milk for quite a bit longer to get it to 180 degrees. I got it up to 177 and called it good.

After cooling the milk to 105 degrees, adding the 1/2 cup of store bought yogurt I just wrapped the whole crock pot in a towel and stuck it in the oven for eight hours (with the oven OFF!)

My yogurt, after straining, was silky and flavorful. I liked it better than store bought because it wasn’t sour or bitter tasting, but that could be that I added honey as the recipe called for (although I didn’t measure).

Anyway, I will totally make this again in the future especially if I need to use up 1/2 gallon of milk.

Long-sleeved Tee Becomes Baby Long Johns

I’m a short-attention-span crafter. Making ten-minute baby pants is like instant gratification. When I found a long-sleeved waffle Tommy Hilfiger shirt being given away, I instantly saw its potential — baby long johns!

I didn’t use a pattern, but I based my creation on this pattern here. I just eyeballed it, but I’ll give you a step-by-step. What’s nice about making pants out of shirt sleeves is there’s already a cuff so you don’t have to turn anything under and you don’t have to sew any inseams.

The material is super stretchy, so I think they will fit for a long time.

Materials:
One adult long-sleeved t-shirt that’s either stretchy or has wide sleeves.
Narrow elastic
Safety pin
Sewing machine
fabric scissors

Directions:
First, cut off the sleeves at the shoulders. It doesn’t have to be exact.

Once the sleeves are trimmed, cut the tops of the sleeves straight across so each sleeve (now we’ll call them legs) measures about 18 inches.

I then cut the crotch part out of each leg, starting about 7.5 inches down from the top of each leg.

I just eyeballed one leg and then laid it on top of the other leg and used it as a guideline for cutting the other.

Then, turn one leg inside out. Slip the right-side out leg inside the inside-out leg and match them up at the crotch.

Now, sew the raw edges of the curved part together. This is the rise/crotch of the pant. Pull the inside leg out so the pants are now inside-out. They should pretty much look like the finished product, but with a raw edge at the waist.

Now, turn down the waist wide enough for the elastic to easily be fed through it, about an inch. Sew all the way around, but leave a gap so you can feed in the elastic.

Pin the safety pin to the end of the elastic and feed it through the waistband area, being sure not to twist it.

When the elastic is fed all the way around, play with the length till you feel it’s good. I didn’t measure the length of the elastic. I just cut it where I thought it seemed best and sewed one end of the elastic on top of the other.

Finally sew up the gap of the waistband.

Ta-da!

Cute Cute Cute

Stylin’

Guest Blogger — Li’l Sis’ Unsweetened Chocolate Chip Cookies

My little sister, Alex, made some delectable chocolate chip cookies for my baby shower last Sunday. I’m going to let her take over from here.

Hey there. This is my first post ever, and I’m honored to make my first step on my big sister’s blog.  Now let me talk about cookies. Much like Tasha, I prefer cooking to baking, but chocolate chip cookies has always been an exception. During the winter,  I would make cookies nearly on a weekly basis with my best friend who lived down the street. As a result, I have the Tollhouse chocolate chip cookie recipe memorized. The point is, I love chocolate chip cookies. Have I made that clear?

Last summer,  I found a cafe in my neighborhood in San Francisco. It served the best chocolate cookies I’ve ever tasted. I couldn’t identify what particular element in them made them so remarkable. Then, after my third cookie (I only got one cookie per visit, I do have some self control), I figured out that the bakers used unsweetened baking chocolate. The sweet cookie dough contrasted with the sharpness of unsweetened cocoa makes for a pretty profound cookie experience. Since then, I’ve only made chocolate chip cookies à la SF cafe.  Here’s what I did for Tasha’s shower.

Makes about 36 cookies

Ingredients:
2 1/4 c. all purpose white flour
1 tsp. baking soda
1/4 tsp. salt
3/4 c white sugar
3/4 brown sugar
2 sticks of butter (substitute coconut oil if you feel adventurous.  Tastes yummy)
2 eggs
1tsp. vanilla
2 c chopped up unsweetened baking chocolate
Pinch of cinnamon (optional)

Preheat oven to 375 degrees. In one bowl, mix the flour, baking soda and salt. In another bowl, mix the softened butter with the brown sugar, eggs, white sugar, and vanilla in that order (to avoid a clumpy mess). Slowly add in the flour/salt mixture until you have a soft, gooey, golden mixture. Finally, mix in your chocolate. I chop up the chocolate into small pieces. You’ll inevitably end up with some chocolate powder, which is totally awesome. When you mix the in chocolate, you’ll see that your cookies look speckled rather than just “chipped.”

With a spoon, scoop out your cookie dough and place on lightly greased cookie sheets.  Let bake for 10 minutes.

Eat more than you expected.

Roasted Red Pepper Veggie Dip

I’ve been sort of obsessing over Fage Greek yogurt lately. It’s so affordable at Costco. It’s been heavenly with blueberries, honey and granola in the mornings, but the tart, creamy yogurt is also a great ingredient for salads and dips.

My sister and I catered my baby shower Sunday and we purchased the ubiquitous veggie platter with a bland cream dip in the middle. I chucked the plastic container for something homemade and it was a big hit.

The secret ingredient is a Bulgarian puree of roasted red peppers and garlic. I found it in the exotic grocery section of Wal-mart, believe it or not, and I use this stuff for pasta dishes, salads and pretty much anything I want to add a little zing to. Most grocery stores I’ve been to have some sort of version of this stuff.

Otherwise, this recipe is pretty simple. Fresh herbs are best, but I’m sure you could toss in some dried basil or oregano and it would still be outstanding.

Roasted Red Pepper Veggie Dip

Ingredients (all measurements are approximations. I eyeball it):
1.5 cups Fage fat-free Greek yogurt
1/2 cup light mayo
2 Tbs. fresh lemon juice
2 Tbs. chopped fresh parsley
2 Tbs. chopped fresh oregano
3 Tbs. Zergut red pepper/garlic puree
salt and pepper to taste

Directions:
Mix together all of the ingredients. Taste your dip and add more red pepper puree if you’d like.
Refrigerate for at least an hour for flavors to meld.

The Best Baby Shower

My little sister is in town just for a week and she won’t be back till our baby is three months old, so she and I put together the shindig of all shindigs — a Price style baby shower.

I’m pretty much against baby showers. Most of my friends growing up were guys and being surrounded by a ton of women oohing and aaahing at little clothes, stuffing myself with cupcakes and playing games involving bottle sucking and diapers just isn’t appealing to me.

I wanted to spend my baby shower with family and friends no matter what the gender. I wanted it to be a party I’d want to be invited to.

And that’s what came together.

We had good food, cocktails, a craft station, one optional silly game and my husband hosted beer pong in the garage for those girls and guys who wanted to play.

Watching me open presents was optional, as was oohing and ahhing.

We served a cheese platter, hummus and pita chip platter, veggie platter, homemade smoked salmon and cream cheese platter, mini caprese salads, lemon cookies, cantaloupe, homemade unsweetened chocolate chip cookies, homemade Italian and Spanish sausage on the grill, terrific macaroni salad and unbeatable baby back ribs.

We also had a bellini bar where people could mix sparkling white wine with either mango, strawberry or peach purees with fresh raspberry garnish (I had ginger ale mixed in mine, don’t worry).

Didn’t get many photos, but here’s a bit of a montage. Recipes will follow.

Most photos by my friend Priscilla.

Caprese skewers

Bagels and lox spread
Cookies with unsweetened chocolate chips

Veggies with roasted red pepper yogurt dip
Lots of goodies!

Ok, I had to have one photo of me in here

The bellini bar was a total succes, as was the design-a-Onesie craft station. My friends Kelly and Rosey set up paints, stencils, stamps, brushes and I provided the blank shirts. I had acquired about 25 of them over the past month from thrift stores. This might have been the biggest hit of the party. There were girls and guys both making creative designs. Here’s a collage of some of my favorites.

We had people stay till 11 p.m. Truly a wonderful, successful baby shower.

Paper crane mobile

I was a crafty kid, believe it or not, and one of my favorite kid hobbies in addition to lanyard making, collages and friendship bracelets was origami. I could make a paper crane in about a minute. I thought a mobile of paper cranes would be a colorful and simple addition to the baby room.

I have to admit, my origami skills were a tad rusty and when I first attempted a crane I somehow inadvertently made a balloon, so I found a link on Google to use as a refresher course. Reading and understanding origami instructions can be a challenge as it requires you to think outside the box once in a while, but paper cranes aren’t too tricky once you figure it all out.

My husband and I went on a walk the other day and found a nice birch tree branch as the mobile base. I used silver thread and with a long needle, poked up from the bottom of each crane, through the top of the back and then just played it by ear in terms of crane placement.

It wasn’t hard to balance the branch. I tied two pieces of string on either end of the branch and brought them to the center so it balanced just right and tied a knot. Then my 6-foot-2 husband used a lightweight hook to affix it to the ceiling.

I hope my baby finds it enjoyable!