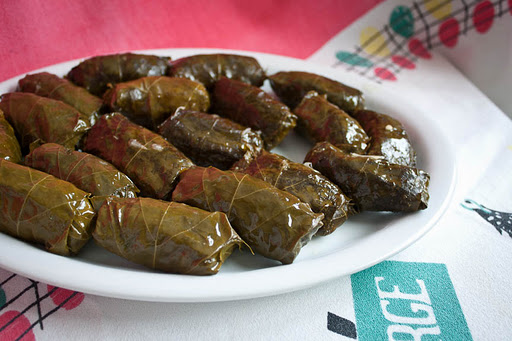
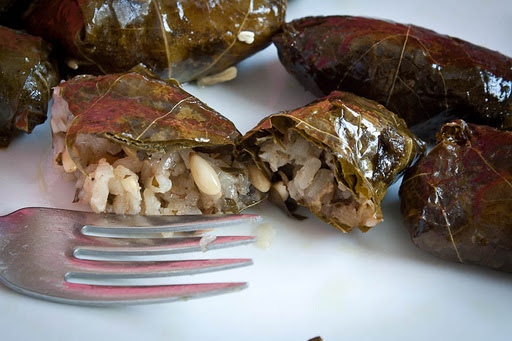
One of my coworkers got married Friday and the food at the reception was superb. In addition to the several authentic Filipino dishes, there was a pita platter with those little Greek snacks wrapped in grape leaves. I’d never really been a fan in the past, but maybe it’s the pregnancy, I ate about ten of them at the reception.
I woke up early for a Sunday and all I could think about was making my very own yummy Greek snacks wrapped in grape leaves. After about 10 seconds of research, I discovered they are called dolmas, or dolmades. I found several recipes that sounded good. I settled on a combination of two recipes. I used the methods of this recipe, and the ingredients from this recipe, slightly altered.
It took me three grocery stores to find all the ingredients. The grape leaves were in the section with the jars of roasted red peppers. I was going to use dried mint because fresh mint is really pricey up here in Alaska, but one grocery store didn’t have it and another one wanted to charge more than $7.00 for a spice jar. Forget about that! I went with fresh.
Here’s a step-by-step guide to making this delicious snack that could be a meal if you’re pregnant and starving.
Ingredients:
1 onion, grated
1 tsp. lemon zest
1 cup of raw white rice
1/2 cup olive oil, divided
2+ cups water, divided
1/2 cup golden raisins, chopped
1/2 pine nuts
1/2 finely chopped fresh parsley
1/4 cup finely chopped fresh mint
1 tsp. salt
pepper to taste
several dashes of allspice, to taste
1/2 tsp. cinnamon, or to taste
1/2 tsp. freshly grated nutmeg
2 lemons, juiced and sliced (slice them after juicing)
1, 8-oz. jar grape leaves, drained and rinsed
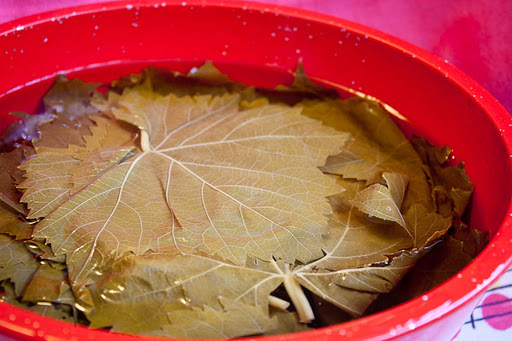
To prep grape leaves:
Bring a large pot of water to a boil. Lay the grape leaves flat and set into the pot. Cover and return to a boil, then turn off the heat and let the pot sit for ten minutes. Drain and set the leaves in a bowl of cold water until you’re ready to fill them.
Directions for filling:
Heat a large saute pan with 1/4 cup of oil over medium-high heat. Add the onions and zest and cook, stirring once in a while, for 10 minutes. Add the rice, pine nuts and raisins and stir so that the rice is thoroughly coated in oil. Cook for 2 minutes then add 1 cup of water. Stir rice frequently and cook for 10 minutes so rice absorbs the water. If the water evaporates before this time is up, just add a bit more water.
Transfer mixture to a bowl and combine with the parsley, mint, salt, pepper, allspice, cinnamon and nutmeg. Taste mixture and make sure you like the flavor. Let it cool.

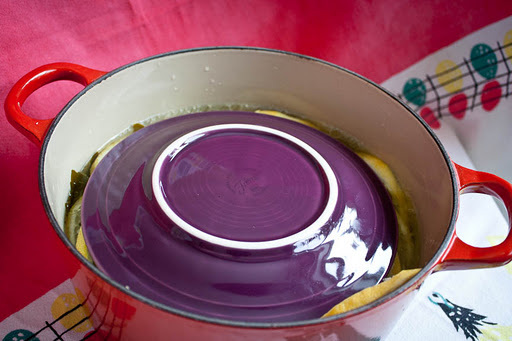
Take a dutch oven and place a plate inside of it. Cover the plate with grape leaves (use ones that are torn).

Now prepare the dolmades. Click on photos to enlarge.
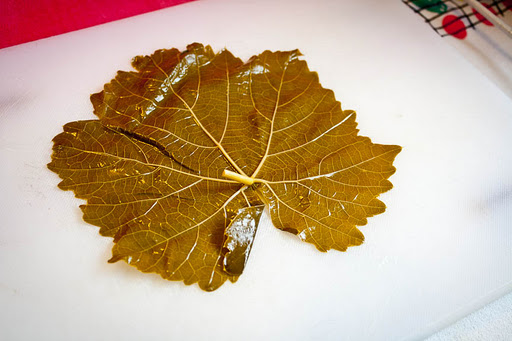 |
| Place leaf veiny side up |
 |
| With a paring knife, cut away the stem |
 |
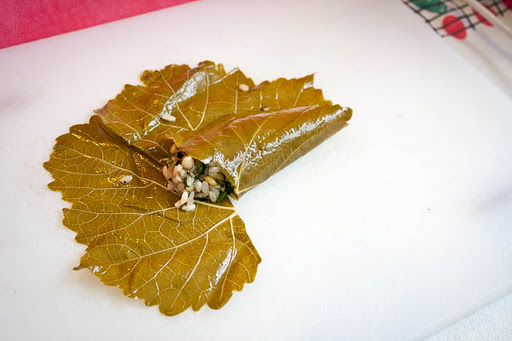
| Add about 1 Tbs. filling and form it into a little sausage shape |
 |
| Fold up the right corner of the leaf |
 |
| Fold up the left corner |
 |
| Fold in the sides |
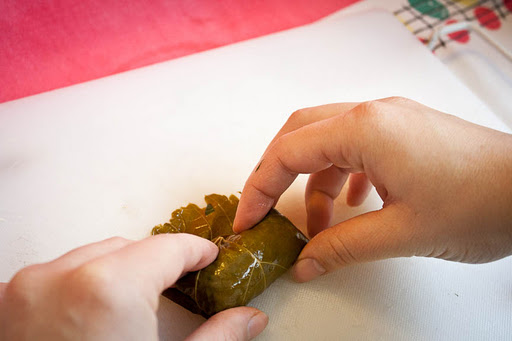 |
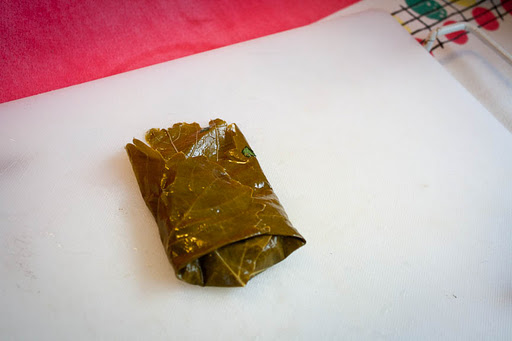
| Now roll it up! |
Place each finished dolma seam side down in the dutch oven so they are tightly packed in one layer. When you’ve filled the bottom of the pot cover the dolmades with a layer of grape leaves and start placing more finished dolmades on top. When you’ve used up all your filling or grape leaves or you don’t have any more room in your pot, pour 1/4 cup olive oil, 1 cup of water and the lemon juice over the dolmades. Fill the pot with more water until the water line goes halfway up the top layer of dolmades. Now fit the lemon slices all around, in between and on top of the dolmades.


Place an upside-down plate on top of it all. If there’s room, place another plate right side up. You need to add weight so the dolmades don’t come undone while they are boiling.
Place the lid on your pot and bring it to a simmer. Turn heat to low and simmer for 40 minutes. Test one of your dolmades. If the rice isn’t cooked enough, simmer for another 10 minutes.