Category Archives: Sewing

Quick Craft: DIY Heart Shirt

Shirts with big hearts are big right now, but despite the fad I actually think they are pretty cool.

I’ve had a few old cashmere sweaters awaiting crafting and this was the perfect short-attention-span craft: cut out a heart, sew it on a shirt.

Quick Craft: DIY Heart Shirt | Alaska Knit Nat

My husband had the idea of sewing on the heart with contrasting embroidery thread. It not only gives it some “pop,” but it also adds more of a homemade touch.

 Here’s what you’ll need:

 An old sweater

A plain shirt

A large piece of paper or newspaper

chalk

Thin, double-sided fusible interfacing or Stitch Witchery

Embroidery thread

iron

large needle

1. Make a heart template to your liking. I just folded an 11 x 17 piece of paper in half and cut out a heart shape.

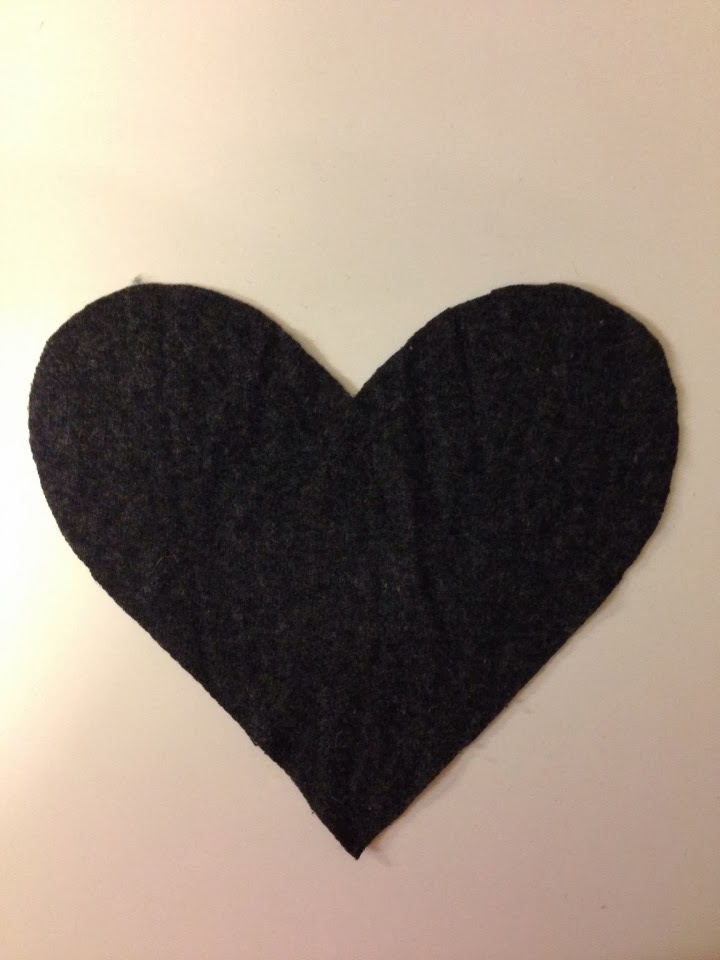
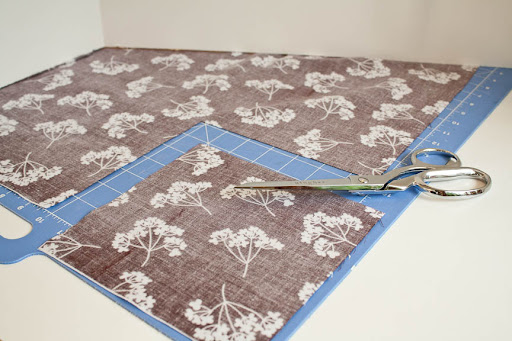
 2. Place your heart template on the sweater and use chalk to trace the shape. Cut your shape out of the sweater.

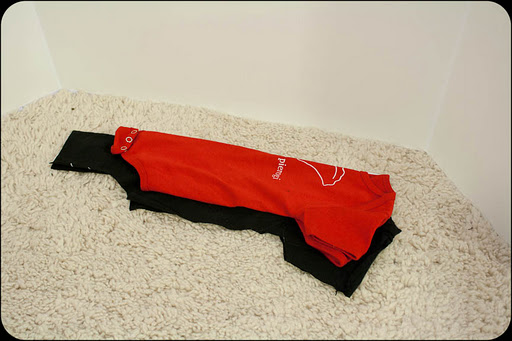
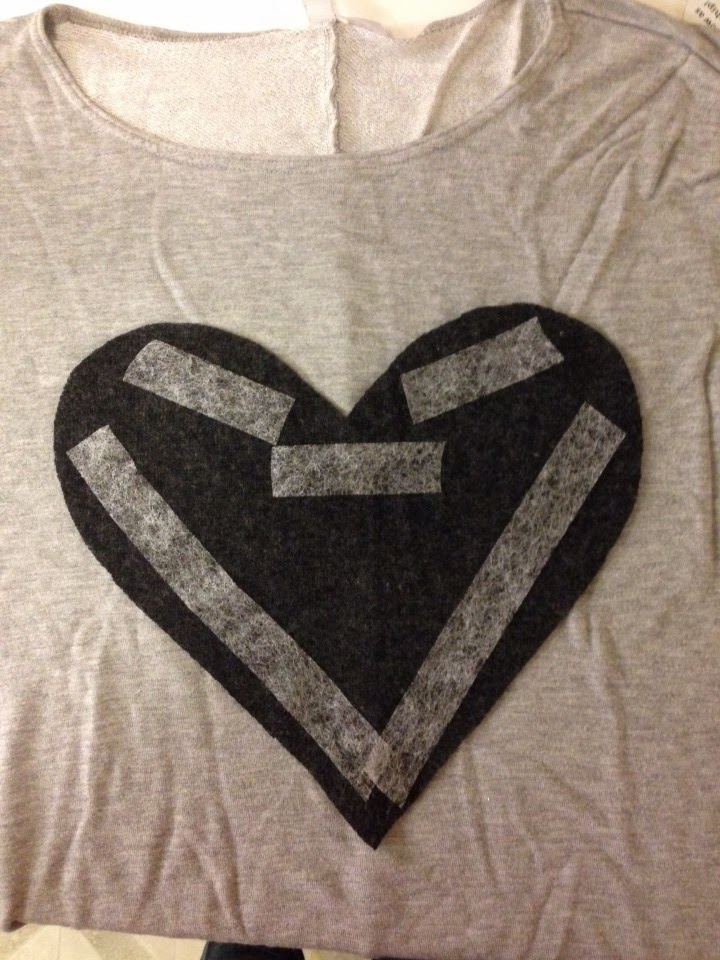
 3. Figure out where you’d like the heart to be placed on your shirt. Cut strips of interfacing or Stitch Witchery and place them on the shirt. Lay your heart, right side up, on top of the strips and fiddle around to get everything centered and flat. The photo below just shows where I placed the Stitch Witchery. In reality, the strips should not be facing up.

 4. Iron the heart according to interfacing instructions, so it fuses to the shirt. This way it won’t slip around when you’re sewing and you won’t have to worry about pins sticking you as you sew.

 5. Cut a long piece of embroidery thread and straight stitch around the edge of the heart. Secure thread with a couple of knots on the inside when finished.


 Ta-da!


The Best Way to Hem Jeans

The Best Way to Hem Jeans

Have you ever gotten your jeans professionally hemmed? It looks all neat and tidy and they even manage to keep the original hem. If you have basic sewing skills and a sewing machine, then hemming your jeans is easy. Save yourself the alteration charge. Learn to shorten your jeans and keep the original hem. This is the best kind of project because it takes about 15 minutes. Here’s what you’ll need:

  • Jeans that are too long
  • Straight pins
  • Sewing machine
  • Ruler or tape measure
  • Stitch Witchery double fusible tape (optional)
First, try on your jeans and figure out how much length you’d like to take off by folding up the cuff and measuring from the edge to the fold. With today’s pair I wanted them to be two inches shorter.
Take your measurement and divide it in half. This is how much you’re going to sew away. Remove your jeans (and continue crafting without pants if you’d like) and now fold up the edge of your jeans till the fabric below the hemline measures half of what you’d like to remove. In my case, I want to remove two inches, so I make sure there is one inch of fabric folded below the hem. Pin in place.
the best way to hem jeans

Start your seam in the inner leg and sew right below the edge of the original hem. Repeat with other leg.

the best way to hem jeans
You are now basically done and if you are truly lazy you could walk away from this project now. But why not make them look perfect? It will only take a few more minutes.
Turn your jeans inside out and iron the fold you just made. Iron the whole “flap” you just created upward. Take your Stitch Witchery and cut a couple of strips that are long enough to be tucked under the flaps. You may need to trim the tape if the flap is narrower than the tape’s width. Sorry, no photo, but it’s really not that hard. You’re just fusing the flap to the leg so it doesn’t flop around when you wear the jeans. Press your hot iron on the flap, using steam, for about 20 seconds and *PRESTO* your flap has been fused to the leg.* I love Stitch Witchery. It’s one of my favorite sewing notions.
the best way to hem jeans
Now, admire your professionally hemmed jeans and how you saved, like, $15.
The best way to hem jeans
*If you are shortening your jeans by a lot, such as more than four inches, I would consider cutting the flap till it’s about an inch wide and running a zig zag stitch around the raw edge (which used to be a fold). Then fuse this flap to the leg.

Insta-craft: Lace Sweater Trim

As you can see by my lack of posts these days I don’t have a lot of time to craft out. But sometimes I just need a craft fix.

Spruce up an old cardigan with trim. All you need is a sewing machine with a straight stitch and some pins. Months ago I found a big bag of lace trim at the thrift store and I knew it would come in handy some day. Observe this boring but comfy cardi my little sister rejected and I scooped up:

Insta-craft: Sweater Trim

Fifteen minutes later I had a cute piece of clothing that I can wear with a long t-shirt and some leggings. I have no one to take photos of me, so you’ll have to imagine the cardigan with a long t-shirt and some leggings.


Insta-craft: Sweater Trim


Materials:

One old cardigan

About two yards of lace trim

Straight pins


swetaertrim2


Directions:

Look closely at your trim and you’ll see that one side is more obviously the outside. If you can’t tell, then no one else can either so don’t worry about it. Start at the bottom of one side of the cardigan. Pin the trim to the bottom leaving an inch to wrap around and pin on the inside so the raw edge of the trim doesn’t show. Now start pinning the trim all around the edge of the sweater, up around the neck, and back down to the other bottom edge. Cut leaving an inch of trim and wrap that around the bottom and pin to the inside.

Insta-craft: Sweater Trim

Sew along the trim’s pre-made stitch, backstitching at the beginning and end. Trim threads. Rock out cause you just crafted out.

Insta-craft: Sweater Trim

Recycled Cashmere Baby Booties — Free Pattern

It’s getting cold up here in Alaska and my son is still too small for winter boots, but he’s outgrown his cute little warm booties. I’ve been collecting thrift store cashmere sweaters for a while now with no real plan for them. I washed and dried them several times to felt them up a bit and strengthen the fabric and I decided a pair of sock-like booties would be just right for winter.

I did a little Google searching but couldn’t find a pattern I was satisfied with, so I made one. You can access it here.

These booties were pretty simple to make and only took me about 45 minutes. When printing off the pattern be sure your printer doesn’t scale it down. I had to go to my settings and change the scale to 100% and it printed off just fine. If you have troubles, please let me know.

What you’ll need:

Free Alaska Knit Nat Bootie Pattern

One cashmere sweater you’re willing to cut up (or any old sweater for that matter)

Two 2-inch pieces of narrow elastic

Sewing machine

Pins

Fabric scissors

Stretchy sewing machine needle (not required, but really helpful)

1. Using the pattern, cut the body of the bootie along the bottom of the sweater so the ribbing will become the cuff of the bootie. You’ll be cutting four pieces out, but you can cut through the front and back of the sweater at one time. Cut two soles from the sweater being sure to lay the pattern on a fold.

2. Lay the body of the booties right sides together. Pin and sew up the back of the bootie using 1/4-inch seam allowances.

3. Trim the seam toward the top so no raw edges stick up. Lay the bootie out flat, wrong side up and place the 2-inch piece of elastic a few inches from the top (I just used the end of the ribbing as a guide). Stretch the elastic across the back to see where you should start sewing. Sew along the length of elastic, stretching it as you go. This will ripple the bootie in the back so hopefully they will stay on better. You could skip the elastic altogether and sew laces to the back when you are finished.

4. With right sides together, pin and sew along the front of the bootie. The only raw edge remaining should be the bottom of the bootie.

5. Pin the sole wrong-side out around the edges of the bootie. Make sure the wider part of the sole is at the front and the narrower part is in the back. It seems like a no-brainer, but why do you think the booties in the photo look so pointy? Sew around. I didn’t trim because I figured the extra bulk inside would add some more warmth.

6. Turn right-side out. Pop onto cute baby feet. This is where you could add a long lace to the back and wrap it around the bootie and tie if you don’t want to use elastic. I might even crochet a long chain and put pom-poms on the ends.

Please let me know if you have any questions about this pattern, as I’m not used to writing my own patterns.

Hooded Baby Towel and Mitt Set — A Tutorial

Our son is a tall little fellow and store bought hooded towels are too short for him. I want him to be bundled up and cozy after a bath so I decided to make my own hooded towel out of a plush bath towel.

He’s not too sure about this bath thing…

Here’s how you can make one too.

Materials:
1 large towel
Sewing machine
Heavy duty needle (optional, but makes the job easier)
Fabric scissors or rotary cutter

Directions:

1. Fold your towel lengthwise or “hot dog” style. Cut a 12 to 14-inch piece from one end.

2. Turn under the raw edge of the big piece and pin in place. With a straight stitch sew across. Go back along this seam with a zig zag to prevent the towel from unravelling. Since my towel had stripes I didn’t pin. I just made sure the stripes lined up.

3. Take the big piece and line up one corner on top of the 12-inch piece with the finished edge of the small piece on the bottom. The finished edge is going to be the edge of the hood. You’re going to cut a triangle form the little piece so you want to make sure it’s the right shape of triangle. I eyeballed how big to make the triangle. I just imagined it as the hood and how big my baby’s head is.

4. Cut out the two edges of the triangle and pin it to the corner of the big piece. Save the scraps.

5. Sew along the two edges with a straight stitch.

6. Turn the triangle inside out and there’s your hooded towel!

For the mitt:

1. Place your hand on the scrap of towel to figure out how tall you want your mitt. Fold your scrap in half and cut out a rectangle with one side being on the fold.

2. Unfold your rectangle and turn under one of the long edges and sew down.

3. Fold the rectangle in half with the turned under edge on the outside (right sides together) and sew the raw edges.

4. Turn right side out and there’s your mitt!

Homemade Cloth Baby Wipes

All right, apparently it’s been a full month since my last post, and boy, did that month fly by! Here’s the reason I’ve been so absent:

His name is Jack Oliver and he is a month old. It’s been an exciting month and I’m finally settling into a new normal, so let’s get back to craftin’!

We have already purchased a Costco-sized box of wet wipes and I’m realizing how we’re fast becoming a wasteful family. We are doing a combo of cloth diapers and disposables, so I thought I’d give cloth wipes a try.

Today was the first big garage sale day and for once I’m actually stoked when all a garage sale has is baby stuff. I found some nice clothes for Jack but I snagged several flannel receiving blankets to craft out with.

Homemade wipes are super easy. Since I’m washing cloth diapers anyway, I figured a few scraps of flannel added to the wash wouldn’t make a big difference.

Here’s what you need to make 32 or so wipes:

2-3 flannel receiving blankets, or a yard of flannel fabric
An empty wet wipes box (sometimes thrift stores have these)
Sewing machine with zig zag stitch

Photo by Amber Telling

Cut your blankets into 7-inch squares. No need to be precise. You’ll end up with about 16 squares per blanket.

Using a wide zig-zag (or a serger machine is even better!) sew a border around any unfinished edges. I just incorporated the finished edges into each square.

Fill up your empty wet wipes box. If you have time (and I doubt I’ll find myself doing this often) overlap each wipe so that when you pull out a wipe, then next one will come out.

I plan on wetting each wipe as I use it with a spray bottle of water with a small amount of baby oil and baby soap in it. I suppose you could prewet the wipes by pouring some water into the wet wipes box after it’s filled. I’m not sure how that works, but I’m sure it’s fine.

Once a wipe is used, place it in your designated dirty cloth diapers receptacle. When it’s time to wash the wipes and diapers, here’s what I do (this is after hours of online research on washing cloth diapers using homemade detergent). I use a combination of equal parts Borax, Arm & Hammer Soda Wash (found next to Borax in grocery store) and Oxy Clean. I have a front loading HE machine and I run it through two cycles. The first cycle I run on cold and add one tablespoon of detergent. The next load I select an extra rinse cycle, add another tablespoon of detergent and run the load on hot.

Either line dry or dry on hot for more than an hour.

Homemade Carseat Canopy

Since I finally decided to stop working, I’ve had a lot of time on my hands and not a lot of motivation. It’s hard to move around when I’m more than nine months pregnant! But I powered through and made a couple of carseat covers, one for us and one for my friend who is having a girl. I love the color combos and it finally gave me a reason to buy the popsicle fabric at Jo-Ann’s — and it was half off!

The pattern was a Pinterest find and can be accessed here.

It was a really easy project, but it took me literally all day to make both because I had to take so many breaks. Also, I didn’t have enough hippo fabric for our cover and I had to do some extreme pregnant math (brain no work good) to figure out how to piece it with the blue fabric. Also due to pregnant brain I cut the popsicle fabric completely down the middle by accident, but I think the stripe looks pretty good!

The only thing I did differently from the pattern is I put the straps a couple of inches closer together. I used safety pins before sewing them down, tried it on, and realized the straps were flopping to the sides. I repositioned them till they were a good distance — about six inches apart.

Insert baby here

Love this!

finally got to put these hippos to good use!

Make Your Own Fitted Crib Sheet

My husband and I are putting together the baby room. We’ve got shelves, a bassinet, a comfy chair, a cradle and as of last week, the crib that all four of the children in my family used. It’s a gorgeous maple crib made in Sweden in 1971. My father bought it in England when he was going to school there before my brother was born.

I love being able to use family heirlooms. Our family doesn’t go very far back so means even more to me to keep things that have history.

I soon discovered the downside to this priceless piece of furniture when we tried to find a sheet at Babies R Us. Looks as though the crib mattress (which thankfully is in pristine condition) is an irregular size and stores just don’t carry a fitted sheet in its dimensions.

So let’s sew one! It was pretty easy. The hardest part was cutting, honestly.  Here’s how to make a fitted sheet for your crib mattress.

Materials:
Two yards of 100 per cent cotton fabric (length depending on dimensions of mattress)
36 inches of 1/4-inch wide elastic
Iron

Directions:

Prewash your fabric to make sure it’s preshrunk.

Measure your mattress’ width, length and depth. Ours was 23″x48″x4″. I decided I wanted the sheet to wrap around the mattress by three inches, making the depth of the sheet 7 inches. I didn’t take into account seam allowance and hem, but it seemed to work out just fine for me. You may want to consider adding 3.5 or 4 inches to the depth to compensate.

Since the depth on each side of the sheet will be 7 inches, I added that length to each side of the sheet, or rather, added 14 inches to the width and the length, thus making the dimension of my sheet 37″x62″.

Cut your fabric to the proper dimensions.

Cut 7″x7″ squares out of each corner of the fabric. Discard the cut squares.

Turn under and iron the edges of the sheet. Turn under and iron again so you have no raw edges. Pin and sew hem on all sides.

In the areas you cut out the squares, pin the fabric right sides together where the raw edges still are. Sew each corner. You should now have a somewhat baggy fitted sheet.

Place on the mattress to make sure it’s a good fit. If it’s too baggy, increase the seam allowance of all four corner seams.

Next, cut your elastic into four 9-inch lengths. Find the center of one piece of elastic and line it up with one of the corner seams. Pin or hold in place. While holding or pinning the middle part of the elastic to the hem, stretch the elastic on the right edge as far as it will go and mark where the end of the elastic hits on the inside of the hem. This is where you’ll start sewing the elastic.

Sew elastic in place and backstitch. Now stretch the elastic along the edge while you’re sewing. The fabric should ripple up behind the sewing machine foot as you sew. Sew the length of the elastic, stretching it all the while. When you get to the end, backstitch in place.

Repeat this for the three other corners.

That’s it! It’s not quite as snug as a store bought sheet, but it does the job and you can pick whatever fabric you want.

T-shirt Onesie — A Tutorial

I’ve been in full baby crafting gear lately. Last night I sewed a couple of little pants and I’ve been tinkering with the idea of making a onesie out of an old T-shirt. I have a special one in mind, but I thought I should test it out on a junker first. Success!

It was about a 45-minute project. And here’s how I made it:

Materials:
A small adult T-shirt, or a child’s size shirt
A store-bought onesie (to use as a guide)
Velcro (the kind you have to sew on, not stick on)
Stretchy materials needle (recommended, but not required)

Directions:

First, turn your T-shirt inside out and fold it in half down the middle. Fold your store-bought onesie in half down the middle and lay it on top of the T-shirt so the collars line up and the shoulders/sleeves run along the top. Cut around the onesie leaving about 1 inch of a border on the sleeves and sides but about 2.5 inches at the bottom crotch area. You should end up with one piece of fabric where the front and back are connected at the collar/shoulder/sleeve area.

Trim the sleeve edges how you prefer. The sleeves just happened to end up right where the big shirt sleeve began so there was a sewn edge that made it easy to trim.

Turn under the edges of the legs (there should be four of them) and sew in place. This looks pretty rough since I didn’t have a mini screwdriver to install my stretch needle. When you sew jersey be sure you stretch it out as you’re sewing it so there is give to the seams.

Sew along the sleeves and sides of onesie using a half-inch salvage.

Turn right-side out and turn under the bottom crotch flap of the front twice over. This will add extra thickness to better stabilize the velcro. Pin and sew in place.

Next, turn up the bottom crotch flap of the back, but just once over. You want the back flap to be about two inches longer than the front flap once the edges are turned under. Pin and sew in place.

I chose to use three squares of velcro, but a strip would work also. Sew the softer side of the velcro to the wrong side of the back flap. Sew the rougher strip of velcro to the RIGHT SIDE of the front flap.

And there ya have it — a make-your-own onesie. This would be a fun project if you had a sports team T-shirt or a TUXEDO T-shirt, which is the reason I wanted to try this out. Stay tuned for my tuxedo onesie in the next couple of weeks.

And, as always, please contact me if part of this tutorial isn’t clear.