Thanks to all who entered the Knit Nat Giveaway. The winner was chosen and contacted this morning.
Keep your eyes peeled for any upcoming giveaways, as I plan on doing this in the future.
-Natasha

Thanks to all who entered the Knit Nat Giveaway. The winner was chosen and contacted this morning.
Keep your eyes peeled for any upcoming giveaways, as I plan on doing this in the future.
-Natasha

After making a Tokyo Tie Bag the other day, I decided to experiment with the dimensions and make a bag that has a size I prefer. I like the dimensions of the pattern I was given, but I wanted it a little deeper and the handles a little longer. So I busted out my butcher paper and made a better pattern. Here’s a photo of the original pattern on top of a pair of pyjamas.
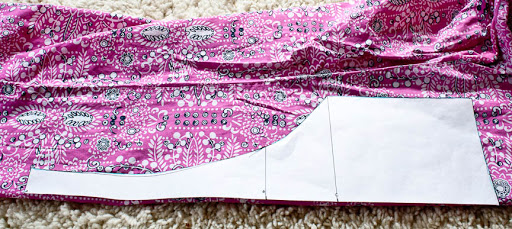
I just added two inches to the bottom of the bag and three inches to the top where the handle is.
The dimensions are as follows:
I drew the curves out by hand between the two lines and the top of the handle.
After I figured that out I transferred the pattern to a piece of tagboard I nabbed from a boot box (thank goodness I work at a shoe store — endless supplies of cardboard). So now I have a stiff pattern so all I have to do is trace around it on my fabric and cut it out. Presto!
Anyway, to get to this posting’s title, I never use flat sheets on our bed. But they make awesome curtains and scrap fabric. I used a dark red flat sheet as the lining for my new purse.


Look at that 400 thread count Egyptian cotton! The handles are just the right length to sling over my shoulder.

I’ve been trying different ways to make tags for my purses, and after finding a 10-cent piece of cotton ribbon stuff and some rubber stamps at Michaels, I came up with this:


Several months ago I purchased this sweater from Her Tern Boutique:
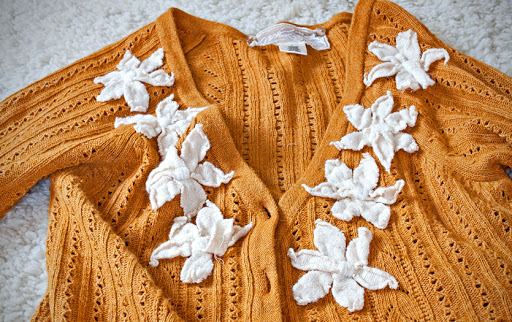
I love the flower embellishments. The petals seem to be made of sweater material and were hand sewn onto the garment.
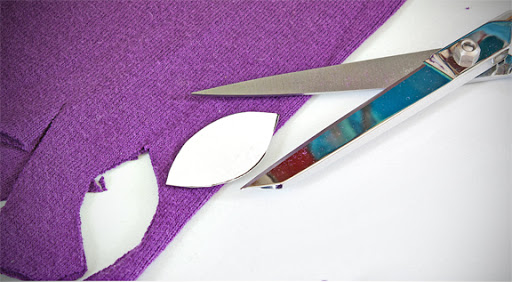
I had a couple of sweaters I never wear, so I thought I’d give it a try.

I made a little petal template out of tagboard and cut out five petals for each flower. I pinned them in place and then sewed them onto the sweater. Then I used embroidery thread to make the center of each flower.
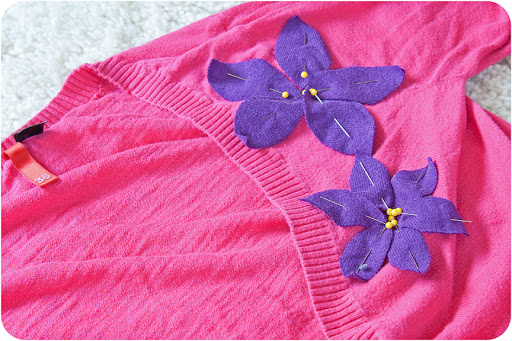
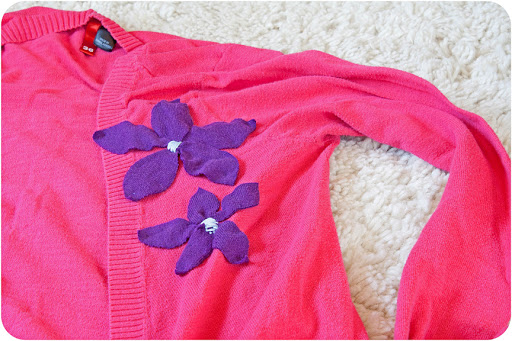
I think I might add more tonight, but I wanted to wear my newly refashioned sweater to work.


Creativity is in the air here at Knit Nat AK, which means it’s time for a crafty giveaway. One lucky person will win a hand made craft from Knit Nat!

My husband left today on a two-week road trip through Canada. He knows it makes me sad to see him go, so he made us breakfast this morning. This is a rare occurrence since he claims he can’t cook. How wrong he was! After devouring two of his ham and cheese egg cups, I am convinced that I’m not the only one making dinner from here on out!

He got the recipe from Cook’s Country Magazine. It was a laborious preparation — he said — but the results were pretty tasty. The bread had the texture of puff pastry and all of the ingredients blended well.
Here’s how to make it.
Makes 5 servings
Ingredients:
5 eggs
5 slices white sandwich bread with the crusts cut off
2 Tbs. unsalted butter, melted
5 thin slices of cheddar
3 thin slices of black forest ham, halved crosswise
salt and pepper
Directions:
Preheat oven to 375 degrees F. Place eggs in a large bowl of hot water for 10 minutes.
Using a rolling pin, roll the pieces of bread till they are thin. Pinch the sides of the bread and fit each one into little ramekins or a muffin tin. Brush each piece with butter and bake until golden brown, about 5-7 minutes.
Top each cheese slice with a ham slice. Make a cut from center to one side of each stack. Shape it into a cone and press into the toasted bread. Crack an egg into each ramekin/muffin tin and season with salt and pepper.
Bake about 15 minutes. Remove from oven, cover with foil and let sit about 5 minutes.

An acquaintance came into the store the other day with the loveliest little purse. It was a simple design and when I commented on it, she said she bought it in a little arts market in New York City, but a friend of hers had scanned a pattern for something similar.
She forwarded me the pattern and it was for a Tokyo Tie Bag. Here was my first attempt:

If you do a Google search for this, you will find several patterns that resemble the one I made. I recommend this pattern from Darling Petunia’s Blog. Her pattern looks like the one I made, but the dimensions are slightly different.
Besides cutting the fabric, it only took about 30 minutes to construct. It’s really worth trying.
After whipping out my first one, I decided to tweak the pattern a little. I wanted my next one to have a flat bottom, but to also have a sort of kimono look to it. I was hoping the crossover of the fabric would create a little pocket, but it turned out too floppy so I had to sew it shut. I like how it turned out decoratively, though.
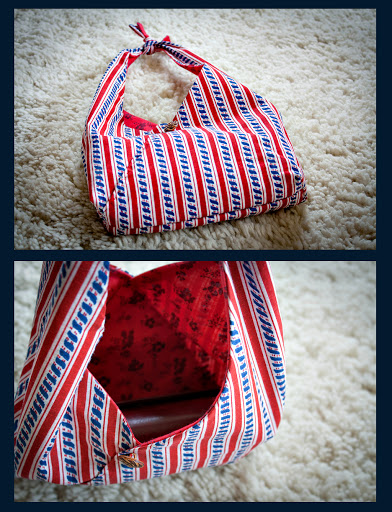
I’m going to have to make a ton of these. I think for my next one I’ll make the straps longer. My friend Robert suggested making large versions out of T-shirts, so I’m going to give that some thought. It also dawned on me that thrift store pillowcases could be put to good use with this pattern.


My mother-in-law gave us an antique kitchen scale last week.
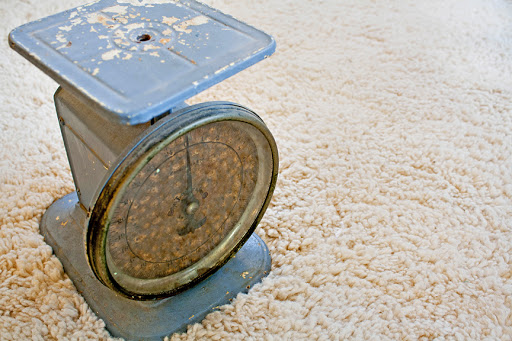
My plan was to simply spray paint it a different color. But then I lost motivation. My husband picked up that motivation and went all the way. He got a wire brush that attaches to his power drill and sanded off most of the paint. Then he took acetone to it to get off any remaining paint. Then he spray painted it.
In other words, he did a much better job than I ever would have.
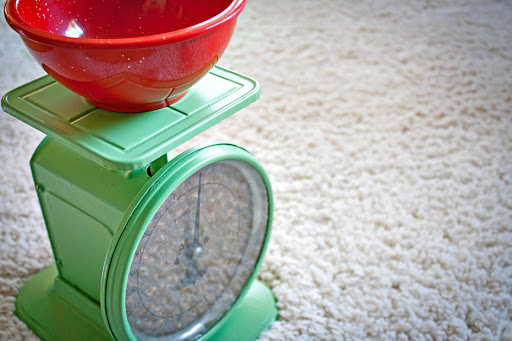
Way to go, Stephen!

As I’ve said before, nothing beats a $5 Costco rotisserie chicken. And what to do with the leftovers? Why, make savory crêpes! In this month’s Food Network Magazine, they had a recipe for chicken and asparagus crêpes. They call for store bought crêpes, but why buy them if you have the time to make them? The following is the Joy of Cooking’s recipe for crêpes. I made them in the blender and refrigerated the batter for about a half an hour before making.

Makes about 12 crêpes
Ingredients:
1 cup flour
1 cup milk
1/2 cup lukewarm water
4 large eggs
1/2 stick of butter, melted
1/2 teaspoon salt
To make crêpes, heat a 9- or 10-inch frying pan with rounded edges over medium-high heat. When it’s heated, rub a stick of butter all around the pan. Then take a paper towel and rub the butter all around the pan. Next, add about 1/3 cup of the batter to the center of the pan while rotating the pan round and round to evenly distribute the batter. It’s ok if the batter goes up the sides of the pan. The crêpe will begin to brown around the edges and separate from the pan. When it does so (it always takes a little longer with the first one) use a rubber spatula to separate the edge of the crêpe all the way around.
My favorite way to flip a crêpe is to shake the pan vigorously to loosen it and then using momentum, flip it without using a spatula. Here’s a photo of my doing this a few months ago:

Then cook the other side of the crêpe for about 30 seconds or so.
As far as the Food Network recipe goes, I changed it slightly. For the fresh herbs, my dad brought over some of his homegrown.
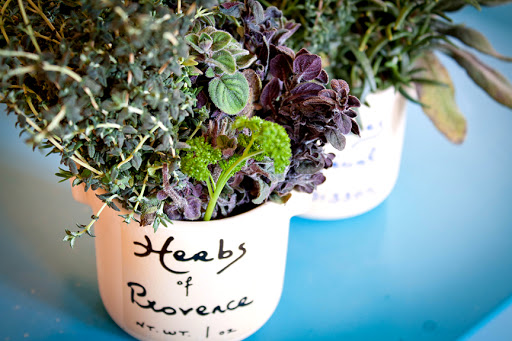
I ended up using parsley, thyme and oregano. I also only used 1/2 cup of parmesan in the filling and didn’t top the the dish with the remaining cheese. Instead of ricotta, I used cottage cheese. We just can’t get good ricotta up here.

