I’m usually the crafter in my household, but yesterday my husband showed real initiative and made himself a tie rack. I’d like to show it off here:

And here:

Way to go!

I’m usually the crafter in my household, but yesterday my husband showed real initiative and made himself a tie rack. I’d like to show it off here:
And here:
Way to go!

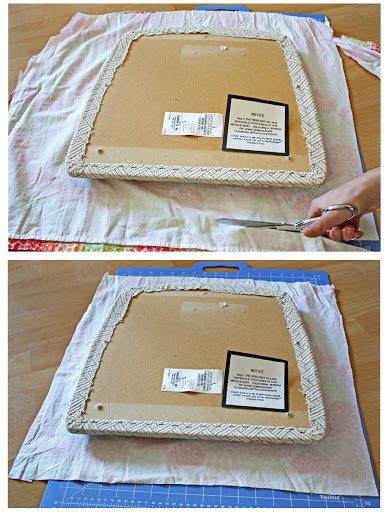
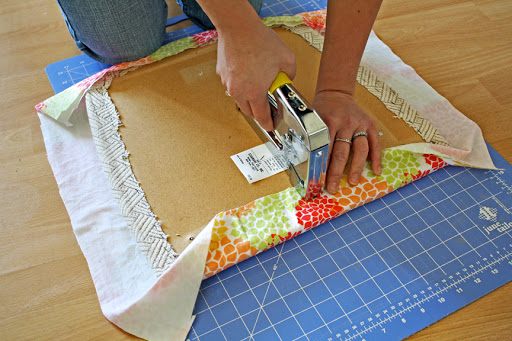
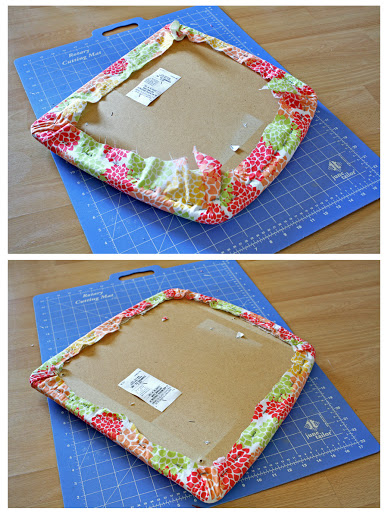
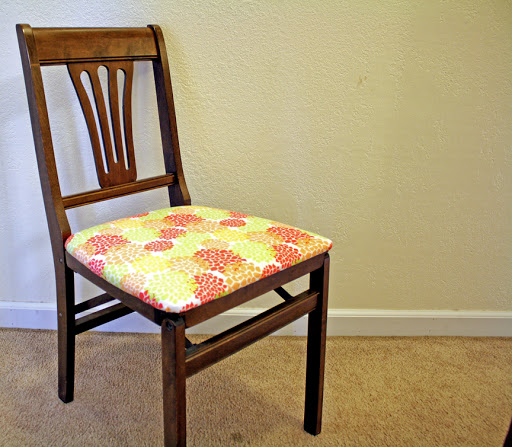
Recovering a dining chair is simple. It’s about a 30 minute project that can brighten up any drab, thrift store chair. I decided to use a dress I bought at the thrift store to recover a chair that looked as though it needed some love. The frame was in great shape but the seat was all torn up and let’s just say….ugly.
 |
| Old chair – $5 at thrift store |
 |
| Sundress – $2 at thrift store |


 |
| Before and after! |

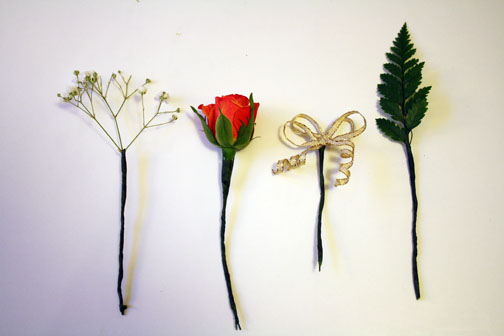
My friend Rosey is organizing a banquet Saturday and she decided to make her own boutonnieres instead of paying for them. The first job I ever had was working in the flower shop at my local grocery store when I was 14. I picked up a lot of techniques that have been useful in my crafting endeavors throughout the years. I was totally stoked about teaching Rosey how to make boutonnieres since I won’t be able to make them for her banquet.


Yesterday was Stephen’s birthday and since he was out of town all week I had plenty of time to clean up and decorate.
After gleefully searching through beautiful craft blogs all week, I came across ruffledblog.com where there were free, printable letter flags.

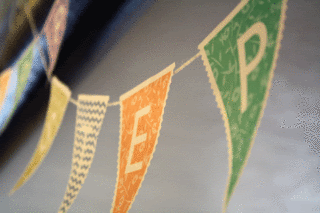
In photoshop, I halved the size and altered the colors a bit since I had a few repeat letters. I strung them up on wool yarn and hung them up three days before his birthday (just because I loved to look at them).
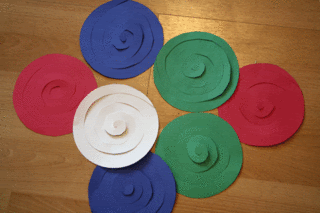
To add to the festivities, I thought back to elementary school days when we’d make cut-out spirals and hang them around the classroom.
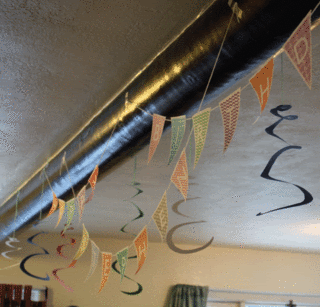
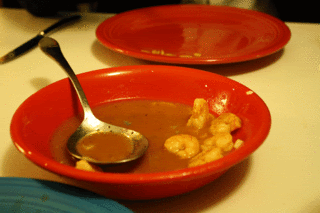
We have a disco ball we bought at the thrift store last year, so I set that up too. It looked pretty awesome. Now time to think of a menu. Stephen originally wanted to go to Club Paris, since that’s his favorite restaurant, but he must have been burnt out on fancy restaurants after going to the Vallata restaurant in Fairbanks the night before. In honor of Club Paris, I decided to make an appetizer of orange garlic shrimp. That’s something we usually get alongside our steak. It was so good, I almost forgot to take a photo before it was all eaten!
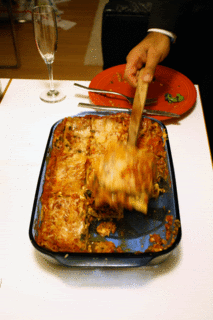
I didn’t do steak for the entree. Steve’s been asking me for lasagna for a while, so I made a big ol’ batch of it with spicy ground pork, mushrooms, and three kinds of cheeses.
And for dessert, the piece de resistance — a pink champagne cake. I’m no baker, but this is the most successful cake I’ve ever created.
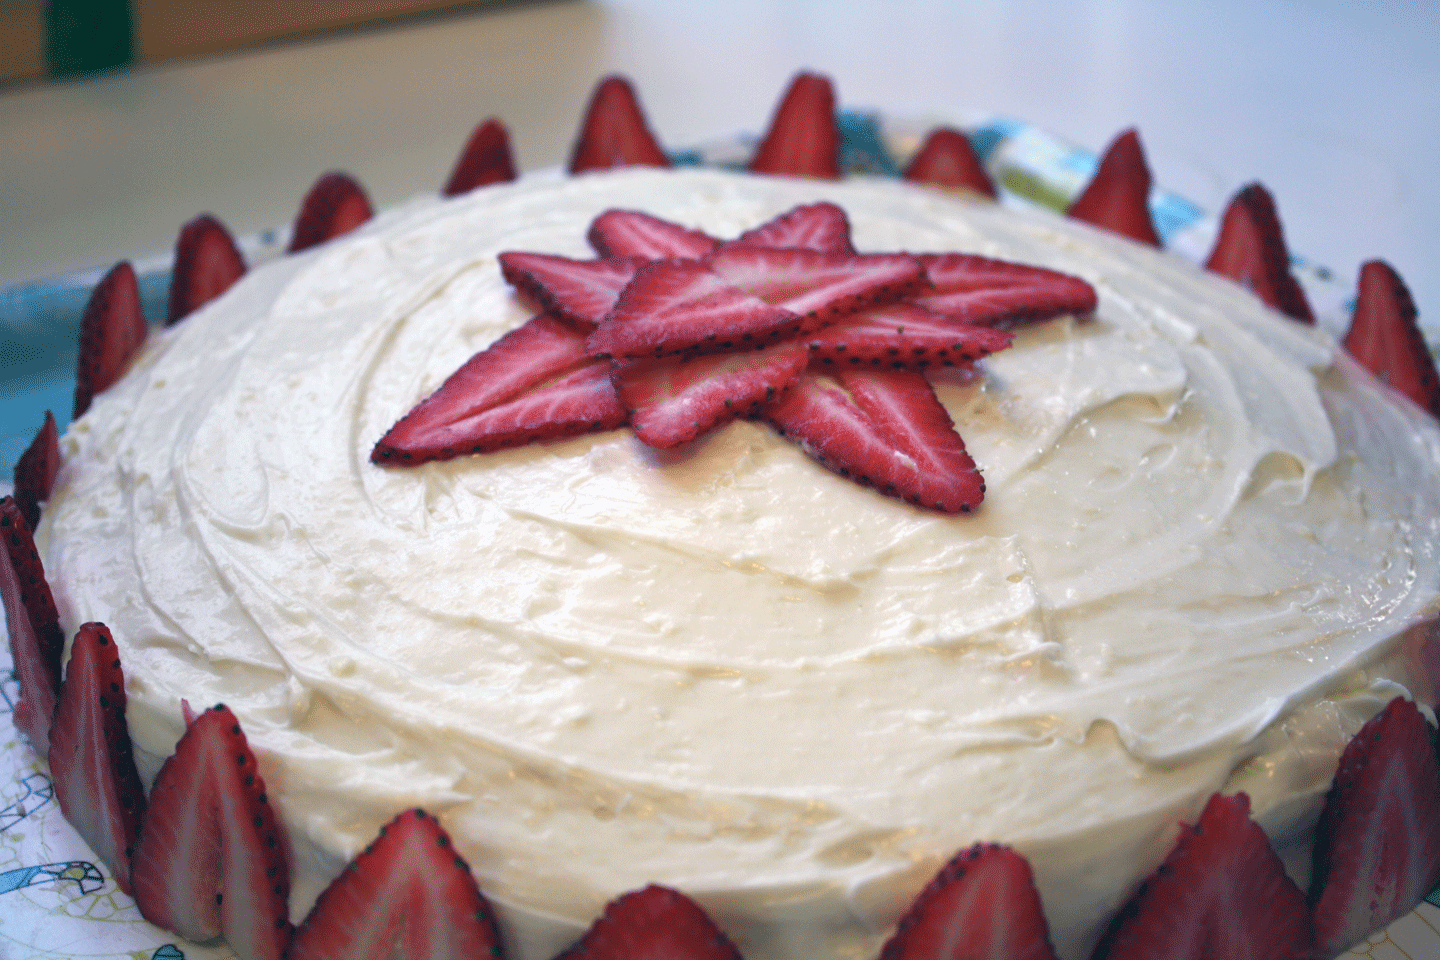
Recipes to follow.

My new favorite site is How About Orange where loads of paper ideas are at your fingertips. I just discovered her Gift Bags Made from Envelopes. She has a step-by-step guide to making the cutest little bags you’ve ever seen. Here’s my version:


A couple of month’s ago I acquired a big bag of craft pom poms (thank you Muggle in Pink!) and since then I’ve had no idea what to do with them.
Leave it to my favorite blogster, Attic 24, to inspire me with her pom pom creation
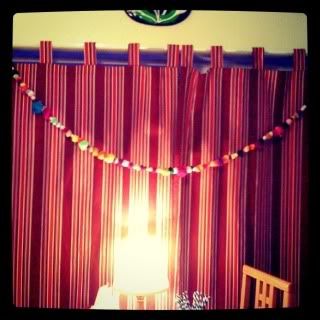
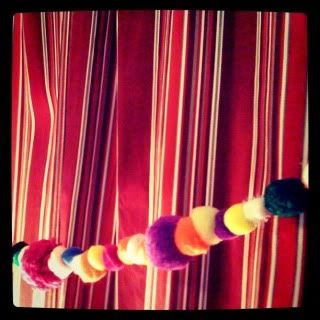
I don’t think anything is more satisfying than stringing multicolored pom poms. A 15 minute project that I’ll use all the time.

My best friend got married today. It was a perfect Alaska wedding — crisp, clear night, moon shining high in the starlit sky. Friends and family huddled closely as the couple exchanged their vows beneath a lit up arch draped with fresh evergreen garlands. The ceremony ended with the couple rubbing noses in the traditional Inupiaq way.
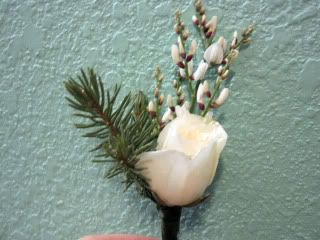
I got to make the flower arrangements for the reception. I made boutonnieres and corsages, but since the wedding party was all bundled up in sealskin parkas, most of them weren’t used. That’s fine by me because I love any chance I have to make boutonnieres.
The bride said her colors were white and red, but mostly white, so I bought two types of mums, some stock, white and red spray roses, some kind of white bushy filler (I don’t dig baby’s breath), and some sort of exotic budding flower that looked appealing to me. I also got 25 red roses and picked some spruce and birch branches from my yard.
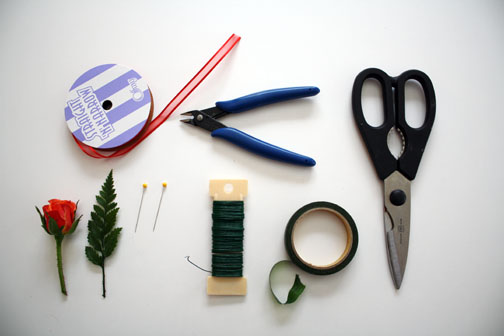
Making corsages really isn’t tough. Simple materials:
Floral wire
Floral tape
Scissors
Pearl pins
I try to keep my designs simple. I don’t like big honking roses that end up sagging by the end of the night, so I used one or two mums and a spray rose with a background of spruce and whatever the bushy filler I got.
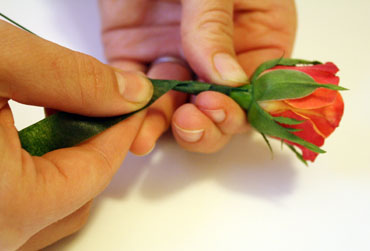
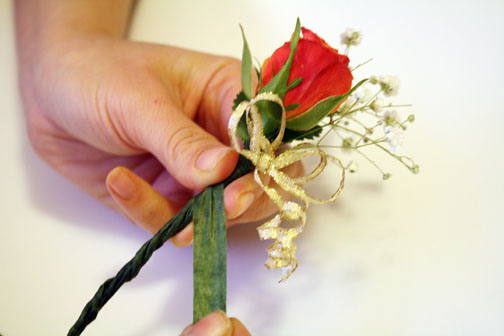
When wiring a flower, cut the bloom leaving about 1-2 inches of stem. Poke about 6 inches of wire through the base of the bloom and wrap the wire around the stem, leaving about 3 inches of bare wire. Then tightly wrap the base of the bloom all the way to the tip of the wire.
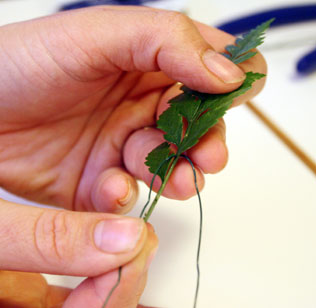
When wiring a twig or non-bloom piece, just look for crux in the branch and fold the wire around it, and follow the instructions above.
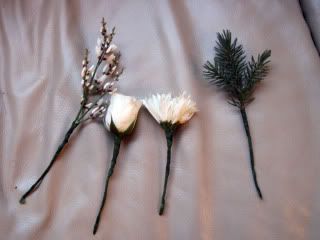
Above is an example of some corsage pieces. After this, I just arrange the pieces and then wrap all the sticky stems together, like so:

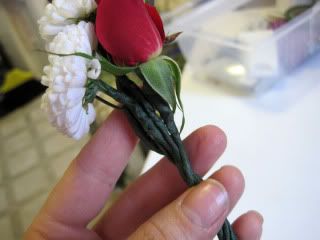
Then using floral tape I wrap the entire thing from top to bottom. I curl the end of the corsage around a pen so it looks pretty.

Usually I make a bow and wire it up the same way and include it in the corsage, but the bride didn’t want bows.
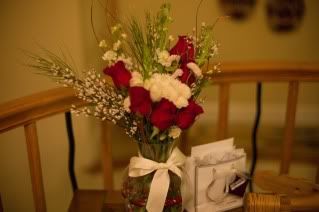
I made her a bouquet, which I think turned out lovely.

I also made a couple of arrangements. I put fresh cranberries in the vases and some glass marbles. I loved the effect, although after arranging I got a couple of cranberry floaters.

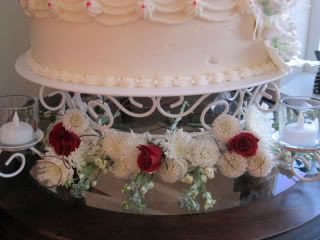
And then I decorated the base of the cake:
All in all, this was a great wedding and I’m so happy I had a part in it.

We have way too many Christmas wrapping bows so I decided to make something out of them. Easiest craft of the day:

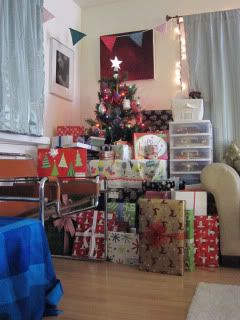
I love the holidays! It’s only halfway through the month and I’ve done all my Christmas shopping. Our tree is overflowing with gifts:
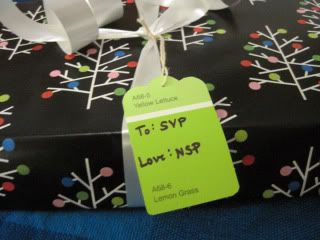
This year I decided to get a little creative with the gift tags. Usually I buy tags from the thrift store. I found some cute vintage ones this year, which I used, but I also made my own gift tags out of paint chips. I printed off some gift tag templates and traced them onto free paint samples from the hardware store. They turned out so well!

Last night I decided to embellish some gifts by making an initial out of a pipe cleaner.
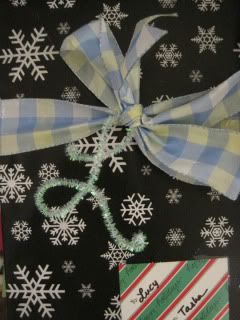
Easy to make: I drew a large cursive letter on a piece of paper and then curved the pipe cleaner to match. Where the pipe cleaner intersects with itself I twisted it around so it would stay put.
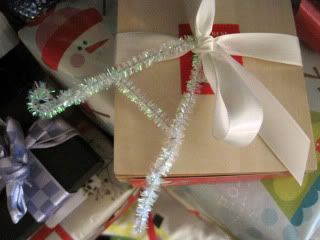
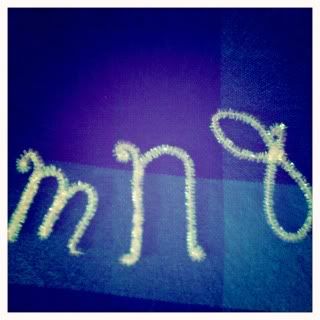
Inexpensive and it makes the present that much more special.

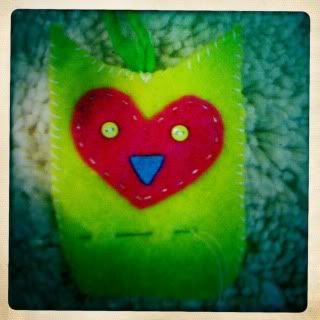
My friend Rosey is a lover of all things owl and it has definitely rubbed off on me. We made a bunch of felt owls for a Christmas bazaar last month. Although I don’t have photos of hers, which were undeniably cute, here are some of mine I didn’t sell. Notice there is one cat ornament.
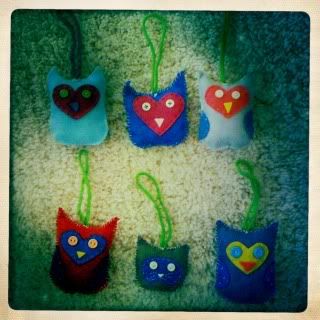
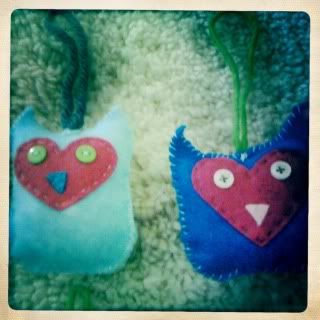
And one unstuffed owl: