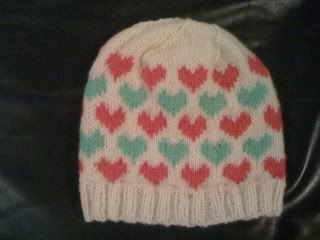
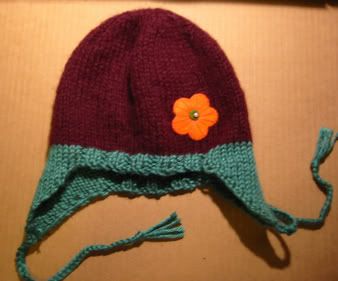
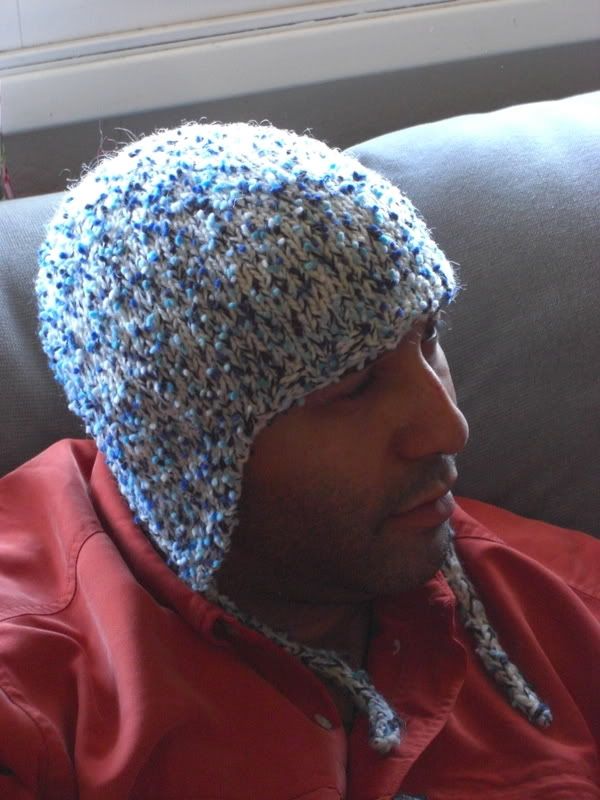
This is one of my loveliest hats to date. It’s based closely on the From Norway With Love pattern from www.pickles.no.
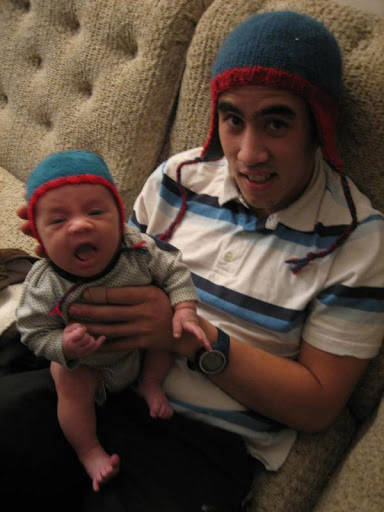
I first followed Pickles’ pattern exactly, but I must have bought too thin of yarn because it turned out baby.
It is a very very cute baby hat, but I wanted one for me! So I went with my gut, which I should have done in the first place, and tweaked the pattern to fit my own hat patterns. The biggest problem I had with Pickles’ pattern was the heart chart. When I thought less about the chart, the hearts turned out perfectly. I used the chart as a guide for where to place the hearts and how many stitches they were made of, but I stopped counting row by row and it worked out better. Somehow her chart didn’t seem quite right.
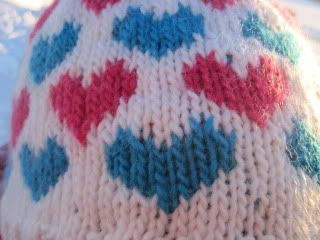
The hat is made in sets of 10 stitches. The base of the heart (one stitch) occurs every 10 stitches, so when you start the first row of hearts, start the pattern by knitting 4 in the main color, k1 in the heart color, k9 in the main color, k1 in the heart color, k9 in the main color, k1 in the heart color and so on. When you get all the way around you’ll see your first heart color stitch. With the heart color, k1 before that stitch, k1 on top of that stitch, and k1 after that stitch. Row by row you add one heart color stitch on either end of the heart till there are 7 stitches (so, 1, 3, 5, 7). Knit two rows of 7 heart stitches and then the rest of the heart chart will make sense.
Once you’ve finished the first row of hearts, you immediately start the second row by knitting 9 in the main color, K1 in the 2nd heart color, 9 in the main color and so on. Basically the heart pattern alternates every 5 stitches so they fit in between each other.
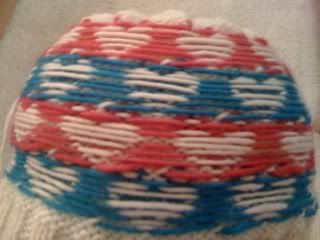
This pattern is a great introduction to Fair Isle patterns because you carry the unused colors along with you as you knit. In other words, if you knit 4 stitches in the main color and then switch to the heart color, you carry the heart color on the inside of the work. Here’s what the hat looks like inside out:
The most difficult thing about knitting hats like this is making sure to keep the unused yarn loose in the back of the work. If you carry over the yarn too tightly, your hat will be super scrunched up and won’t fit over your head. My solution to this is when I’m carrying yarn over more than three stitches, I place my finger under the yarn so it leaves a gap and knit a couple of stitches with my finger in place behind the work. It might look really loose, but it will tighten up when you wear it. If you’re carrying the yarn over 1-3 stitches, just try not to knit very tightly. It just takes practice, so you might end up knitting a beautiful baby hat for someone.
Whew! At long last, here is the pattern
My Heart Goes Out to Fairbanks Hat
Ingredients:
Size 7 circular needle, 16″ long
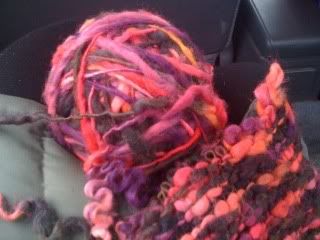
2-5 colors of Lamb’s Pride worsted yarn, one skein each
one set of size 7 double points
darning needle
Important Abbreviations:
MC = Main Color
HC1 = Heart Color 1
HC2 = Heart Color 2
K2tog = knit two stitches together
Heart Chart:
Note: I honestly believe the tan heart in this pattern is not correct. The second row from the top, on the far right, that should be a white square, not tan
Directions:
With MC, cast on 100 stitches. Place a marker and connect the round without twisting the yarn. K2, P2 for two inches, or till brim is a width of your liking.
K 2 rows
Next row: With MC, K4 stitches. *With HC1, K1 stitch. With MC, K9 stitches.* Repeat * till you get back to the place marker.
Next row: With MC, knit to two stitches before the first HC1 stitch. *With HC1, K3 stitches. With MC, K7 stitches.* Repeat * to end of row. (NOTE — this is a very visual project. It’s hard to write out the directions. Just keep in mind that once you see the first stitch of the heart, that you’ll be expanding the size of the heart in the following row. My written instructions may not be exactly correct.)
Next row: With MC, knit to two stitches before the previous row’s first HC1 stitch. *With HC1, K5 stitches. With MC, K5 stitches.* Repeat * till end of round.
Next row: With MC, knit to two stitches before the previous row’s first HC1 stitch. *With HC1, K7 stitches. With MC, K3 stitches.* Repeat * till end of round.
Next row: With MC, knit to the stitch before the previous row’s first HC1 stitch. *With HC1, K7 stitches. With MC, K3 stitches.* Repeat * till end of round. (This row you aren’t expanding the heart. You are knitting the same heart stitches as the previous row.)
Next row: With MC, knit to one stitch before the previous row’s first HC1 stitch. *With HC1, K3. With MC, K1. With HC1, K3. With MC, K3.* Repeat * till end of round.
Next row (top of heart): With MC, knit to one stitch before the previous row’s HC1. *With MC, K1. With HC1, K1. With MC, K3. With HC1, K1. With MC, K5.* Repeat * till end of round. Cut HC1 leaving an 8-inch tail.
Immediately the next round: *With MC, K9. With HC2, K1.* Repeat * till end of round. Follow the same instructions above for creating the HC2 hearts. Refer to the chart, keeping in mind it’s flawed in the second to the last row from the top of the heart.
Create 4 sets of heart patterns. Make 5 sets if you want a tall sort of floppy hat.
K 2 rows using the MC yarn.
Decrease pattern:
First, you need to change your hat to be in multiples of 8, so in the next row, K2tog four times somewhat evenly through the row. Every 20 stitches or so I K2tog. You won’t be able to notice this row in the end. You should end up with 96 stitches.
Next row: *K2tog, K6.* Repeat * till end of row.
Next row: K one round
Next row: *K2tog, K5.* Repeat * till end of row.
Next row: K one round
Next row: *K2tog, K4.* Repeat * till end of row.
Next row: K one round
Next row: *K2tog, K3.* Repeat * till end of row.
Next row: K one round and transfer to double points while knitting this row.
Next row: *K2tog, K2.* Repeat * till end of row.
Next row: K one round
Next row: *K2tog, K1.* Repeat * till end of row.
Next row: K one round
Next row: *K2tog.* Repeat * till end of row.
You should have 12 stitches. If you have 24, repeat the last round again.
Cut yarn leaving a 12-inch tail and loop through the remaining stitches. Cinch it up and weave in the ends. I tied the heart color ends together and snipped them instead of taking all the time to weave them in.